Teams we're sorry—we've run into an issue [Fixed in 10 Steps]
Some users found that using the web client solved this issue
6 min. read
Updated on
Read our disclosure page to find out how can you help Windows Report sustain the editorial team. Read more
Key notes
- To fix the “We’re sorry – we’ve run into an issue” error on Microsoft Teams, try restarting the application and checking your internet connection. If the issue persists, consider clearing the Teams cache or reinstalling the software for a more comprehensive solution.
- Continue reading below for a detailed guide and extensive steps
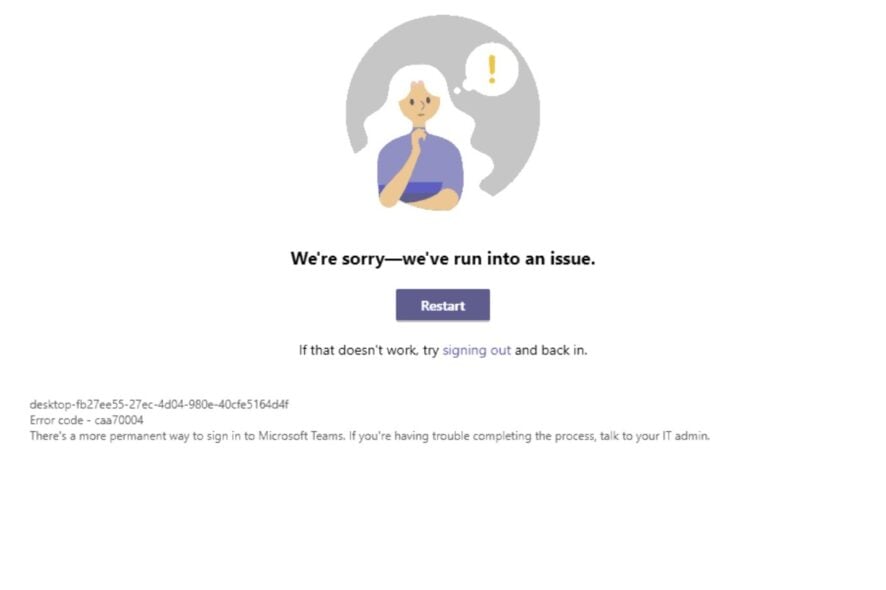
If you’re hitting the “We’re sorry – We’ve run into an issue” wall on Microsoft Teams, especially on Windows 11, you’re far from alone. It’s a common hiccup, but the good news is there are multiple avenues for troubleshooting, from the basic—like a simple restart—to the more involved, like diving into cache folders.
To be honest, we actually use Microsoft Teams for collaboration inside our own company, so I actually vetted all these solutions myself. I’ve went ahead and compiled all the solutions starting with the one that might work the best. These fixes apply even to Mac users.
How can I sign into MS Teams if I get “We’re sorry – we’ve run into an issue”?
1. Update MS Teams to the latest version
If you are using the MS Teams Desktop client, make sure that you update it to the latest version.
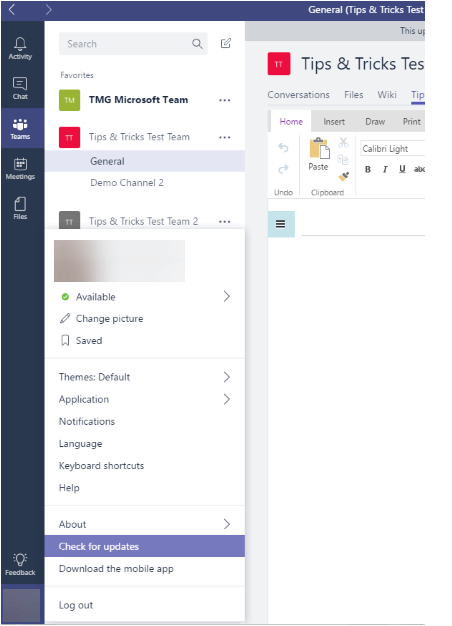
The desktop app automatically updates but, if you want, you can still check for available updates by clicking your profile picture at the top of the app, and then select the Check for updates option.
2. Use the web client
Most login issues related to Microsoft Teams usually involve those that access it via the desktop client.
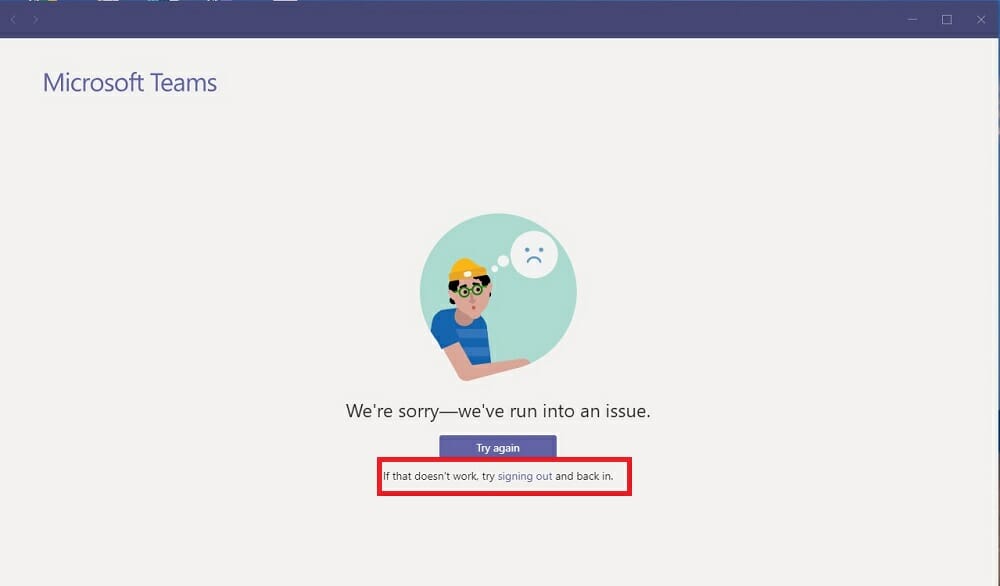
If you are also using the desktop client and encounter the We’re sorry—we’ve run into an issue error, simply consider switching to the web client, which you can access via any of the most popular browsers.
Also, if you are sick of Microsoft Teams’ constant issues, then take a closer look at our dedicated guide to finding the best cloud collaboration software to work on team projects.
3. Enlarge Microsoft Teams and try again
- Launch Microsoft Teams.
- Close the window with the error message.
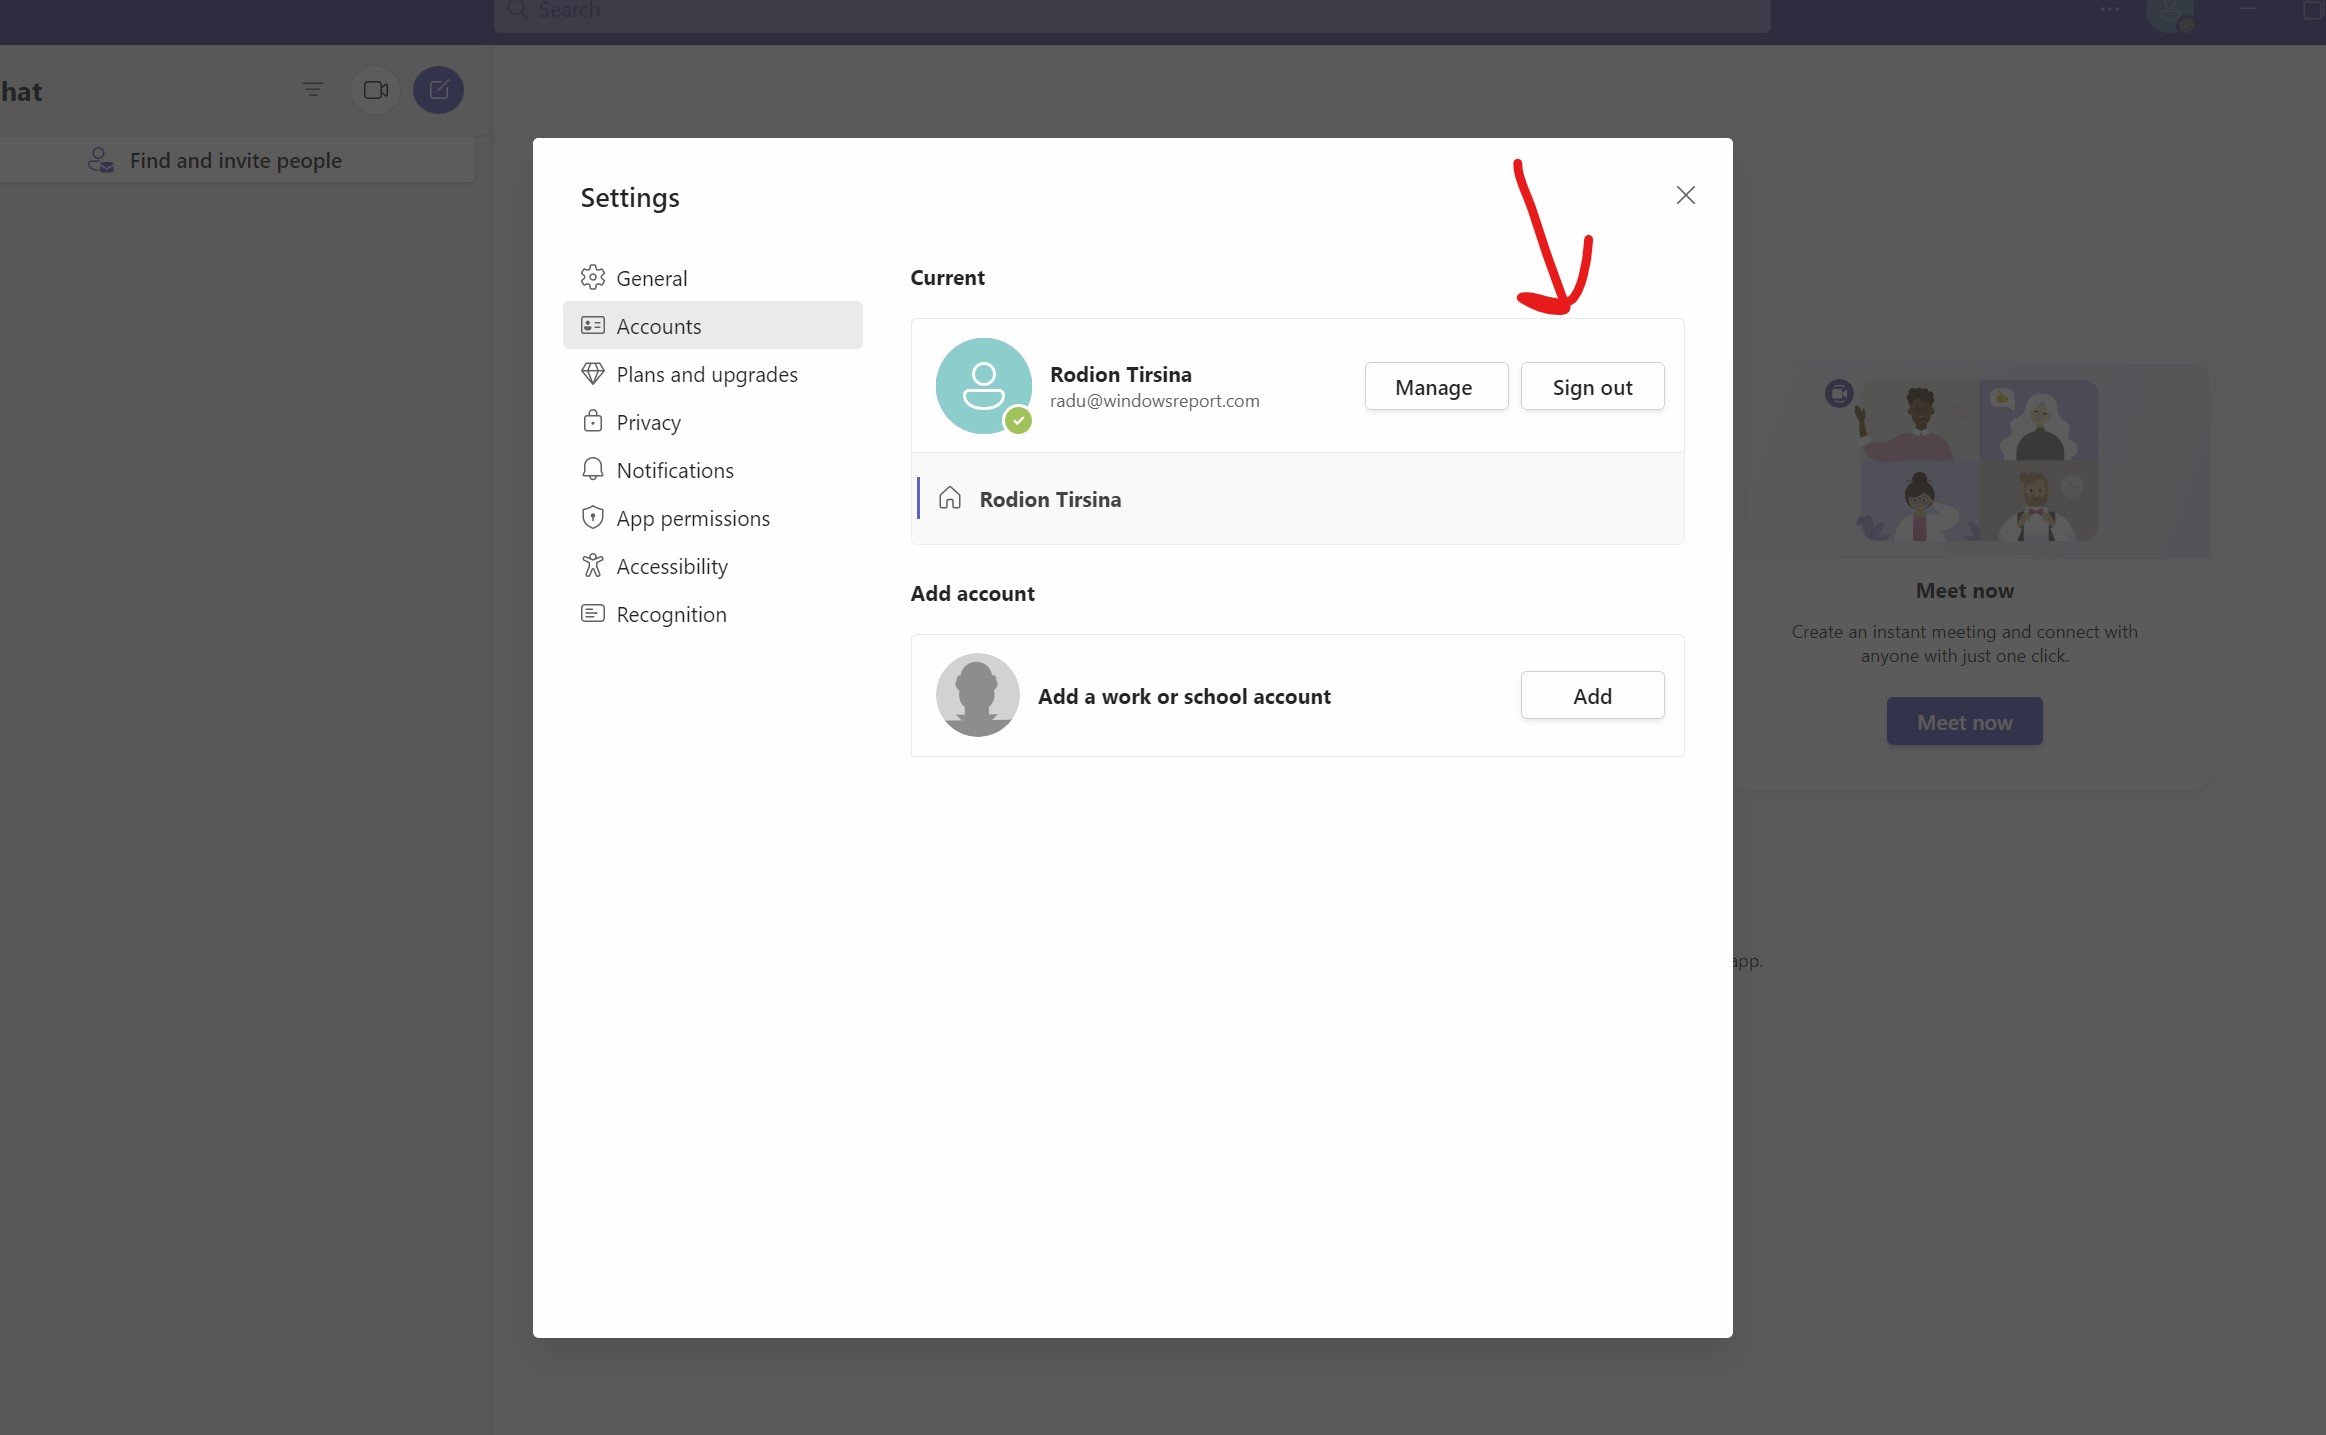
- Enlarge the Teams window, and click on the Signing out link.
- Login to Teams again.
This workaround has proved to be quite a useful one, as many users have said that it has helped them get rid of this error, so it’s worth trying it out.
4. Running Teams in Compatibility Mode
- Locate Microsoft Teams Shortcut:
Go to your desktop and find the Microsoft Teams icon. If it’s not there, search for it in the Start menu. - Right-Click for Properties:
a. Right-click on the Microsoft Teams icon
b. Select ‘Properties’ from the context menu that appears. - Open Compatibility Tab:
A new window will open. Click on the tab labeled ‘Compatibility’. - Automatic Troubleshooting:
Click the button that says ‘Run compatibility troubleshooter’. Windows will automatically find the best settings for Teams. - Manual Compatibility Mode:
If you prefer, you can manually select a previous version of Windows from the dropdown menu under ‘Run this program in compatibility mode for’. - Save Changes:
Click the ‘Apply’ button, followed by the ‘OK’ button. - Restart Microsoft Teams:
Make sure to close Microsoft Teams completely and then reopen it to apply the changes.
5. Deleting Generic Credentials for Teams
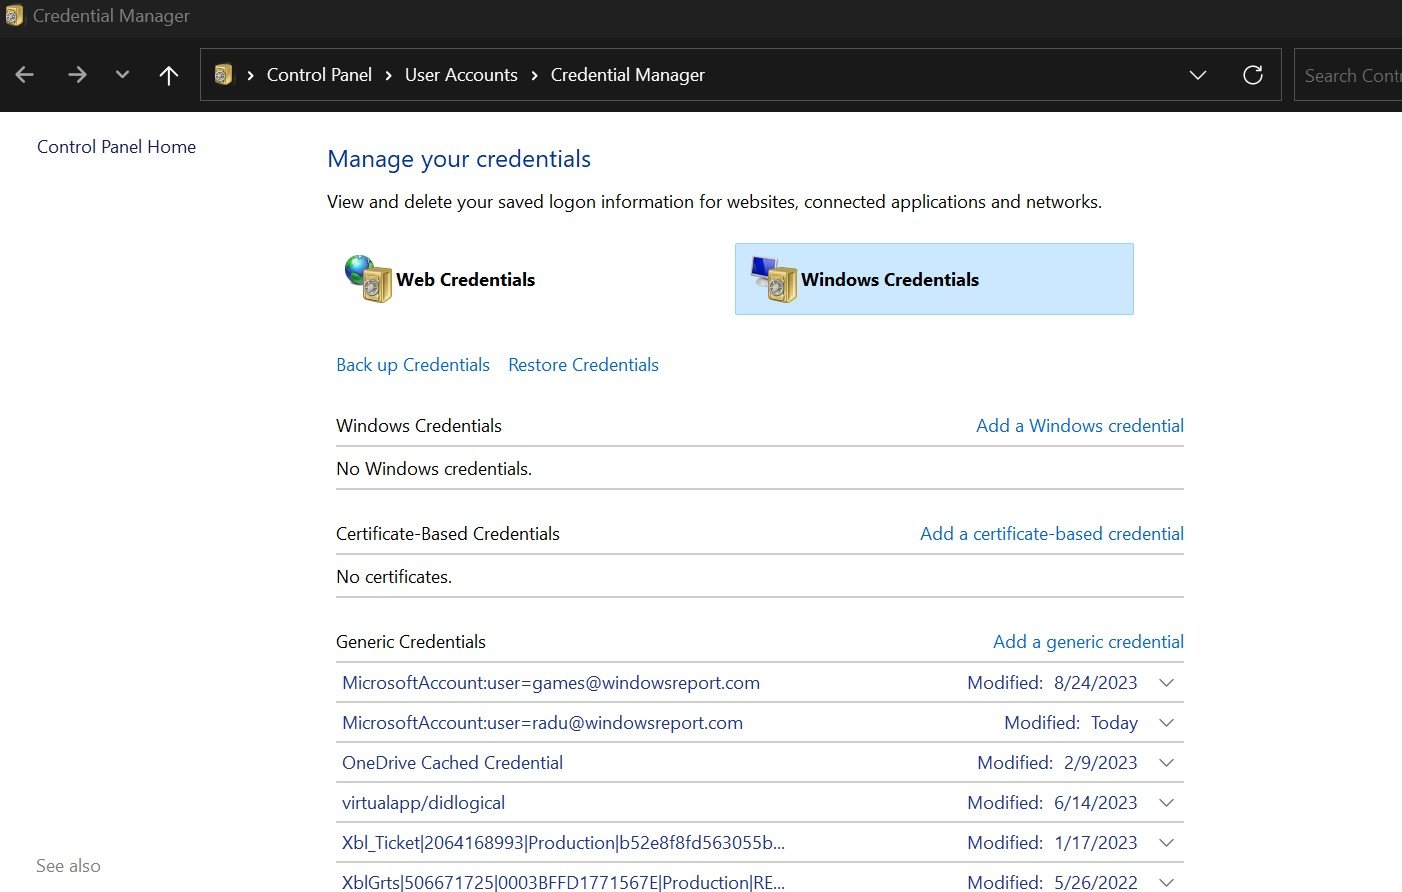
- Access Search Bar:
Press theWindows + Skeys simultaneously to open the search bar. - Search for Credential Manager:
Type ‘Credential Manager’ into the search bar and click on the app to open it. - Navigate to Windows Credentials:
In the Credential Manager, click on the tab that says ‘Windows Credentials’. - Identify Teams Credentials:
Scroll through the list to find any credentials that are associated with Microsoft Teams. - Select and Remove:
Click on the Teams-related credential, then click the ‘Remove’ button. - Confirm the Action:
A popup will appear asking you to confirm the removal. Click ‘Yes’. - Restart Microsoft Teams:
Close the Teams application and reopen it to see if the issue has been resolved.
6. Enabling TLS Features
- Open Search Bar: Press
Windows + Sto open the search bar. - Type Internet Options: Type ‘Internet Options’ and click to open it.
- Navigate to Advanced Tab: In the new window, click on the ‘Advanced’ tab.
- Scroll to Security Section: Scroll down until you find the ‘Security’ section.
- Check TLS Boxes: Check the boxes next to ‘Use TLS 1.1’ and ‘Use TLS 1.2’.
- Apply and Confirm: Click the ‘Apply’ button and then the ‘OK’ button.
- Restart Your Computer: To ensure the changes take effect, restart your computer.
7. Resetting Microsoft Edge Settings
- Launch Microsoft Edge: Open the Microsoft Edge browser from your desktop or Start menu.
- Access Settings: Click on the three horizontal dots in the upper-right corner to open a dropdown menu, then click ‘Settings’.
- Scroll to Reset Section: Scroll down until you find the ‘Reset settings’ section.
- Initiate Reset: Click on ‘Restore settings to their default values’.
- Confirm Reset: A popup will appear asking for confirmation. Click ‘Reset’.
- Close and Reopen Edge: Close Microsoft Edge and reopen it to apply the changes.
8. Renaming a Specific Teams File
- Open File Explorer: Click on the File Explorer icon on your taskbar or press
Windows + E. - Navigate to Teams Folder: Go to
C:\Users\[YourUsername]\AppData\Local\Microsoft\Teams. - Locate Update.exe: Find the file named
Update.exe. - Right-Click to Rename: Right-click on
Update.exeand choose ‘Rename’ from the context menu. - Change Name: Rename the file to
Update.old. - Confirm Rename: A popup may appear asking for confirmation. Click ‘Yes’.
- Restart Microsoft Teams: Close Microsoft Teams completely and then reopen it to see if the issue has been resolved.
9. Other workarounds to consider
To use Teams as efficiently and effectively as possible, keep these suggestions in mind:
- Sign-out and log-in again
- Don’t create multiple teams for the same purpose
- Each project or complex task should have its own team
- Create a library of shared documents to avoid sharing the same files over and over again
- Create a two-way connection between Teams and SharePoint to extra efficiency
- Enable all the security features supported on Teams for peace of mind
10. Wait for MS Teams to patch things up
Admittedly, this is the most counter-productive method of them all. However, Microsoft frequently runs into bugs and issues that prevent a user from accessing MS Teams.
As such, your best bet is to simply wait until they release another patch and see whether it fixed it or not.
By following these steps, you shouldn’t see the We are sorry we’ve run into an issue error anymore when trying to log in.
Also, we wrote more about Microsoft Teams login errors, so be sure to check out our comprehensive guide and fix them with ease.
Before you go, you might want to check our guide on Microsoft Planner not working, for more useful information.
If you have faced this issue and are aware of another way to solve this problem, share it in the comments section below so that other users can try it, as well.




User forum
5 messages