How to Fix Microsoft Word it it's not Continuing Numbering
Changing the numbering value should help restore normalcy

Users complain that Microsoft Word is not continuing numbering. This is despite the fact that you didn’t turn off auto-numbering on Word. One of the major causes of this issue is problems with the multi-level list you created. This might come in the value definition or the starting method. In this case, you need to recreate the list properly to solve the problem.
Sometimes, this problem can be due to your number values. Changing these values should restore normalcy here.
What do I do if Word doesn’t continue numbering?
1. Recreate the list style
1.1. Set up heading paragraph styles
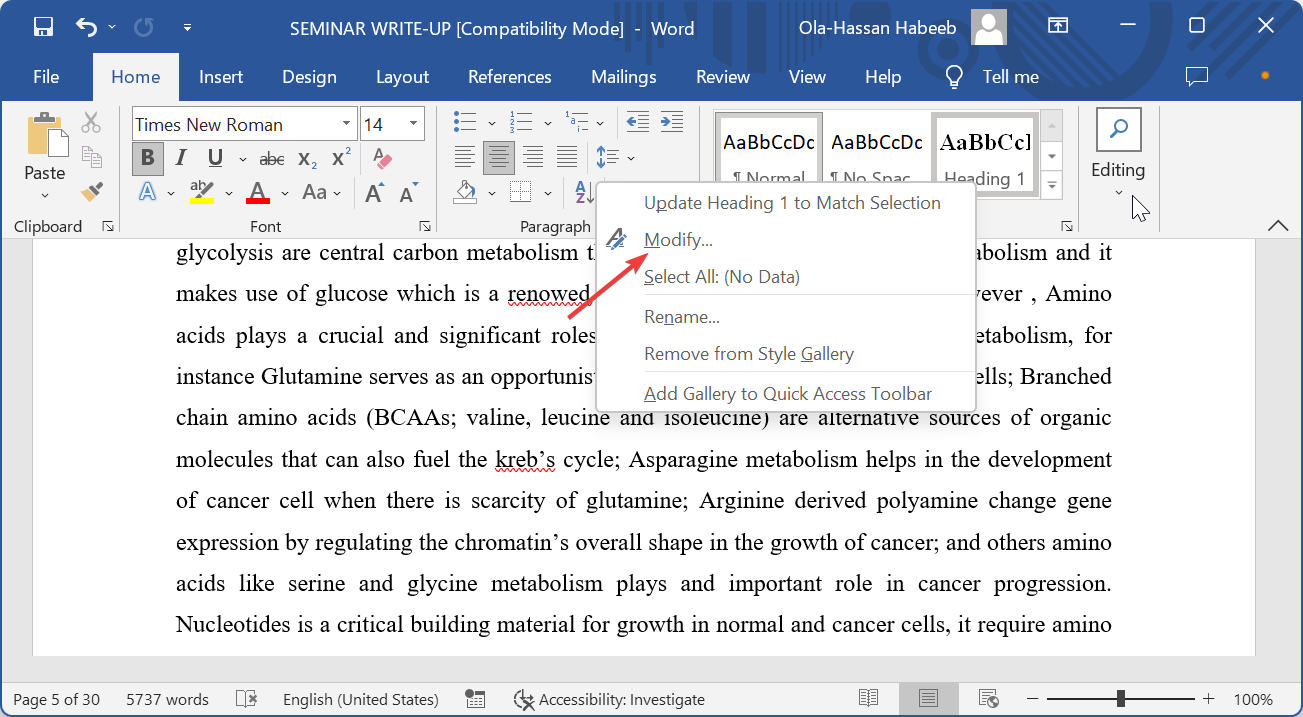
- Open the document with the numbering problem and right-click the Heading 1 style at the top.
- Select Modify.
- Now, click the Style based on dropdown and select (no style).
- Next, click the Format button in the bottom left corner and select Paragraph.

- Set the Left Indent to 0 and the Special Indent to none, and click OK.

- Go back to the document, right-click the Heading 2 style, and select Modify.

- Click the Style based on dropdown and select Heading 1.

- Repeat steps 3 and 4 for this Heading 2.
- Finally, modify Heading 3 based on Heading 2 and continue the trend for the other heading styles following the steps above.
The first thing to do in the quest to ensure Microsoft Word is continuing numbering is to set up the Heading styles. This will be linked to the list style later.
1.2. Create list style
- Click the Multilevel list option in the Ribbon.
- Select the Define New List Style option.

- Now, name your list style, then click the Format button and select Numbering.

- Next, click the More button on the Modify multilevel list page.

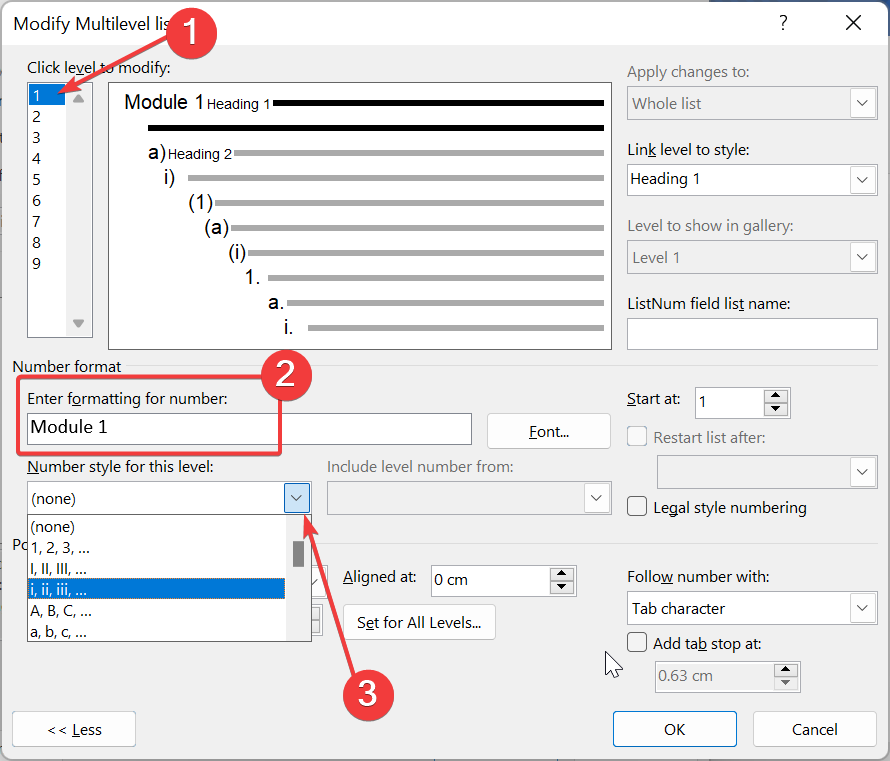
- Select 1 in the Click level to modify list, then select Heading 1 in the Link level to style box.

- Choose 2 in the Click level to modify list, then choose Heading 2 in the Link level to style box. Repeat this to link the other levels to the corresponding Heading.

- From here, select 1 in the Click level to modify list and delete the entry in the Enter formatting for number box.
- Type the numbering format you want in the Enter formatting for number box. For example, Step 1 or Module 1.
- Click the Number style for this level option and select your preferred numbering type.
- Go back to the Click level to modify list and set up the numbering for the other levels as you want.
- Set up your indents and click the OK button on the two open pages to save your changes.

- Finally, to apply the list, click the paragraph you want to apply it and select the Heading 1 style in the Ribbon.
With this, you have set up your list style successfully. There are lots of customization options still available, depending on your preference.
But the above is the basics you need to ensure Microsoft Word is continuing numbering in your document.
2. Adjust the Continue numbering option
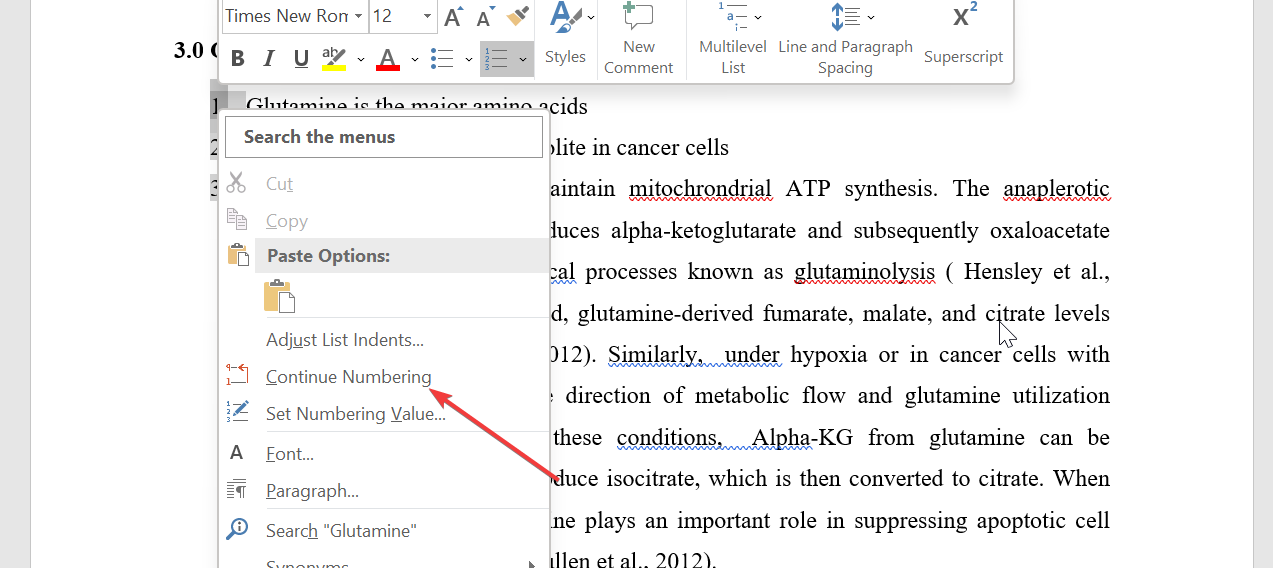
- Right-click the top of the number 1 on your list.
- Choose the Continue Numbering option. This should pick up the numbering from the previous numbered list.
- If this does not work, right-click the top of number 1 again and select Restart at 1.

- This will restart the numbering completely and place a restart marker in the first paragraph of the list.
If you just want to make sure Microsoft Word is continuing numbering for the present document you are working on for printing, you can use this method. However, you will have to repeat this manually for the lists having the problem.
3. Change number values
- Right-click the first incorrect number on your list and select Set Numbering Value.

- Now, choose whether to Start a new list and type 1 in the Set value box. This will help restart the numbering from 1.

- You can also Continue from the previous list to assign the next number from the last numbered list.
- Finally, click the OK button.
With this solution, we can conclude this comprehensive guide on how to fix Microsoft Word if it is not continuing numbering.
If your Word document won’t save, check our detailed guide to fix it effortlessly.
Feel free to let us know the solution that helped you fix this issue in the comments below.
Read our disclosure page to find out how can you help Windows Report sustain the editorial team. Read more


Improve this guide


User forum
0 messages