Fix: MSI Afterburner Failed to Start Scanning
Check for compatibility or run the legacy scanner
5 min. read
Updated on
Read our disclosure page to find out how can you help Windows Report sustain the editorial team Read more
Key notes
- While finding the best overclocking settings, the MSI Afterburner OC Scanner may fail due to misconfigured settings or an outdated driver.
- Your primary approach should be to update the drivers and terminate all background applications.
- For more effective fixes, read this guide.
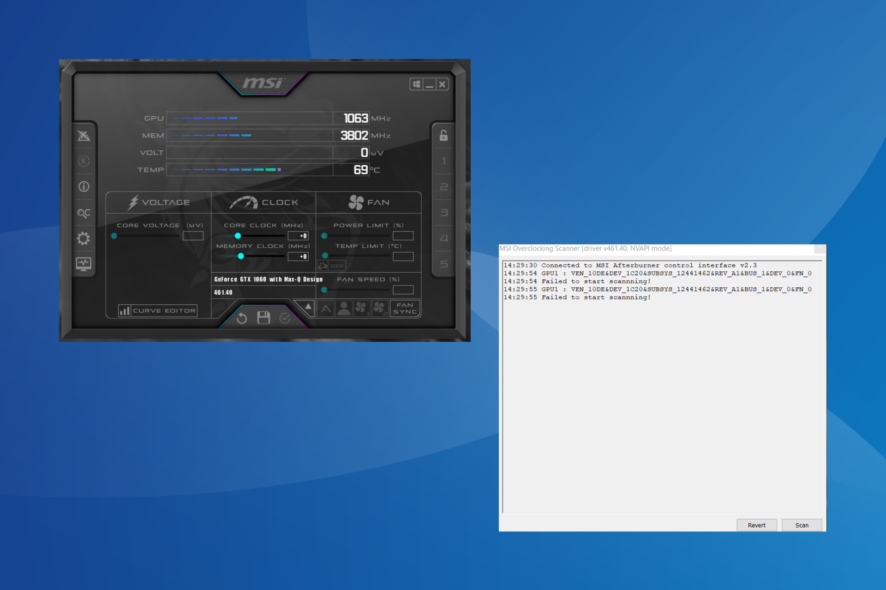
MSI Afterburner remains the most popular graphics card software due to its compatibility with a wide range of hardware. But it doesn’t always work perfectly. A few got the Failed to start scanning error when running the MSI Afterburner OC scanner.
The problem was more prevalent in the recent versions of the MSI OC scanner, but reconfiguring these settings usually fixed it.
What causes the MSI Afterburner Failed to start scanning error?
- The graphic card settings are misconfigured
- A third-party program conflicts with the OC scan
- You are running an outdated or incompatible graphics driver
- A bug in the installed version of MSI Afterburner
How do I fix the Failed to start scanning error in MSI Afterburner?
Before we head to the slightly complex solutions, try these quick ones first:
- Turn off the computer, wait for 15-30 minutes, power it on, then run the OC scanner, and verify if you still find the MSI Afterburner scan canceled.
- Check for any available updates and install them, both the program and the OS.
- Make sure your PC meets the system requirements for MSI Afterburner.
- Uninstall apps added to the PC around the same time the error first appeared. Third-party apps can also lead to MSI Afterburner not showing the GPU temperature.
If none work, move to the fixes listed next.
1. Allow access to GPU performance
- Launch the NVIDIA Control Panel, click the Desktop menu, and select Enable developer settings.
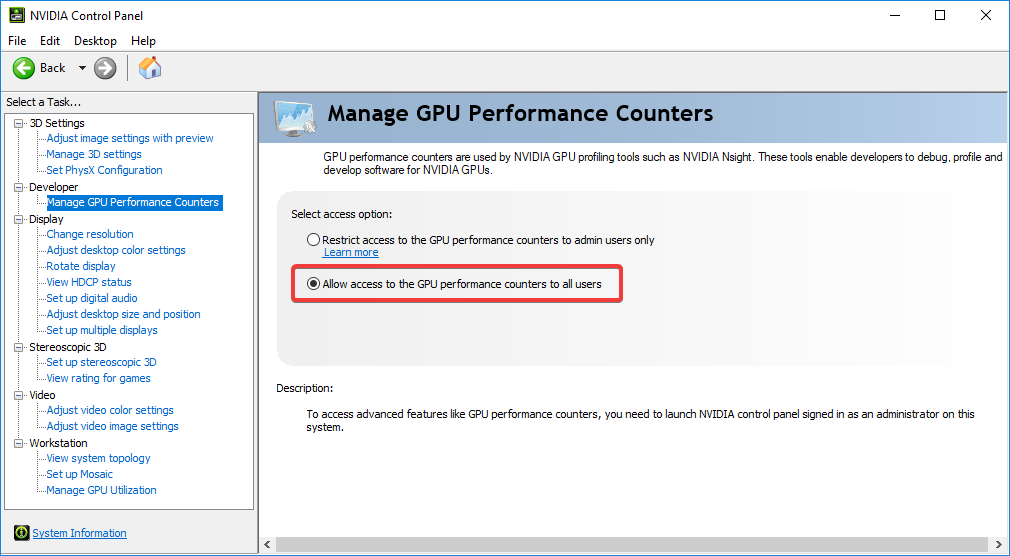
- Select Manage GPU Performance Counters from the navigation pane, and enable Allow access to the GPU performance counters to all users.
- Finally, click Yes in the confirmation prompt, and restart the computer.
2. Terminate all active programs
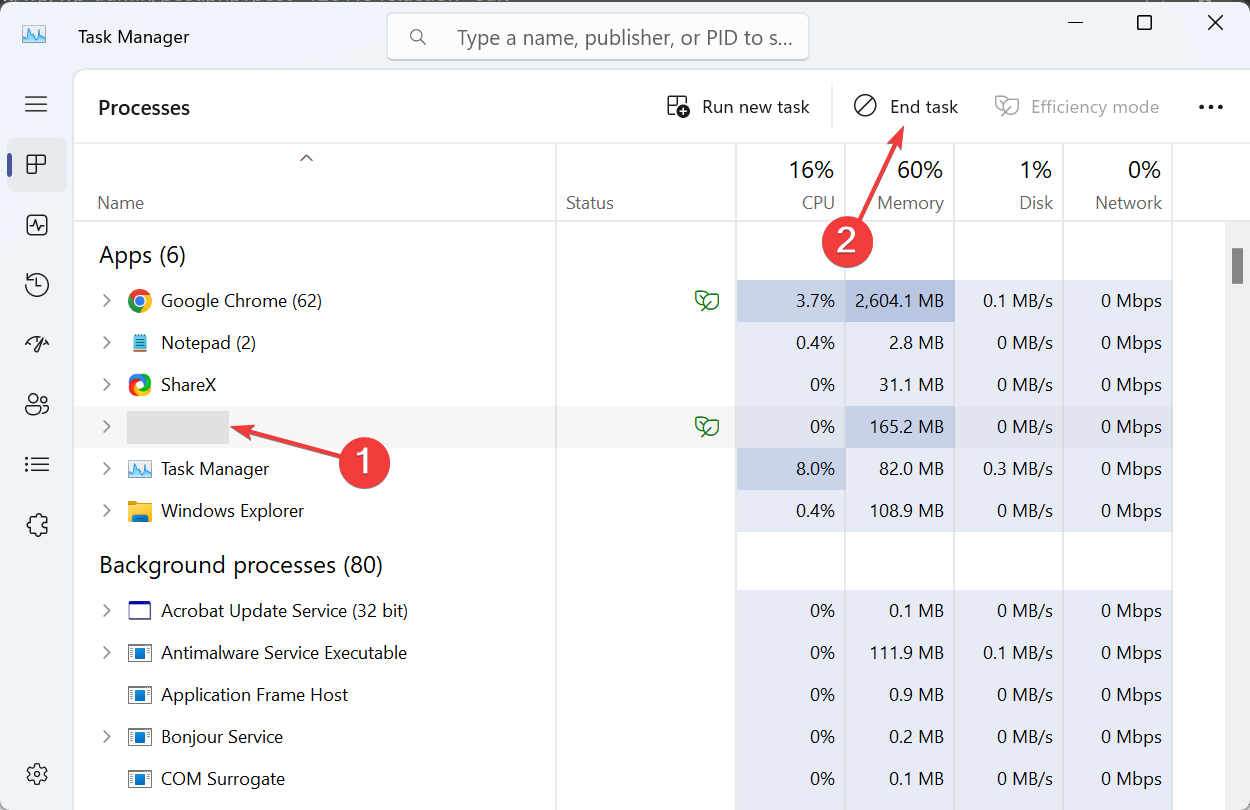
- Press Ctrl + Shift + Escape to launch the Task Manager and identify all active programs on the PC.
- Now, select them individually and click the End task button.
- After killing the programs, check for any non-critical processes and terminate them as well.
3. Enable CUDA in NVIDIA Control Panel
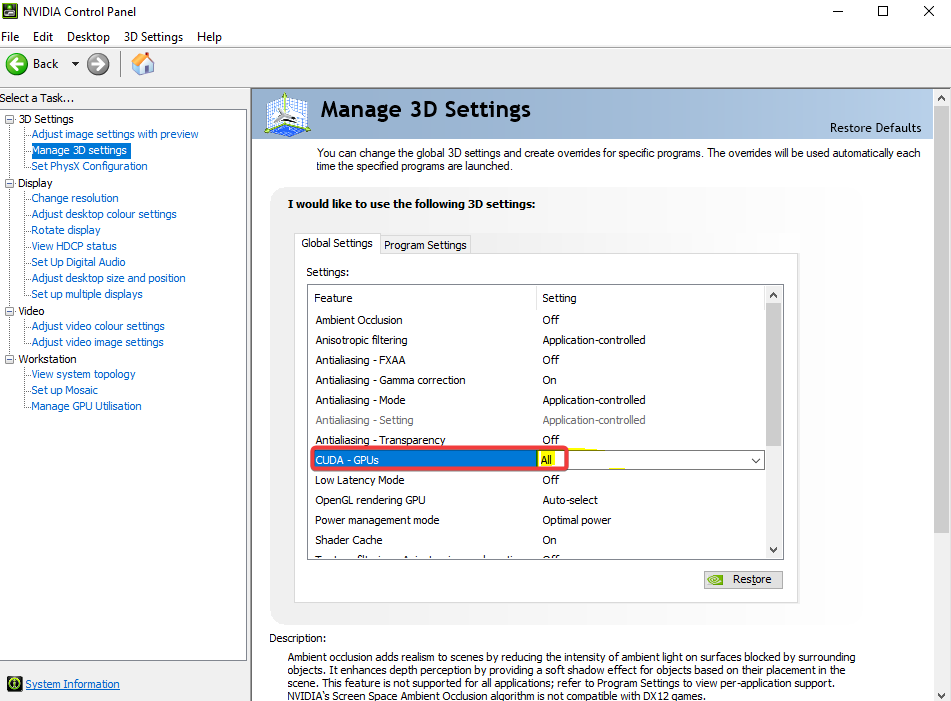
- Open the NVIDIA Control Panel, and go to Manage 3D Settings from the left pane.
- Locate the CUDA -GPUs entry, and select All from the dropdown menu.
- Save the changes and reboot the computer.
When the MSI Afterburner OC scanner failed to start scanning, enabling CUDA will do the trick! If the option is greyed out or the changes don’t reflect, add your card to the list and turn on CUDA under Program Settings instead of Global Settings.
4. Update the graphics card driver
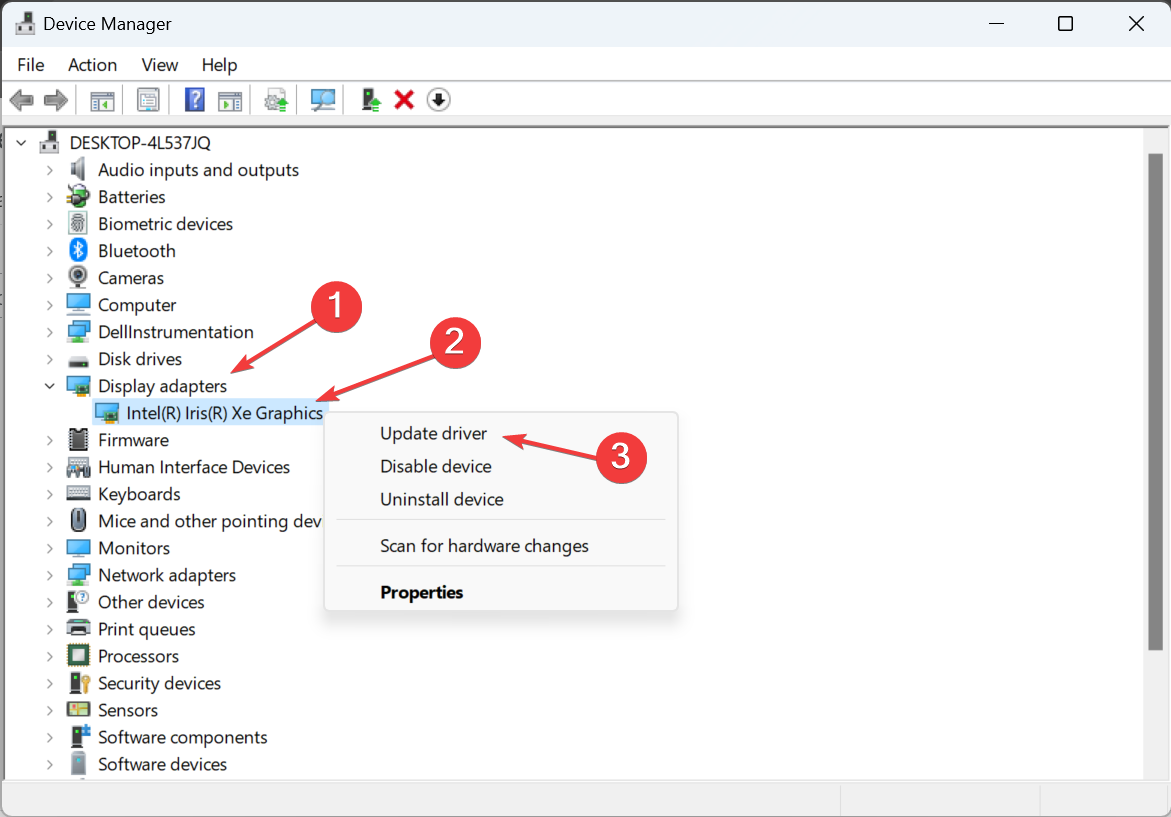
- Press Windows + X to open the Power User menu, and select Device Manager from the list of options.
- Expand the Display adapters entry, right-click on the active graphics adapter, and select Update driver.
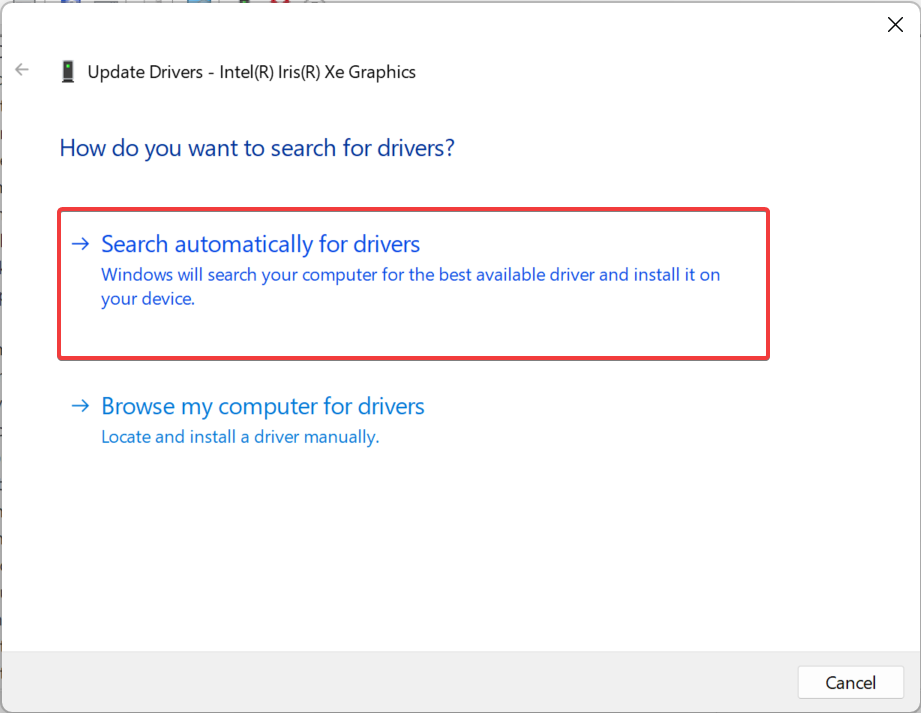
- Click on Search automatically for drivers and wait for Windows to find the best available version and install it.
Often, an incompatible or outdated driver can trigger the Failed to start scanning error in MSI Afterburner. In this case, simply updating the graphics driver should do!
When Windows can’t find a better version, head to the manufacturer’s website, locate the latest version, download it, and then manually install the driver.
Here are the direct links to the driver download page for major manufacturers:
- Download and install the Outbyte Driver Updater app.
- Launch the software and wait for the app to detect all incompatible drivers.
- Now, it will show you a list of all faulty drivers to select the ones to Update or Ignore.
- Click on Update & Apply Selected to download and install the newest versions.
- Restart your PC to ensure the applied changes.

OutByte
Keep your GPU in a flawless state without worrying about possible driver issues.5. Unlock Voltage Control in MSI Afterburner
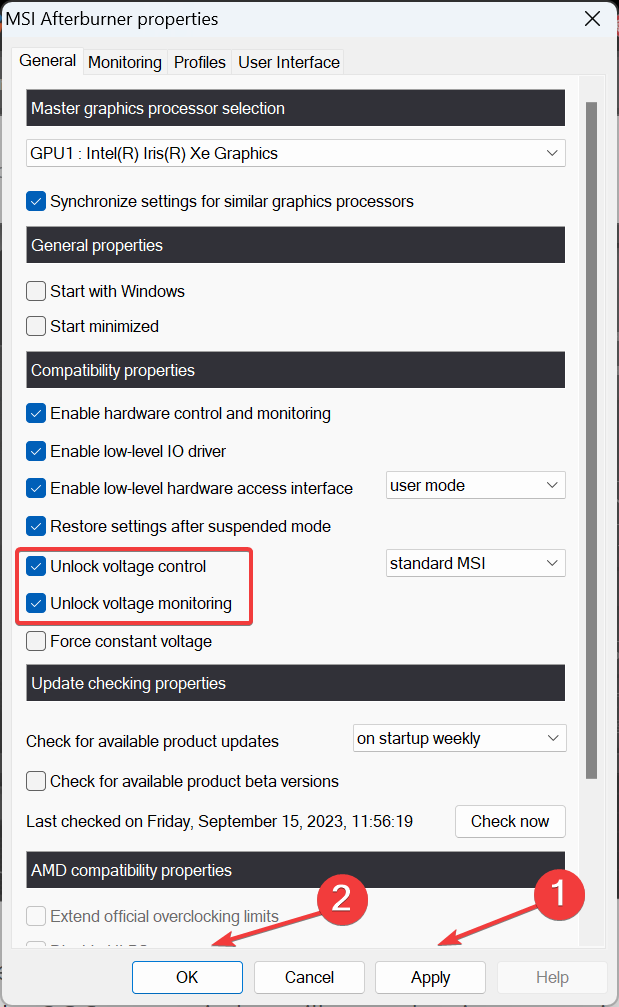
- Launch MSI Afterburner, and open its settings.
- Tick the checkboxes for Unlock voltage control and Unlock voltage monitoring, then click Apply and OK to save the changes.
- Click Yes to confirm.
Unlocking voltage control will also help when you can’t change the core voltage in MSI Afterburner.
6. Run the legacy scanner
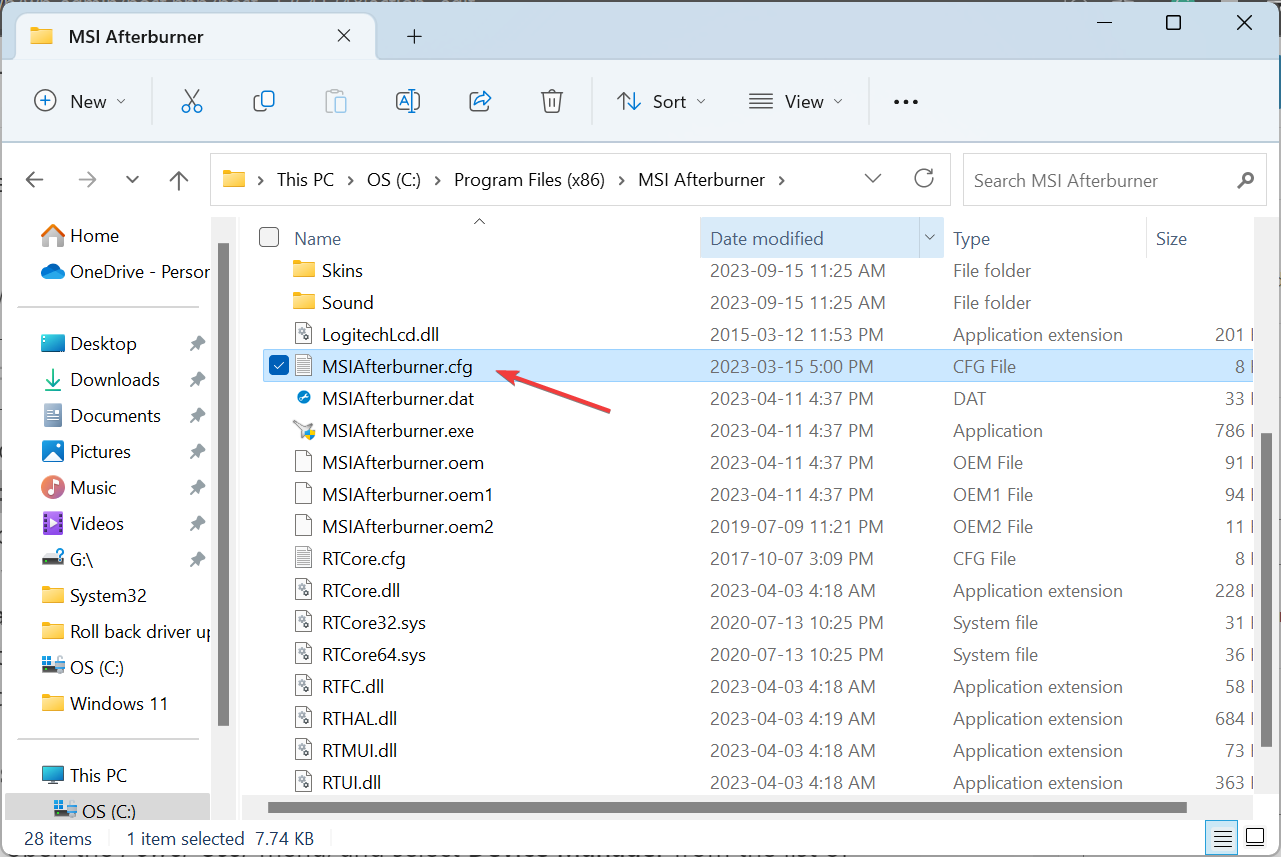
- Press Windows + E to open File Explorer, paste the following path in the address bar, and hit Enter:
C:\Program Files (x86)\MSI Afterburner - Locate and double-click the MSIAfterburner.cfg file.
- If asked, open the file with Notepad.
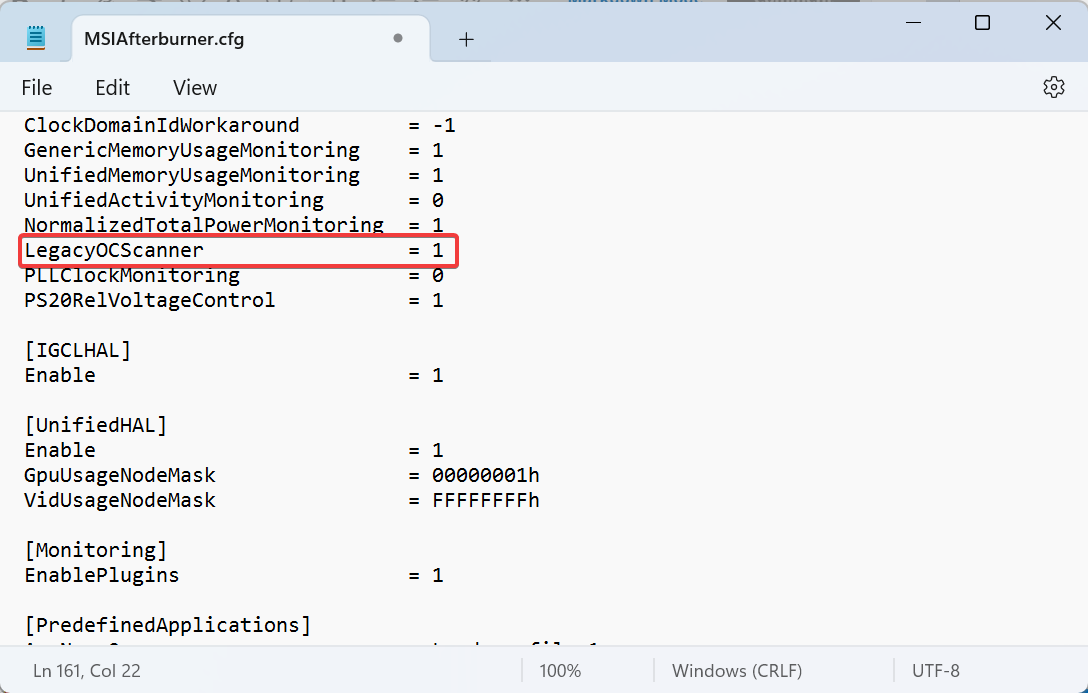
- Find the LegacyOCScanner entry and change the value next to it from 0 to 1.
- Save the changes, restart the computer, and then run the overclocking scanner.
7. Reinstall MSI Afterburner
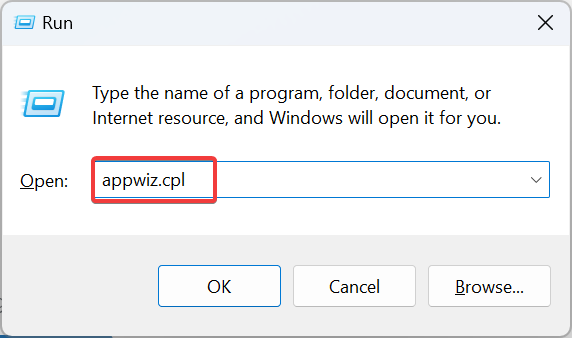
- Press Windows + R to open Run, type appwiz.cpl in the text field, and hit Enter.
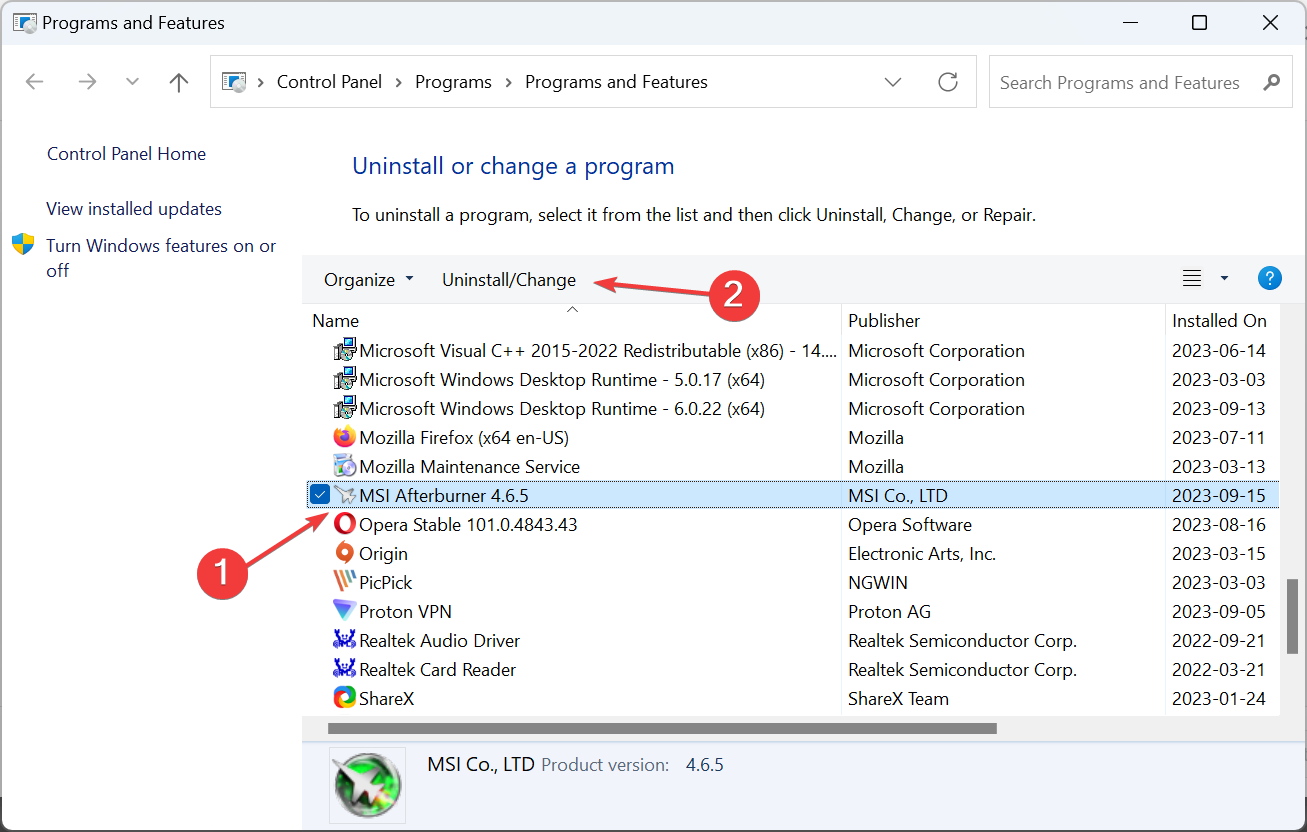
- Select MSI Afterburner from the list of programs, and click Uninstall.
- Follow the on-screen instructions to complete the process, and then restart the computer.
- Now, head to the official MSI website and download the program’s installer.
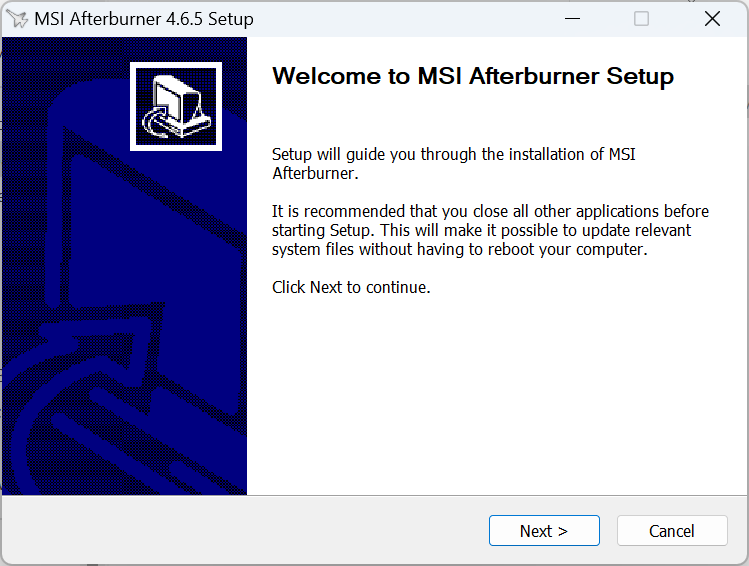
- Run the setup to install MSI Afterburner.
When a simple removal doesn’t work, and you still face the error, use a reliable third-party uninstaller tool. It will clear any leftover files and registry entries created by the program.
Besides, a reinstall is an effective solution against the MSI Afterburner scan failed with code 3 error.
How does MSI Afterburner OC scanner work?
The OC scanner identifies the highest clock speed that delivers a stable performance without damaging any of the hardware. It uses the same algorithm developed for RTX 20 series graphics cards by NVIDIA.
The program does so by gradually increasing the clock speed, stressing the GPU, and verifying the stability. When things turn unstable, the last set configuration will be termed stable overclocking settings.
The MSI Afterburner OC scanner has made overclocking simpler than ever, and though you may encounter errors like Failed to start scanning, these are easy to fix. Remember to verify whether MSI Afterburner is not working, and if that’s the case, fix it first.
For any queries or to share what worked for you, drop a comment below.

User forum
0 messages