There are no More Endpoints Available Endpoint Mapper [Fixed]
10 min. read
Updated on
Read our disclosure page to find out how can you help Windows Report sustain the editorial team Read more
Key notes
- The No more endpoints available from the endpoint mapper error can appear in all sorts of different situations.
- The error can interfere with file sharing, printer setup, or with your antivirus tool.
- Our Windows 10 section is full of interesting tips and guides so it's worth taking a look.
- We have a dedicated Troubleshooting Hub to help you fix any other PC problems.

Computer errors are somewhat common, and while some errors can be generated by Windows 10, some can be caused by third-party applications.
Users reported There are no more endpoints available from the endpoint mapper error, and this error can appear in all sorts of different situations.
Since this error can be rather annoying, today we’re going to show you how to fix it.
How can I fix the No more endpoints available error?
- How do I fix the no more endpoints available error?
- How do I fix the no more endpoints available printer error?
- How do I fix the no more endpoints available sharing error?
- How do I fix the no more endpoints available Avast error?
- How do I fix the no more endpoints available Exchange error?
How do I fix the no more endpoints available error?
1. Reset the credentials for Enterprise Single Sign On service
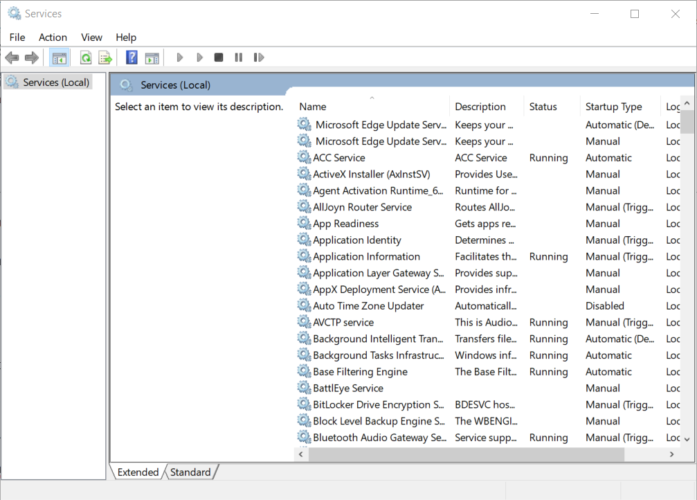
- Open the Services window.
- Locate the Enterprise Single Sign On service and make sure that it’s running.
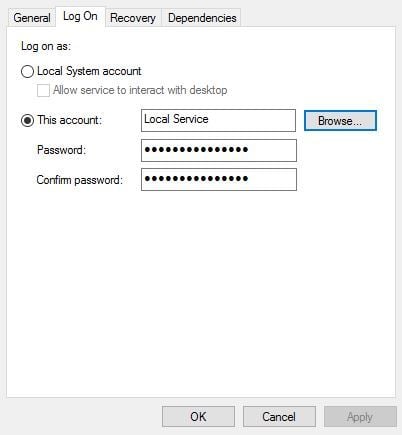
- Specify which user will run this service by double click the service to open its properties.
- Go to the Log on tab and select This account. Enter your account username and password and click Apply and OK to save changes. Alternatively, you can click the Browse button and search for your account.
- Restart the service and check if the problem is resolved.
2. Restart the byProcessManager and RPC Server services
- Open the Services window.
- Locate byProcessManager and RPC Server services. Right-click each of these services and choose the Restart option.
How do I fix the no more endpoints available printer error?
1. Turn on the Firewall
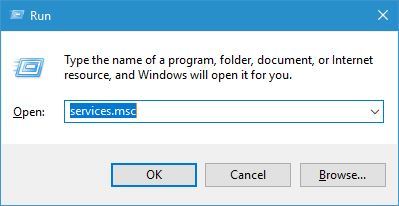
- Press Windows Key + R, enter services.msc and press Enter.
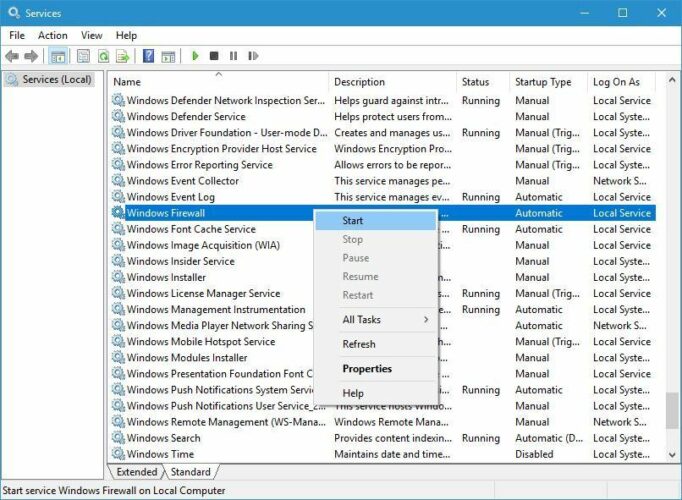
- Locate the Windows Firewall service, right-click it, and choose Start from the menu.
- Close the Services window.
Note: For some unknown reason it seems that the printer installation process is related to the status of the Windows Firewall, and in order to successfully install a printer, you’ll have to turn this service on.
After starting the Windows Firewall service, the error should be fixed and you’ll be able to install your printer without any problems.
If your default printer keeps changing in Windows 10, check out this step-by-step guide to fix the issue.
2. Update the printer driver
This error can also be caused by a malfunctioning or old printer driver so you need to make sure that you have the latest drivers installed.
You can do that manually by using Device Manager or using the media included by the manufacturer in the box. Another option is to go to the manufacturer’s website and download it.
All these solutions are fine, but they don’t guarantee to provide the correct driver.
The easiest and safest way of making sure that you end up with a perfect running driver is to use specialized software like Outbyte Driver Updater.
If you’re not familiar with it, it’s an excellent tool that updates your drivers in just a few seconds automatically.
First, you need to download and install Outbyte Driver Updater. The app will start automatically after the installation and will begin searching for driver issues on your PC.
When the process ends, you receive a list of drivers recommended for installation.
The only thing left to do is to decide whether you install all of them of just a few. For the first option, you just need to click the Update All button from the top.
If you want to install them separately, you need to check their corresponding boxes from their left and then hit the Update button from their right.
3. Make sure the Print Spooler service is running
- Make sure that your printer is connected and turned on.
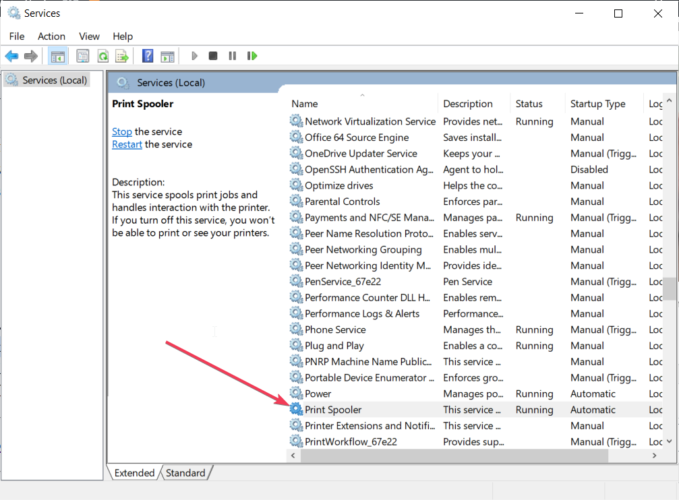
- Open the Services window and locate Print Spooler service.
- Check the status of the service. If the service isn’t running, right-click it and choose Start from the menu.
- Close the Services window and check if the problem is resolved.
4. Check the Print Spooler dependencies
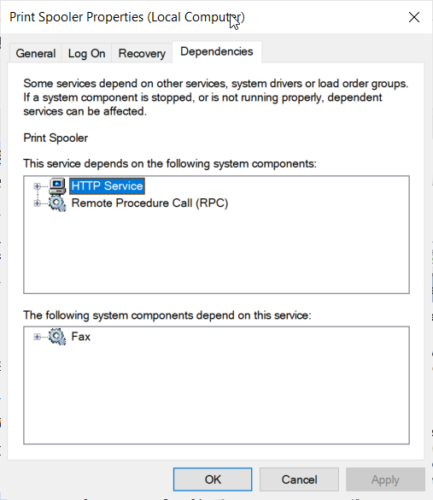
- Open the Services window, locate the PrintSpooler service , and double click it.
- When Print Spooler properties window opens, navigate to the Dependencies tab.
- In the This service depends on the following… expand all services.
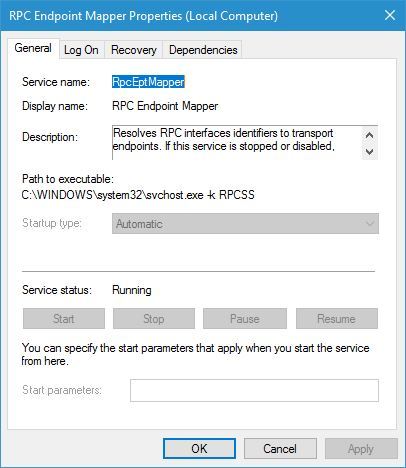
- Go back to the Services window and a look for the services that you got in the previous step. In our case, those were DCOM Server Process Launcher and RPC Endpoint Mapper services (you might get different results on your PC).
- Locate those services, double click them, and set their Startup type to Automatic. If any of the services isn’t running, click the Start button to start it.
5. Run the Print Troubleshooter
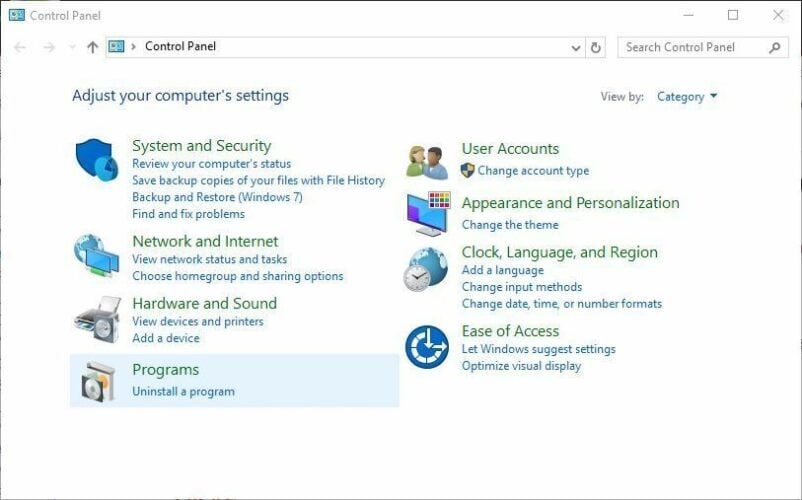
- Open Control Panel.
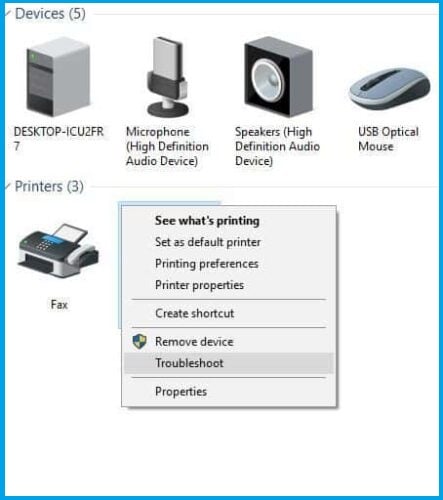
- Navigate to the Hardware and Sound, and then to the Device and Printers section.
- Right-click your printer and choose Troubleshoot from the menu.
- Follow the instructions and wait for the Troubleshoot to fix your problem.
6. Change the Print Spooler recovery options
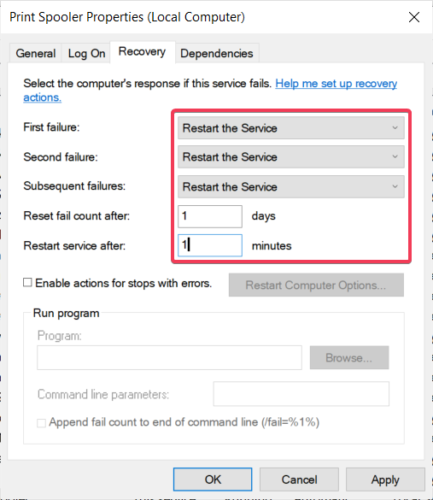
- Open the Services window and double click the Print Spooler service to open its properties.
- Go to the Recovery tab.
- Set First failure, Second failure, and Subsequent failures to Restart the Service. Set Reset fail count after and Restart service after to 1.
- Click Apply and OK to save the changes.
Note: By changing these options, the Print Spooler service will automatically start whenever it crashes or if it suddenly stops for any reason.
If the Print Spooler service keeps stopping on Windows 10, follow the steps in this comprehensive guide, and solve the problem in no time.
How do I fix the no more endpoints available sharing error?
1. Add the registry keys to your registry and change the permissions
- Download the MpsSvc.reg and BFE.reg files and add them to your registry simply by double-clicking both files.
- Restart your PC.
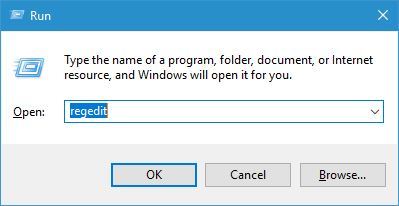
- Press Windows Key + R, type regedit and press Enter or click OK.
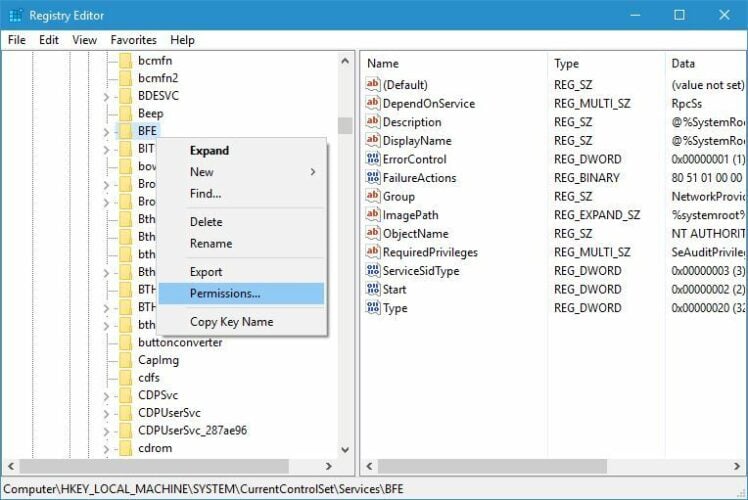
- Go to the following key from the left pane:
HKEY_LOCAL_MACHINESYSTEMCurrentControlSetServicesBFE - Right-click the BFE key and choose Permissions from the menu.
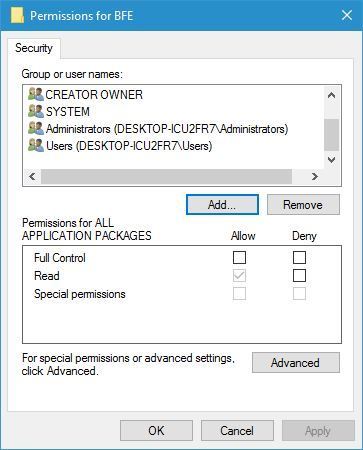
- Click the Add button.
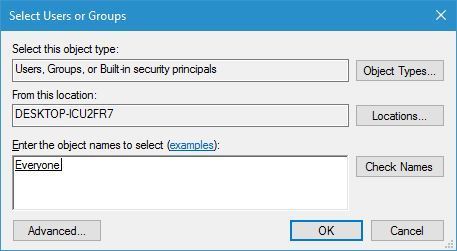
- In the Enter the object names to select field enter Everyone. Click Check Names and OK.
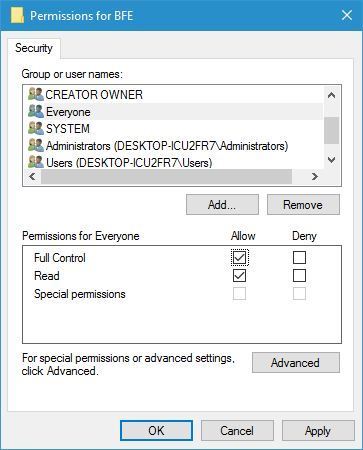
- Everyone should be now added to the Group or user names section.
- Select Everyone from the list and check the Full Control option in the Allow column. Click Apply and OK to save changes.
Note: This solution is a bit advanced and it involves changing your registry.
Before making any changes, we strongly suggest that you create a backup so you can easily restore it if anything goes wrong.
Disclaimer: This is an unofficial download mirror for the MpsSvc.reg and BFE.reg files. WindowsReport is not responsible for the download or the installer package.
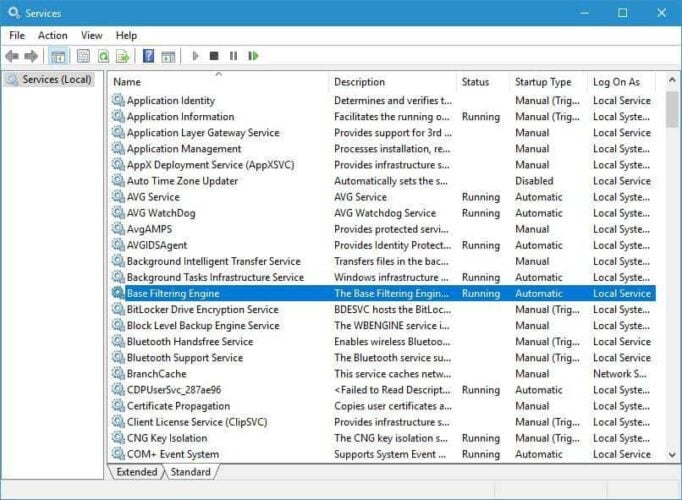
Restart the Base Filtering Engine and Windows Firewall services
- Open the Services window.
- Locate the Base Filtering Engine and Windows Firewall services and enable them both.
2. Run the SFC and DISM scans
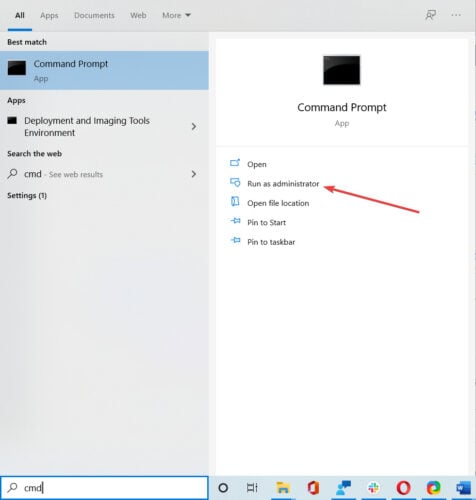
- Search for cmd and click on Run as administrator to start Command Prompt.
- Enter sfc /scannow and press Enter.
- After the scan is completed, enter the following command and press Enter to run it:
Dism /Online /Cleanup-Image /RestoreHealth - After the DISM scan is completed, close Command Prompt.
- Restart your PC and check if the problem is resolved.
If the DISM scan fails, check out this quick guide and get rid of the worries. Also, if the SFC scan has stopped before the process finished, check out this easy fix.
How do I fix the no more endpoints available Avast error?
1. Download the latest update file for Avast
You can fix this problem simply by downloading the latest update file for your version of Avast.
To do that, simply go to Avast’s download section and download the necessary files. Install the download files and restart your computer.
When your computer restarts, open Avast and click on Fix Now button. The software will attempt to fix the problem.
2. Repair the Avast installation
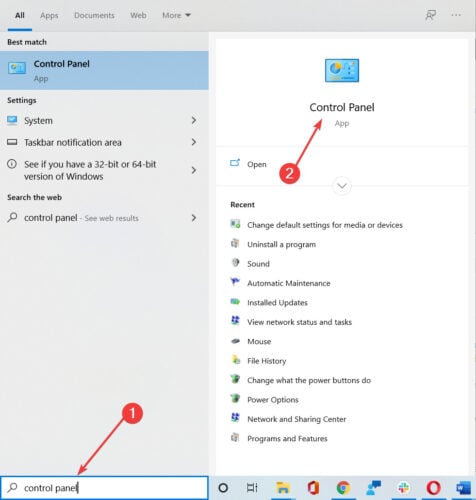
- Search for control panel and click on Control Panel from the results.
- Select the Uninstall a program option.
- Select Avast and choose the Repair or Change options from the menu (you can also right-click the application from the list and choose the desired option).
- Follow the instructions on the screen to complete the repair process.
- After you complete the repair, restart your computer and check if that fixes the problem.
3. Reinstall Avast
If this problem still persists, you might want to try reinstalling Avast. To do that, first, you need to uninstall Avast. Uninstalling Avast isn’t usually enough, and you’ll have to remove all files and registry entries associated with it.
You can easily do that by downloading and running Avast Uninstall Utility. After you remove all Avast files from your PC, restart your computer. When your PC restarts, download the latest version of Avast and install it.
After you install Avast again, the problem should be resolved.
How do I fix the no more endpoints available Exchange error?
1. Make sure that firewall service is running
Users reported that one of the simplest ways to fix this problem is to enable the Microsoft Firewall service.
We already explained how to enable Microsoft Firewall service in one of our previous solutions, so be sure to check it out.
2. Delete the Watermark and Action keys
- Open Registry Editor.
- Navigate to the following key and expand it:
HKEY_LOCAL_MACHINESOFTWAREMicrosoftExchangeServerv14HubTransportRole - You should see the Watermark and Action keys available. Delete them both.
- Close Registry Editor and check if the problem is resolved.
Note: Deleting registry keys can lead to system instability, therefore we recommend creating a backup of your registry before proceeding. To delete the problematic keys, do the following:
If you can’t edit your Windows 10’s registry, read this handy guide and find the quickest solutions to the issue.
3. Make sure that necessary services are running
- Open Services window.
- Locate Microsoft Exchange Search Indexer, Microsoft Exchange RPC Client Access server, and Microsoft Exchange System Attendant services and make sure that all are running.
- After starting them, close the Services window and check if the problem is resolved.
There are no more endpoints available from the endpoint mapper error can interfere with file sharing, printer setup, or with your antivirus tool, and in most cases, you can fix this problem by checking your services and changing your settings.
In case that none of our solutions work for you, you might want to consider performing a clean install of Windows 10.
If you have any other questions, don’t hesitate to leave them in the comments section below and we’ll be sure to check them out.

