No Physical Memory is Available at The Location Required [Fix]
Best solutions for unavailable memory for Windows boot manager
4 min. read
Updated on
Read our disclosure page to find out how can you help Windows Report sustain the editorial team. Read more
Key notes
- If you’re experiencing no physical memory available at the location required, it’s most likely that your hard drive is corrupted.
- Ensure that your system hardware is tightly fitted to prevent such errors.
- Reinstalling Windows is the ultimate solution to help tackle this error.
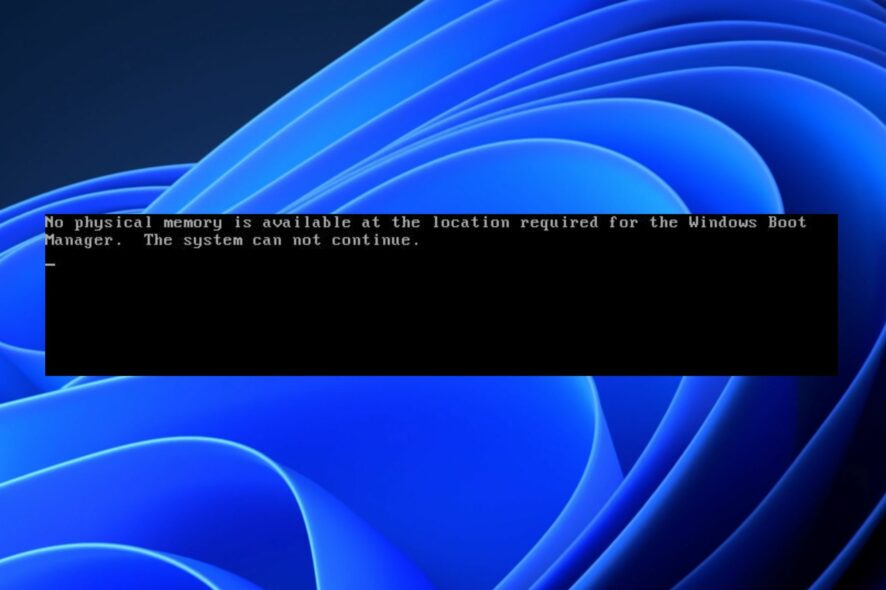
Booting errors are one of the frustrating things that occasionally plague Windows users. One such error is that no physical memory is available at the location required for the Windows boot manager.
We’ve also noticed a lot of complaints from our readers on this and similar issues like not enough physical memory in VMware. So, this guide will examine the likely causes and solutions.
Why do I encounter no physical memory available at the location required?
The following are some of the reasons why you’re experiencing no physical memory available at the location required:
- Hard drive failure – If the hard drive has been recently damaged, your system won’t be able to boot up. Also, Windows may refuse to boot with the second hard drive if that’s what you are using.
- Corrupted modules – If the memory modules on your computer are not fitted properly, the system might not boot up.
- Damaged CMOS battery – CMOS batteries have about 4 – 5 years’ lifespans. If they’re way past their valid life cycle, it might be the reason you’re experiencing this error.
- BIOS error – You might have accidentally triggered an error if you’ve recently changed the configuration settings of your BIOS. This may also cause Windows to skip BIOS.
Irrespective of the causes, any of the solutions below should fix it.
What can I do if there’s no physical memory at the location required?
Troubleshooting is the only way to resolve system errors. However, users should ensure that they’ve performed the following preliminary checks:
- If you’ve experience handling disk drives, open up the system unit to check if the hard drives and memory modules are tightly fitted. Sometimes, hard disks can be slightly displaced when they experience forceful external contact.
- You can also try narrowing down the problems by inserting your current hard disk into another working computer. This will help you determine if the fault is from the hard disk or your system.
Here are a couple of things you can do to help you resolve this error.
1. Adjust your Boot Sequence
- Hit the power button to turn on the computer.
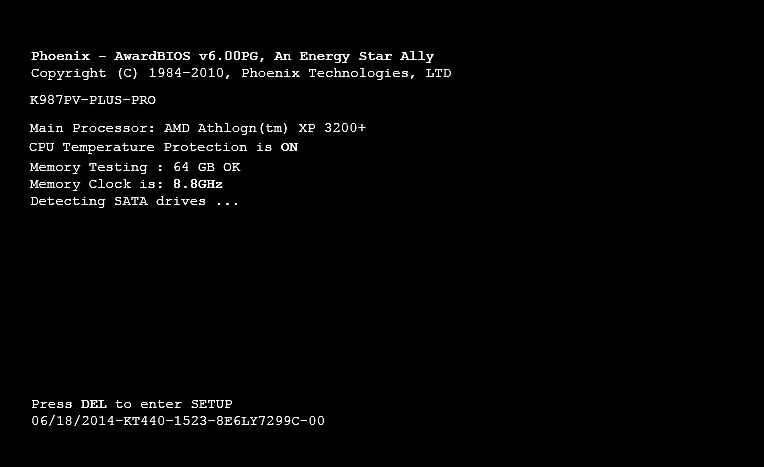
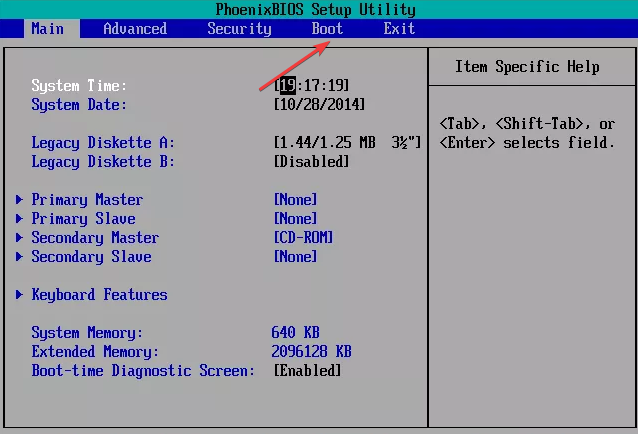
- To enter the BIOS, hit the F2 or Del button. (Depending on the system’s manufacturer)
- In your BIOS setup, click the Boot tab.
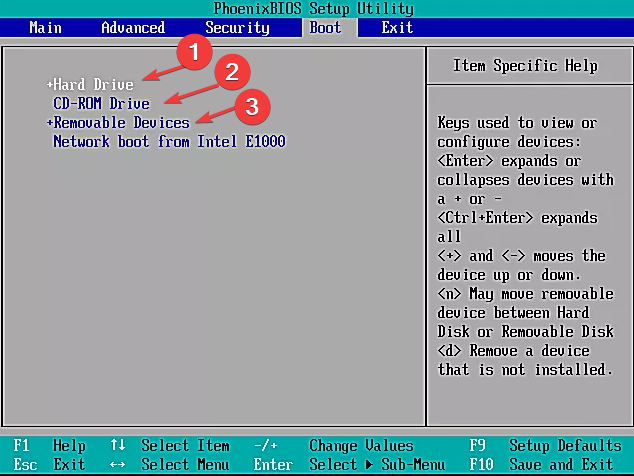
- Reorder the Boot sequence to the following by clicking the + or - keys:
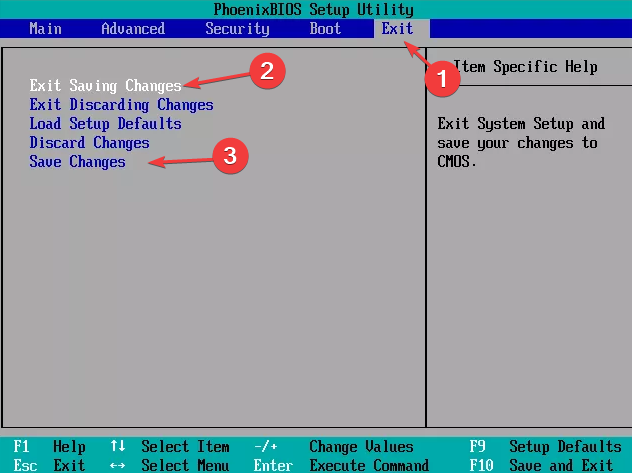
Hard Drive > CD > Removable devices - Click on the Exit tab and select Exit Saving changes or Save changes.
Your computer will restart once you save your changes and exit the BIOS setup. Try the fixes here should your laptop ignore the boot order on Windows 11.
2. Replace your CMOS Battery
- Disconnect your system’s power cable or remove the battery if it’s a laptop.
- Press and hold the power button to discharge residue electricity.
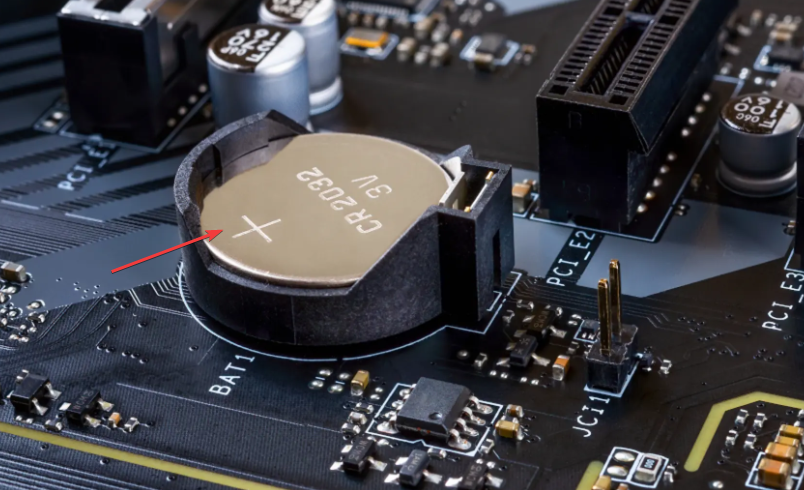
- Locate the CMOS battery (It looks like a quarter; you can find it on the motherboard.) Hold the motherboard firmly to ensure that you only remove the damaged CMOS battery.
- Replace the battery with a new version of the current cell.
BIOS settings will be erased when you replace a CMOS battery. However, it will fix the no physical memory is available at the location required for the Windows boot manager.
3. Reinstall Windows
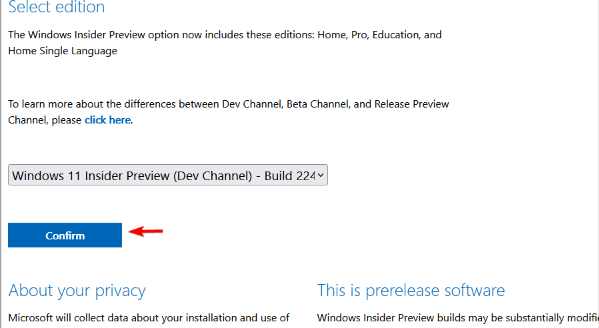
- Go to Windows Insider’s download page, select the version you want to download, and click on Confirm.
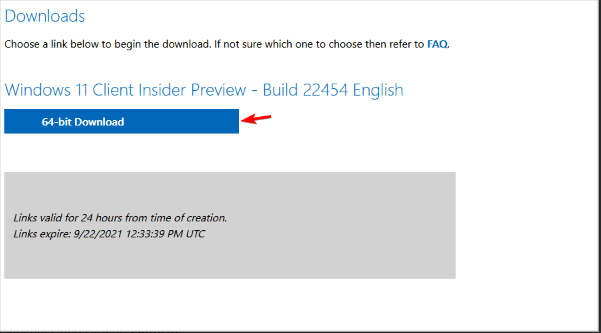
- Now click on 64-bit Download.
- Press the Windows + E keys to open File Explorer. By default, the file should be in the Downloads folder.
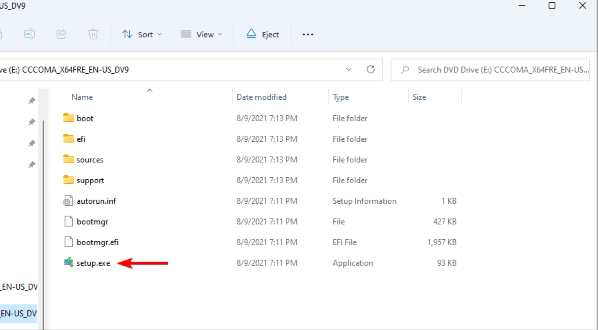
- Expand the Windows 11 ISO file to mount it and double-click on setup.exe.
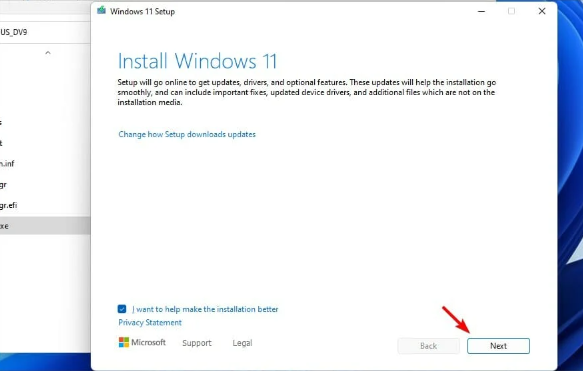
- Click Next on the welcome screen.
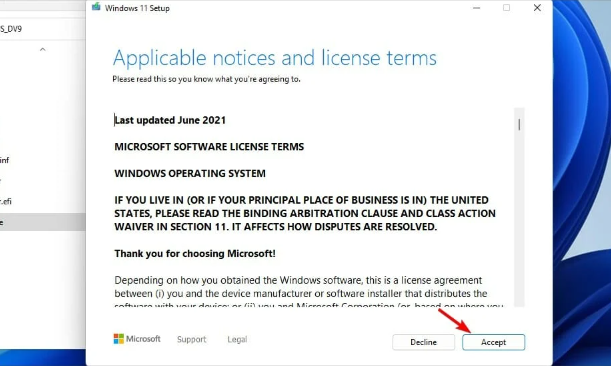
- Once the updates are downloaded, click Accept.
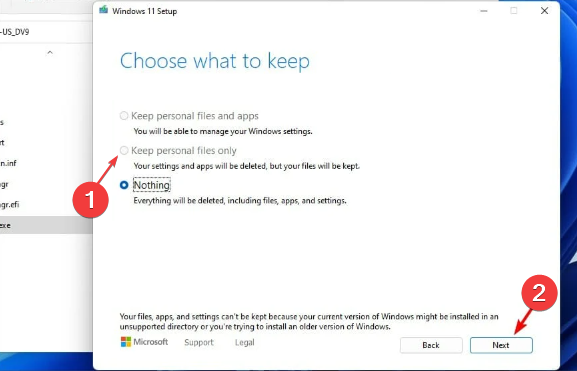
- Choose the Keep personal files and apps option and click Next to proceed.
- Follow the instructions on the screen to complete the process.
Reinstalling Windows will wipe out your entire system files. We recommend you have a working backup before reinstalling Windows.
You should note that this error isn’t similar to the not enough memory in Windows 11. So, you can check our guide to get solutions for that. Further, you can look at what to do if your computer is low on memory.
Let us know in the comment section if you have any other suggestions or solutions.


User forum
0 messages