[FIX] Raspberry Pi relay not working
Key notes
- Many reported that the Raspberry Pi relay is not working, but there’s a way to fix this issue.
- Before we start, be sure to check both the relay and Raspberry Pi for hardware damage.
- To ensure that the relay is working, make sure that it’s properly connected.
- If the Raspberry Pi 3 relay is not working, be sure to check your power supply.
The Raspberry Pi is a miniature computer that can do simple things at a low cost, but sadly, some users reported that Raspberry Pi relay is not working.
This can be a big problem in your projects, and today we’re going to show you how can you easily fix this problem for good.
How do I fix my relay not working on Raspberry Pi?
1. Reconnect your relay
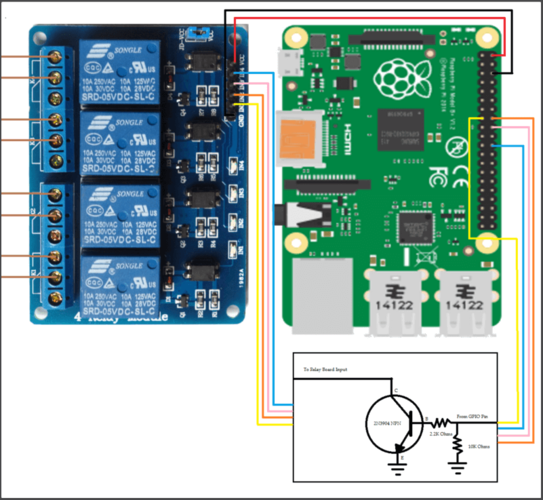
- Connect the 5V Pi pin to the Vcc pin on the relay board.
- Then connect the ground pin of the Pi to the ground pin of the relay board.
- Connect GPIO pin to the input of the transistor circuit above and the output to IN1 pin of the relay board.
- If you have other relays repeat the process for each of them
Note: Each relay requires a separate transistor circuit, drawing approximately 72mA from the Pi when activated, given that the Pi itself required 500mA.
Make sure the Pi’s power supply can power all of them. A 1.5 Amp power supply would be the safest choice.
Your issue might come from a relay that is not connected properly to your Raspberry Pi. Sometimes a misplaced pin will not allow the circuit to function and you will be left wondering why it doesn’t work.
The steps above will help you if your Raspberry Pi relay is not working.
2. Check the power supply

The power supply can cause a series of problems to your Raspberry Pi. If it doesn’t have the right voltage, your relays will not be powered, and in some cases, the Pi itself will fail to boot.
Make sure you have a stable PSU that is compatible with your model of Raspberry Pi. Many people use smartphone chargers to power their Raspberry Pis, although they are not reliable.
You should make sure you use a dedicated, suitable PSU instead.
3. Check the operating system

Your Raspberry Pi needs an operating system to work. Even if you successfully connected your relay, you still need to program it using scripts.
Make sure that your Raspberry Pi has one of the many available OS installed on it. If you do have an OS installed, check for corrupted files that might alter its functionality.
Install an OS
- Download the required software and files on another device.
- Get your SD Card and Card Reader.
- Go to My Computer and find the mounted SD Card.
- Format your SD Card.
- Write the Operating System you downloaded on the card.
- Insert it into your Raspberry Pi and install your OS.
Installing a new Operating System on your Raspberry Pi is pretty simple. You just need to download the OS you chose on another device and copy it on an SD card compatible with your Pi.
There are a lot of great OS choices out there, including Windows, Linux, and Ubuntu.
After checking your OS, be sure to check if your Raspberry Pi relay is still not working.
4. Check the condition of your relay
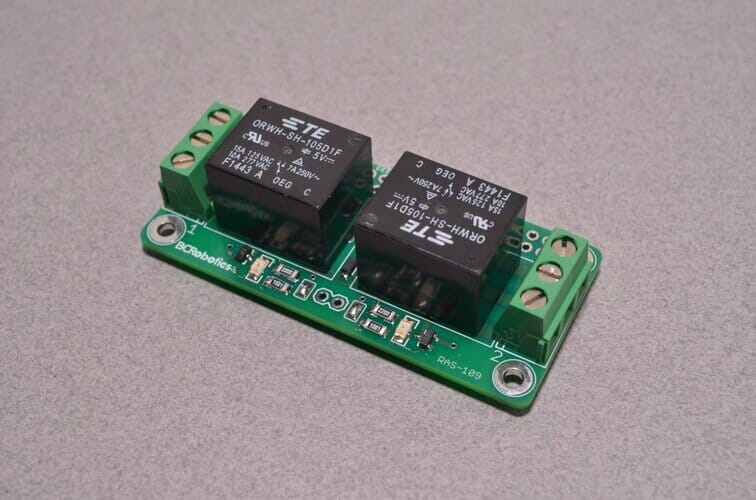
If the other solutions didn’t fix your problem, make sure your relay is in pristine condition. In other words, your device might be physically damaged and not working at all. Check for any visible dents or missing parts.
This is not a universal solution, but it might help if Raspberry Pi relay is not working properly.
If you wanted to play around with your Raspberry Pi and control the devices in your house using a relay, but you couldn’t get it to work, the aforementioned steps will provide you with all the information needed to fix your issue.
We hope that our article helped you with your problem. If you’d like to add anything else to the article, feel free to do so in the comment section below.
Read our disclosure page to find out how can you help Windows Report sustain the editorial team. Read more


Improve this guide


User forum
0 messages