How to run a port scan using SolarWind's Port Scanner

There are many port scanning tools that can help you to carry out vulnerability assessments. However, one of the popular tools for this job is SolarWinds Port Scanner.
SolarWinds Port Scanner is a freeware and allows you to carry out a vulnerability assessment to find ports on a device and check what services are running on those ports.
In this article, we will show you how to run a port scan using the SolarWinds Port Scanner tool to help you check for open ports on a device and possibly probe for the services running on those ports.
How do I run a port scan using SolarWinds Port Scanner?
Download and run the tool
- Download SolarWinds Port Scanner from the official website
- Extract the zip file to a folder.
- Open the folder and run portsanner.exe.
- Accept the terms and conditions of the license agreement to proceed.
Note: Before proceeding with the installation, make sure your computer meets the minimum system requirement.
Configure scan settings
- Launch the SolarWind Port Scanner tool.
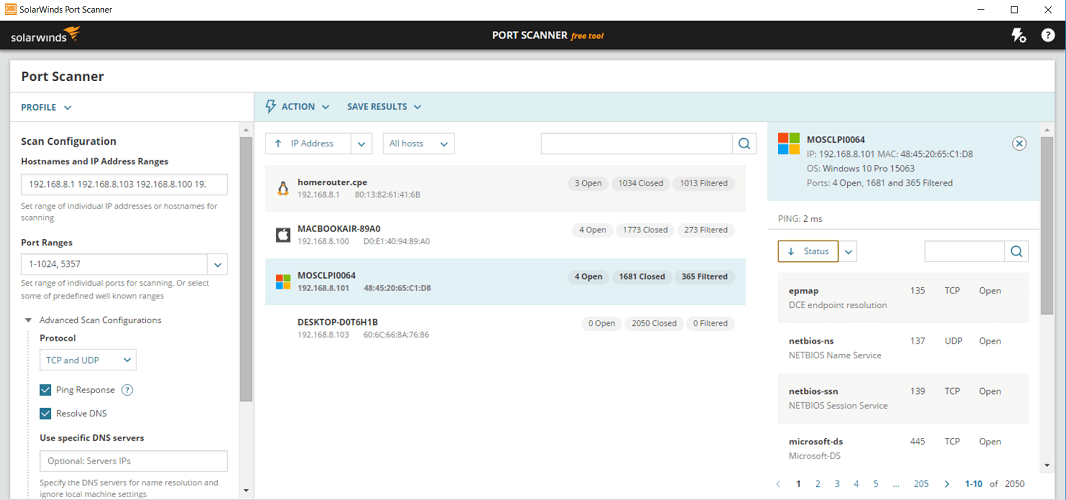
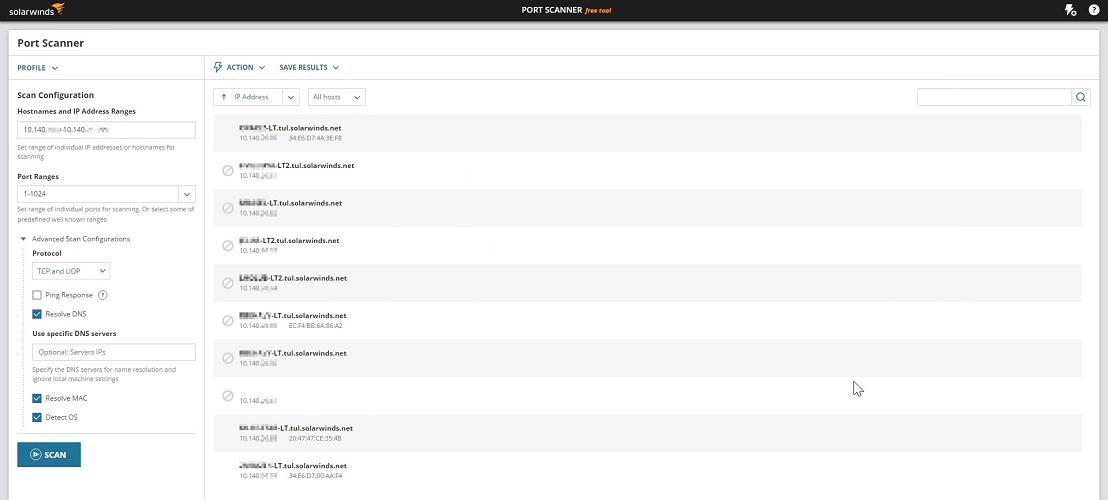
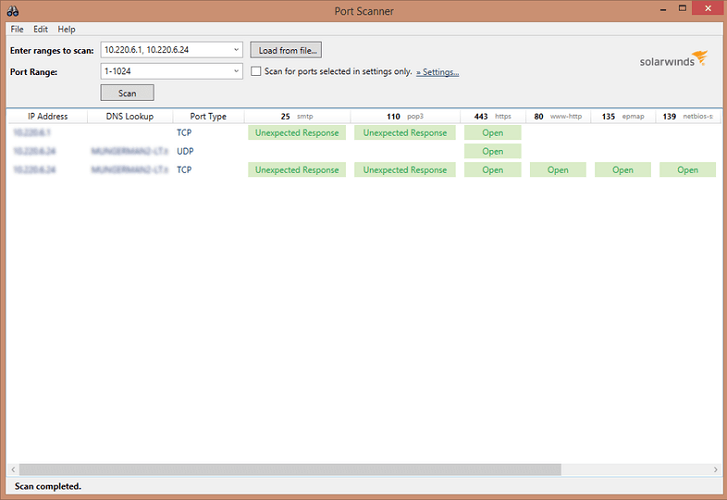
- Set your hostname and IP address ranges, as shown below:
192.168.0.100 – 192.168.0.105 will scan six IPs (from 100 to 105)
192.168.0.0/24 will scan 256 IPs (from 0 to 255)
192.168.0.1 192.168.0.2 myhostname will scan two IP addresses and one hostname
192.168.0.1;192.168.0.2; myhostname
192.168.0.1,192.168.0.2, myhostname - Next, set your port range:
1–100 will scan a range of 100 ports
1,5,8,50,100 (will scan five specified ports)
1 5 8 50 100 (will scan five specified ports)|
1;5;8;50;100 (will scan five specified ports) - Next, select Protocol options to scan TCP ports, UDP ports or both.
- Check the Ping Response box.
- Check the Resolve DNS box if you want the scanner to resolve hostnames.
- User-Specific DNS – if no IP address of a DNS server for hostname resolution is given, the port scanner will use default adapter settings.
- Resolve Mac – if you want the scanner to resolve MAC addresses
- Check Detect OS option – the scanner will try to detect the OS version on the destination host.
- Finally, click on the SCAN button to initialize the scan.
Save your scan profile
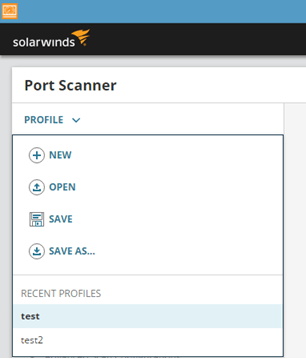
- Once you have configured all of the settings, you can save your scan profile and can load it to initialize scan without having to configure the scanner all again.
- To save the profile, expand the Profile section under Port Scanner and click on Save As.
- Enter a name and click on Save.
Review scan results
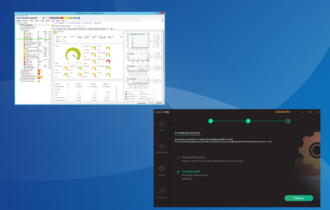
- SolarWinds Port Scanner will display the scan results in the middle columns of the tool. By default, the tool is configured only to show active hosts only.
- For detailed analysis, you can sort the list of the results by IP address or hostname.
- To get the details about scanner ports, click on the result. It will show one of the following statuses:
Open – it means the application actively accepting TCP connection
Closed – the port is accessible but not active
Filtered – the scanner failed to detect if the port is open or close. - You can also save the scan results into xlsx, CSV or xml file formats.
Port scanning tools are essential to perform a Vulnerability Assessment, and the SolarWinds Port Scanner tool is one of the best tools you can use with excellent output.
If you are new to SolarWinds Port Scanner, follow the steps in this article to get started with Vulnerability Assessment and let us know what do you think of the tool in the comments.
READ ALSO:
Read our disclosure page to find out how can you help Windows Report sustain the editorial team. Read more


Improve this guide


User forum
0 messages