Simple Ways to Fix the Search Results Aren't Quite Ready Yet Error
Rebuild the search index and bring back search results
4 min. read
Published on
Read our disclosure page to find out how can you help Windows Report sustain the editorial team. Read more
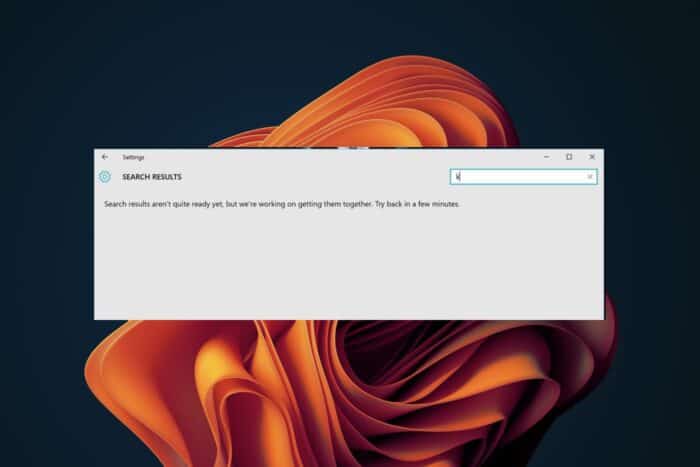
Windows has a search feature that allows it to perform an internet search if the result is not available but if you run into a search results aren’t quite ready yet message, it could be a network issue or indexing failed.
More often than not, system files may be corrupt that affects search functionality but recent changes like a Windows Update may also play a part especially if there are known bugs or glitches in the update.
What can I do if the search results aren’t quite ready yet?
1. Run the Indexing troubleshooter
- Hit the Windows key and select Settings.

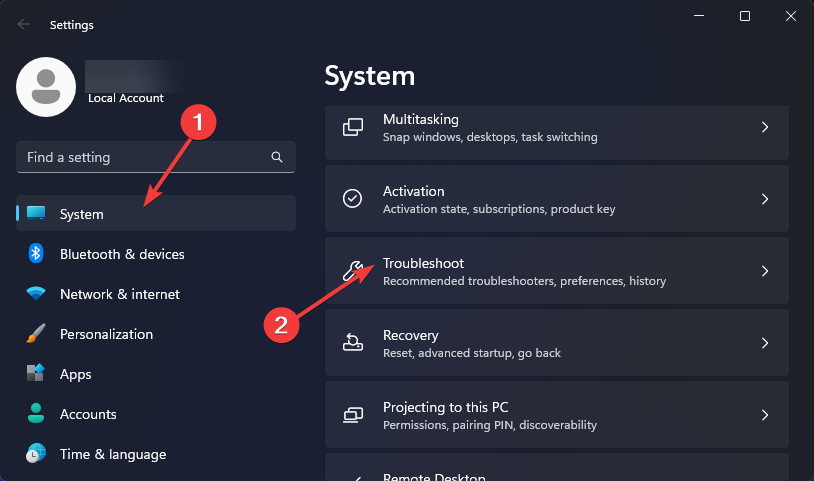
- Select System and click on Troubleshoot.
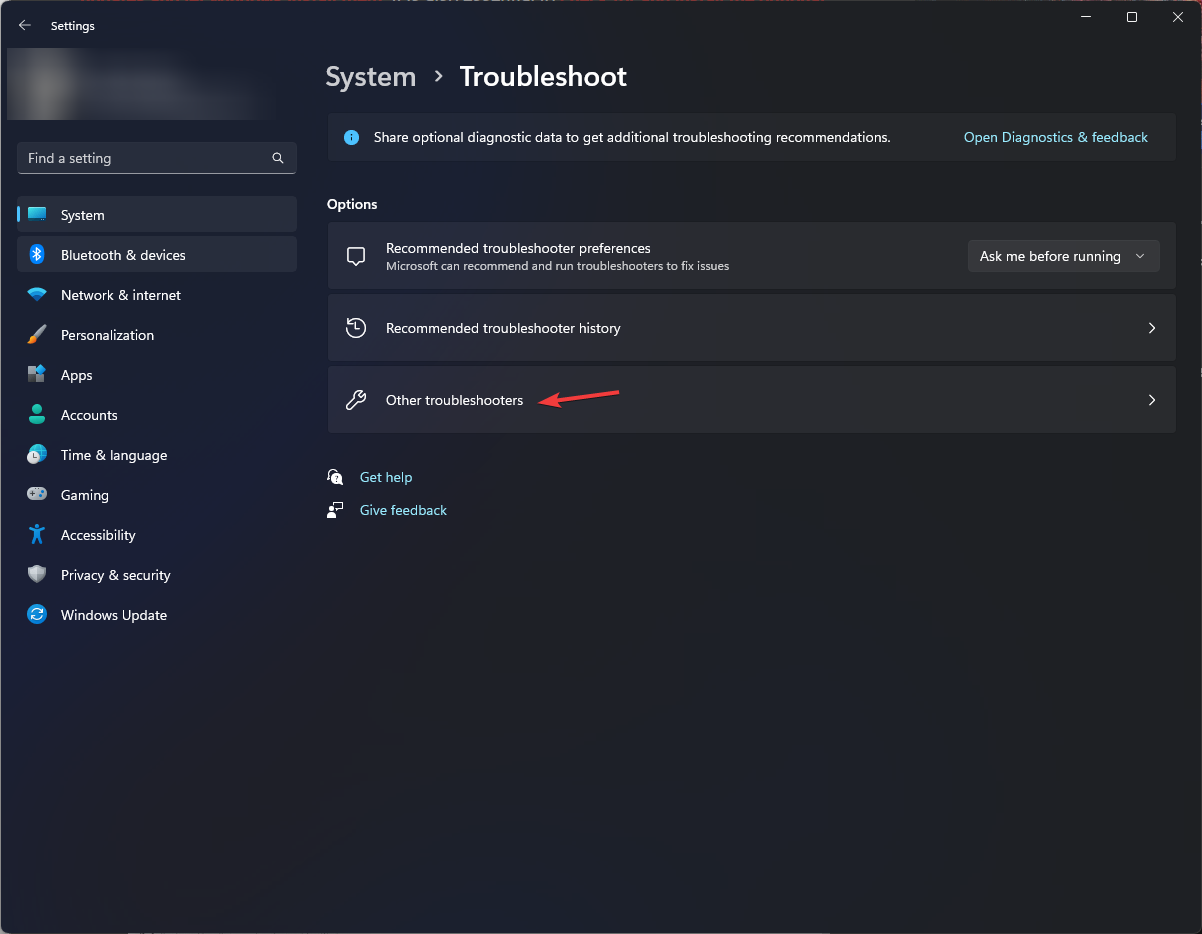
- Click on Other troubleshooters.
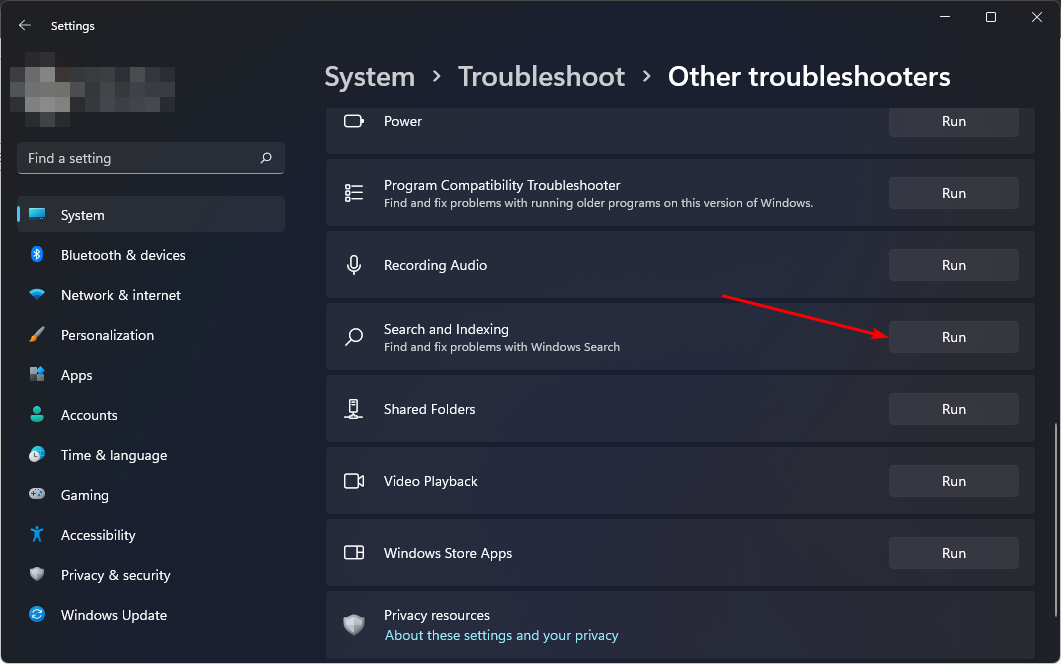
- Navigate to Search and Indexing troubleshooter and click the Run button next to it.
2. Restart the Windows Search service
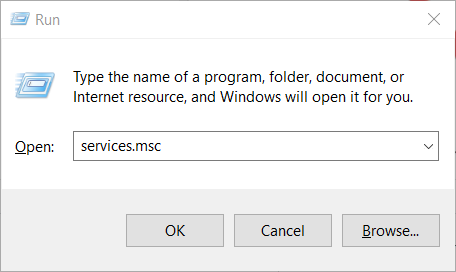
- Hit the Windows + R keys to open the Run command.
- Type services.msc in the dialog box and hit Enter.
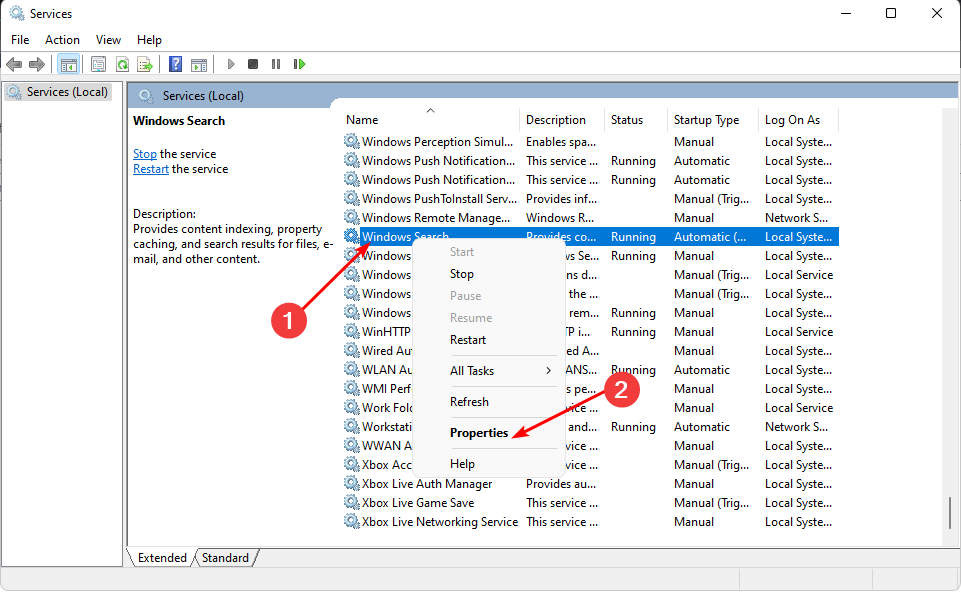
- Locate Windows Search, right-click on it, and select Properties.
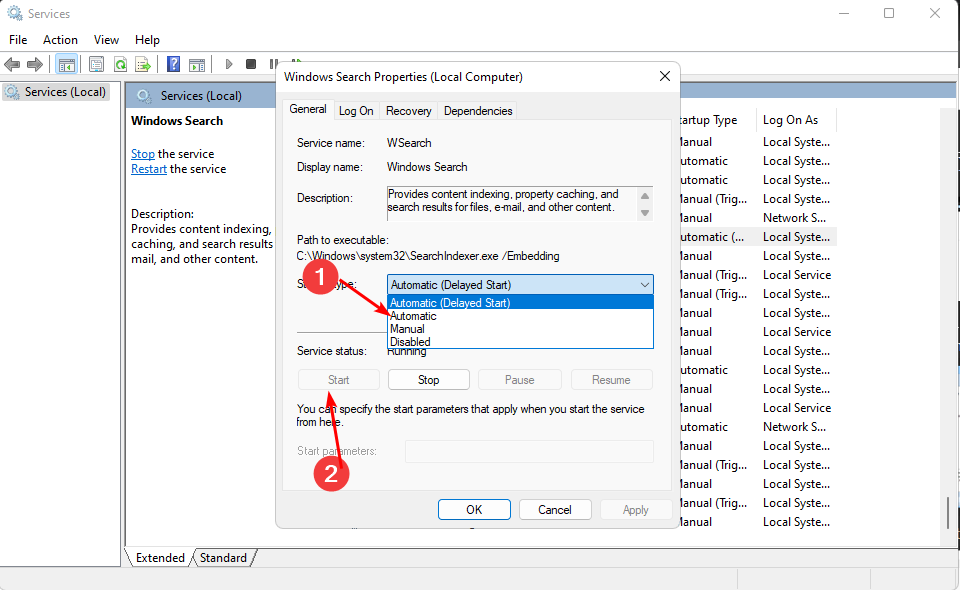
- Go to Startup type, and in the drop-down menu, select Automatic, then click Start.
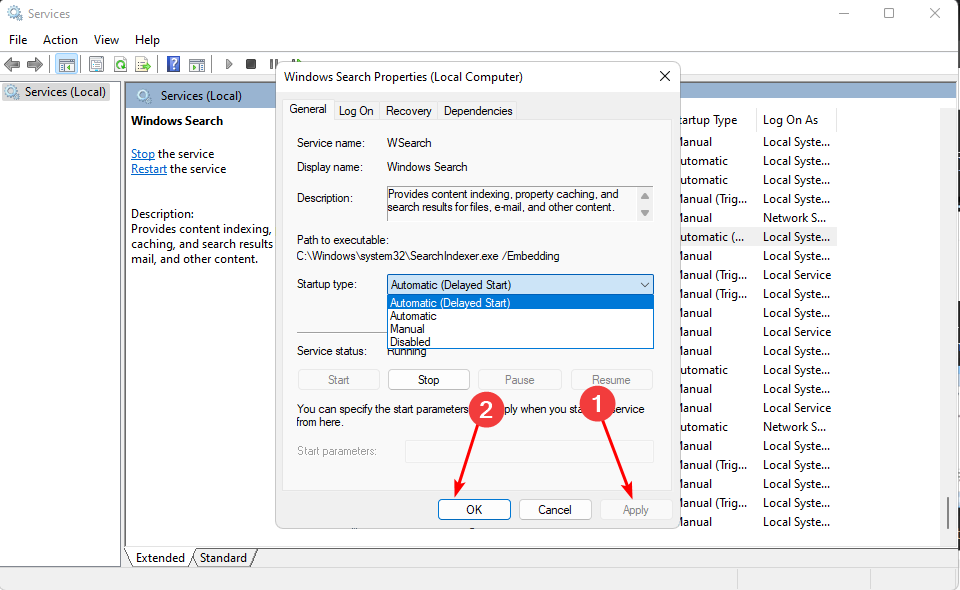
- Click Apply, then OK to save changes.
- Restart your PC and see if the issue persists.
3. Rebuild the search index
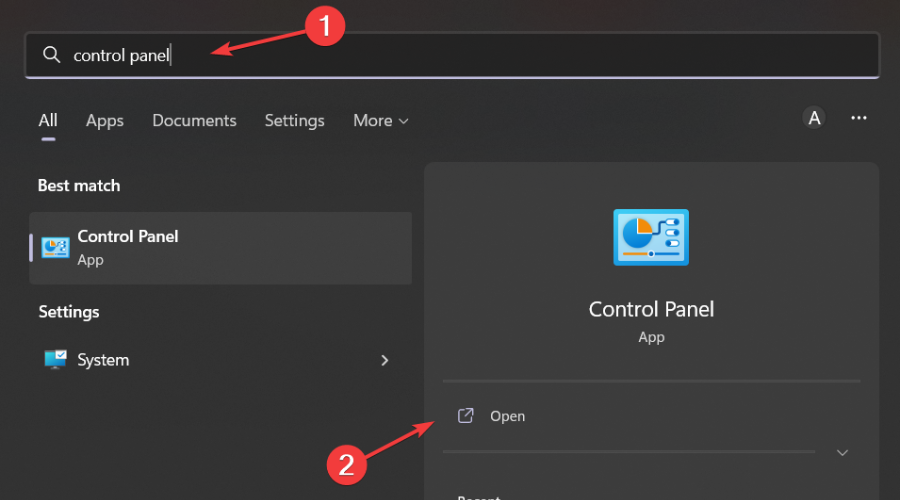
- Hit the Windows key, type Control Panel in the search bar, and click Open.
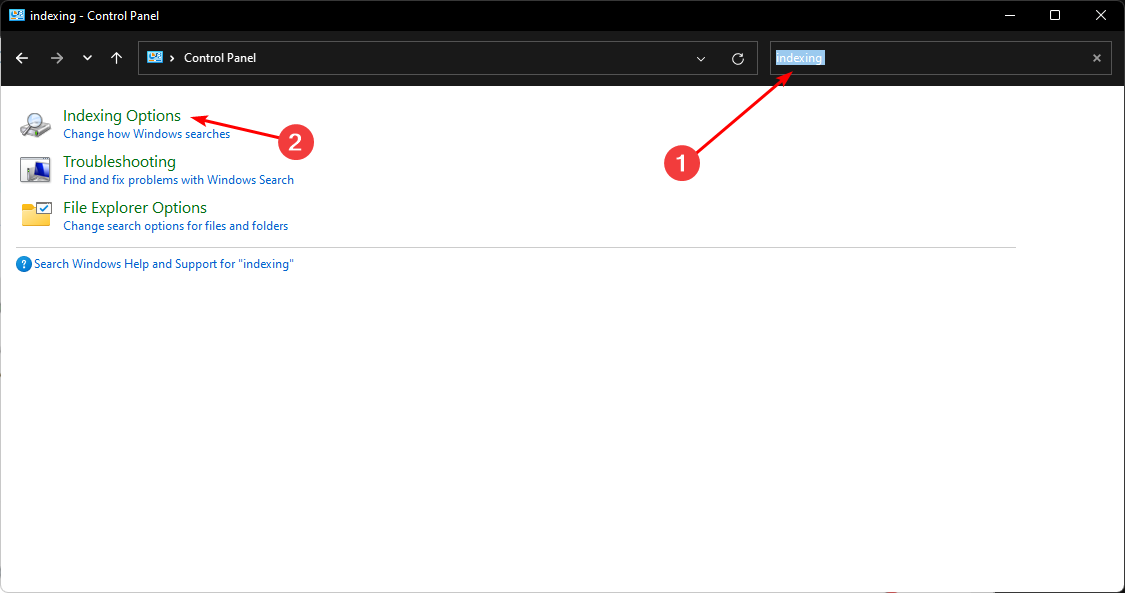
- Search for Indexing Options in the Control Panel search bar and click to Open.
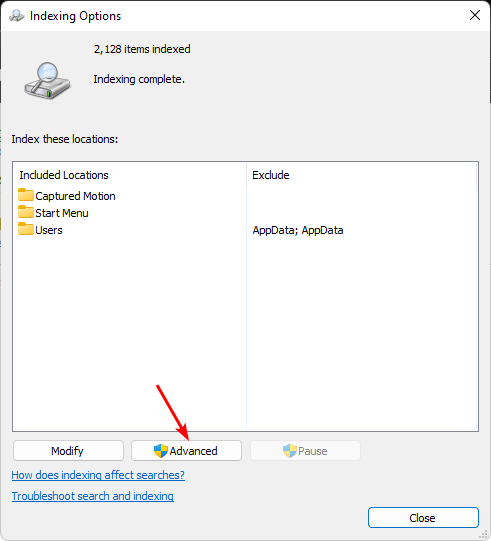
- In the Indexing Options dialog box that opens, select the Advanced option.
- Click Rebuild under Troubleshooting in the Advanced Options dialog box that pops up.
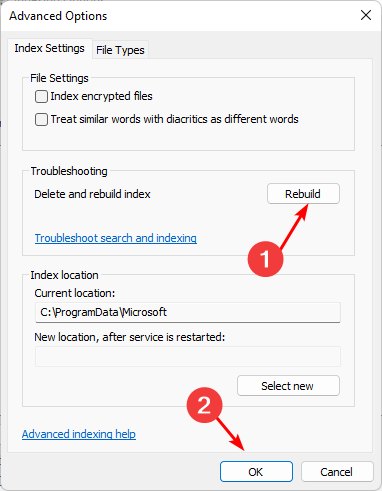
- Press OK to confirm that you want to rebuild. Note that it may take a while, so ensure you don’t have any pressing matters when performing this step.
4. Run DISM and SFC scans
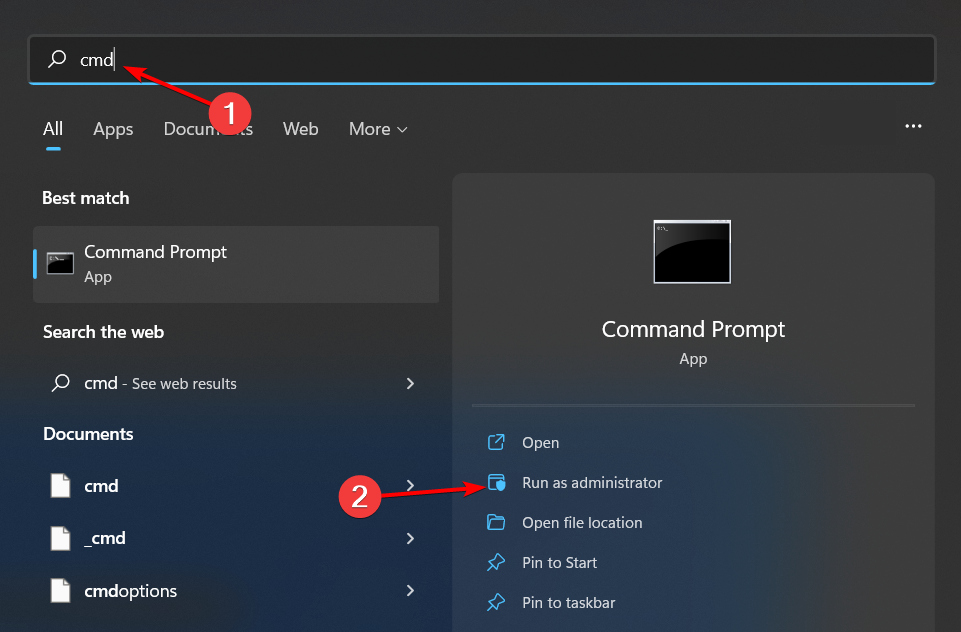
- Hit the Start Menu icon, type cmd in the search bar, and click Run as administrator.
- Type the following commands and press Enter after each one:
DISM.exe /Online /Cleanup-Image /Restorehealthsfc /scannow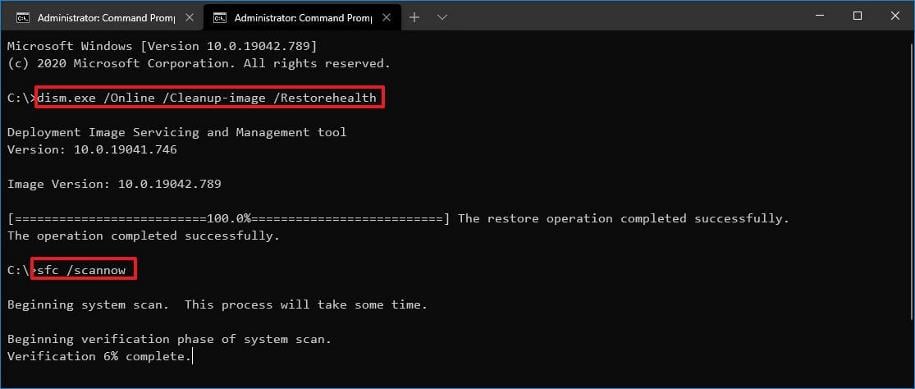
- Restart your PC.
5. Change your system display language
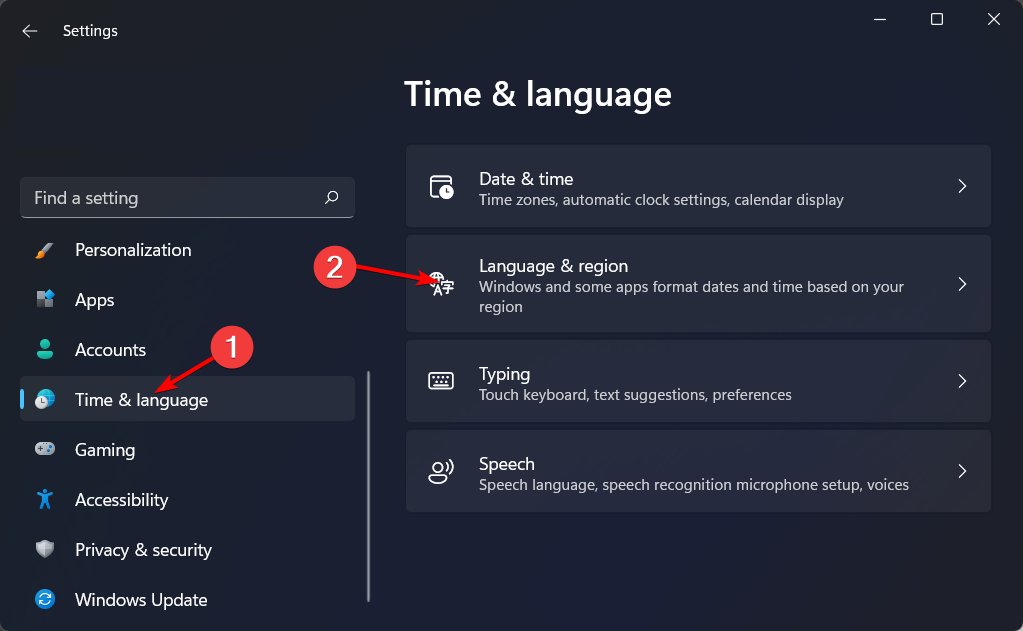
- Press Windows + I to open Settings and navigate to Time & language followed by Language & region.
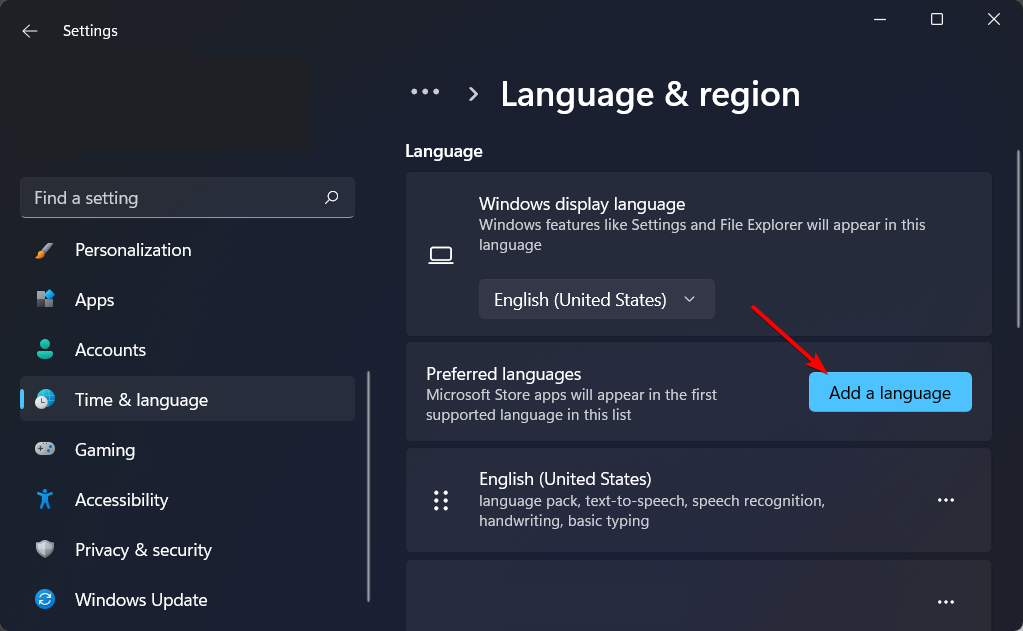
- Next, click on the Add a language button.
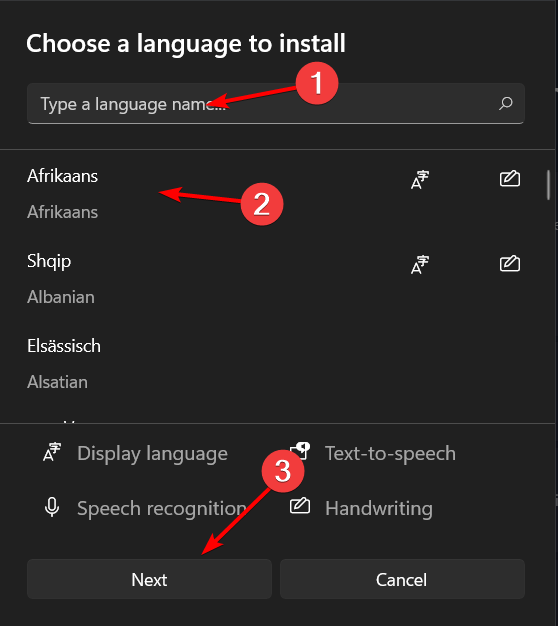
- Now, search for the desired language, click on it and select Next.
- Check the Set as my Windows display language and select Install.
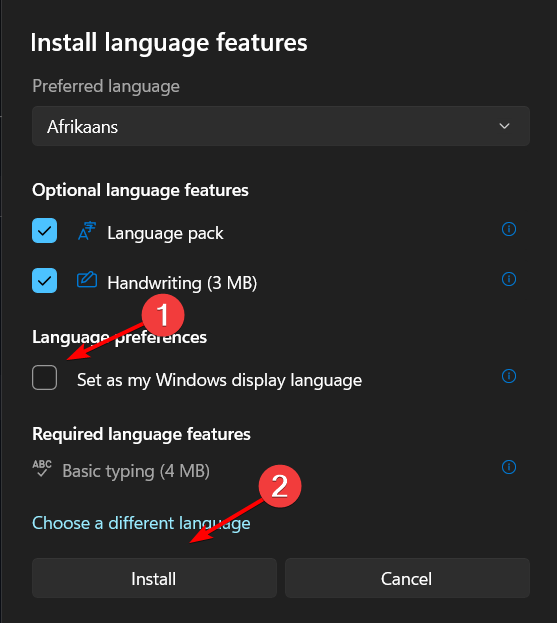
Indexing and your system language are interconnected and if the current language settings have some compatibility issues, there may be a need to adjust it to language-specific configurations. Sometimes, setting it to one language and switching back can also do the trick as it will force an update.
6. Uninstall recent Windows update
- Hit the Windows key and select Settings.

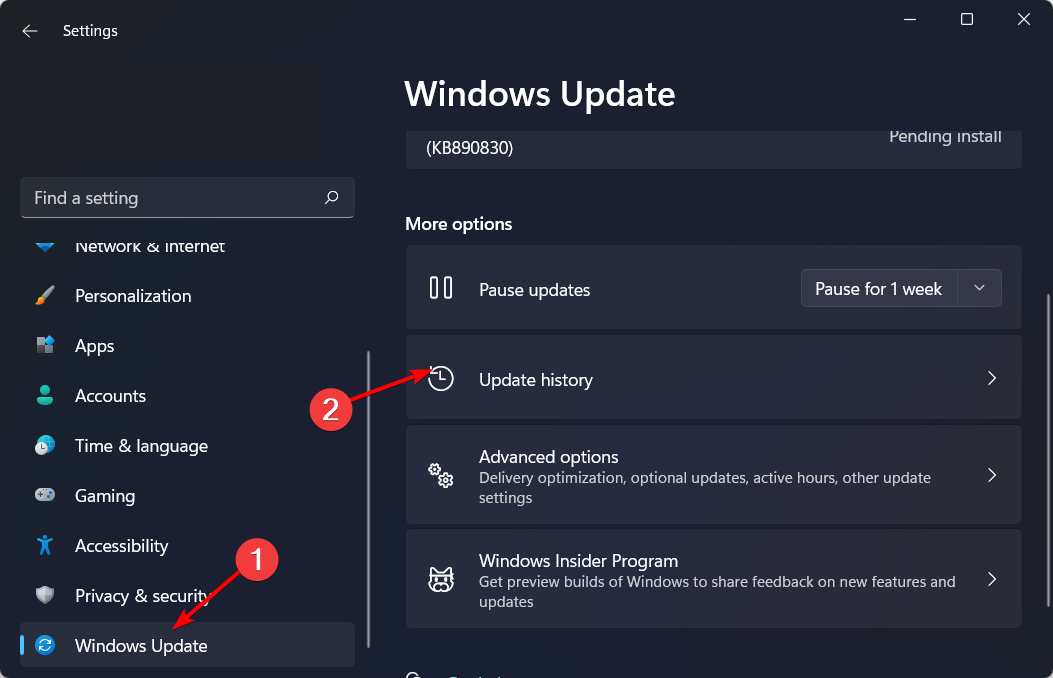
- Click on Windows Update and select Update history on the right pane.
- Scroll down, and under Related settings, click on Uninstall updates.
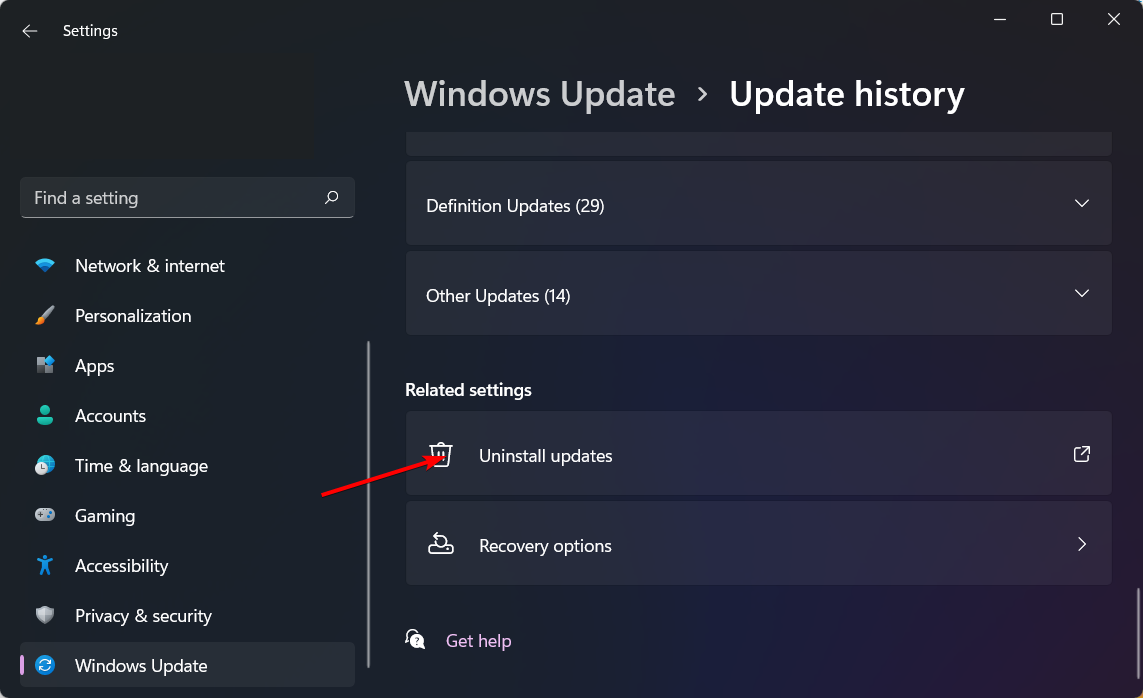
- This will take you to the most recent installed updates.
- Select the topmost update and click on Uninstall.
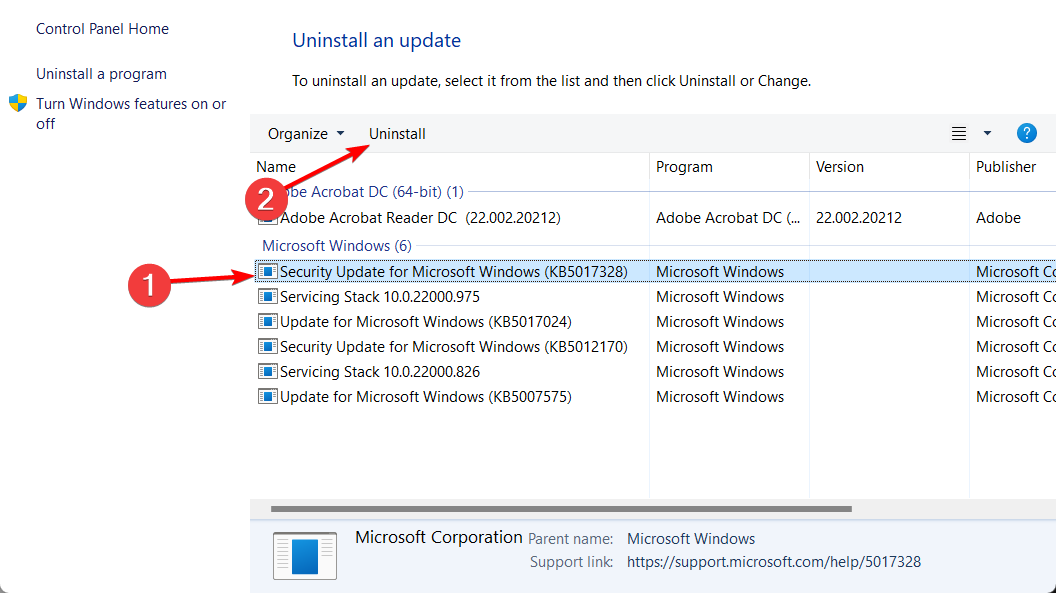
- Restart your PC and check if the problem persists.
7. Create a new user profile
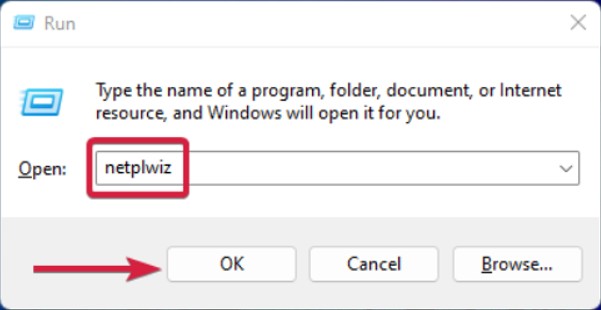
- Press Windows + R to launch the Run console, enter netplwiz in the text field, and click OK.
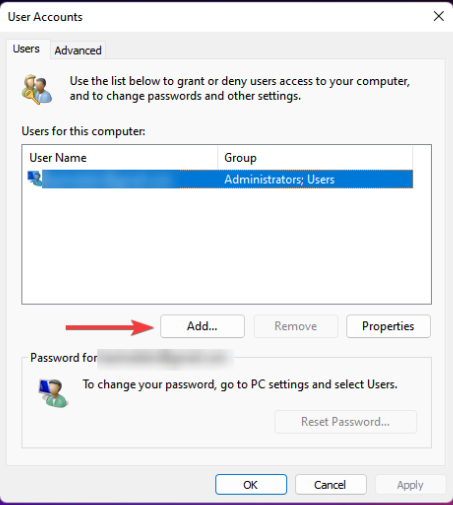
- Click Add in the User Accounts window.
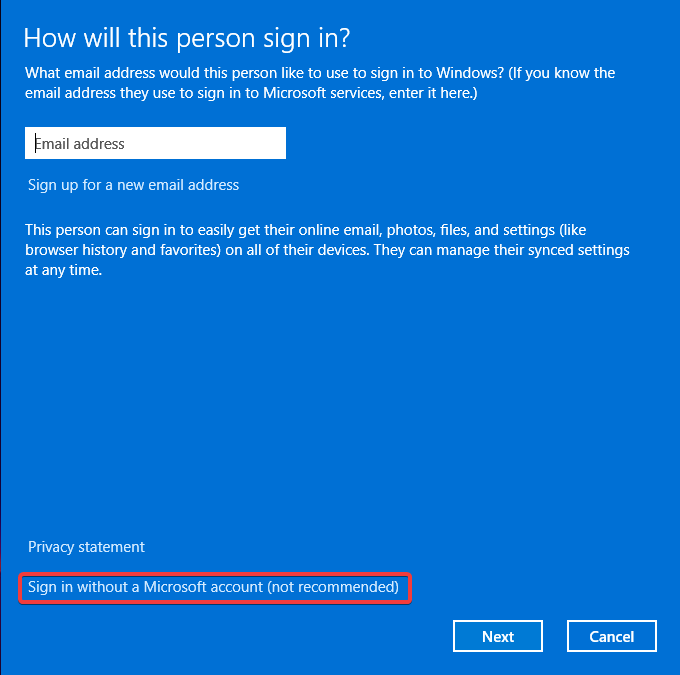
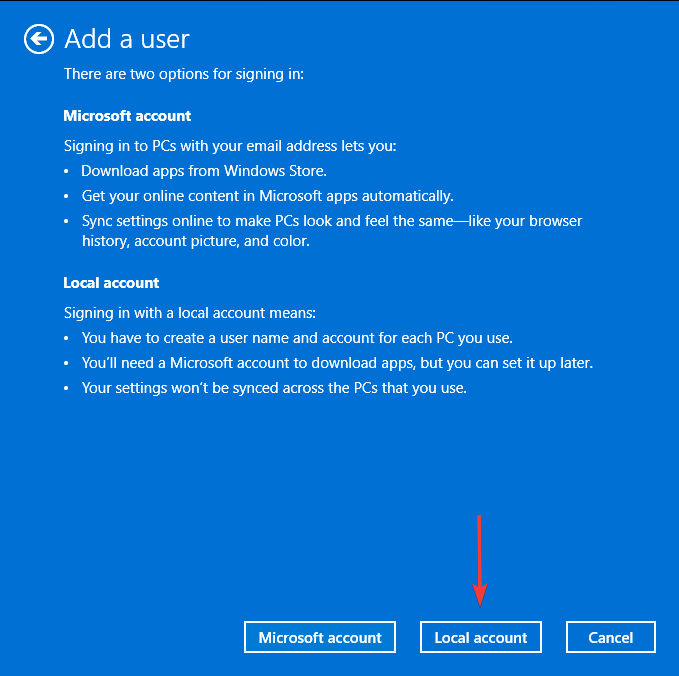
- Select Sign in without a Microsoft account (not recommended).
- Click on Local account button.
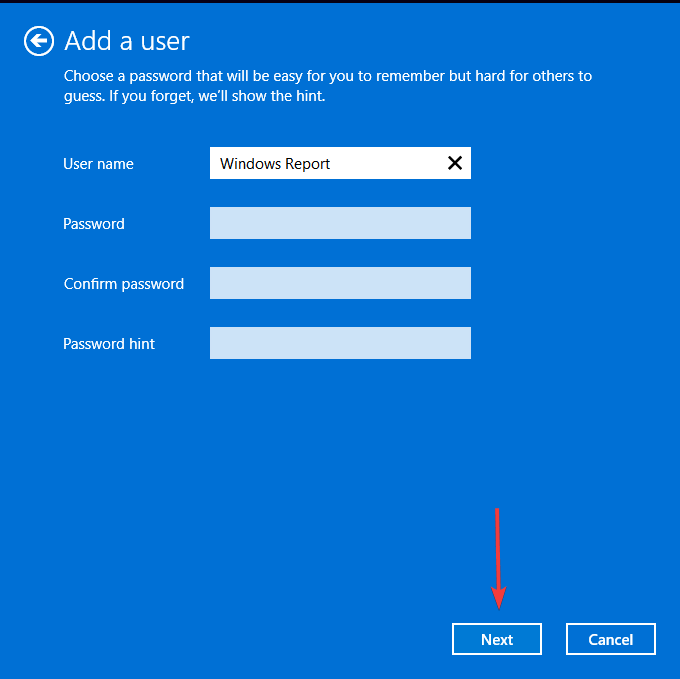
- Enter a username and password (optional) for the new user account, and a hint, in case you set a password. Once done, click on Next.
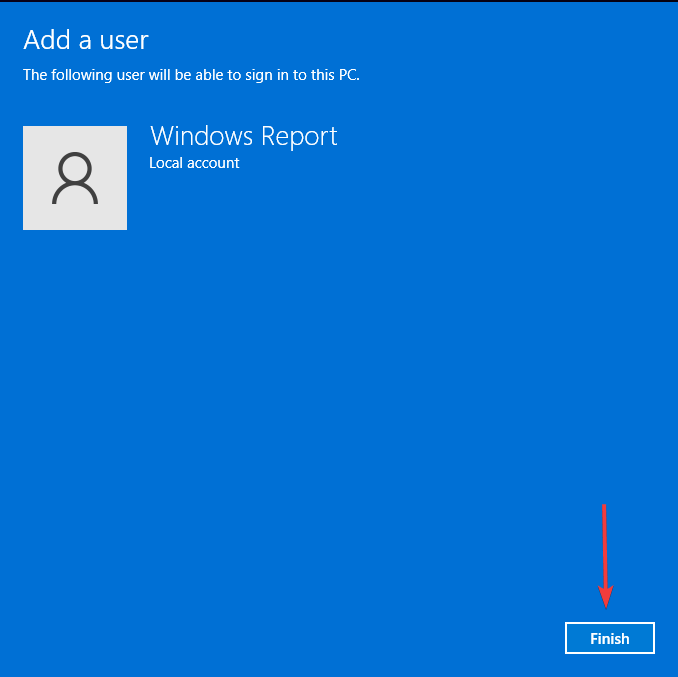
- Click on Finish to create the Local account.
Additional tips to enhance search indexing and results
- Optimize index settings – Sometimes, your search results may be slow or consume a significant amount of your system’s resources. You can reset your search settings or customize it to exclude unnecessary searches.
- Rebuild search index – Your search cache can accumulate and become corrupt. Rebuilding it regularly ensures you get rid of outdated indexes.
- Clean up your system – Regular virus scans, system file checks and Disk Cleanup can help get rid of corrupt files and ensure they don’t appear in searches or interfere with indexing.
Also, ensure your system is always up-to-date and you have a stable and fast internet connection. Elsewhere, if web results are unavailable on your Windows search, we know what to do to get them back. And if you wish to get rid of web results from your Start Menu, feel free to check out our expert article.
You can also explore other search tools if the built-in Windows Search is presenting a lot of problems.
Have you encountered this error before? Which one of the solutions above helped fix it? Let us know in the comment section below.


User forum
0 messages