Secure Boot Failure: How to Bypass This Error
Adjust BIOS settings if you encounter Security Boot fail
6 min. read
Updated on
Read our disclosure page to find out how can you help Windows Report sustain the editorial team. Read more
Key notes
- Using the built-in startup repair option can sometimes help with Secure Boot issues.
- If Secure Boot is not working, you might have to reset or restore your system in some cases.
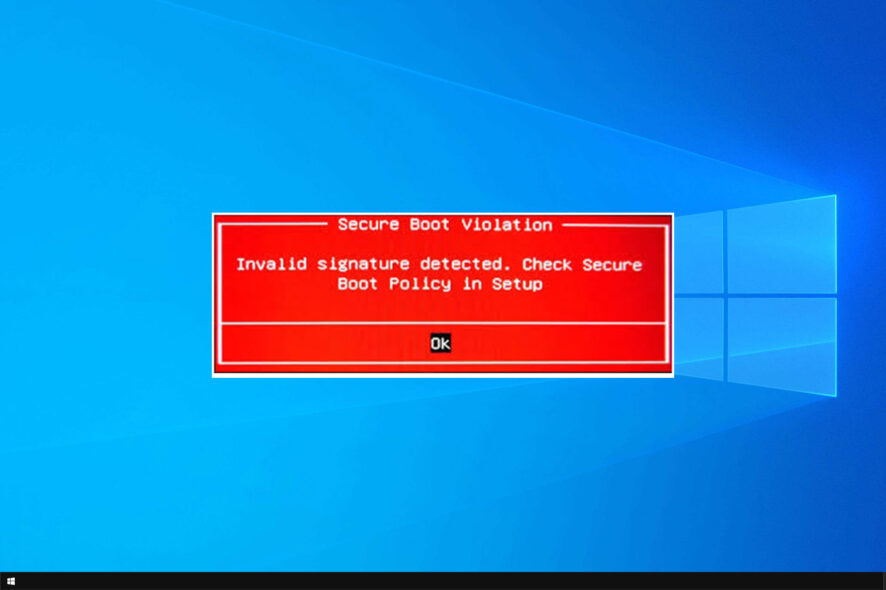
Secure Boot prevents malware from affecting your bootloader, but what if Secure Boot failure occurs? If this happens, your PC won’t be protected against these attacks.
This can be a problem since malware can run on your PC even before Windows starts, so it’s essential to fix this issue as soon as possible. and this guide is going to show you how to do it.
How do I fix Secure Boot failure?
1. Turn Off Windows 10 Secure Boot
- Force shut your PC by long pressing the power button.
- Now switch on the computer and access the BIOS This is by typically pressing a specified key on the keyboard during the boot-up sequence. The commonly used BIOS access keys are F1, F2, F10, F12, and Esc depending on the manufacturer and computer model.
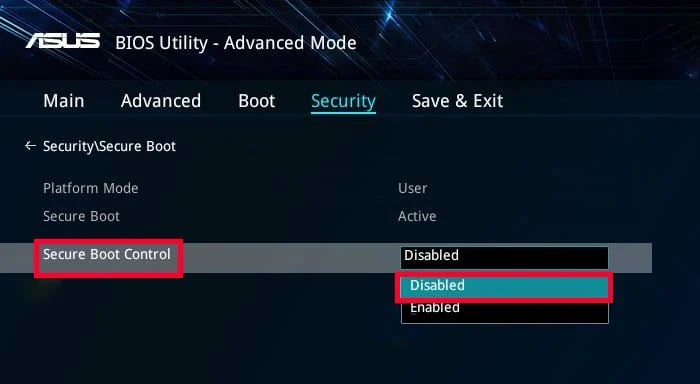
- Now locate the Windows 10 Secure Boot setting mostly found under Security.
- Using the right key, change it to Disabled.
- Save the changes, exit, and retry boot.
In certain instances, you may have to additionally change other firmware to enable legacy support and load the Compatibility Support Module (CSM).
An alternative way to disable Secure Boot
- While holding down the Shift key, go to start then choose Restart.
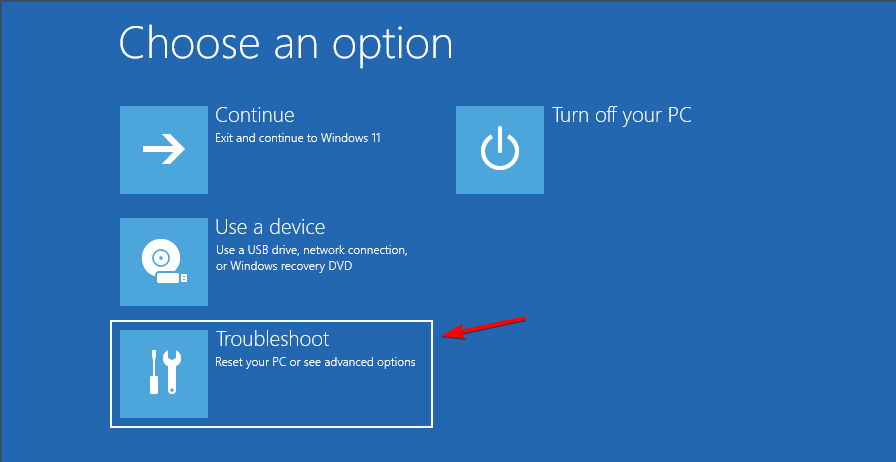
- From the next screen, Go to Troubleshoot.
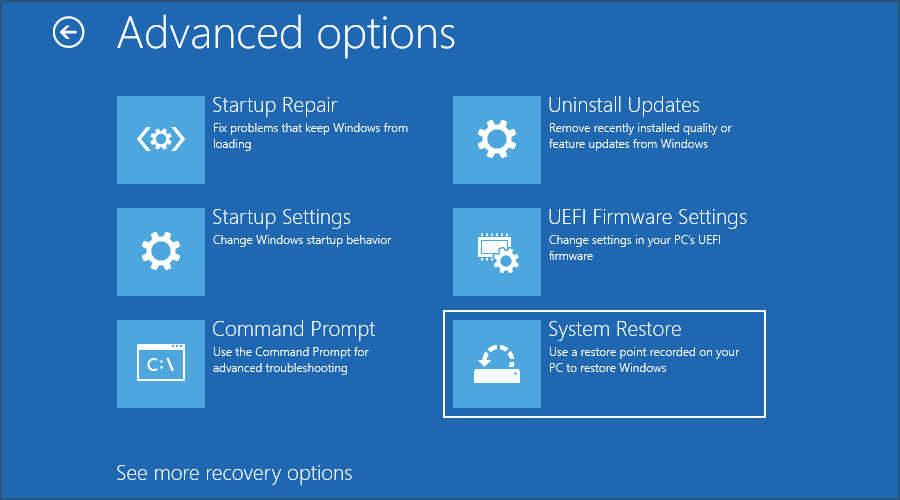
- Select Advanced Options.
- Then click UEFI Firmware Settings.
- Again find the Secure Boot option, and switch it to Disabled.
- Save these changes and exit to allow the PC to reboot.
Overall, since you disable Secure Boot via the PC’s BIOS menus, the procedure for disabling varies among PC manufacturers.
How to re-enable Secure Boot
- Uninstall any hardware, drivers, or apps you suspect caused the problem.
- Restart the computer.
- Go to the PC BIOS menu by starting to press the correct BIOS entry key ( F1, F2, F12, F10, or Esc) immediately after the computer returns.
- Look for the Secure Boot setting in the Security tab and set it back to enabled.
- Save your new settings and proceed to boot.
If the PC denies you the option to enable Secure Boot, do a factory reset (see the steps later).
2. Use System Restore
- Press the power button to turn off the PC.
- Then bring it back on by again pressing on the power-on
- Wait until the computer brings the sign-in screen.
- Now, while holding down the Shift key, click start then power button before choosing restart.
- Your PC restarts to a new screen inviting you to Choose an option.
- Click Troubleshoot then Advanced options.
- Now select System Restore.
- Again the PC restarts, this time to the System Restore option. Choose your account and enter the password.
- Choose a recent restore point from the list shown.
- The system will hopefully restore its earlier working settings and henceforth successfully boot.
Alternatively, you can always rely on professional third-party software designed to initiate a complete system restore and optimize your device.
This type of tool performs this complex action automatically, without harming your user data in any way.
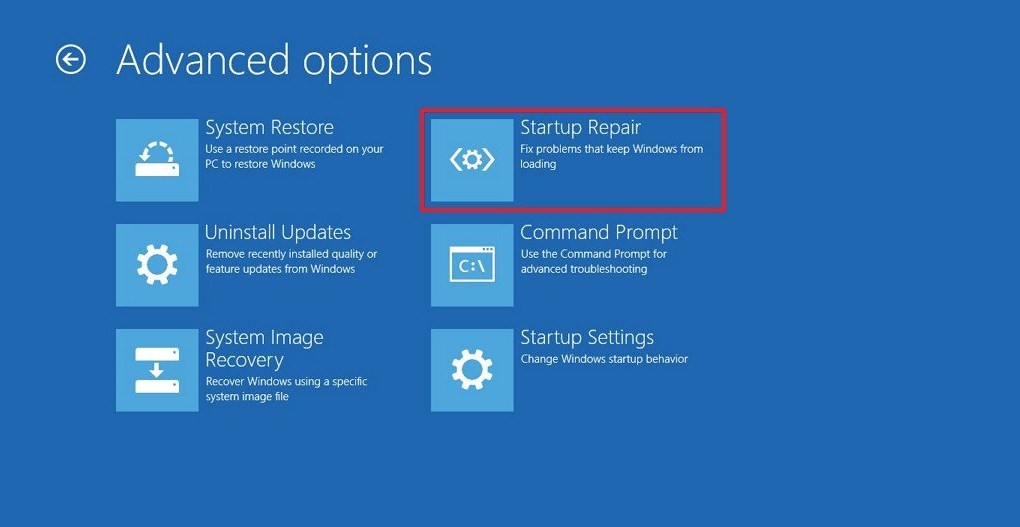
3. Run Startup Repair
- Repeat steps 1-5 as enumerated in Solution 2.
- Click Advanced options.
- Choose Startup Repair.
- The computer self-diagnoses and attempts to heal whatever is causing the secure boot hitch.
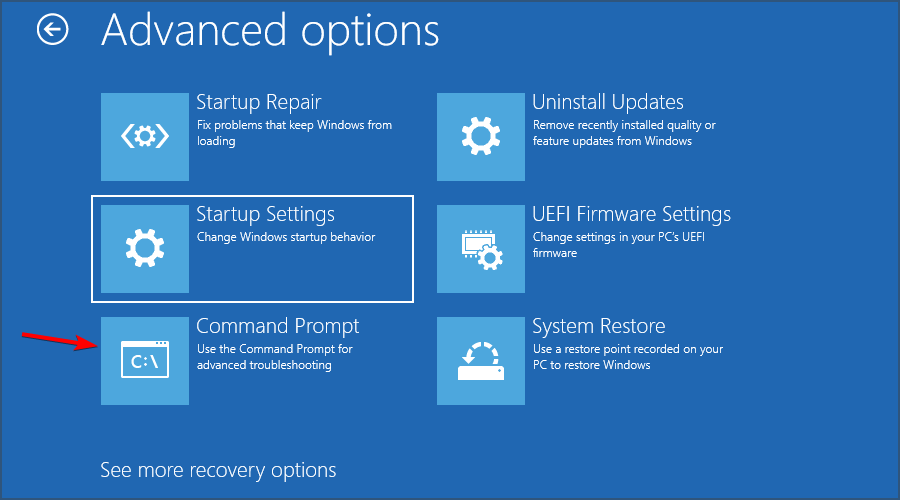
4. Run SFC
- Repeat steps 1-5 as enumerated in Solution 2.
- Click Advanced options.
- Select Command Prompt.
- Type sfc/ scannow in the displayed cmd.exe screen then press Enter.
- Be patient as the tool detects and eliminates pending bugs.
In some instances, sfc /scannow can stop, but that can be easily fixed.
5. Recover Windows 10 from the from a System Image
- Insert your external hard disk/DVD into the appropriate drive.
- Click the Start
- Type backup and restore in the search dialogue box.
- Click the backup and restore (windows 7) option.
- Select create a system image.
- Choose on a hard disk/one or more DVDs to create the image on a DVD.
- Click next then start backup.
- Wait for the image backup creation to finish.
How to use the disk image
- Insert the external hard drive/DVD you just created into the USB/DVD drive.
- Repeat steps 1-5 as enumerated in Solution 2.
- Click Advanced options.
- Select System image recovery.
- Then click select a system image in the next select.
- Click next.
- Select the image location (hard drive/DVD) from the next screen and again click next.
- Be patient as windows 10 executes the recovery boot. (Click retry if you receive the re-image your computer error ).
In case you’re not familiar with disk images, we have a great guide on what is a disk image that can give you more information.
6. Reset the PC
- Repeat steps 1-5 as enumerated in Solution 2.
- Now choose Reset this PC (not advanced options as above).
- Choose to either Keep my files (to retain your data) or Remove everything as shown.
- Confirm that you want to reset by clicking Reset in the next window.
7. Perform a clean install of Windows 10
If all fails, it could be time to do a fresh installation of Windows 10. And while this will take more time than the previous solutions, it’s 100% guaranteed to work.
For a step-by-step guide on clean install the OS, follow the instructions listed in Windows 10 reinstall guide.
You will, of course, need to reinstall everything, including hardware drivers. You can always your files from the backup in the Windows.old folder.
Is Secure Boot really necessary?
- Secure boot validates the software on your PC and prevents unverified software from running.
- While it provides certain security benefits, it can cause issues with dual boot.
- It can also cause issues if you willingly try to run uncertified software.
While the feature is helpful for its security benefits, it’s not mandatory to use it, but unless you’re using dual boot or uncertified software, there’s no reason to disable it.
Secure boot failure can leave your system vulnerable, so addressing this issue as soon as possible is essential. This isn’t the only issue, and many reported that Secure Boot is enabled, but not active, and others a SECURE_BOOT_VIOLATION error but we tackled these issues in separate guides.
What method did you use to fix this issue? Let us know in the comments below.



User forum
0 messages