Set Up Speech Recognition in Windows 11 Step by Step

Speech recognition in Windows 11 lets you control your PC with your voice, making typing and navigation faster and easier. This guide will show you all you need to know to set it up and start using it efficiently.
Table of contents
How to Set Up Speech Recognition in Windows 11?
1. Open Control Panel
To begin, you will need to access the Control Panel.
- Press Windows + S to open the Search bar.
- Type Control Panel and press Enter.

- Click on Ease of Access.
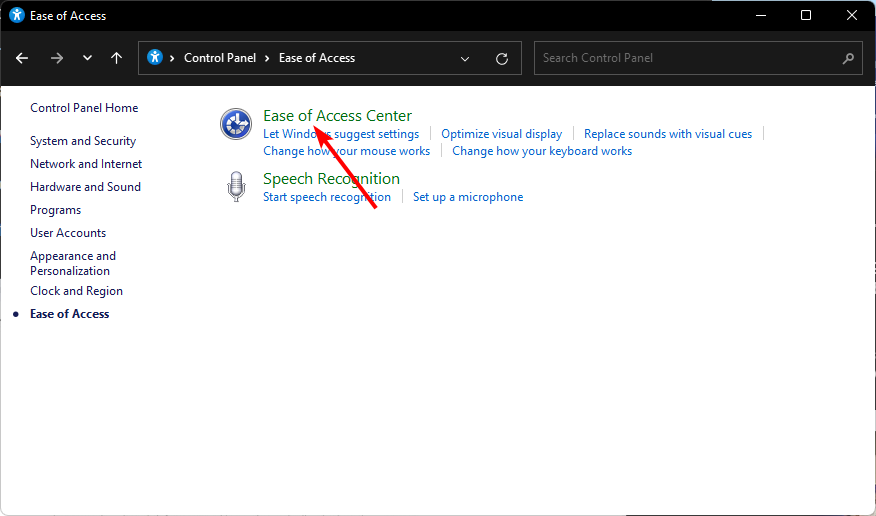
2. Access Speech Recognition Settings
Next, open the Speech Recognition options from within the Ease of Access menu.
- Select Speech Recognition from the Ease of Access menu.
- Click Start Speech Recognition to launch the setup wizard.
3. Choose Your Microphone
Make sure your microphone is properly configured for optimal results.
- When prompted, select the type of microphone you are using such as headset or desktop.

- Follow the on screen instructions to position and test your microphone.
- Once confirmed, click Next to continue.
4. Train Your Computer to Understand You
Training helps Windows understand your voice patterns more accurately.
- Choose Train your computer to better understand you in the setup wizard.
- Read the displayed text aloud so Windows can learn your speaking style.

- After training, click Finish.
5. Enable Speech Recognition Startup
You can choose whether Speech Recognition starts automatically with Windows.
- When prompted, decide if you want Speech Recognition to start automatically.
- You can also turn it on manually by pressing Windows + Ctrl + S.
If you would like to disable it later, learn how to turn off Speech Recognition in Windows 11.
6. Start Using Voice Commands
Once enabled, you can start controlling your PC with simple voice commands.
- Say Start Listening to activate the feature.
- Use commands like Open Word, Click File, or Select all.
- To stop, say Stop Listening or press Ctrl + Windows + S again.
What Is Speech Recognition in Windows 11?
Speech Recognition is a built in Windows feature that lets you dictate text, issue commands, and control applications using your voice. It is especially helpful for accessibility and productivity.
If you are interested in using your PC voice features for reading text aloud, check out how to use Text to Speech in Windows 11.
Why Use Speech Recognition?
Speech Recognition can improve comfort and productivity for many different workflows.
- Hands free operation can boost multitasking.
- Helps users with mobility or repetitive strain issues.
- Speeds up dictation for writing or note taking.
- Integrates with Windows apps and Microsoft Office tools.
If you prefer typing with your voice instead of giving commands, here is how to use Voice Typing in Windows 11.
Tips for Better Accuracy
Use these practical tips to get more accurate results from Speech Recognition.
- Use a high quality microphone.
- Speak clearly and at a steady pace.
- Train the system regularly to improve recognition.
- Avoid background noise when dictating.
FAQs
Say Stop Listening or press Ctrl + Windows + S to disable it.
Yes. Press Windows + H to use the built in Voice Typing feature.
Yes. Windows Speech Recognition works offline once it is installed and set up.
Speech Recognition controls your PC and allows dictation, while Cortana is a virtual assistant focused on tasks, reminders, and web queries.
Conclusion
Setting up Speech Recognition in Windows 11 only takes a few minutes and greatly enhances how you interact with your PC. Once configured, you can control apps, dictate text, and perform tasks hands free, making Windows more accessible and efficient for everyday use.
Read our disclosure page to find out how can you help Windows Report sustain the editorial team. Read more


Improve this guide


User forum
0 messages