2 Easy Ways to Setup DKIM on Office 365
Protects from email spoofing
3 min. read
Published on
Read our disclosure page to find out how can you help Windows Report sustain the editorial team. Read more
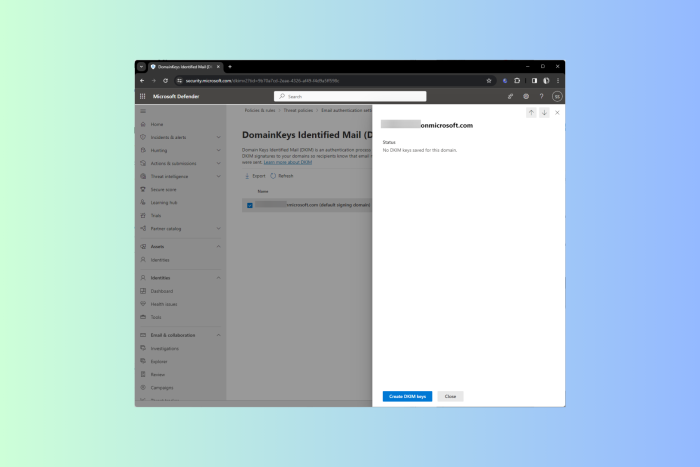
Using DomainKeys Identified Mail (DKIM) with Microsoft 365 can help you establish trust for the outbound emails from a custom domain in destination email systems. Let’s see how you can set up DKIM on Office 365.
How can I set up DKIM on Office 365?
1. Using the Microsoft 365 Defender
 NOTE
NOTE
- Create DKIM keys
- Visit the Microsoft 365 Defender website and sign in using your Microsoft account.
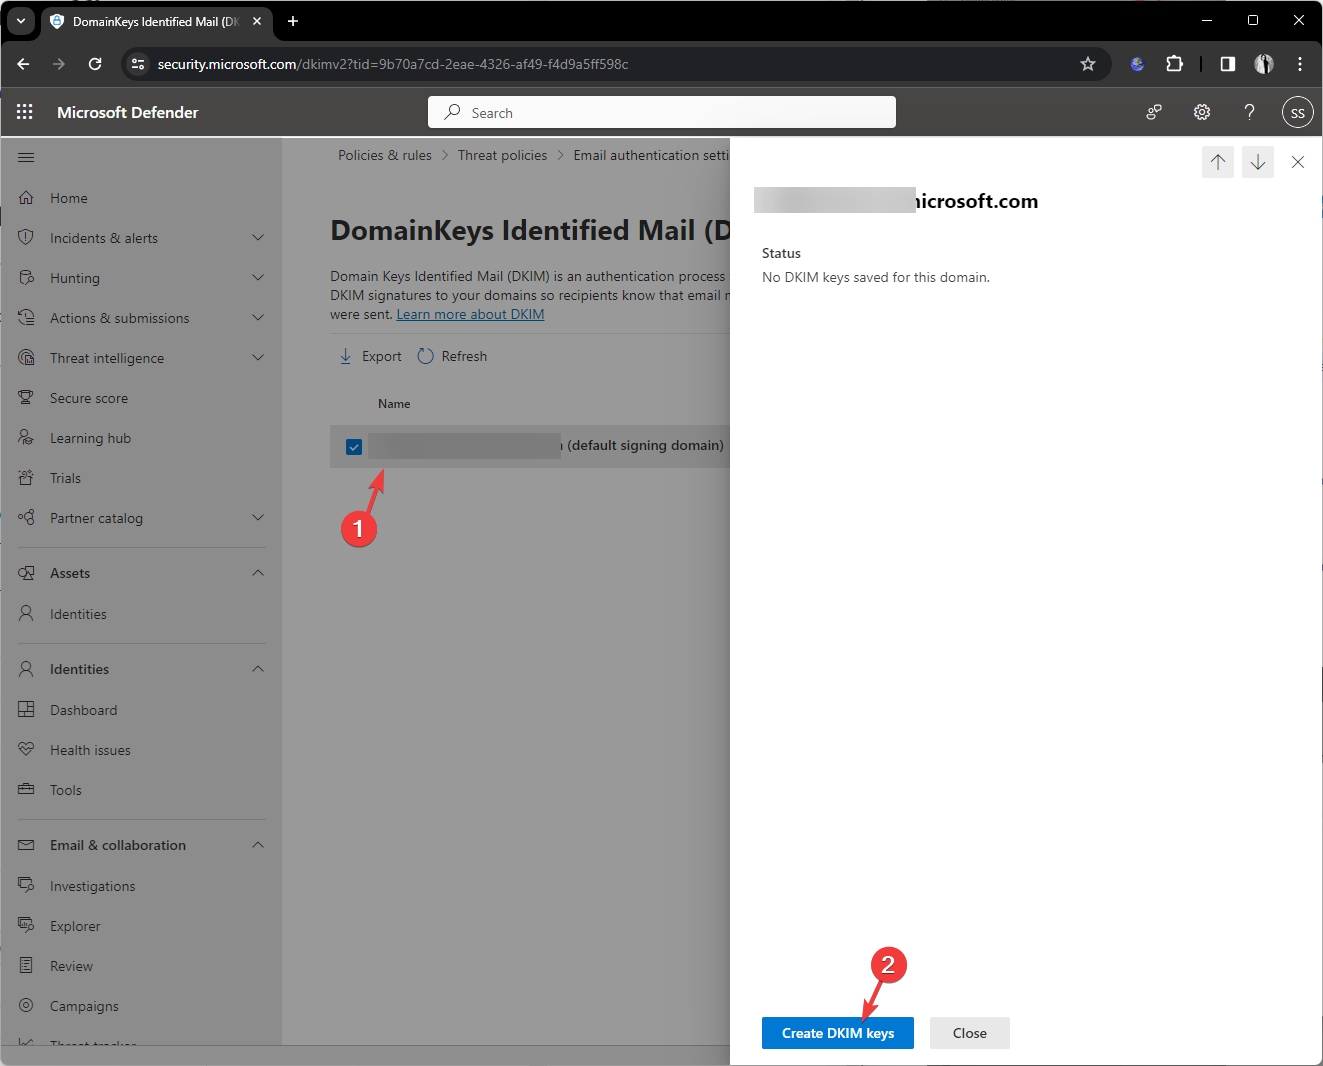
- Double-click on the domain that you will choose to send emails.
- On the following pop-up, select Create DKIM keys.
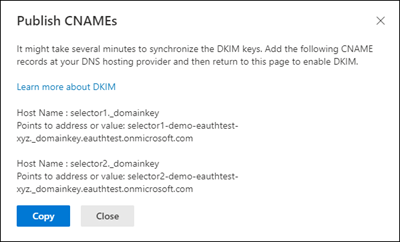
- Once created, you will get a Public CNAMEs pop-up; click Copy & paste it on a Sticky note or Notepad to save the keys.
2. Login at your DNS hosting provider & create the DKIM records
- Go to your DNS hosting provider, then locate DNS records management.
- First, we need to create two CNAMEs records.
- Select Add New Record, then enter the following details:
- Type – Choose CNAME
- Name – Enter the first Host Name from the key that you copied in Step 1
- Value – Mentio the value that you copied for the first Host Name
- TTL – Select Default
- Choose Add More Records, then add the second CNAME record.
- Click Save All Records.
You need to wait for a few minutes to a day, depending upon your DNS providers. Once done, proceed to the next step.
3. Enable DKIM
- Visit the Microsoft 365 Defender website and sign in using your Microsoft account.
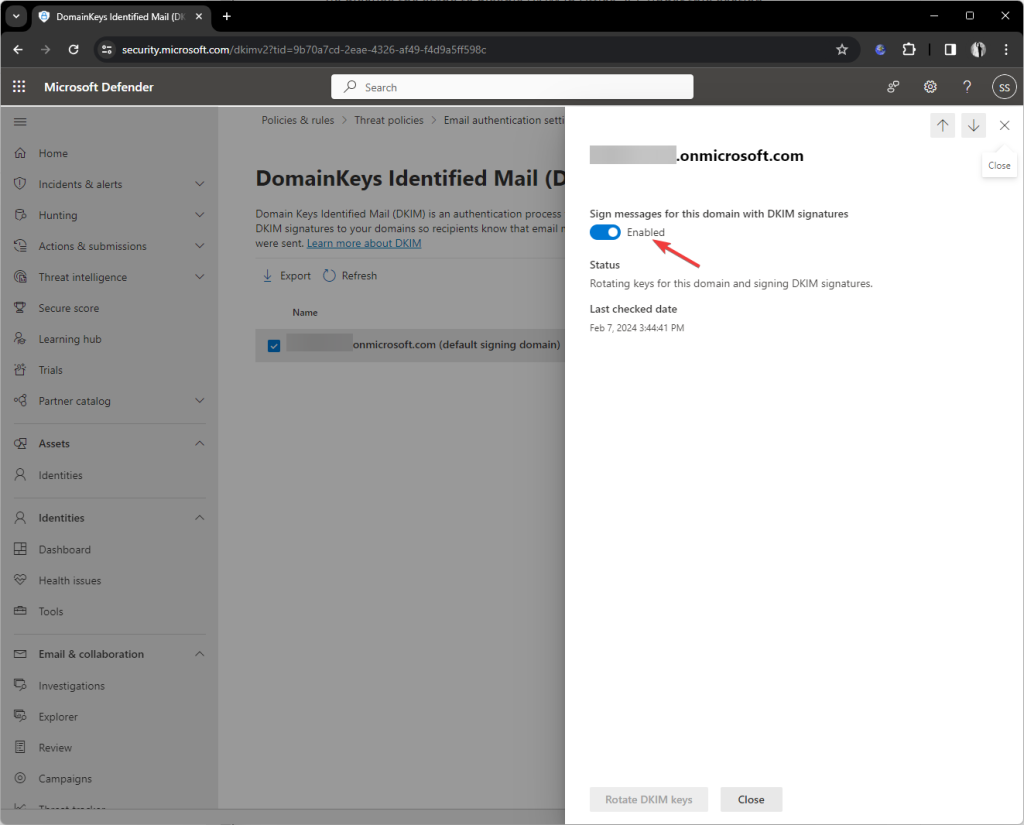
- Double-click the domain and toggle the switch for Sign messages for this domain with DKIM signatures.
- In case you get an error, wait for more time and try enabling it after some time. If it still doesn’t work, check the CNAMEs and other details to ensure the records are correct.
4. Verify DKIM records for Microsoft 365
- Open the Microsoft 365 admin center using this link.
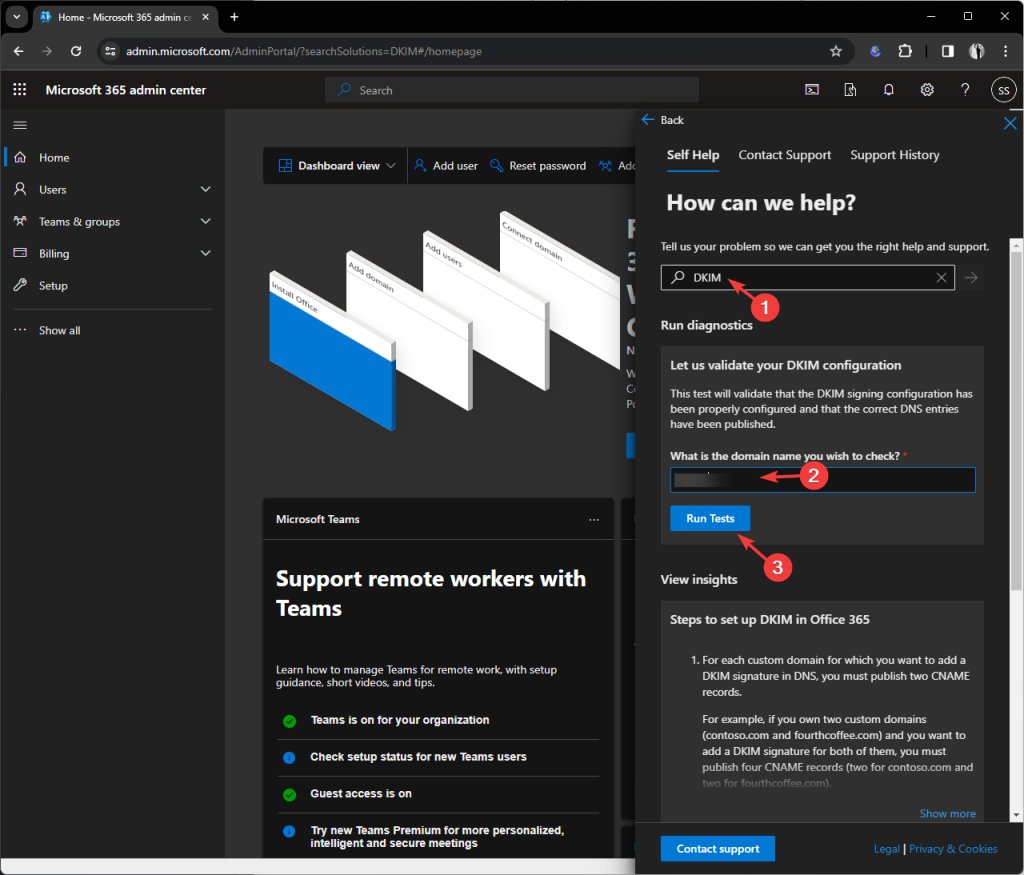
- On the How can we help pop-up, type DKIM in the first box, enter your Domain name, and then click Run Tests.
- Once the diagnostics are complete, you will get the confirmation of the successful creation of DKIM.
2. Using the Windows PowerShell
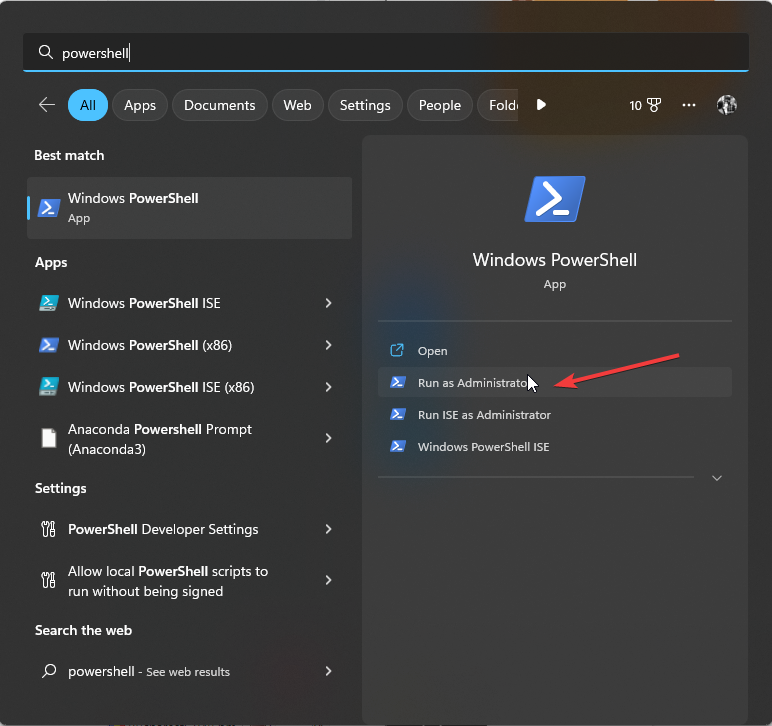
- Press the Windows key, type PowerShell in the search box, and click Run as administrator.
- First, ensure you are connected to Exchange Online; if not, follow the steps in this guide.
- Type the following command to a notepad, replace <domain> with the domain name, and replace Selector1CNAME and Selector2CNAME with the Host Name you copied in the first method. Copy & paste to the PowerShell window and press Enter:
Get-DkimSigningConfig -Identity <domain> | Format-List Selector1CNAME, Selector2CNAME - Next, add the CNAMEs to your DNS hosting provider using Step 2 in Method 1.
- To enable the DKIM in Office 365, open PowerShell with admin rights again, type the following command, then replace <Domain> with the domain name and hit Enter:
SSet-DkimSigningConfig -Identity <Domain> -Enabled $true
To conclude, you can either use Microsoft 365 Defender to create and set up DKIM or PowerShell to get it done.
Remember you have the credentials of your DNS provider before beginning the entire process, and if you are not able to see the DKIM keys added under DNS management, wait for another day before trying again.
In case you want to manage a mailbox, distribution groups, calendar & contact items, or permissions, the Exchange Online PowerShell module is helpful.
Need help with the steps to set up DKIM on Office 365? Feel free to mention your queries in the comments section below.


User forum
0 messages