Fix: Snipping Tool Blocked by Software Restriction Policy
Enable Snipping Tool in the Group Policy Editor
3 min. read
Updated on
Read our disclosure page to find out how can you help Windows Report sustain the editorial team. Read more
Key notes
- Snipping Tool is a great utility on Windows, yet sometimes it gets blocked or malfunctioned.
- This guide shows you exactly how to quickly fix it using the Registry editor.
- Make sure to follow the steps carefully and fix it yourself right away.
Windows 10 OS by default comes with the Snipping Tool installed and enabled. However, for some users, the Snipping Tool gets blocked by a software restriction policy.
If you haven’t disabled the tool manually and still getting Windows cannot open this program because it has been prevented by a software restriction policy error, here is how to fix it in Windows 10.
Follow the steps in this article to enable the snipping tool in Windows 10 to fix the Snipping tool blocked by software restrictions policy issue.
How to enable Snipping Tool in Windows 10?
1. Enable Snipping Tool using Group Policy Editor
Note: Group policy editor feature is not available in Windows 10 Home by default. Although, you can enable Group Policy Editor in Windows 10 Home feature by following this article.
- Press Windows Key + R to open Run.
- Type gpedit.msc and click OK to open the Group Policy Editor.
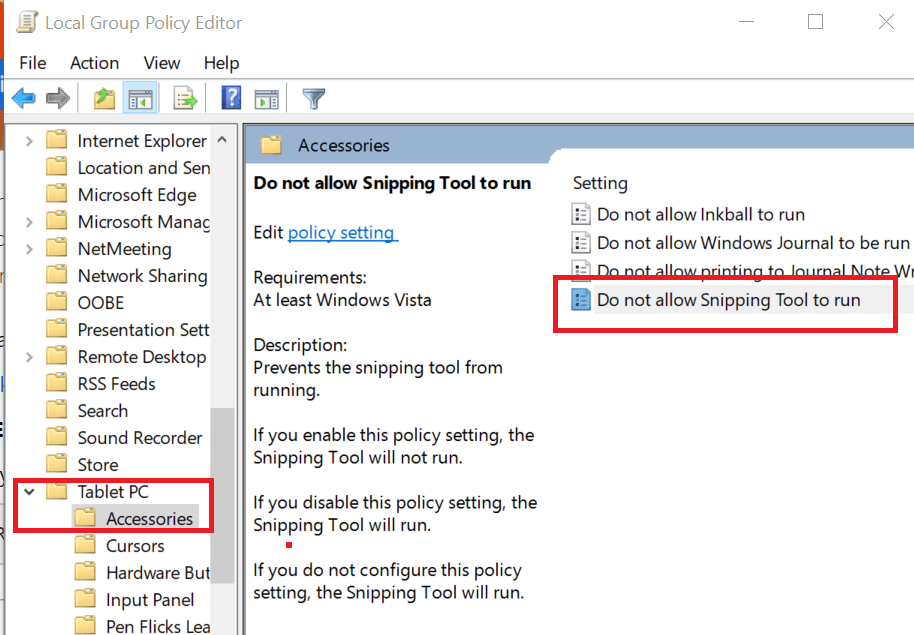
- In the Group Policy Editor, navigate to the following location:
User Configuration > Administrative Templates > Windows Components > Tablet PC > Accessories. - From the right-pane, double-click on “Do not allow Snipping Tool to Run“.
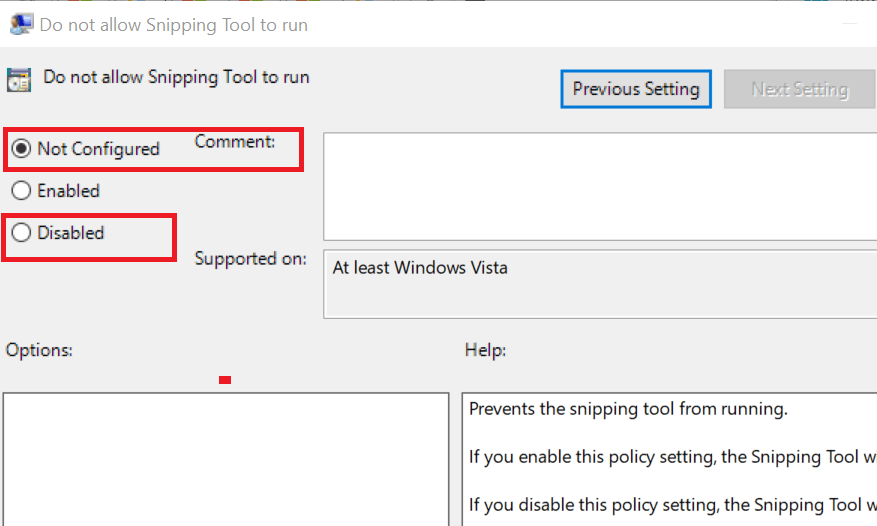
- In the Properties window, select the Disabled / Not Configured option.
- Click Apply and OK to save the changes.
- Close the Group Policy Editor and launch the Snipping Tool.
- If the error occurs, reboot the system and check again for any improvements.
2. Enable Snipping Tool using Registry Editor
- Press Windows Key + R to open Run.
- Type regedit and click OK to open the Registry Editor.
- In the Registry Editor, navigate to the following location:
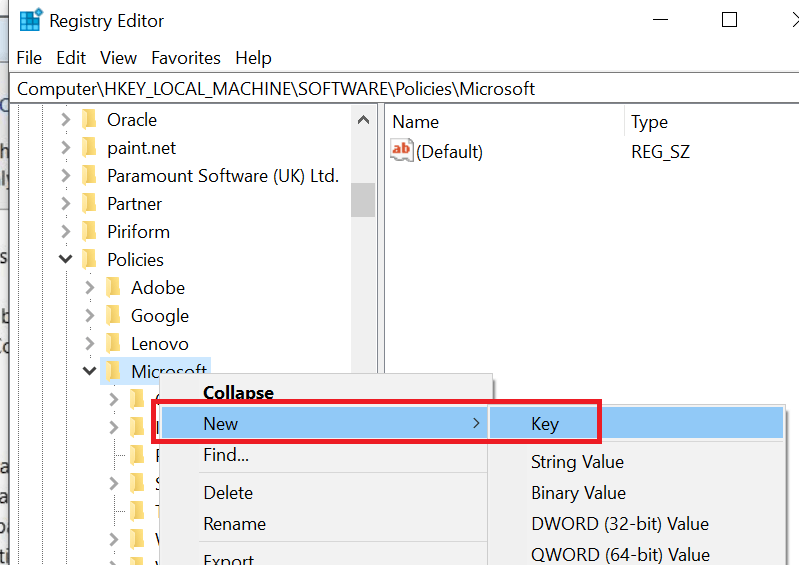
HKEY_LOCAL_MACHINE\SOFTWARE\Policies\Microsoft - Check if the Microsoft key has TabletPC key under Windows NT key. If the TabletPC exists, then go to step 8 directly.
- If not, right-click on the Microsoft key and select New > Key.
- Name the newly created key as “TabletPC” (without quotes).
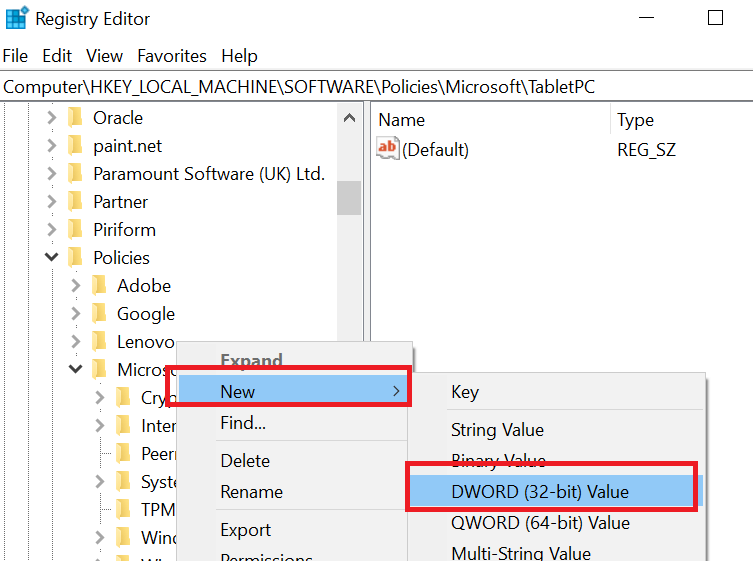
- Right-click on the TabletPC key and select New > DWORD Value. Name the new DWORD Value as DisableSnippingTool.
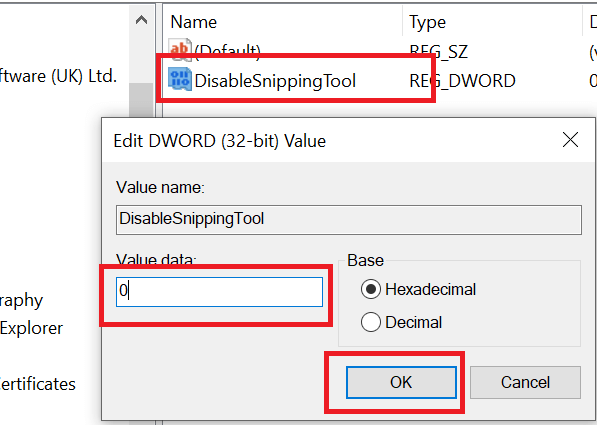
- Double-click on the DisableSnippingTool key.
- In the Value data: field enter 0 and click OK.
- Close the Registry Editor and open the Snipping Tool and check if the software restriction error still occurs.
3. Enable Snipping Tool on Older Windows Version
- If you are running an older version of Windows such as Windows 7, you can enable the Snipping Tool feature from the Windows Features On or Off section.
- Press Windows Key + R to open Run.
- Type control and click OK.
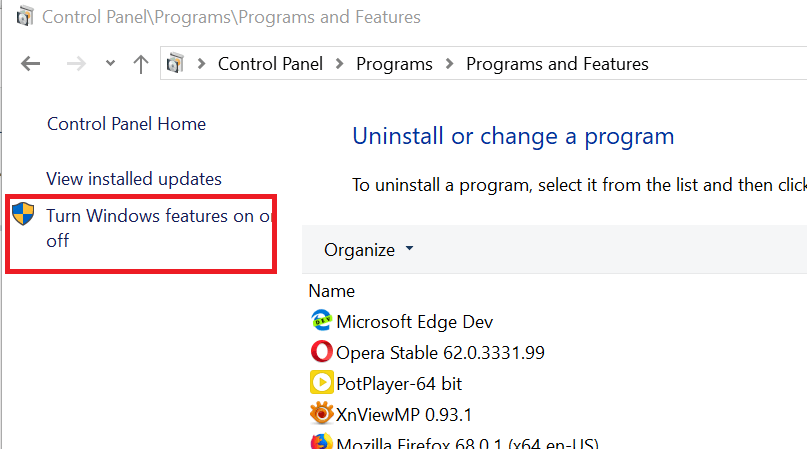
- In the Control Panel, click on Programs > Programs and Features.
- From the left pane, click on “Turn Windows Features On or Off” link.
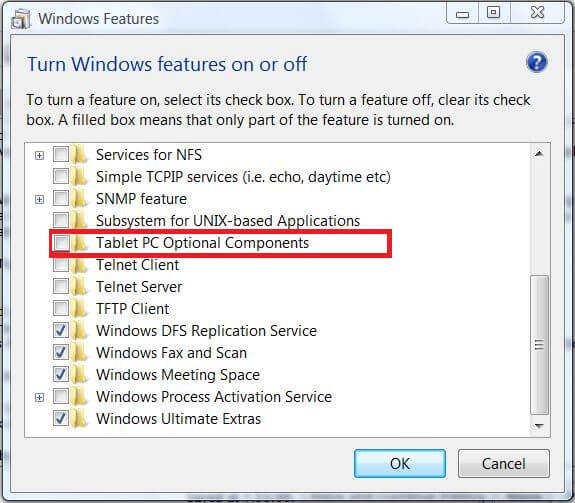
- In the Windows Features window, scroll down and check the “Tablet PC Options Components” option.
- Click OK to save the changes.
- Reboot the system and check if the Snipping Tool software restriction error is resolved.



User forum
0 messages