Steam Voice Chat Not Working: Enable It With These 5 Methods
Get the voice chat up and running in minutes
5 min. read
Updated on
Read our disclosure page to find out how can you help Windows Report sustain the editorial team. Read more
Key notes
- When Steam's voice chat is not working, it will prevent gamers from interacting with one another.
- The problem arises due to misconfigured settings, improper connections, or firewall conflicts.
- To fix things, check the microphone settings, make sure it's selected in Steam, and you have the gaming client added as an exception in the firewall, amongst other solutions.
Steam is undoubtedly one of the most popular gaming platforms, hosting a wide array of exciting titles and offering a seamless and user-friendly interface. But for some, Steam voice chat is not working.
It can be annoying, especially when you are in an important conversation with your teammates. Besides, the Steam chat audio not working problem has been affecting many, and you must understand the intricacies and discover the solutions.
Why is my Steam voice chat not working?
Here are a few reasons the Steam voice chat mic is not working:
- Misconfigured settings: Incorrect voice settings, both on Steam and the PC, can often trigger problems, as a result of which, Steam voice chat is not connecting.
- Issues with the Internet: A slow Internet connection affects the app’s ability to process voice chat, and there may be distortion or lag in the audio.
- Third-party apps triggering conflicts: Several built-in or third-party apps may prevent Steam from using the microphone or conflict with its connection to the network.
What can I do if Steam’s voice chat is not working?
Before we head to the slightly complex solutions, here are a few quick checks to perform:
- Restart the computer and check whether the Destiny 2 voice chat is still not working on Steam.
- Check the Internet speed and take the necessary measures to increase the speed, if it’s slow. This should help eliminate the Steam voice chat Waiting to connect message.
- For an external wired microphone, unplug and then reconnect it. If you have a wireless one, forget the device from the Bluetooth settings and again establish a connection.
- Verify whether apps on the PC can access the microphone. If not, it could be a problem with the mic itself and not Steam.
- Make sure you are not logged into Steam on another PC. If that’s the case, sign out of Steam on all other devices except the one you are using the voice chat feature on.
- In case you recently changed any of the router settings, revert them to default.
If none work, move to the fixes listed next.
1. Set the default device and disable other microphones
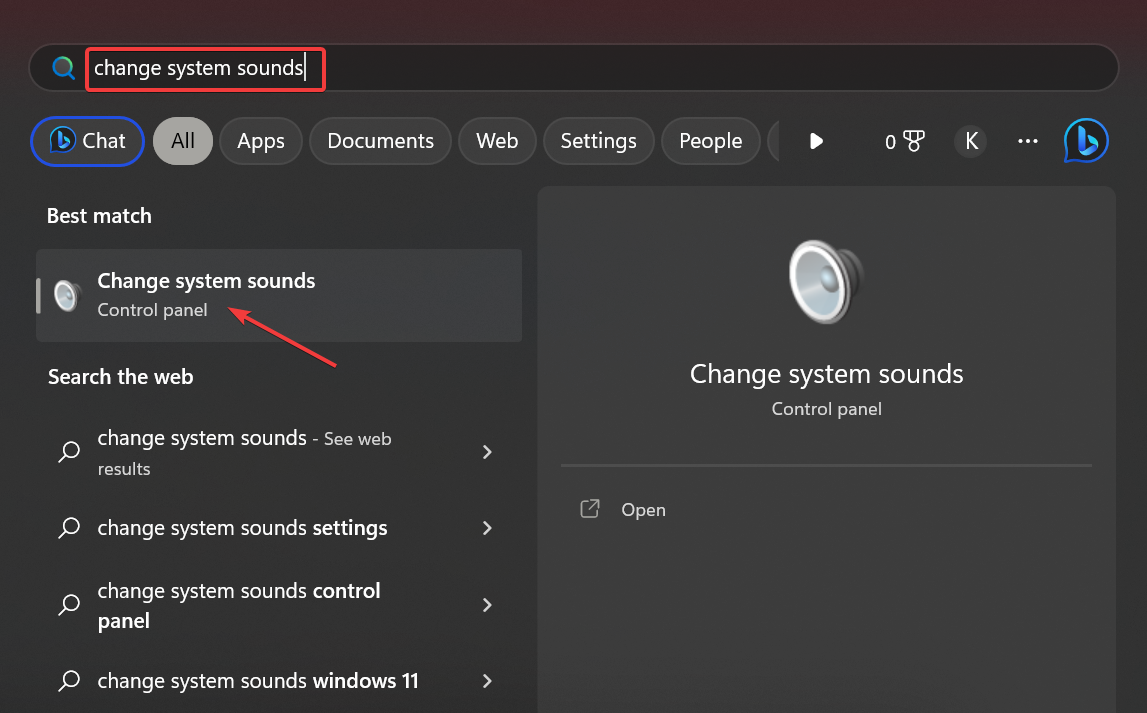
- Press Windows + S to open Search, type Change system sounds in the text field, and click on the relevant search result.
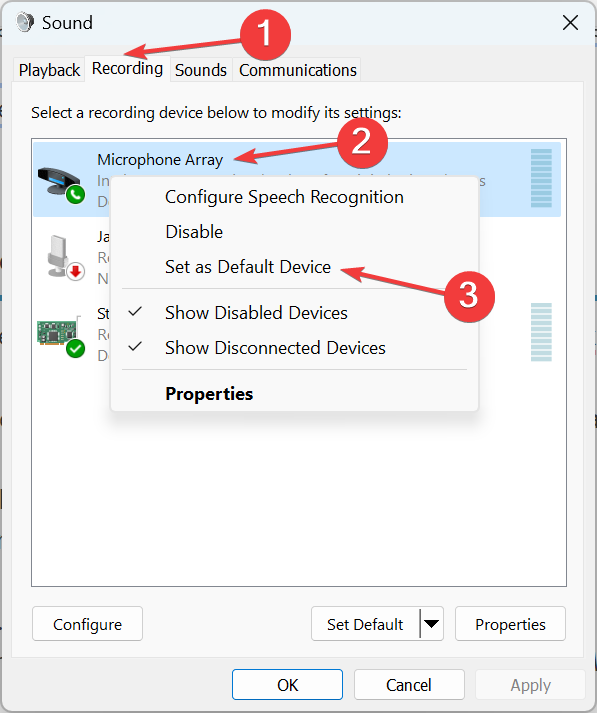
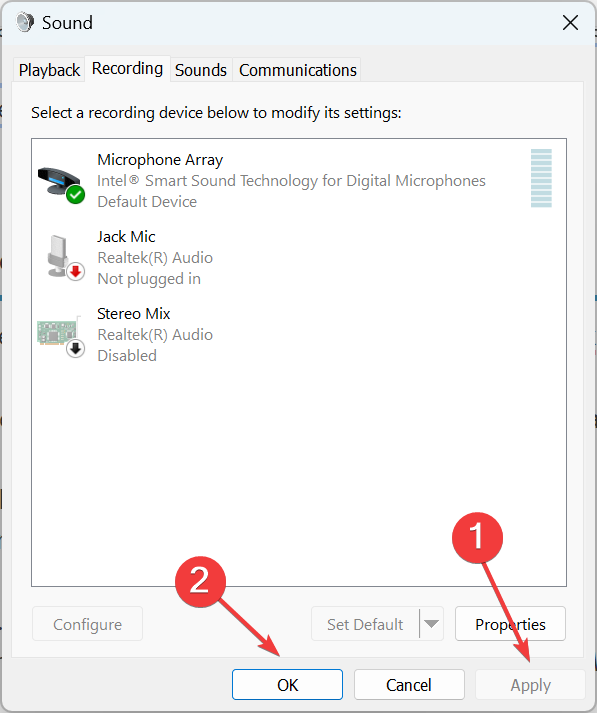
- Navigate to the Recording tab, right-click on the microphone in use, and then select Set as Default Device.
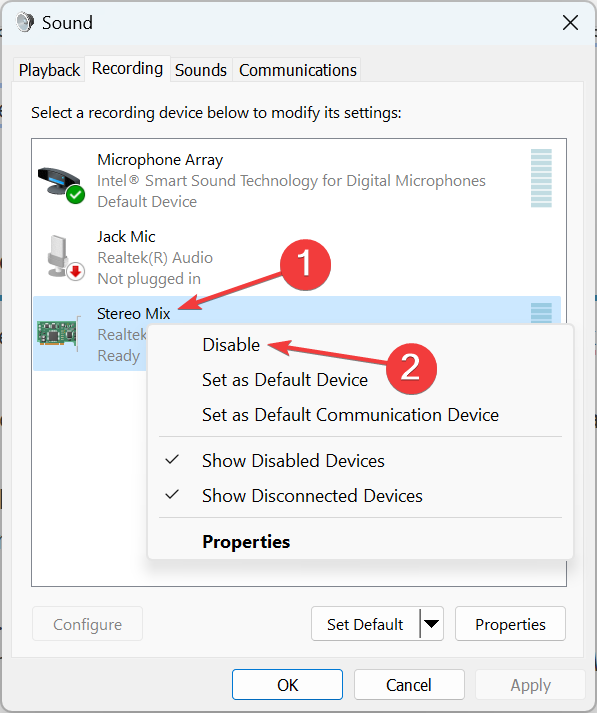
- Now, right-click on every other microphone listed here, and choose Disable.
- Click on Apply and OK to save the changes.
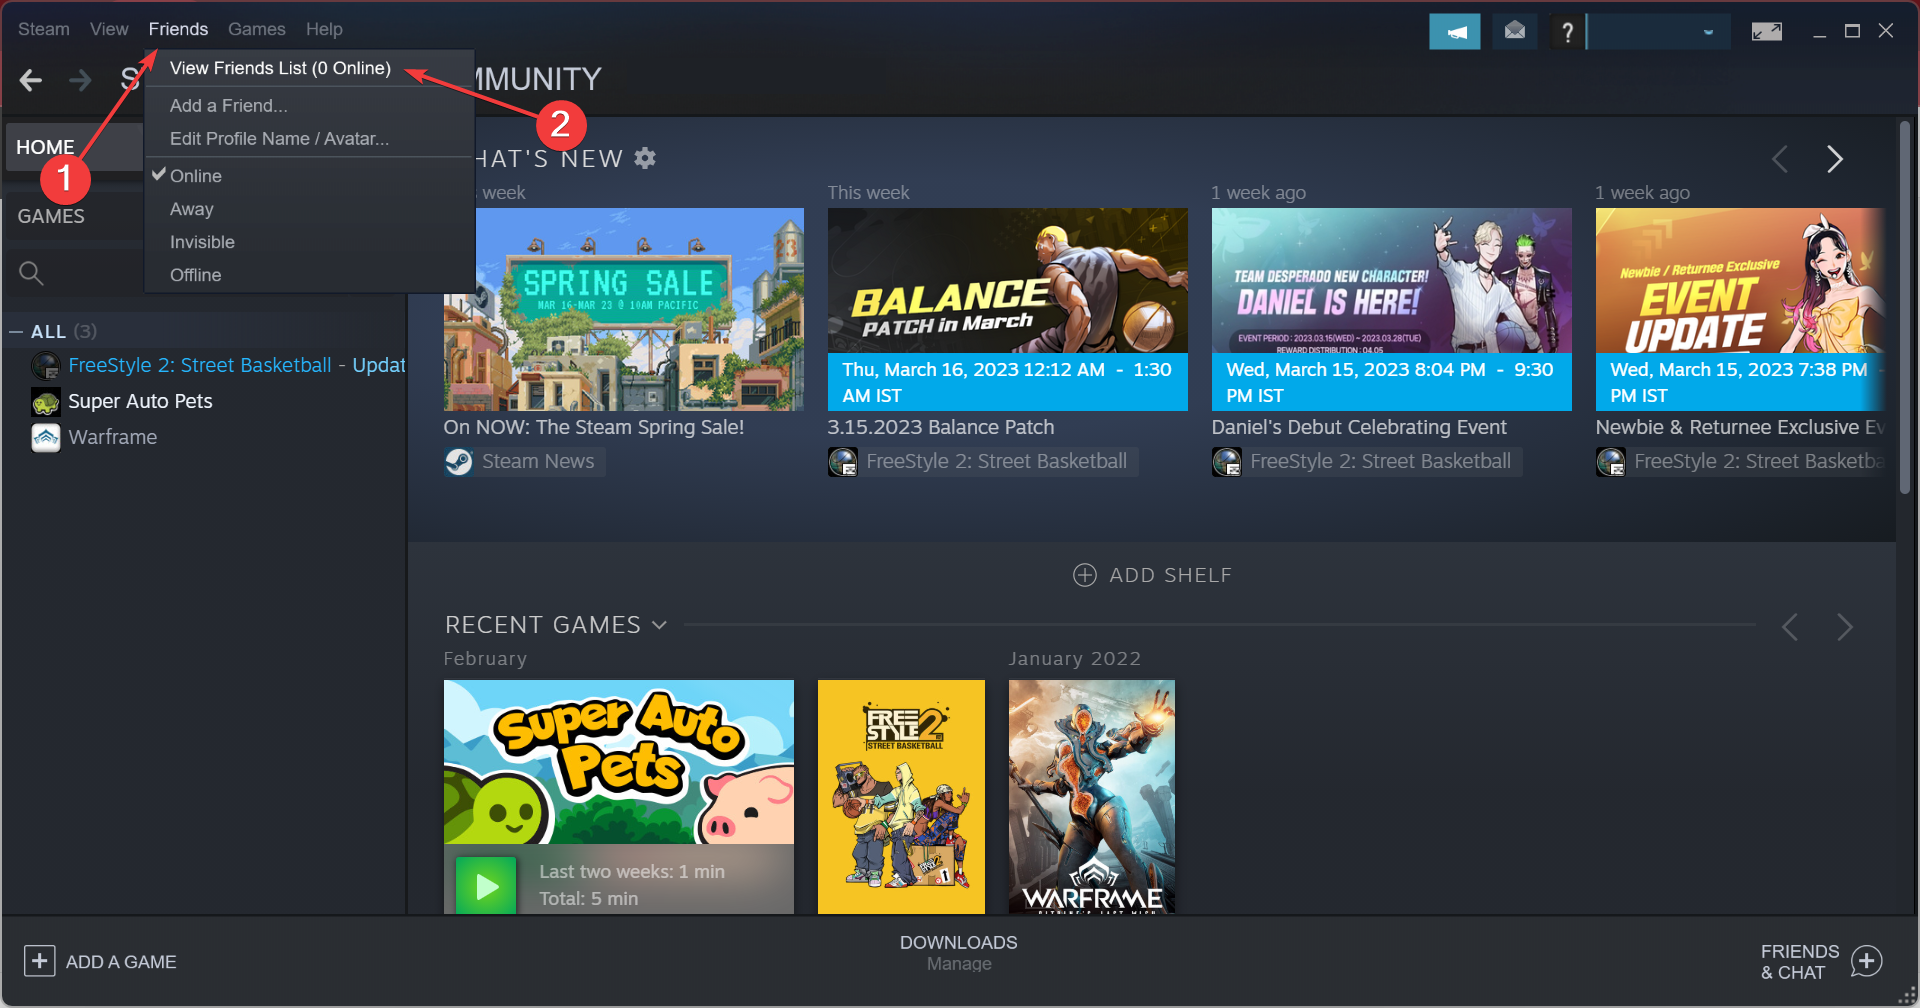
- Now, launch Steam, click on the Friends menu, and select View Friends List.
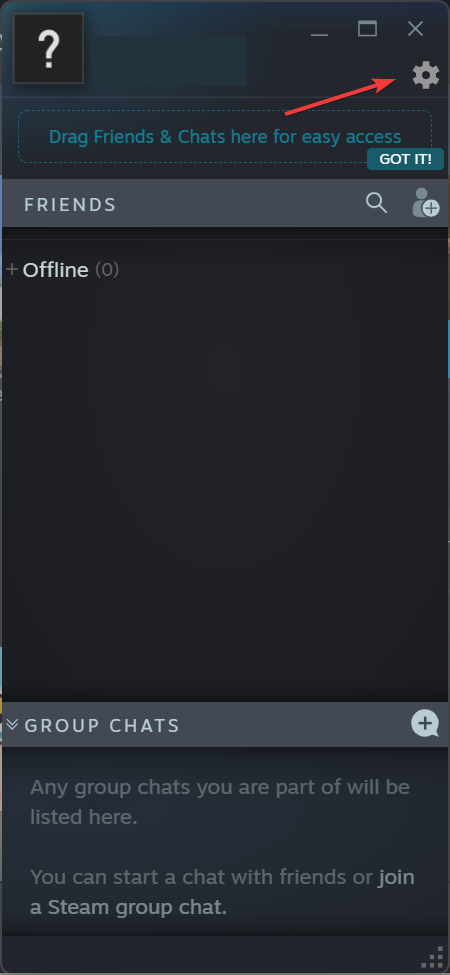
- Click on the gear icon to open Settings.
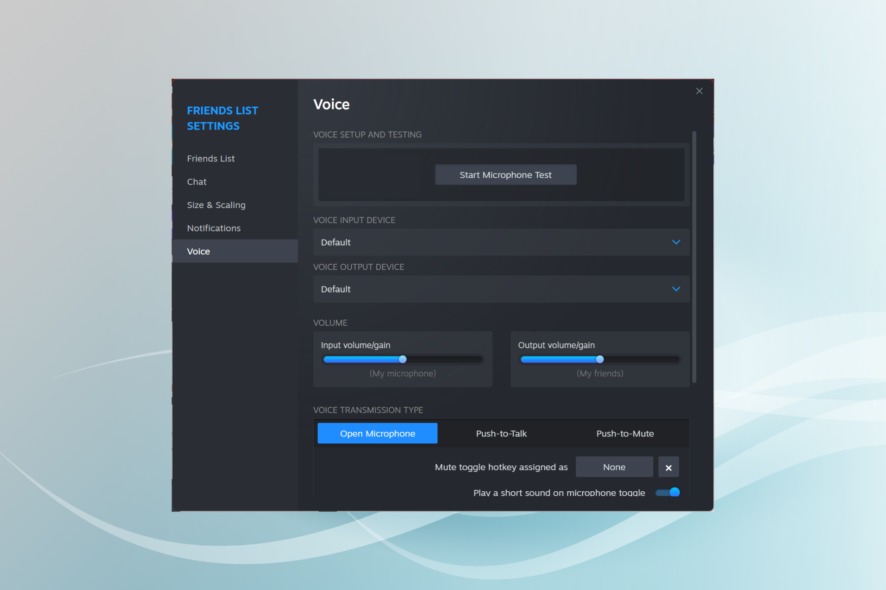
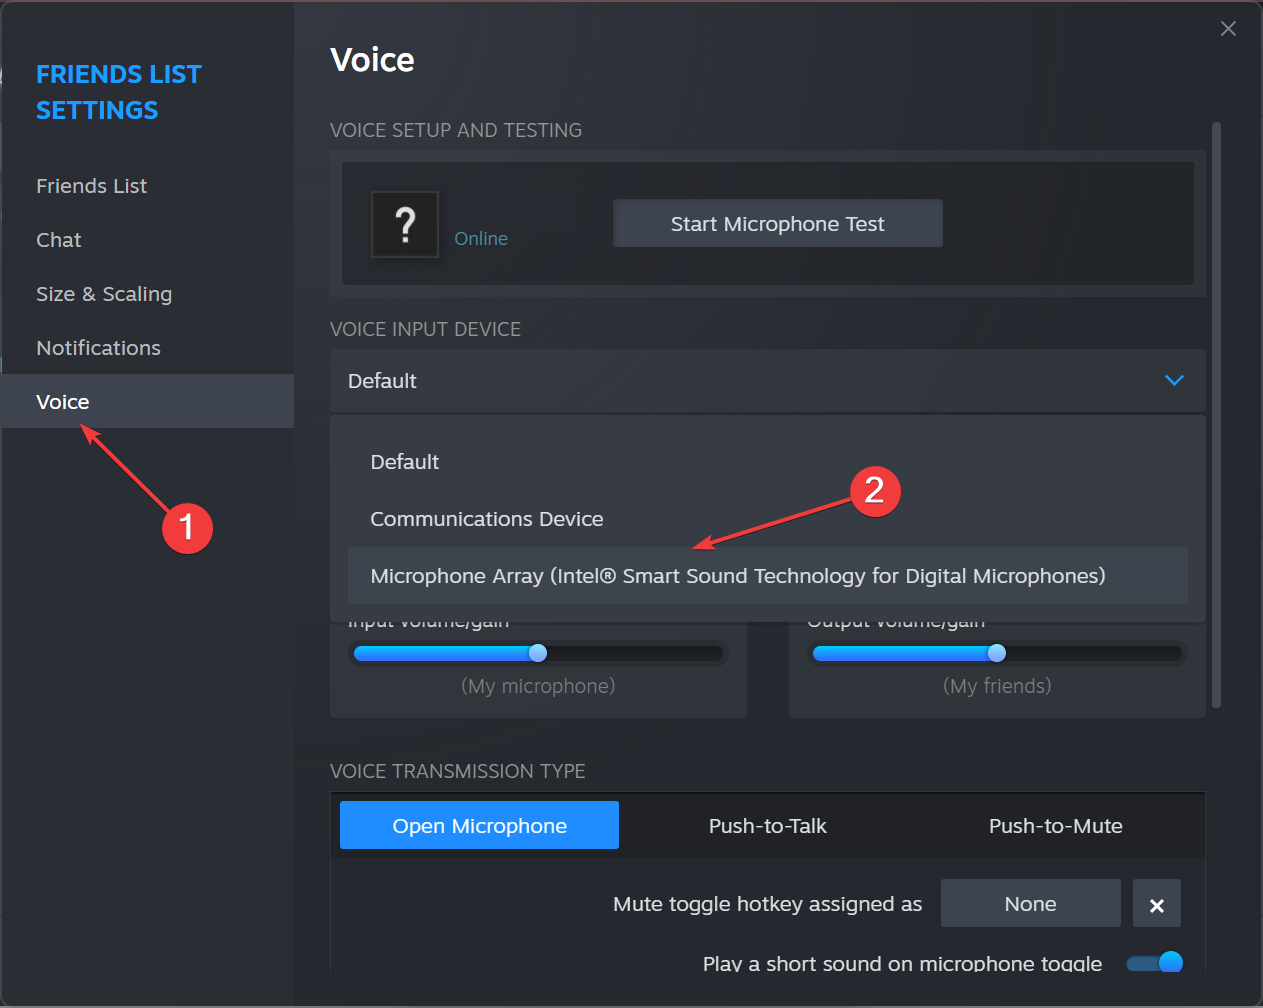
- Navigate to the Voice tab, and select the microphone you set as default earlier from the Voice Input Device dropdown menu.
- Finally, you can test whether the microphone now starts working in Steam chat.
One of the solutions that worked for many when voice chat was not working was to make only the default microphone available to Steam. This way, you can eliminate any conflicts between the built-in and external microphones, if any.
2. Whitelist Steam in the firewall
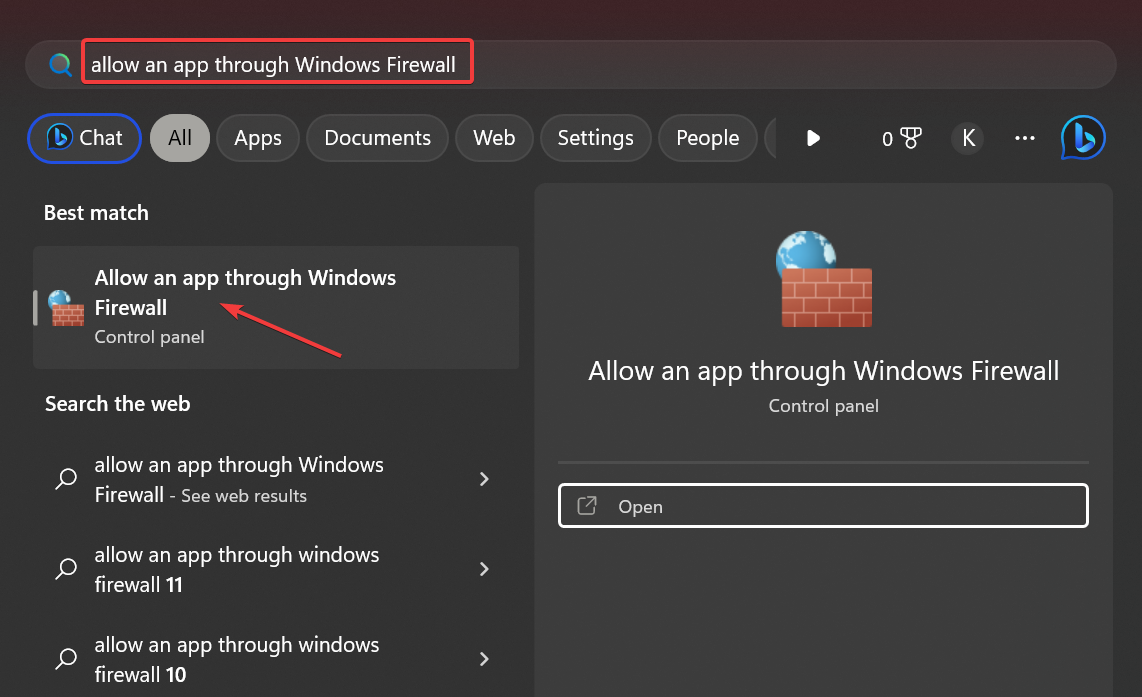
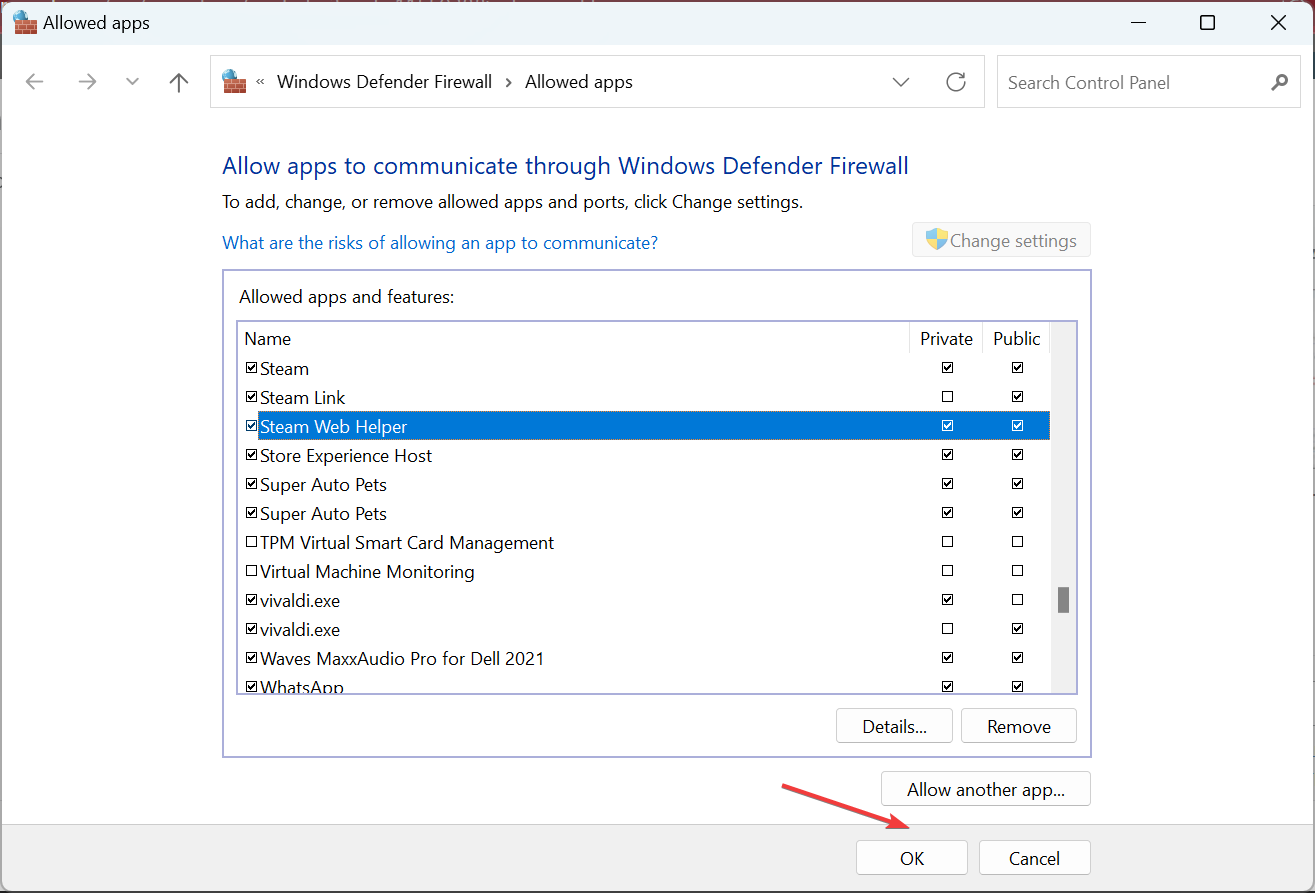
- Press Windows + S to open Search, type Allow an app through Windows Firewall, and click on the relevant result.
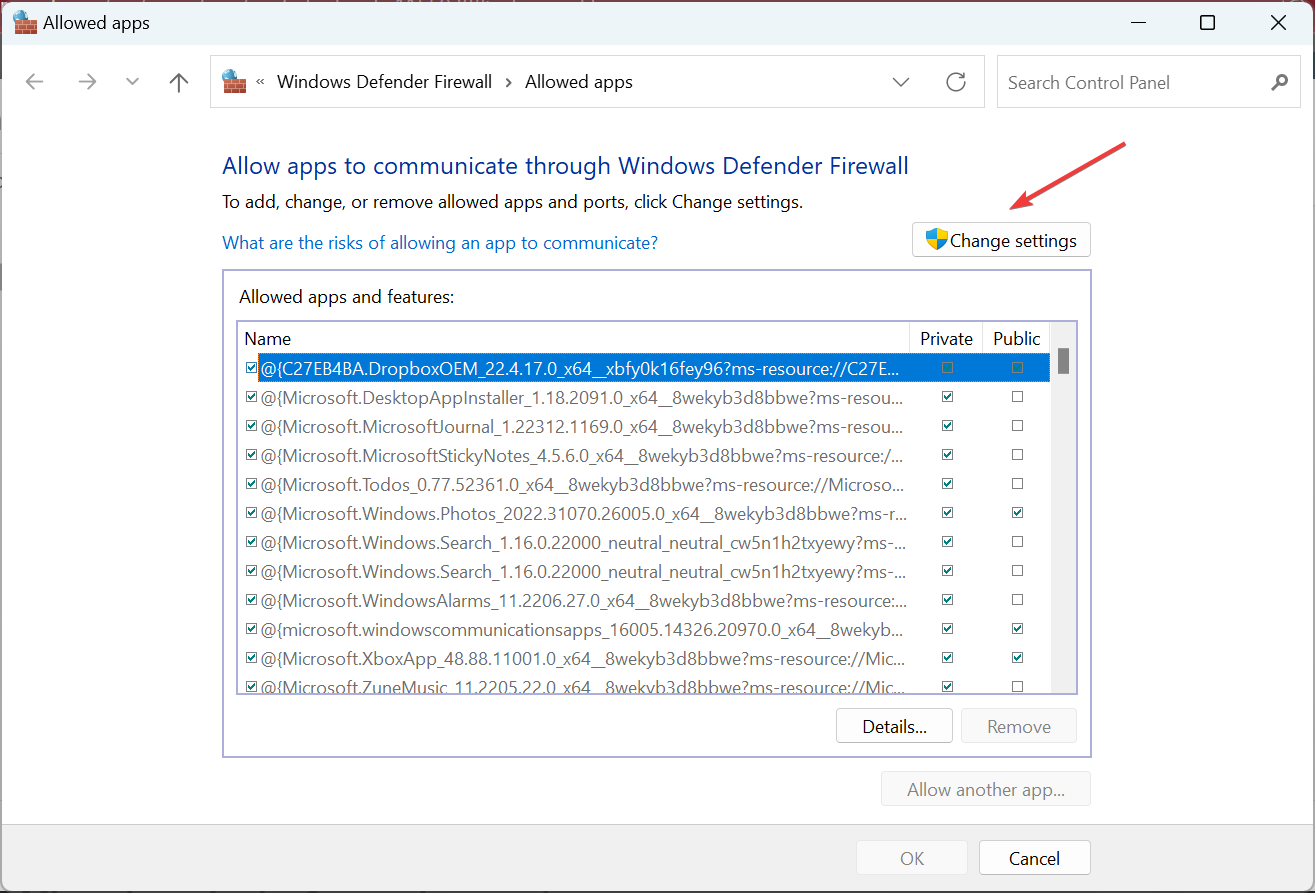
- Click on Change settings.
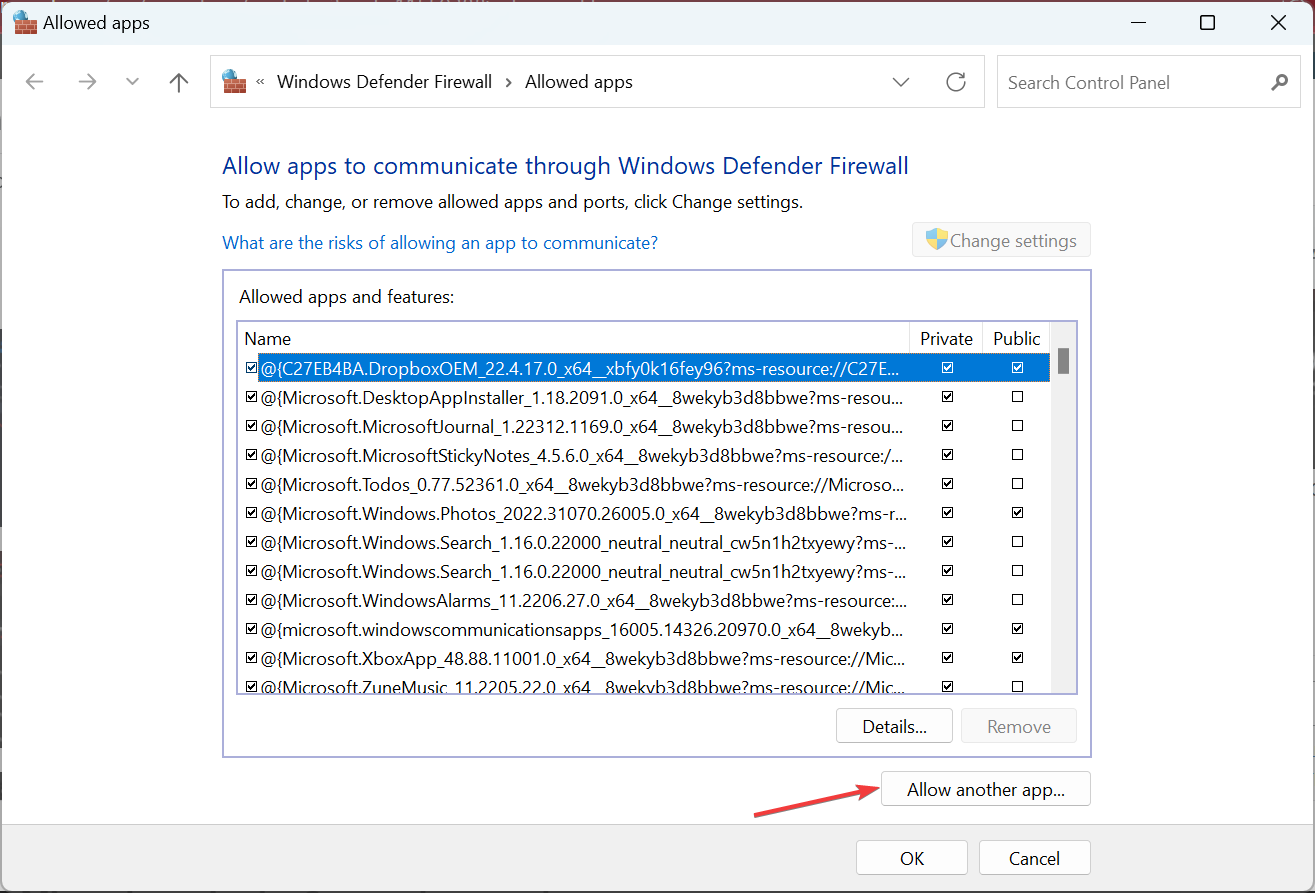
- Click Allow another app.
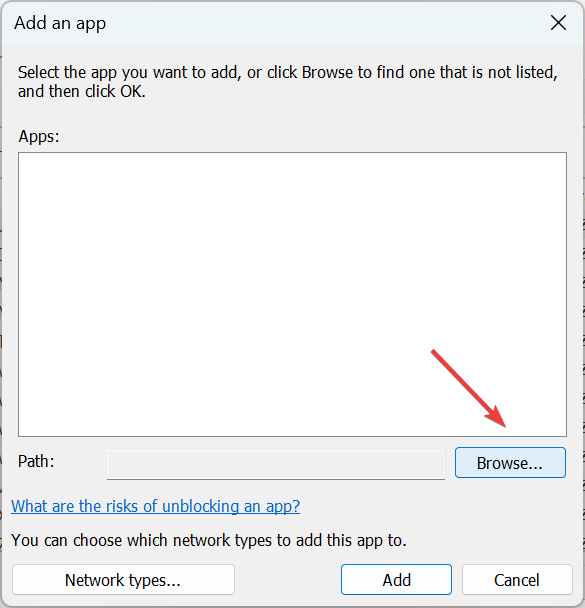
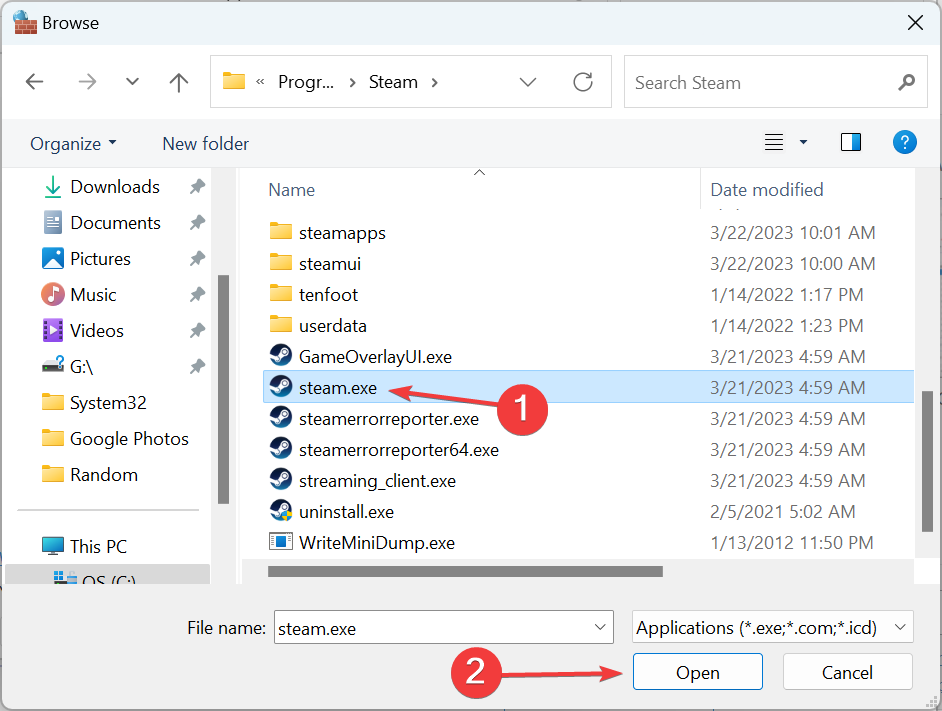
- Now, click Browse.
- Head to Steam’s install location, select the launcher and then click Open.
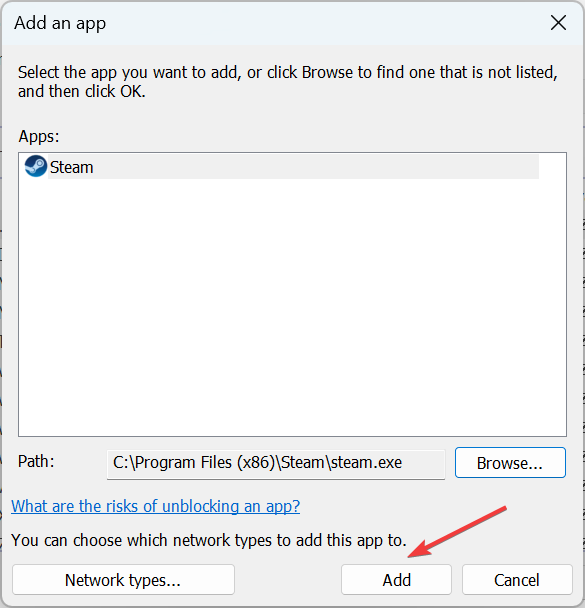
- Next, click Add.
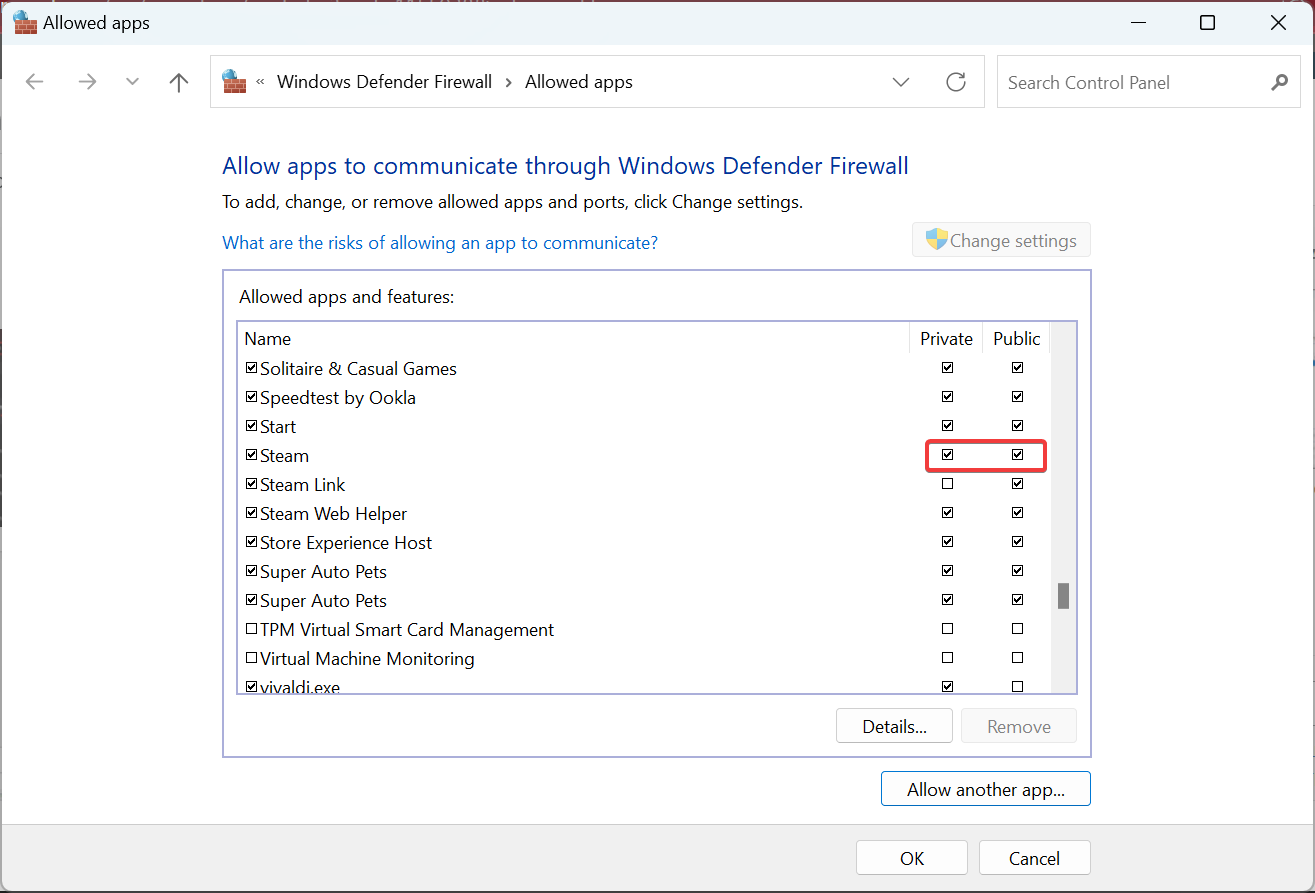
- Make sure both the Private and Public checkboxes are ticked for Steam.
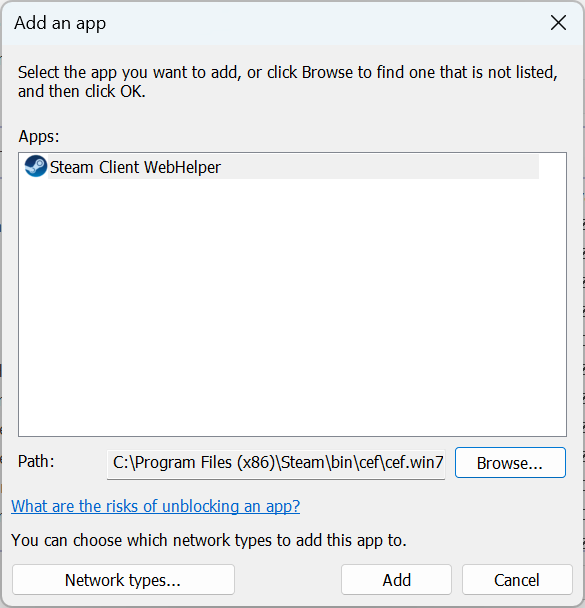
- Similarly, add SteamWebHelper.exe to the list of exceptions in the firewall.
- Finally, click on OK to save the changes.
Your firewall could be blocking the app when Steam voice chat is not working, and adding an exception here did the trick. Just make sure to add both Steam and the related critical processes to the list of exceptions.
3. Uninstall conflicting applications
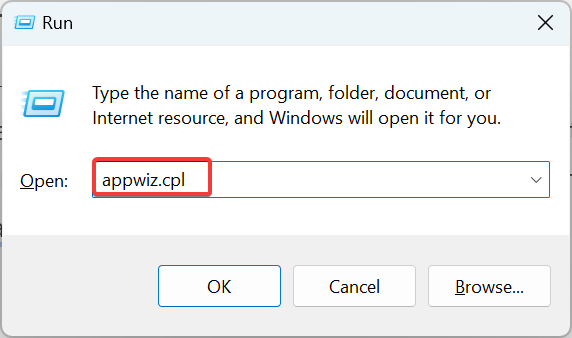
- Press Windows + R to open Run, type appwiz.cpl in the text field, and hit Enter.
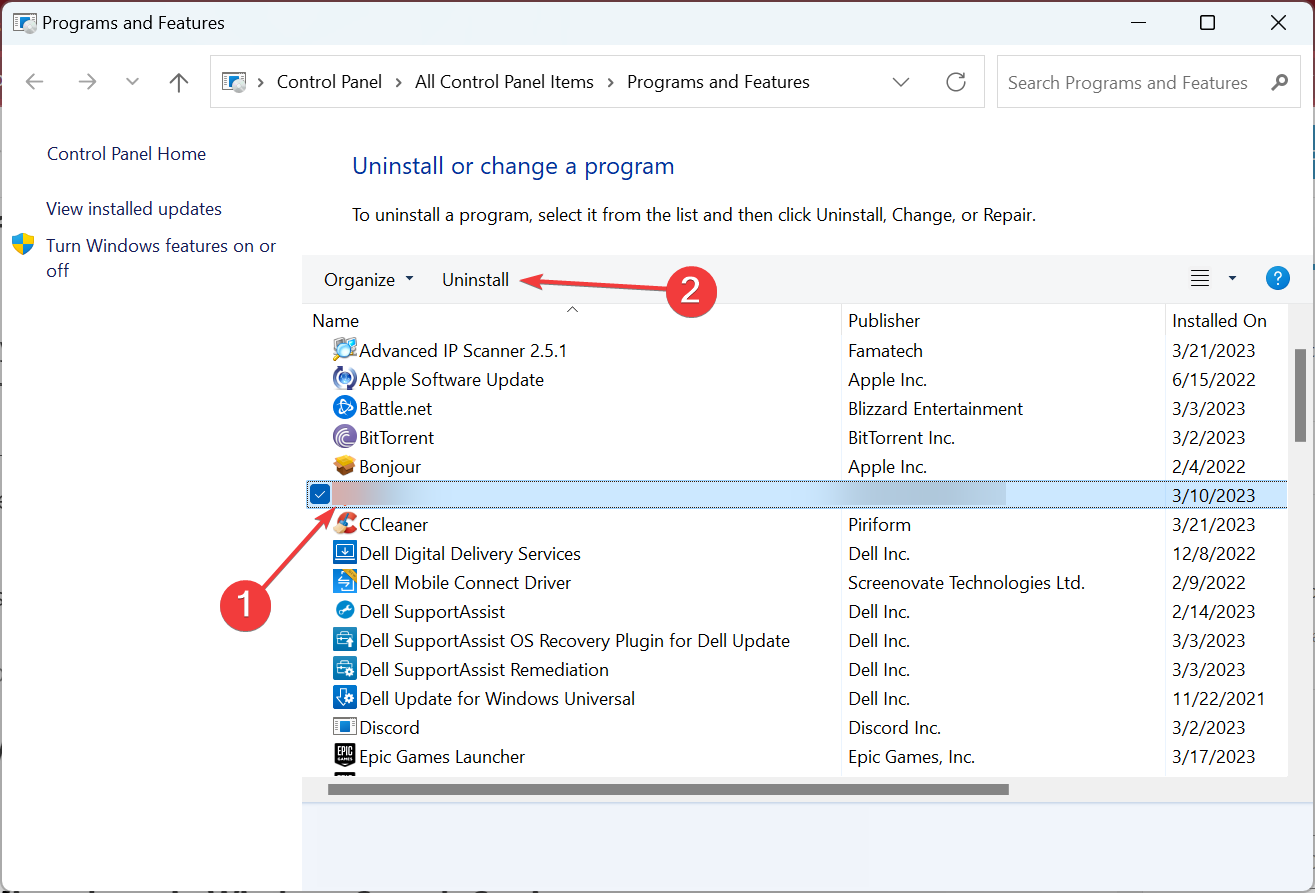
- Select the app you believe to be causing the problem, and click Uninstall. It could be one that was installed or updated recently, so check that.
- Follow the on-screen instructions to complete the uninstallation process.
A few users earlier reported that an update for the GeForce Experience messed things up and caused Steam voice chat to stop working, and uninstalling it helped get the feature running again. Other apps, too, may be responsible, so make sure to check that.
4. Change the sound settings
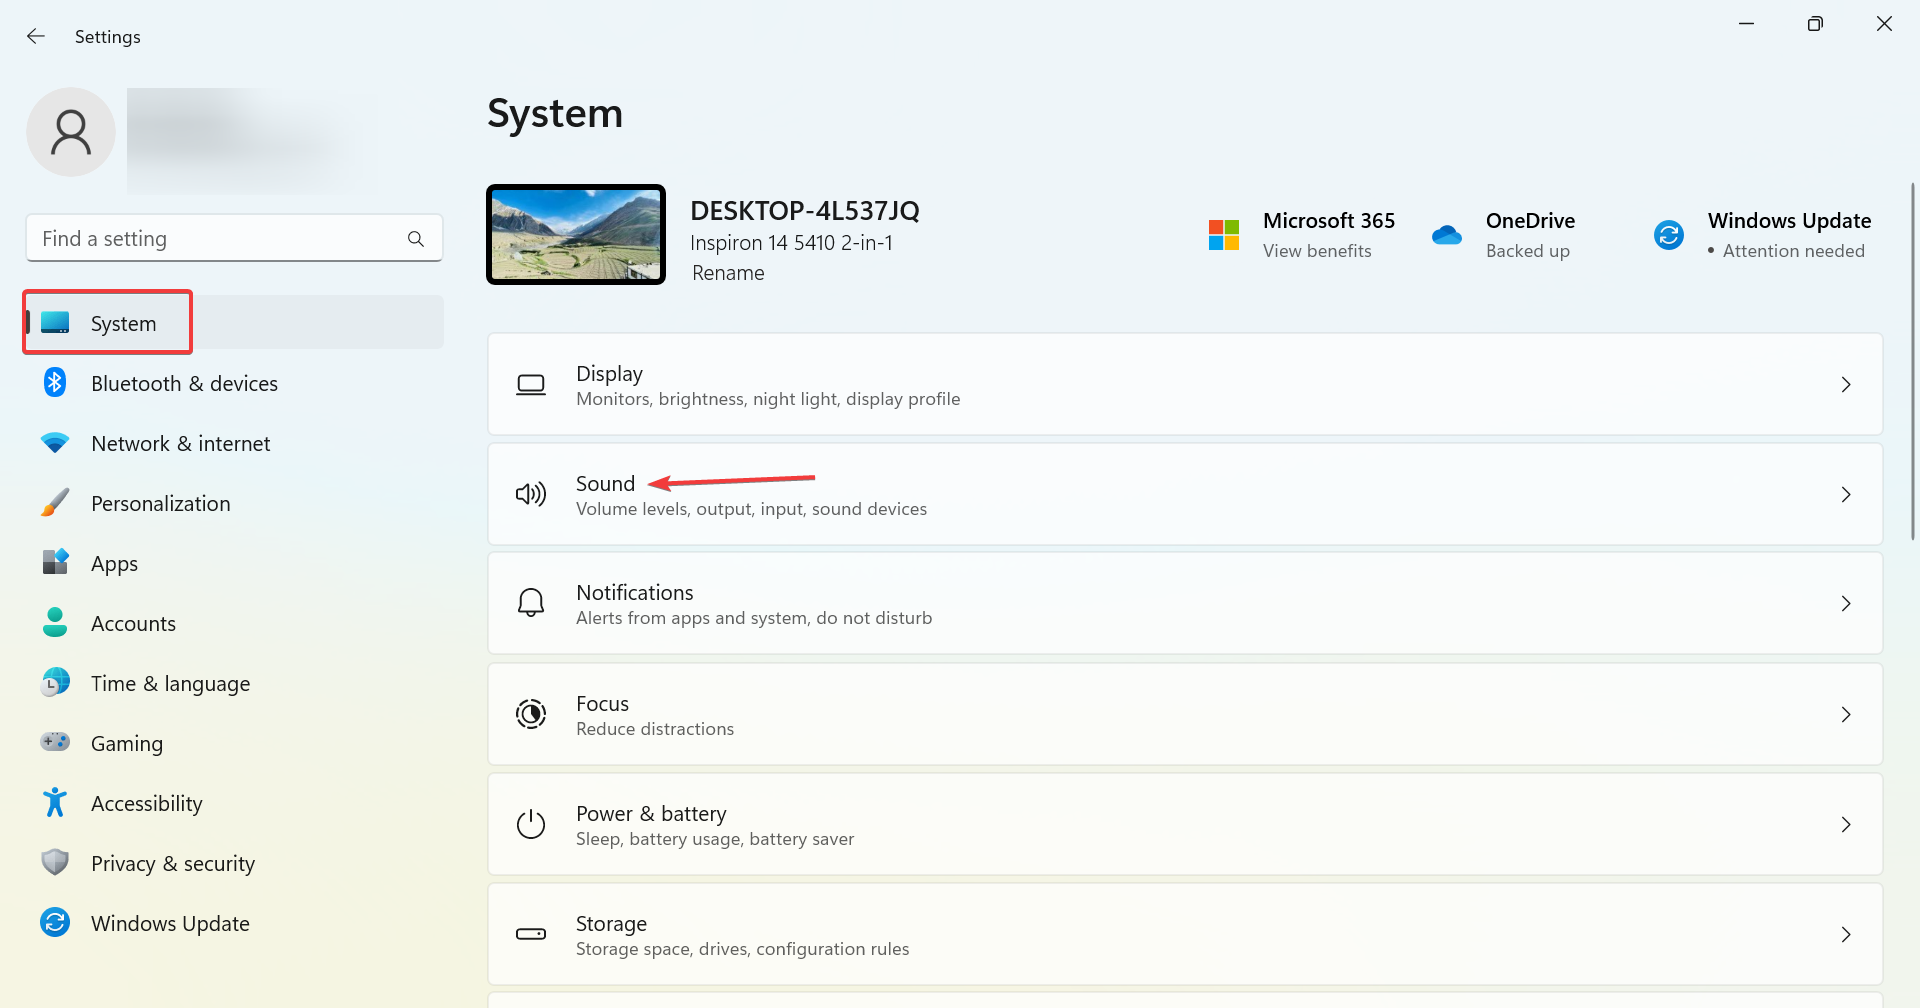
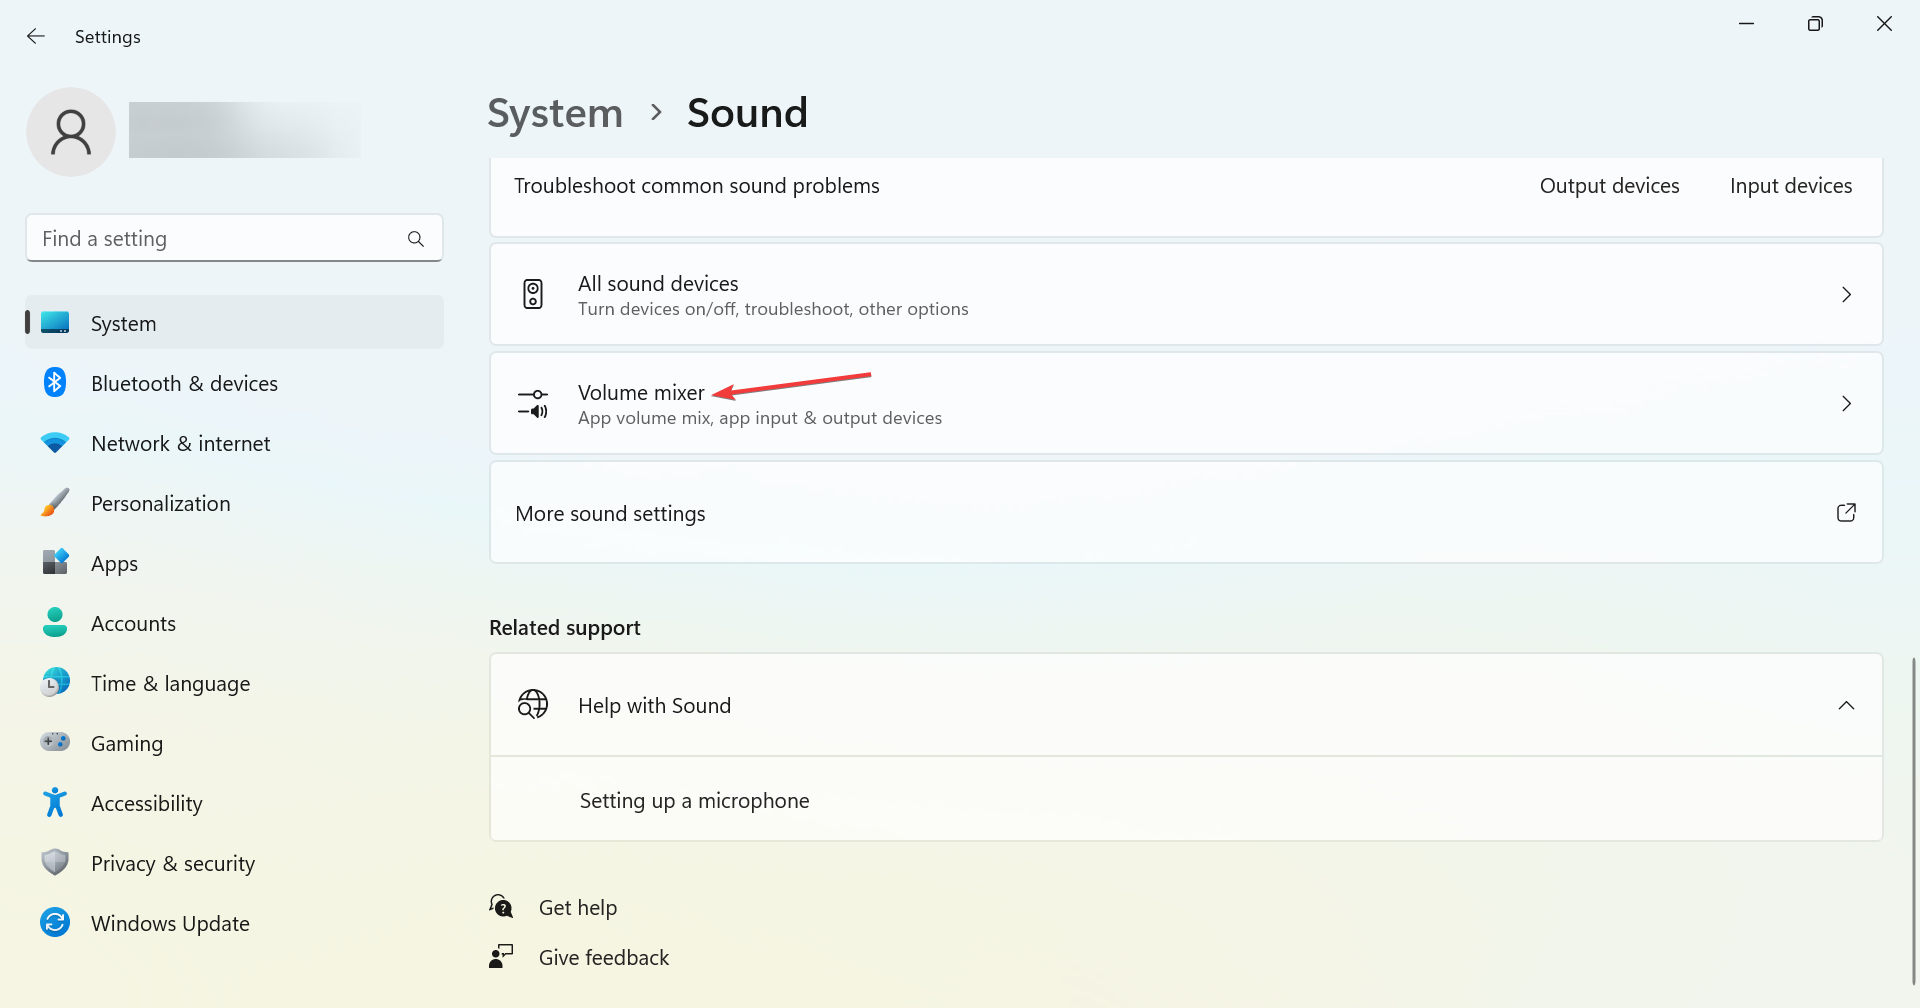
- Press Windows + I to open Settings, and click on Sound on the right in the System tab.
- Click on Volume Mixer.
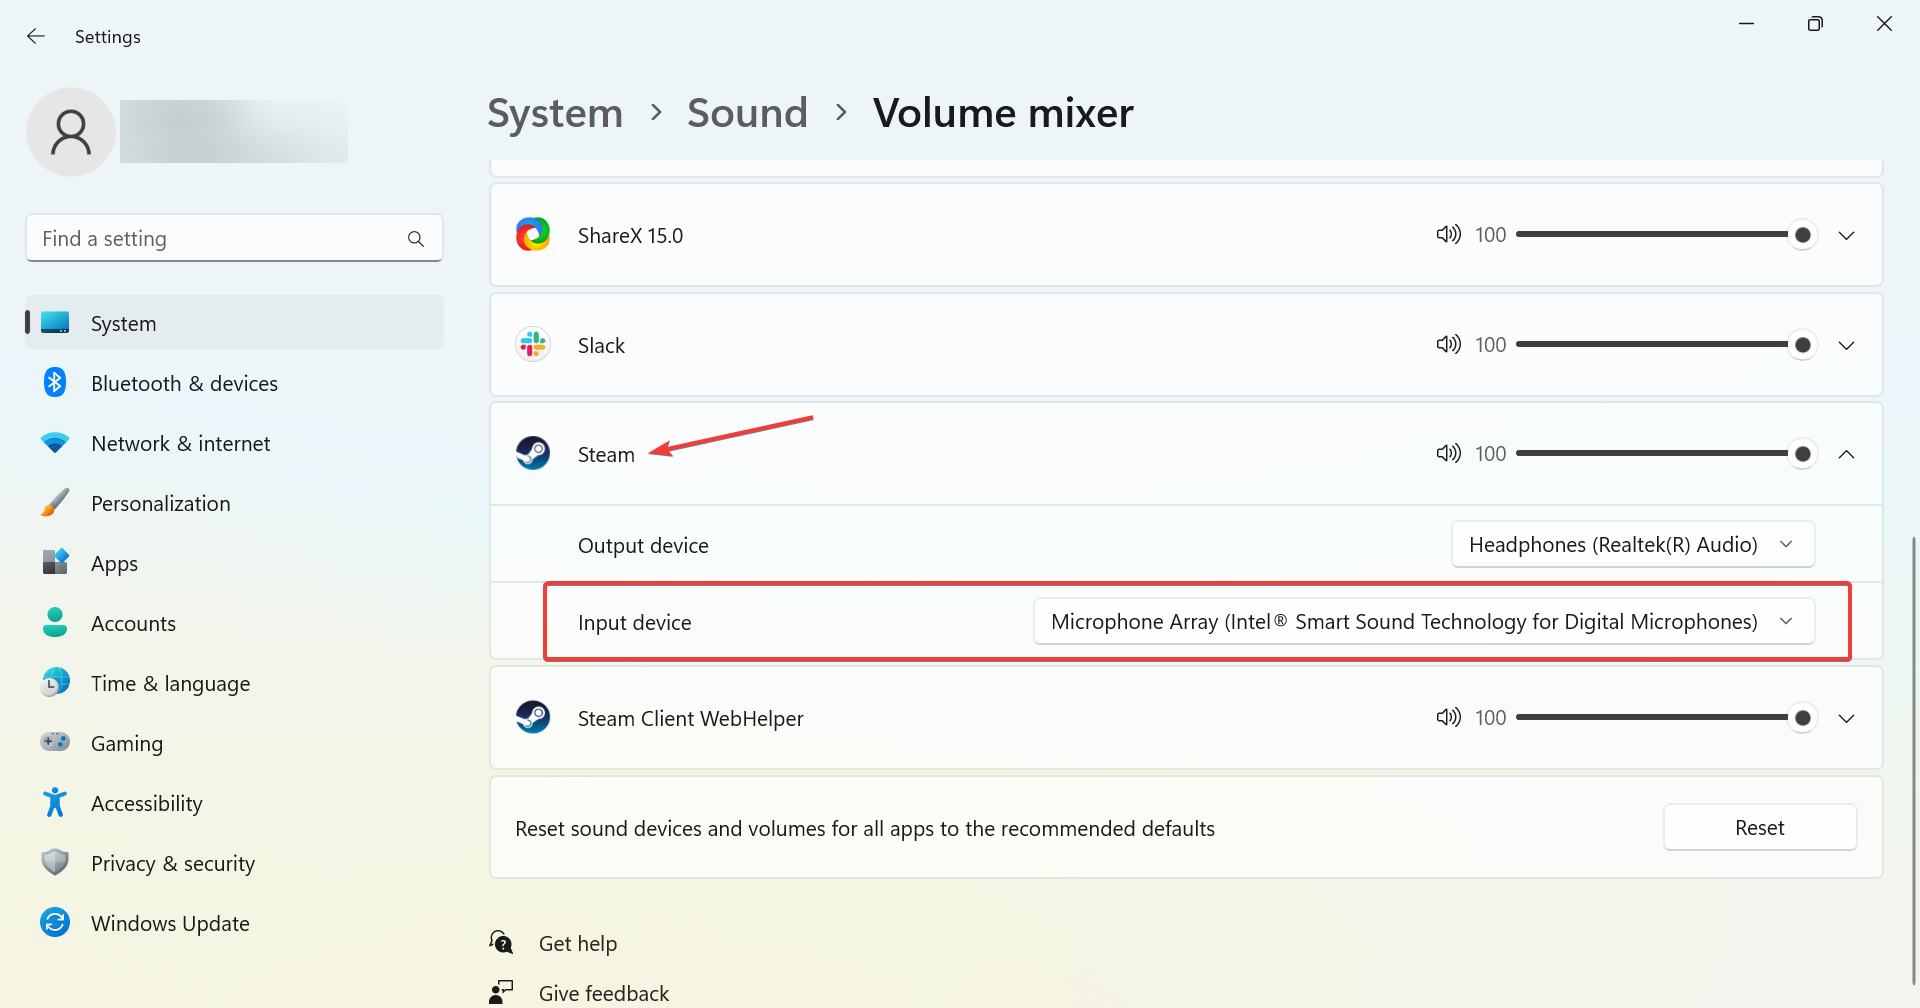
- Now, expand Steam, and choose the preferred microphone from the Input dropdown menu.
- In case the problem is limited to a specific game on Steam, make sure to make similar changes for it as well.
5. Disable enhancements
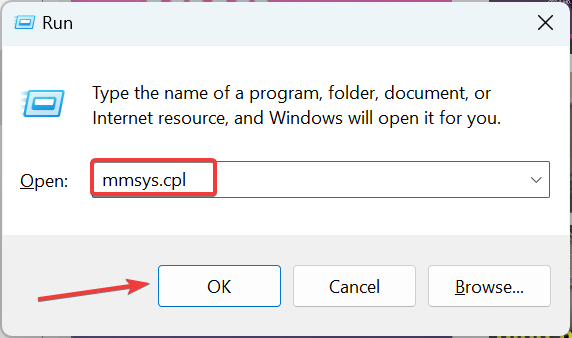
- Press Windows + R to open Run, type mmsys.cpl, and click OK.
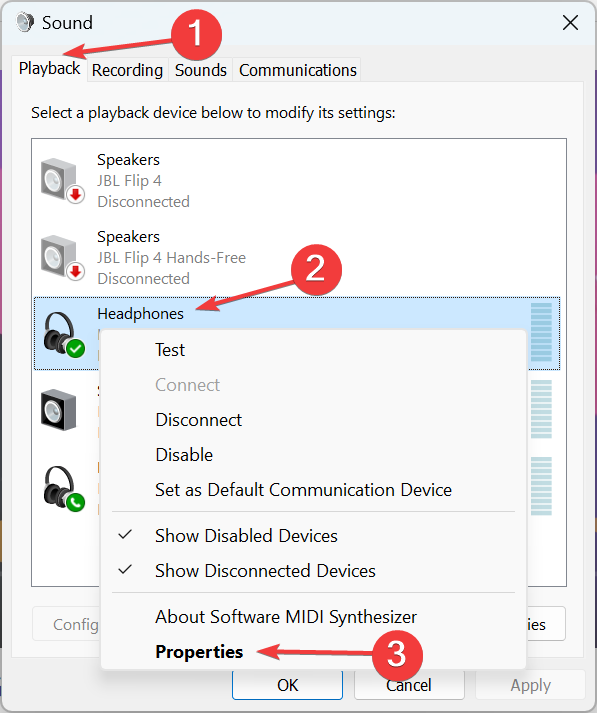
- Navigate to the Playback tab, right-click on your microphone, and select Properties.
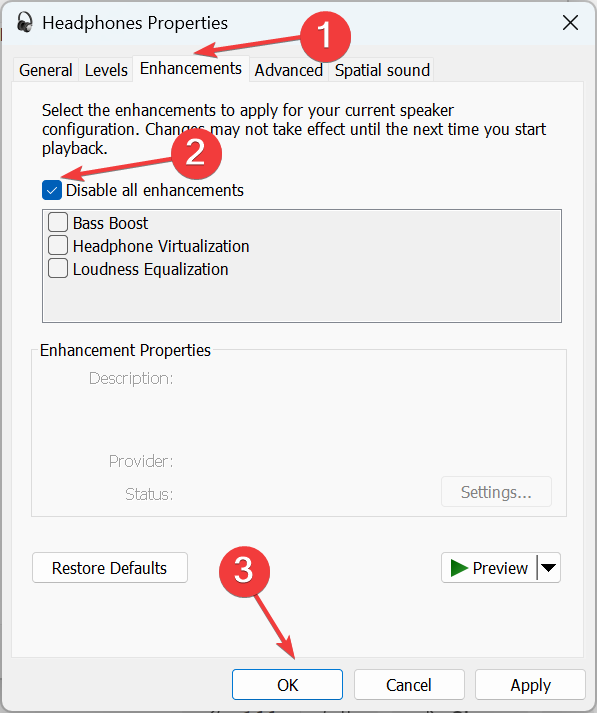
- Now, go to the Enhancements tab, tick the checkbox for Disable all enhancements, and click OK to save the changes.
That’s it! If the previous solutions didn’t work, disabling all audio enhancements should work when Steam voice chat is not working.
Also, before you go, check the best tips and tricks to optimize Windows for gaming and get the best performance.
For any queries or to share another solution with the community, use the comments section below.

User forum
0 messages