How to Turn On Or Off A Metered Connection on Windows 11
Check out the simple steps to set a network connection as metered
Key notes
- Turning on metered connection can help you conserve internet bandwidth, reduce data usage while tethering or avoid unwanted updates.
- This guide will discuss available methods to enable or disable the metered connection.

XINSTALL BY CLICKING THE DOWNLOAD
FILE
Setting a network connection as metered on Windows 11 is useful to limit data usage and conserve internet bandwidth. This can be helpful when you are on a limited data plan or using mobile data.
This guide will discuss ways to turn on or off metered network connections on Windows 11.
How can I turn on or off the metered connection on Windows 11?
1. Use the Settings app
- Press Windows + I to open Settings.
- Go to Network & Internet.
- Click the WiFi or Ethernet, depending on the connection you want to set as metered.
- Click the network and toggle on the switch for Metered connection.
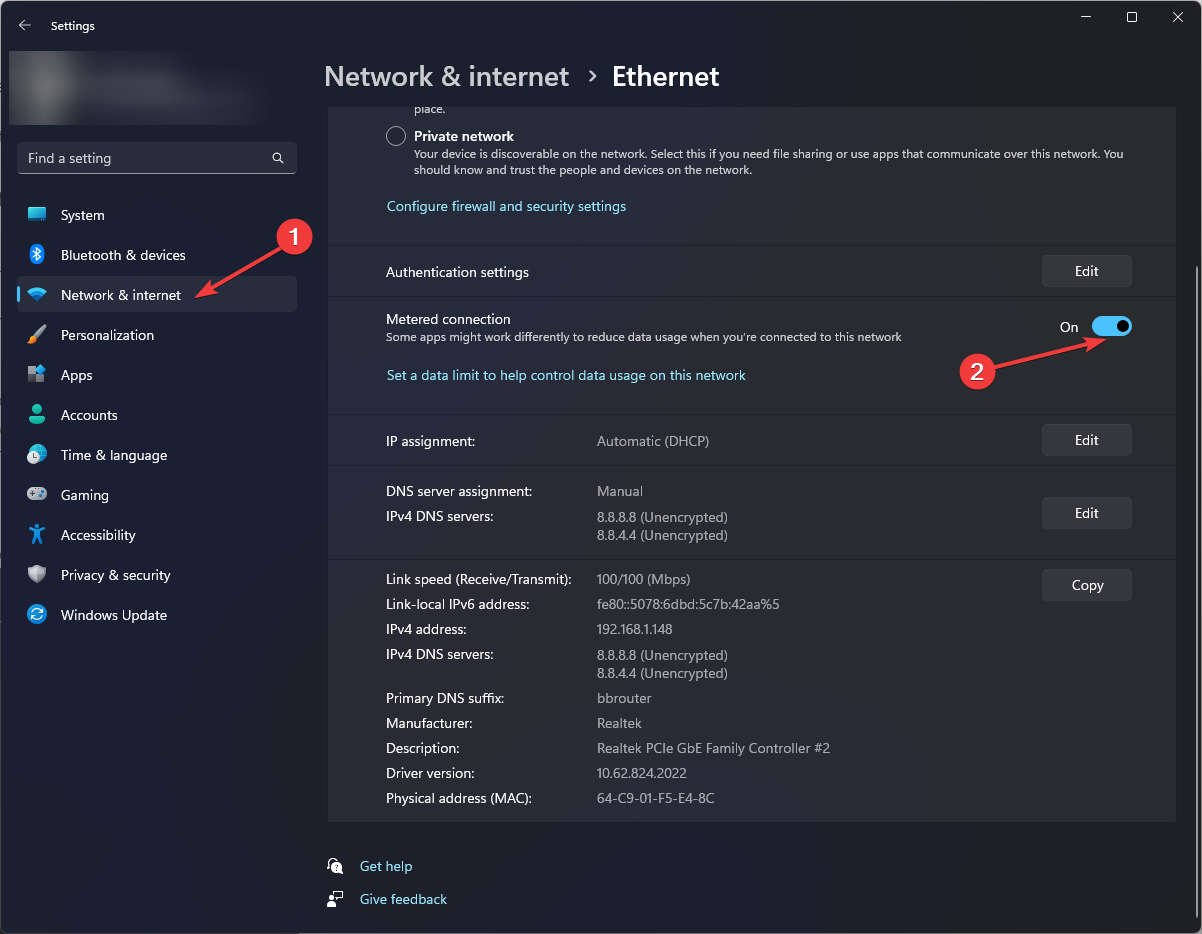
- To disable toggle off the switch anytime you want.
2. Use the Command Prompt
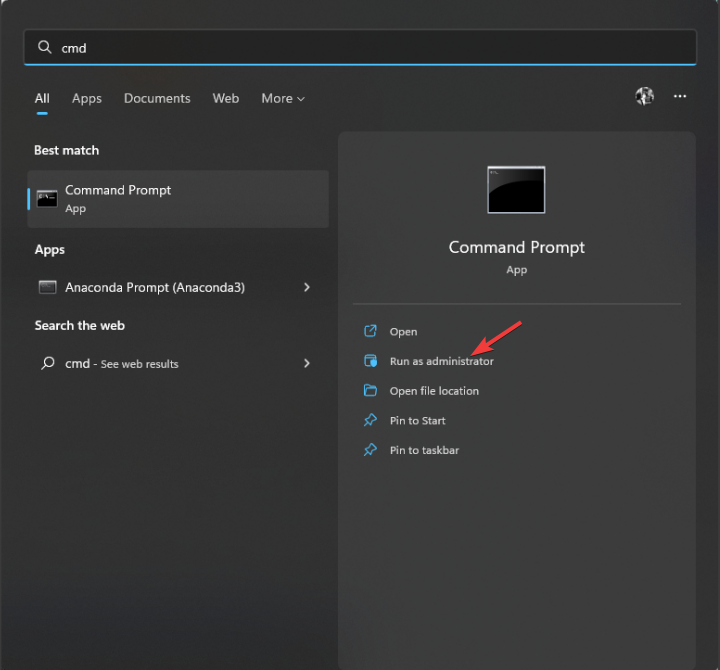
- Press the Windows key, type CMD, and click Run as administrator.
- Copy and paste the following command, replace your WiFi name with the name of the WiFi, and press Enter after every command:
netsh wlan set profileparameter name=YOUR_WIFI_NAME
- Type the following command, replace the WiFi network name with the name of your WiFi to enable a metered connection, and press Enter:
netsh wlan set profileparameter name="Wi-Fi network name" cost=Fixed
- To disable a metered connection, copy and paste the following command, replace the WiFi network name, and press Enter:
netsh wlan set profileparameter name="Wi-Fi network name" cost=Unrestricted
3. Use the Registry Editor
- Press Windows + R to open the Run window.

- Type regedit and press Enter to open Registry Editor.
- Navigate to this path:
Computer\HKEY_LOCAL_MACHINE\SOFTWARE\Microsoft\Windows NT\CurrentVersion\NetworkList\DefaultMediaCost - Double-click Ethernet or WiFi from the right pane.
- Change the Value data from 0 to 1 to enable the metered connection. Click OK.

- To disable the metered connection, change the Value data from 1 to 0. Click OK.

So, these are methods that you can turn on or off the metered connection on Windows 11. Please let us know in the comments section below if you have any questions or concerns about metered connection.
Readers help support Windows Report. We may get a commission if you buy through our links.

Read our disclosure page to find out how can you help Windows Report sustain the editorial team. Read more


Improve this guide


User forum
0 messages