VGA Monitor is Not Working on Docking Station: 5 Ways to Fix It
The video docking station may be the subject of malfunction
4 min. read
Updated on
Read our disclosure page to find out how can you help Windows Report sustain the editorial team. Read more
Key notes
- When using a docking station, you can connect many displays and other peripherals easily to any system.
- Many of our users reported that the VGA monitor is not working on the docking station.
- This might be resolved by updating the system's graphics driver or the Windows system.
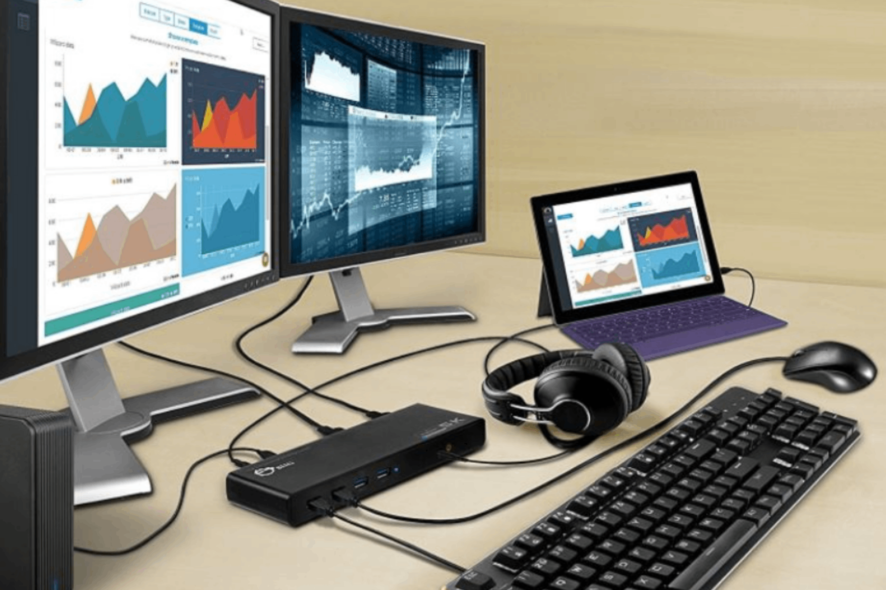
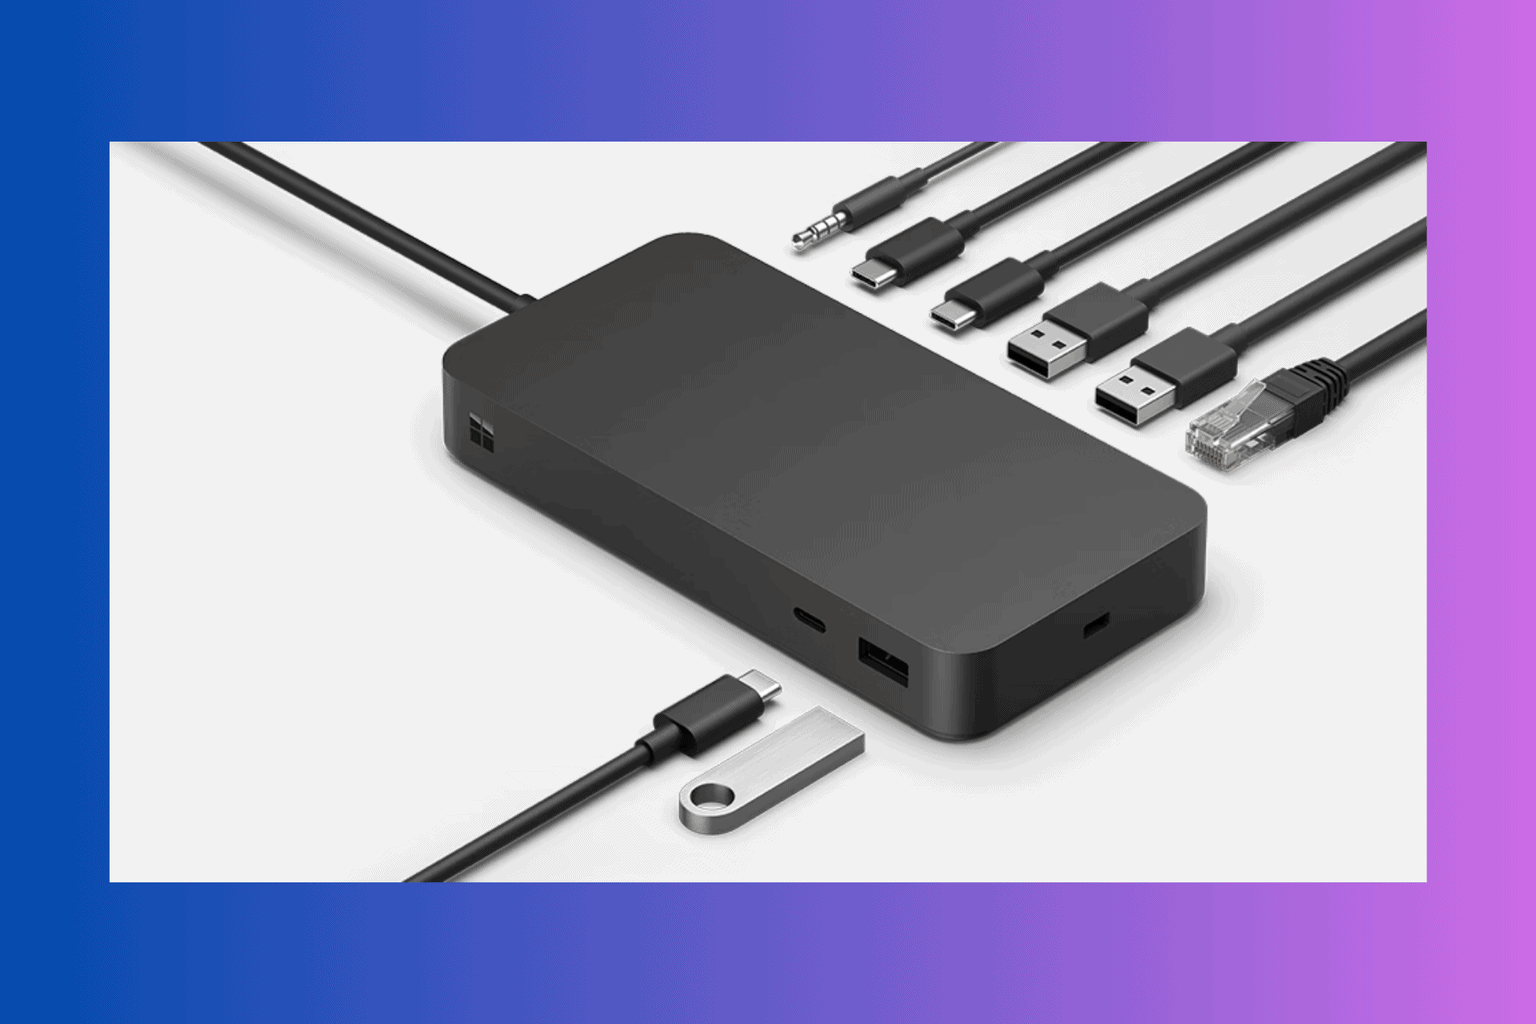
The Docking Station is a device that is used to connect the systems like laptops and desktops to other peripherals such as external monitors, keyboards, mice, etc.
When our readers attempted to connect their system to an external VGA display through the docking station, it was not working.
So they unplugged all of the wires from the system and docking station and attempted to rejoin them, but the problem persisted.
Some of our readers also found issues with their second monitor which was not getting detected on their Windows 11 system.
Why is the VGA monitor not working on docking station?
The factors that might be responsible for causing the problem discussed above in this article are listed below.
- Outdated graphics driver – These types of problems occur when the graphics driver is out of date
- Loosely connected wires – When the cable wires connecting the system to the docking station are not attached properly, a situation like this occurs
- An out-of-date Windows system – When the Windows system is not updated for a long time, this might also lead to such issues
- System requirements – There are some system requirements criteria that need to be met for the devices to work properly
- Device faults – When there are any internal or external issues, the VGA monitor may not work correctly on the docking station
This article will provide you with the five best possible methods for resolving this issue.
How to fix the VGA monitor if it is not working on docking station?
1. Update the graphics driver
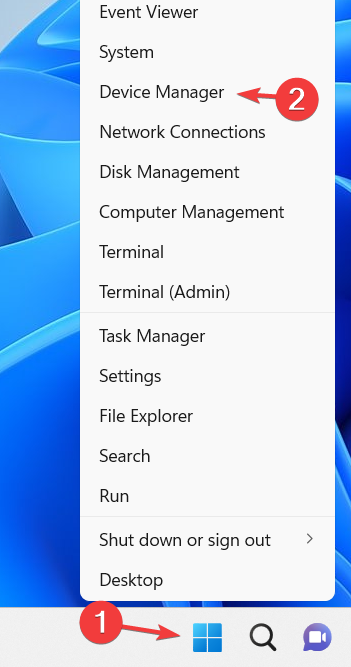
- Right-click on the Start button and select Device Manager from the context menu.
- In the Device Manager window, expand the Display adapters option from the list.
- Next, right-click on the graphics card and choose Update driver from the context menu.
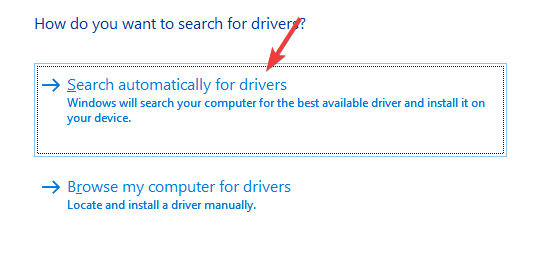
- In the Update window, select the Search automatically for drivers option.
- This will start looking for the latest driver updates available online and if any are found, it will update it.
- After the graphics driver is updated, restart the system.
- Download and install the Outbyte Driver Updater app.
- Launch the software and wait for the app to detect all incompatible drivers.
- Now, it will show you a list of all outdated drivers to select the ones to Update or Ignore.
- Click on Update & Apply Selected to download and install the latest versions.
- Restart your PC to ensure the applied changes.

Outbyte Driver Updater
Maintain your device healthy by letting OutByte Driver Updater find the latest driver options.2. Reconnect the wires
When a system or other peripherals such as a mouse or keyboard fail to function, it may indicate that the cable used to link them to the system is either damaged or weakly attached.
As a result, we request our users to inspect the cables for damage and reconnect them after unplugging them from the system.
If any of the wires are broken or damaged, unfortunately, you will need to replace them before trying again.
3. Update the Windows system
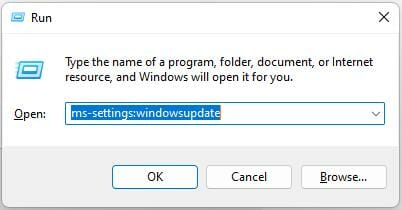
- Press the Windows and R keys together.
- Type ms-settings:windowsupdate in the Run box and press the Enter key.
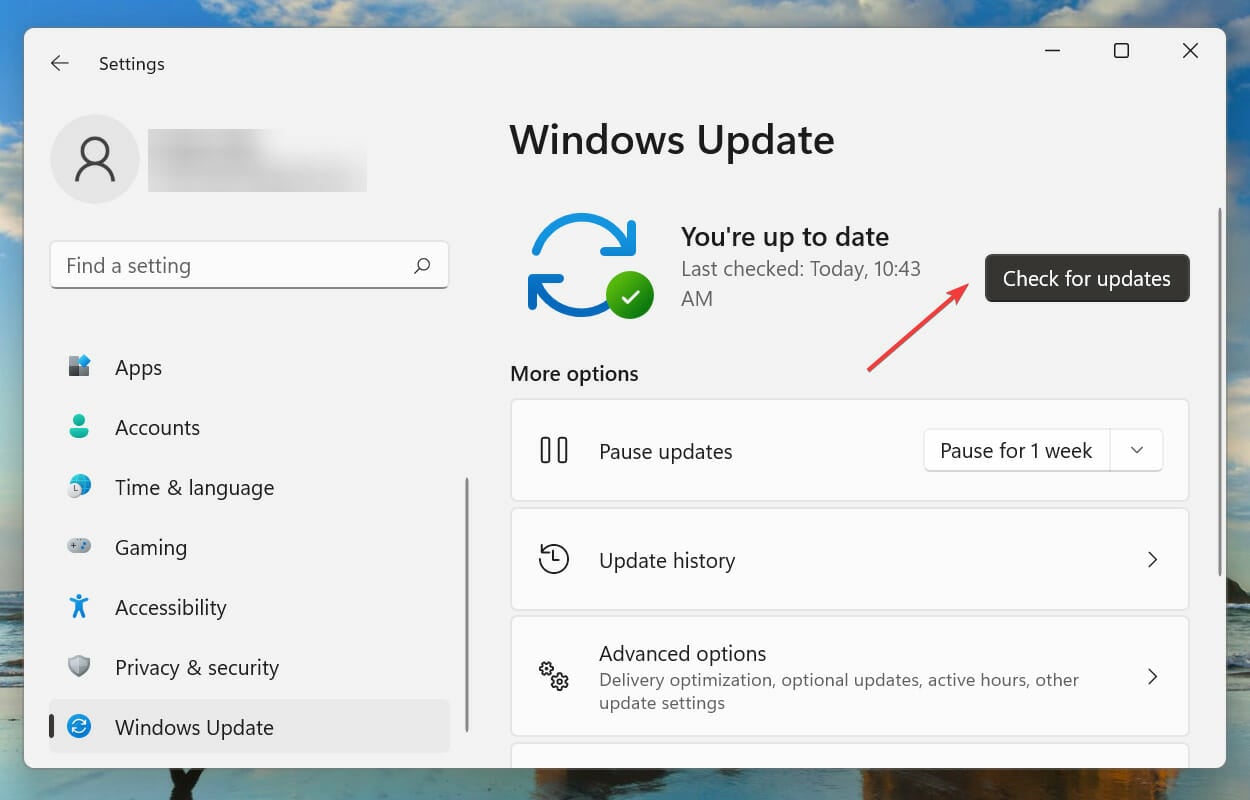
- This opens the Windows Update page.
- Click Check for updates button at the top right corner of the page.
- This starts checking for any Windows updates available online.
- If there are any, download and install them.
- After that, restart the system.
4. Rollback a problematic update
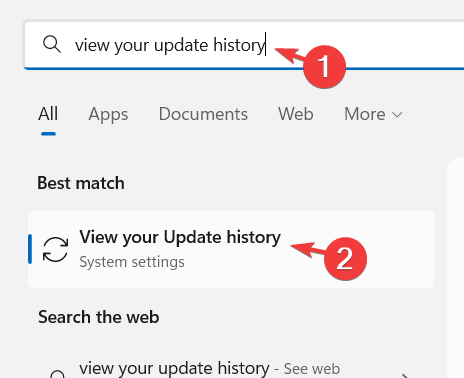
- Press the Windows key and type view your update history.
- Then select the View your Update history system settings from the results page.
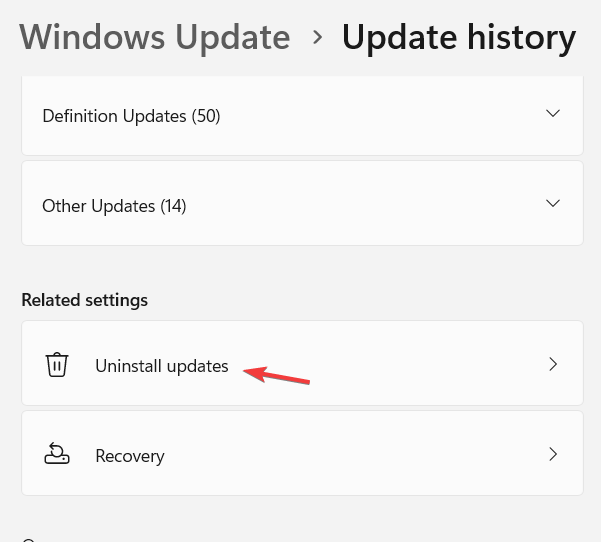
- This opens the Update history page.
- Scroll down to the Related settings section and click Uninstall updates.
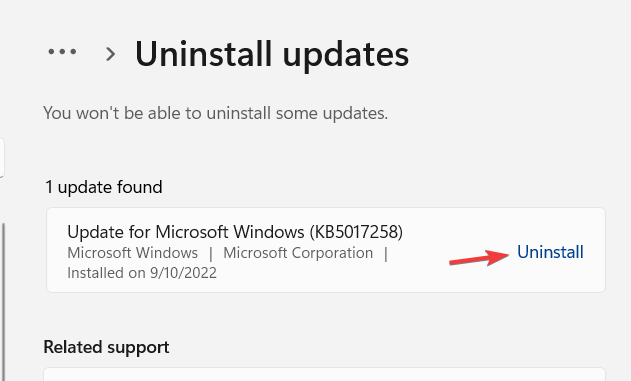
- If there are recent updates that were installed, they will be displayed here.
- Click Uninstall on the updates that you want to uninstall from the system.
- This will start uninstalling the updates from the system.
We usually recommend our readers to keep their systems updated at all times, but sometimes, a new patch can do more harm than good.
In this case, if the monitors stopped working on the docking station after a system update, it’s better to uninstall that update as shown in te solution above.
5. Physical damages
If there are any internal faults in the device or peripherals such as the keyboard, mouse, or monitors, this might be the reason why you are facing such issues with the system and device.
We recommend connecting the VGA monitor to another system via the docking station and seeing if this works.
If it still does not function when connected to another system, it is time to replace or repair the VGA monitor and try again.
Is VGA better than HDMI?
HDMI is always a better choice when compared to VGA because VGA still uses the older standard that carries only the video signal and not audio.
The HDMI cables offer better performance and are not prone to the interference of other unwanted signals.
HDMI is preferred by most gamers for a better experience and performance while playing heavy games.
Also, here is the guide to fixing any docking station issues on your Windows system.
Hope you found this article informative. Please let us know in the comments section below!


User forum
0 messages