Viber Not Installing on PC: 5 Ways to Fix It
Disable your antivirus as it tends to block non-Microsoft apps
Key notes
- Windows 11 allows users to download apps via the Microsoft Store and sideload apps using the Windows Subsystem for Android.
- Viber is available in the store, so users can download it from there or the official site.
- If you have trouble installing it, the installation file might be corrupt, so retry.

Viber is a chat messaging app that allows users to communicate with their friends and family members through text messages. While it does its job well most of the time, sometimes Viber is not opening and other times you can’t even install it.
If you have tried installing Viber on your PC and have faced any issues, this article will help you. We have covered all the possible methods that can be used to install Viber on a PC.
Why can’t I install Viber on my PC?
There are a few reasons why you might not be able to install Viber on your PC. Some of them include:
- Geo-restriction – Some applications are only available for certain countries. If Viber is not available in your country, it won’t install. You need to find a way to circumvent geoblocking.
- Firewall/antivirus interference – Your antivirus software may be blocking the installation file from being downloaded from the Internet.
- Hardware requirements – It is possible that your PC does not meet the minimum requirements for running Viber.
- Corrupted download – If you’re downloading Viber from an unofficial site, the installation file may be corrupted hence why you cannot complete the process. Also, check out if Windows 11 can detect pirated software.
- Insufficient space – If you’re running low on memory, you may have trouble completing and installing downloads.
- Outdated OS – If you’re running an older version of Windows, it may not be optimized for the updated version of Viber.
- Unofficial/discontinued version – Some features of Viber are only available on older versions of the app or have been discontinued. This means that even after downloading it, Viber might keep crashing on your PC.
It’s also important to note that if the problem is Viber not installing on your PC, the solutions below may help. However, if it is not an isolated issue and you’re wondering why apps won’t install on your PC, you may need a different approach.
What can I do if Viber is not installing on my PC?
Before you proceed to the slightly technical solutions, try the following:
- Check out the list of supported countries for Viber and ensure your region is listed.
- Ensure your PC meets the minimum system requirements to run Viber.
- Verify that you’re downloading from the official Viber website or Microsoft Store.
- Delete the download file and redownload.
1. Clear hard disk space
- Press the Search icon, type this pc in the search box, then click Open.

- Right-click on the drive you want to clean up and select Properties from the list of available options.

- Click on Disk Cleanup under the Properties window and wait for it to calculate how much space you’ll be able to free.

- Select the types of files you want to delete and click OK (you can delete temporary files, log files, files in your recycle bin, etc.).
- Click on Clean Up System Files and wait until the cleaner calculates everything. It will give you even more free space by cleaning some unnecessary system files.

- Press OK after you make your selection to confirm the deletion.
Performing a Disk Cleanup is just one of the many ways available to free some hard disk space. Don’t forget to check out our comprehensive article on more ways to get rid of junk files and unwanted apps.
2. Use a VPN
One of the most reliable solutions to this problem is to use a VPN to get around your region’s restrictions and bypass Viber’s server block. In this case, you can use a VPN that masks your IP address, making it impossible for an ISP to recognize your device.
Here’s how you can easily get one of the best VPN services:

- Open the app and select Choose location to view all the available IP locations.
- Click on the Recommended button and pick your region.
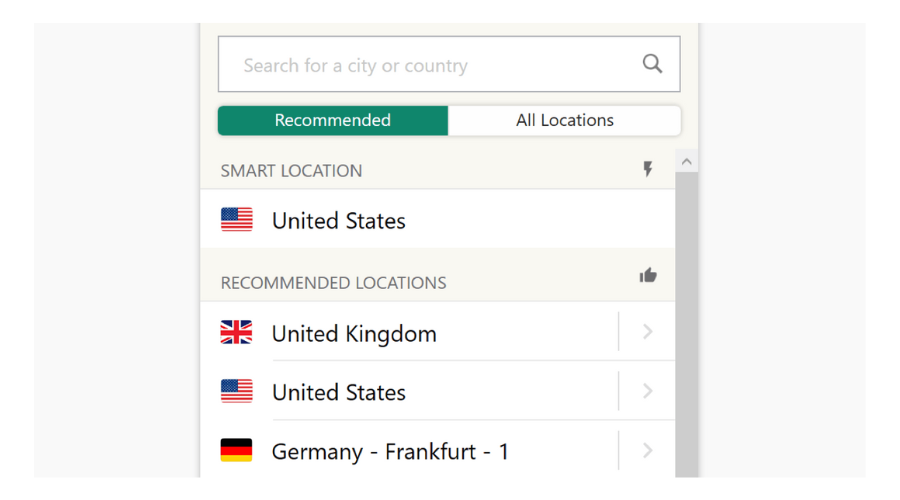
- Enjoy using the ExpressVPN service.
A VPN will allow you to access content on Viber from anywhere in the world.

ExpressVPN
Never worry about geo-blocking and solve connectivity issues with this powerful VPN solution.3. Scan for viruses
- Press the Windows key, search Windows Security and click Open.

- Select Virus & threat protection.

- Next, press Quick scan under Current threats.
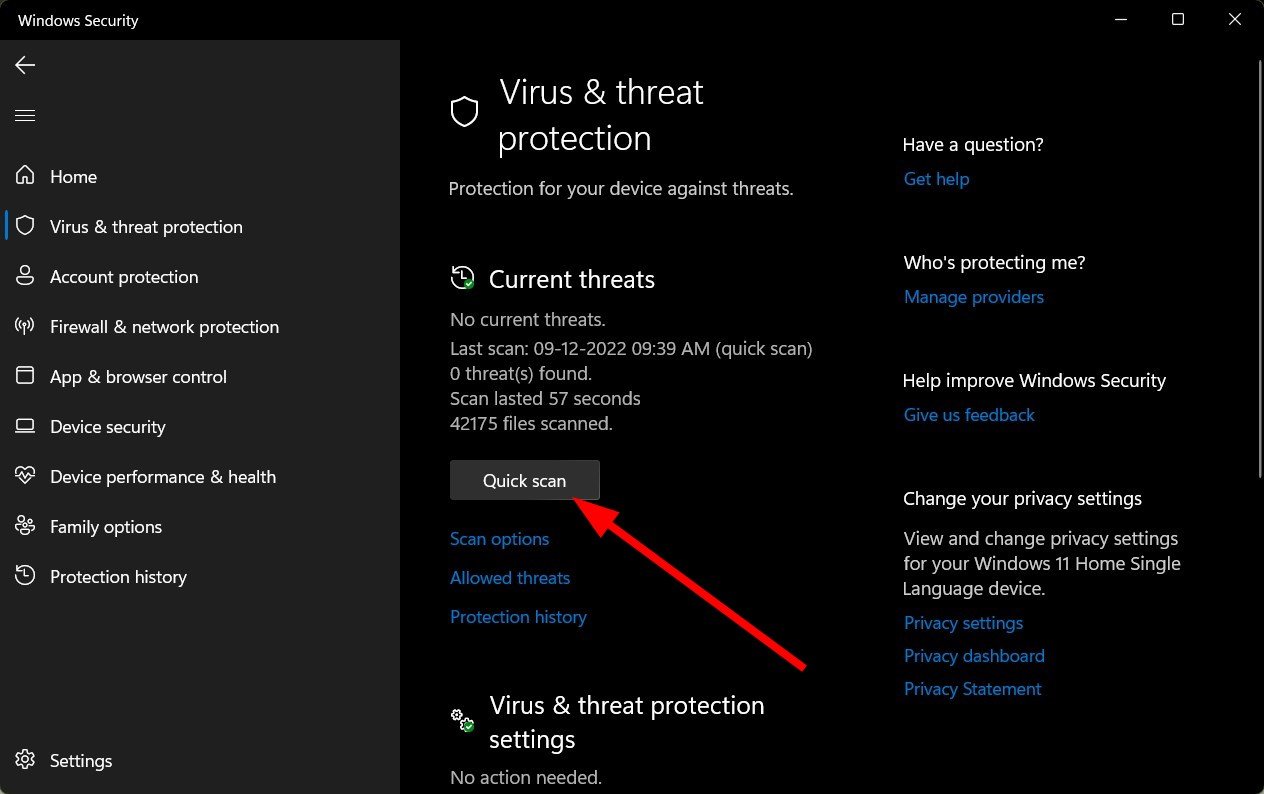
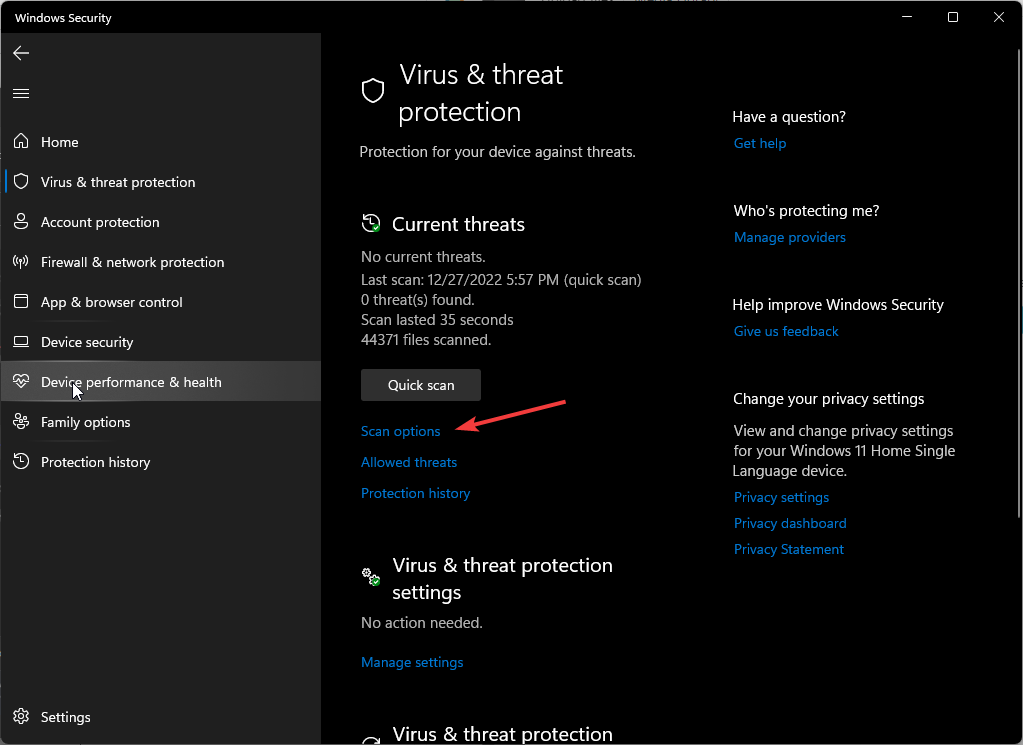
- If you don’t find any threats, proceed to perform a full scan by clicking on Scan options just below Quick scan.
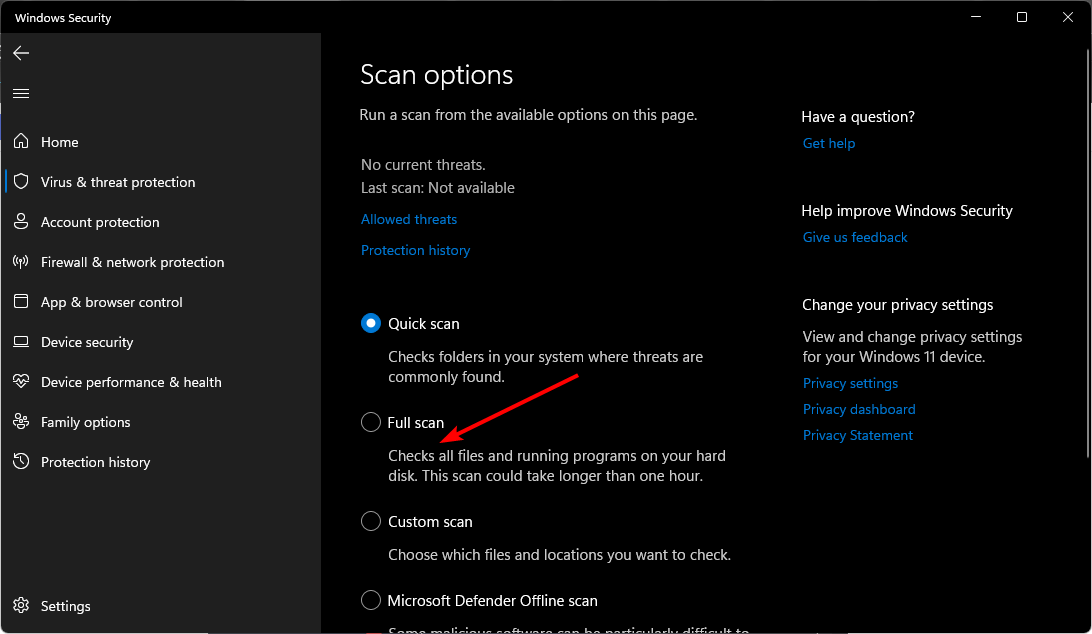
- Click on Full scan to perform a deep scan of your PC.
- Wait for the process to finish and restart your system.
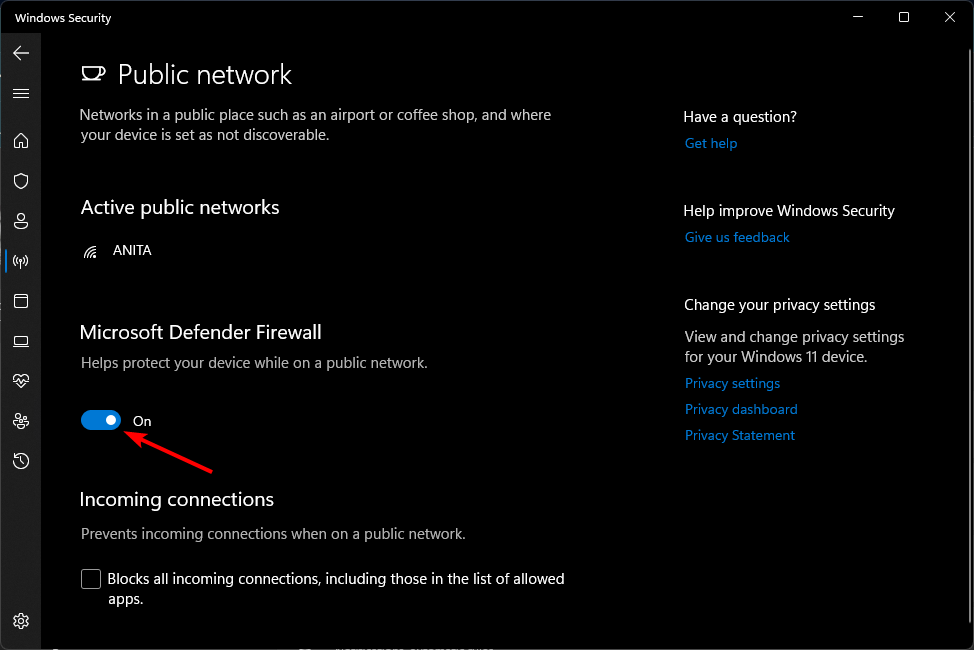
4. Disable antivirus/firewall temporarily
- Hit the Windows button, type Windows Security in the search bar, and click Open.
- Click on Firewall & network protection then select Public network.
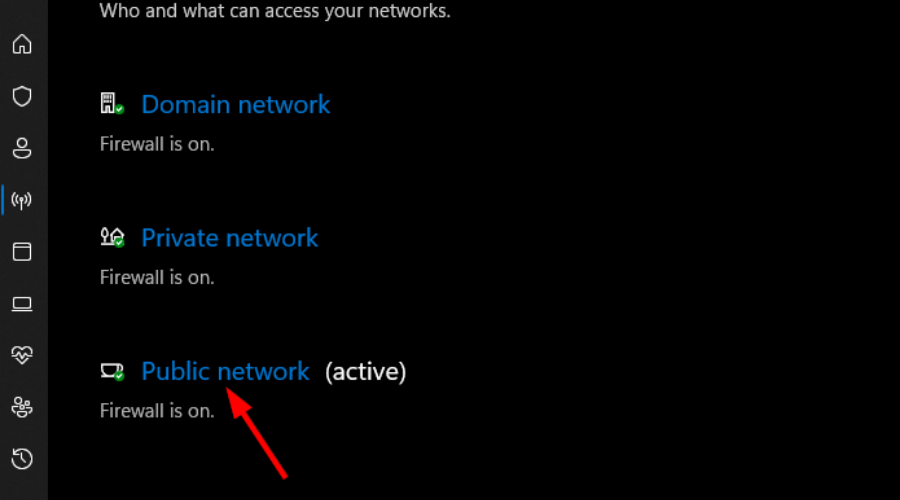
- Locate Microsoft Defender Firewall and toggle the off button.
5. Update your OS
- Hit the Windows key and click on Settings.

- Select Windows Update on the left pane then click on Check for updates.
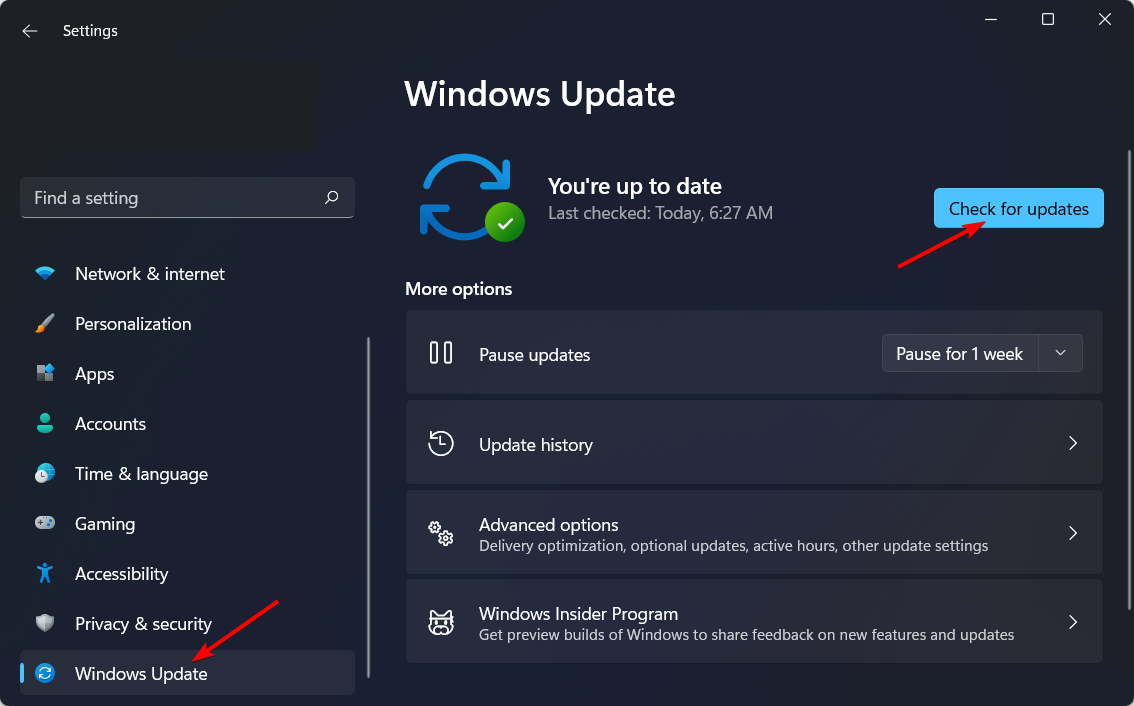
- If available, click Download & install.
We have a lot more in store so if you have problems with Viber not delivering your messages, or system temporary failure, check out our article for quick fixes.
Don’t forget to acquaint yourself with offline messaging apps so that you can stay connected to your friends and family even without an internet connection.
In the comment section below, Share which method worked for you if Viber was not installed on your PC.
Read our disclosure page to find out how can you help Windows Report sustain the editorial team. Read more


Improve this guide


User forum
0 messages