How to View Apple Photos on Windows 10 PCs
You need an Apple ID before you can access iCloud
6 min. read
Updated on
Read our disclosure page to find out how can you help Windows Report sustain the editorial team Read more
Key notes
- Apple has its own environment and it could be difficult to see your Apple photos on Windows.
- You can install a powerful Apple photo viewer for Windows like Adobe Lightroom.
- Another method of opening Apple photos on Windows is to create an Apple ID on your PC.
- You can also open the photos library on Windows using a dedicated tool.

Apple is notorious for locking down its products and services from outside access.
In the case that you’re a Windows user, you need only install a driver to allow access to your iCloud account from a PC in order to view your Apple photos on the PC.
Photos are not the only thing you can download from iCloud: you also access emails, contacts, calendars, and reminders.
How can I open Apple photos on Windows 10?
1. Use Adobe Lightroom
Adobe Lightroom offers cross-platform functionality so you have access to all your photos regardless of the platform you use. Easily edit, manage and share photos with just a few taps or clicks.
This powerful software allows you to search, your library, and do on-the-fly edits and it supports an impressive amount of cameras and mobile devices so you can edit your RAW files with ease.
Take advantage of all of these features for free with the Lightroom app for mobile, PC, and Mac.

Adobe Lightroom
Adobe Lightroom is a great cross-platform software that can view and edit most image formats.2. Open Apple photos on PC via iCloud
The iCloud application is available for download on PC on the Apple official website. Using this app, you can easily access, edit and download your Apple photos to your Windows device.
1. Download iCloud for Windows from Apple. The installation process should start automatically. Otherwise, you need to go to File Explorer and manually open the iCloud Setup.
2. After the installation, restart your computer to let iCloud finish the configuration.
3. Make sure that iCloud is running when you open your PC. Otherwise, you’ll need to go to the Start menu by pressing the Windows button, and then search for iCloud.
4. Double-click iCloud to open it.
5. Enter your Apple ID to access your iCloud Account.
6. Choose what kind of content you want to have synchronized with your iCloud account. Of course, the most important box to check is the one for photos.
7. Click on the Apply button to finish the configuration.
8. iCloud has automatically created a folder called iCloud Photos. All the pictures or videos you add to the iCloud folder from your PC can be viewed on any Apple device connected to your account.
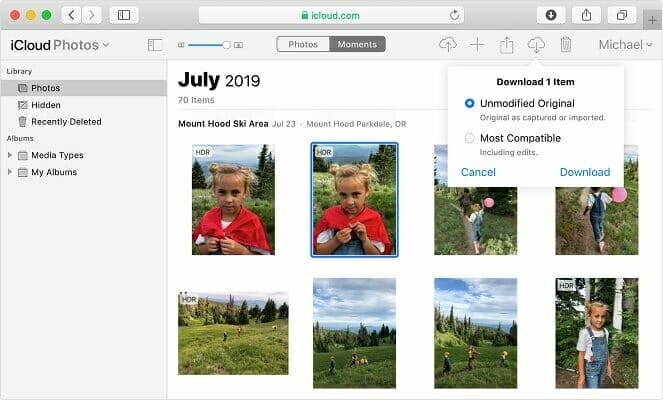
You can also access those files from iCloud.com. Through the iCloud Photo Sharing feature, you can share pictures and videos of your most important moments with friends.
If you want to, you can save the Apple photos to your PC as well, via the download feature.
How can I create an Apple ID for iCloud?
Before you can access your Apple photos, you need to create an Apple ID. Here are three easy methods to do that.
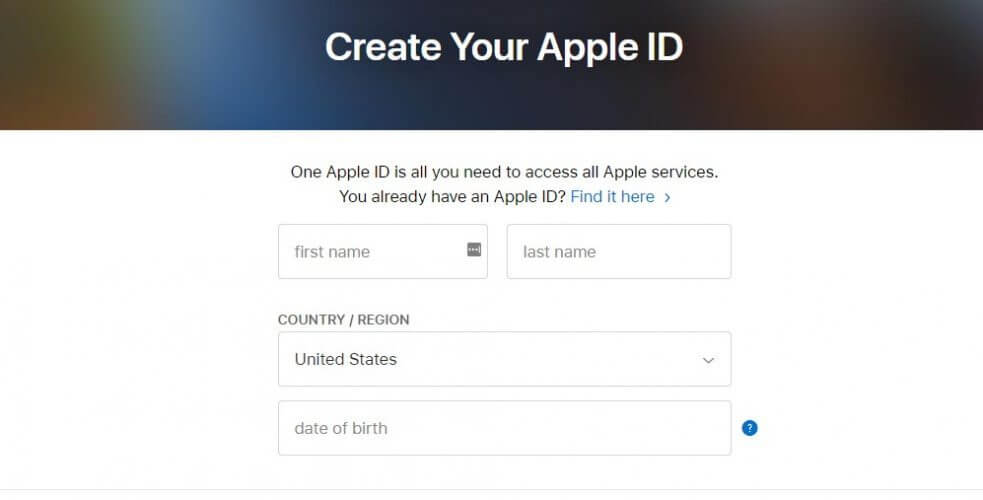
1. Create an Apple ID using your Windows 10 computer
- Go to Apple’s official page to create your account.
- You will be directed to the personal information table (Enter an email that you want to be attached to the Apple account for recovery).
- Choose a strong password.
- Enter your personal information.
- Select and answer three security questions (Pay attention because these questions will be used for the account recovery process).
- Select your country.
- Check/uncheck if you want any notifications from Apple.
- Enter the captcha code and click on the Continue button.
- You will receive a mail with an activation code that you have to enter in the dialog box displayed on the Apple website to finish your account activation.
- Check if your account has been activated.
Open your browser and go to the Apple ID website. An Apple ID and the iCloud Account are pretty much the same things because through the Apple ID you have access to the iCloud storage.
2. Create an Apple ID using an iOS device
- Go to Settings. You can use this feature to sync your files from the device to your iCloud account.
- Tap on iCloud to open the iCloud menu on your iOS device.
- If an account is already signed in, you have to sign out to create a new one.
- After you signed out tap on the Get a Free Apple ID button to start the account creation process.
- Enter your birthday. This will determine what kind of content you can access.
- Enter your real name. The Account information must comply with billing information.
- Enter your e-mail address (Make sure that you still have access to that address because you will receive an activation mail, and if your iCloud account is compromised, you can recover it using this e-mail address).
- Enter a password (Choose a strong one and use a combination of letters and numbers. Remember that the iCloud account contains a lot of your personal information).
- Choose and answer 3 security questions (You will have to answer the same questions every time you want to change the account settings).
- Add a rescue e-mail address (Even if it is an optional feature, we strongly recommend you to do that because it increases the security level of your account).
- Finish the account configuration by accepting the Apple terms and conditions. After accepting, you will be logged in with your new ID.
iOS devices have a preset feature in the Settings app for activating the iCloud account.
3. Using an OS X device
- Click on the Apple menu button from the upper-left corner of your screen.
- Select System Preferences.
- This will open a window with different programs and applications installed on your device. Select the iCloud icon to open the iCloud settings menu.
- It will open a dialog box where you can sign in to your account, if you already have one, or create a new account. In this case, you must click on the Create new Apple ID.
- You have to fill out a form with your personal information (active e-mail, strong password, and security questions). Make sure that you will remember all the information because with their help you can recover your account if it gets compromised.
- Apple will send you a mail with an activation code.
- After you enter the code, you will have access to your iCloud account.
Depending on what kind of information you want to access from iCloud, you need to use different software packages.
For example, for mail, contacts, calendars, and reminders you will need any version of Outlook from 2007 until now.
For bookmarks, you will need Safari 5.1.7 or later, Google Chrome 28 or later, Firefox 22 or later, or Internet Explorer 10 or later. And for documents, you will need to install iCloud Drive.
Manage your iCloud storage space
iCloud is a free service that offers users 5GB of cloud space to store their data. For most of us, this space is often insufficient and because of this, Apple provides us with the opportunity to upgrade our storage space.
Depending on our needs and budget, you can increase the capacity of the cloud up to 2TB. You can find a price list right on Apple’s website. This upgrade is not permanent and comes with a monthly subscription.
How can I upgrade iCloud for Windows?
All you have to do is open the Apple Software Update on your PC and it will notify you when updates are available. To receive update notifications, you need to configure the Apple Software Update.
From the software’s interface, click on the Edit button and go to Preferences. From that menu, you can choose how often you would like to check for updates (daily, weekly, monthly, or never).
How to turn off or uninstall iCloud for Windows?
- Type control in the search tab and click on Control Panel from the results.
- Select Programs and Features.
- You will see a list of all the installed programs on your computer.
- Click on iCloud and select Uninstall.
- Click OK to begin the uninstalling process.
We hope you found our guide helpful and managed to view your Apple photos from your Windows 10 PC. Let us know in the comments section below if you have any questions.

