How to Fix WebDriver Cannot Be Resolved to a Type
Check for missing JAR files
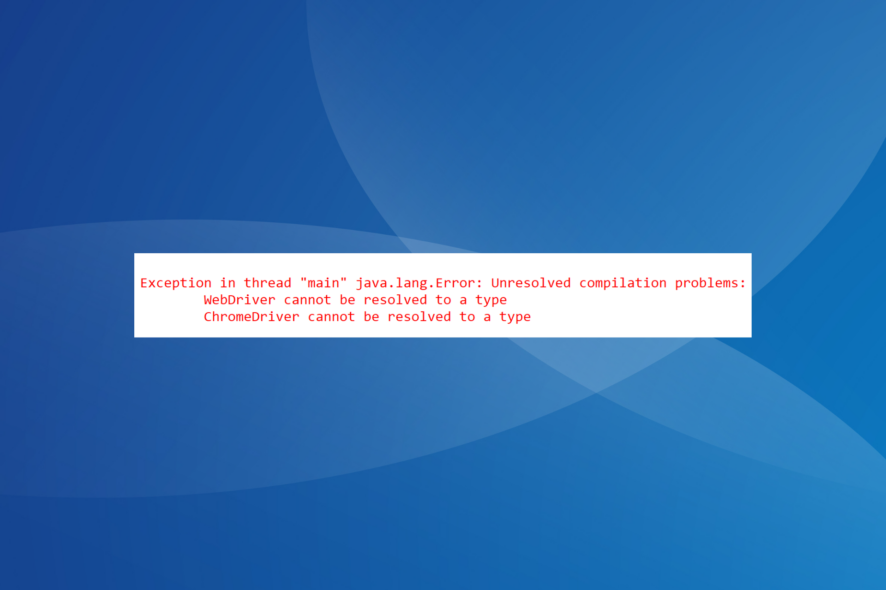
The WebDriver cannot be resolved to a type or ChromeDriver cannot be resolved to a type errors encountered when running a script highlight compilation issues. This is usually due to missing Selenium jar files, but a misconfigured path or similar problems can also trigger the error!
How do I fix the WebDriver cannot be resolved to a type error?
Before we start with the slightly complex solutions, try these quick ones:
- Restart the device and try again.
- Change the Java Compiler’s compliance level to 1.8.
- Check if you are missing the selenium-java-2.53.0-srcs.jar and selenium-java-2.53.0.jar files from Selenium 2.53.0. These are not included in lib but must be included manually from the same folder.
1. Add Selenium jar files to ClassPath
1.1 Download the JAR files
- Go to Selenium’s official website, and download the language-specific client drivers for Java.

- Now, locate the downloaded .zip file, right-click on it, and select Extract All.
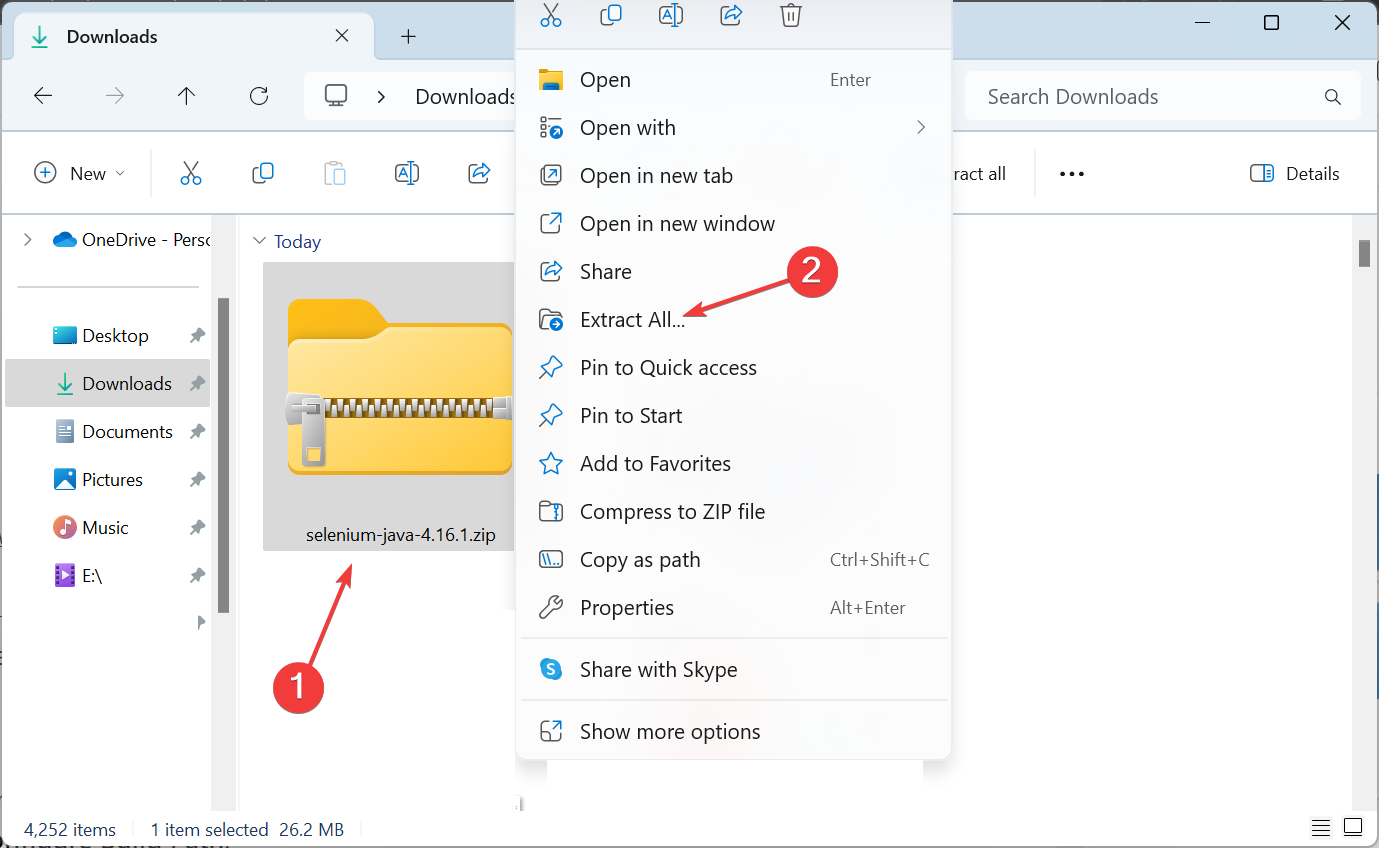
- Go with the default extraction path and click the Extract button. To change the path, click on Browse and set a new one.
- Now, move the extracted files to the preferred location.
1.2 Adding the JAR files
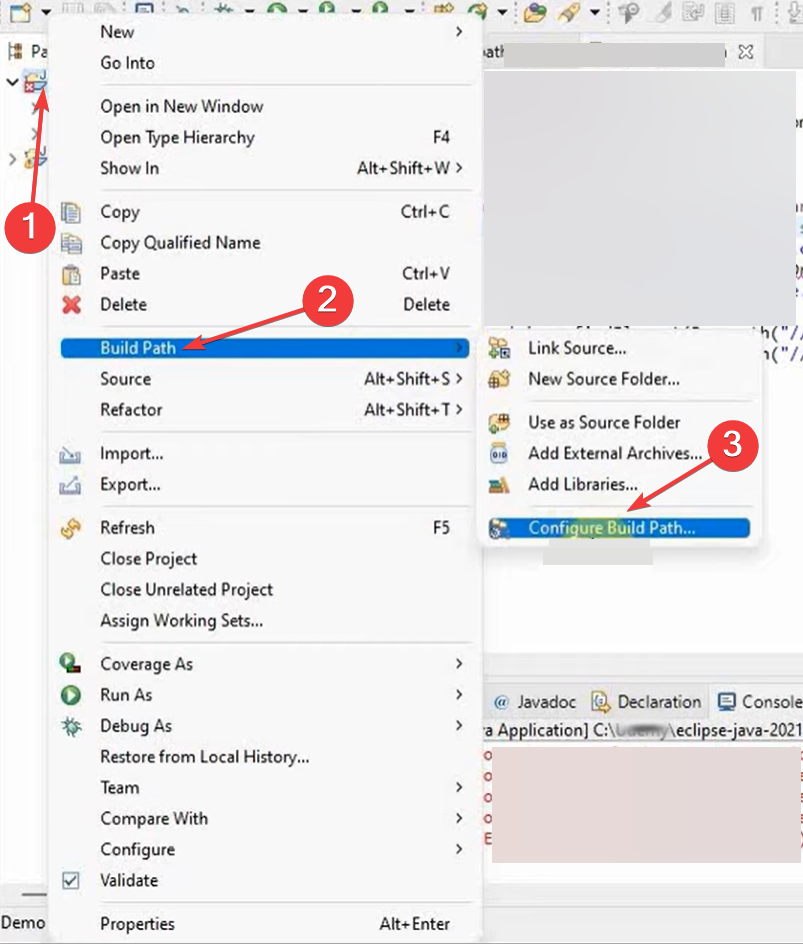
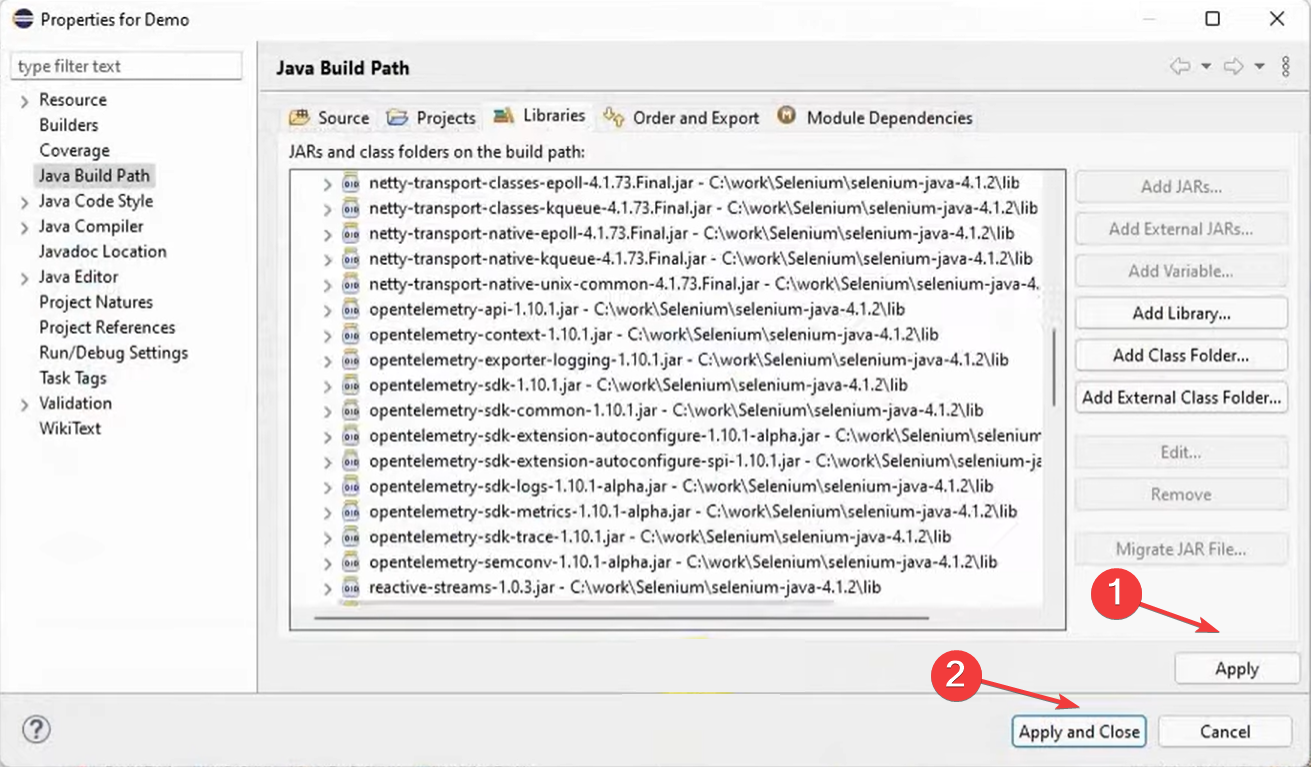
- Right-click on the project in the navigation pane, hover the cursor over Build Path in the context menu, and select Configure Build Path.
- In the Libraries tab, expand the Modulepath entry, select all the files listed here, and click the Remove button.
- Now, select Classpath and click on Add External JARs.
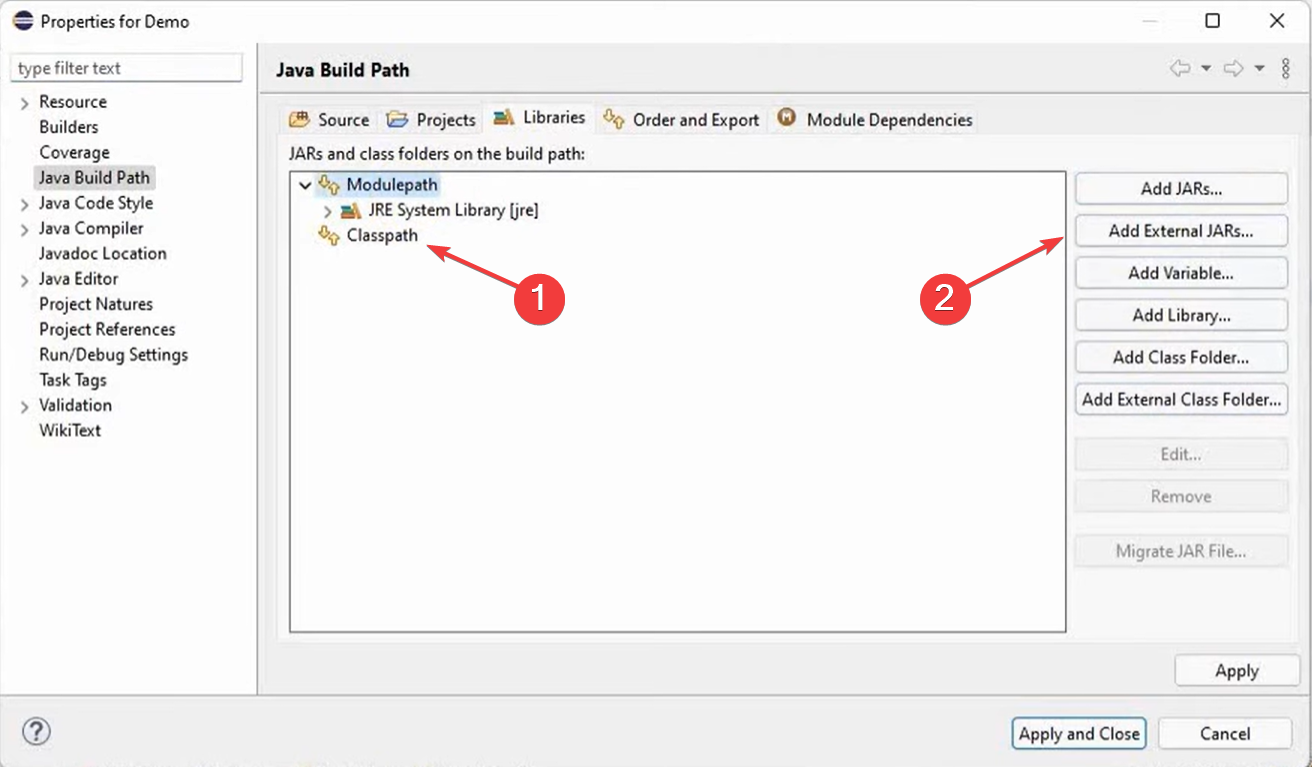
- Navigate to the path where the downloaded JAR files are stored, hold the Shift key, then select them all, and click on Open.
- Once done, click on Apply and then Apply and Close for the changes to come into effect.
When compiling Selenium projects in Java, you need to add the Selenium Jar files. While doing so, make sure to get the latest stable version and also include jar files from the lib folder.
2. Change the path
When adding the property, many users miss out on the lowercase and have parts of it in uppercase instead. Also, the path must include chromedriver as chromedriver.exe.
So, if you currently have the property as (the path is just for reference, Username is the active profile name): System.setProperty("Webdriver.Chrome.driver","/C:/Users/Username/Downloads/chromedriver_win321/chromedriver");
Change it to: System.setProperty("webdriver.chrome.driver","C:/Users/Username/Downloads/chromedriver_win321/chromedriver.exe");
This should fix the WebDriver cannot be resolved to a type error. Also, it works for ChromeDriver and Firefoxdriver since the idea remains the same.
Before leaving, find out how to run JAR files in Windows and you will be able to develop codes seamlessly.
We recently covered Driver cannot be resolved Selenium error, so don’t miss our dedicated guide to see how to fix it. Steps like those outlined above could also fix SNP error request timeout.
For any queries or to share what worked for you, drop a comment below.
Read our disclosure page to find out how can you help Windows Report sustain the editorial team. Read more


Improve this guide


User forum
0 messages