What is Remsh.exe and How to Fix its High CPU Usage
Check out this detailed guide to understand more about remsh.exe file
Key notes
- Remsh.exe is a legit file from Microsoft that was rolled over with the Windows 10 update.
- It affects only a few versions of Windows 10 OS, which is why it isn't visible to everyone.
- In this guide, we have explained what is remsh.exe and how you can fix high CPU usage errors associated with it.
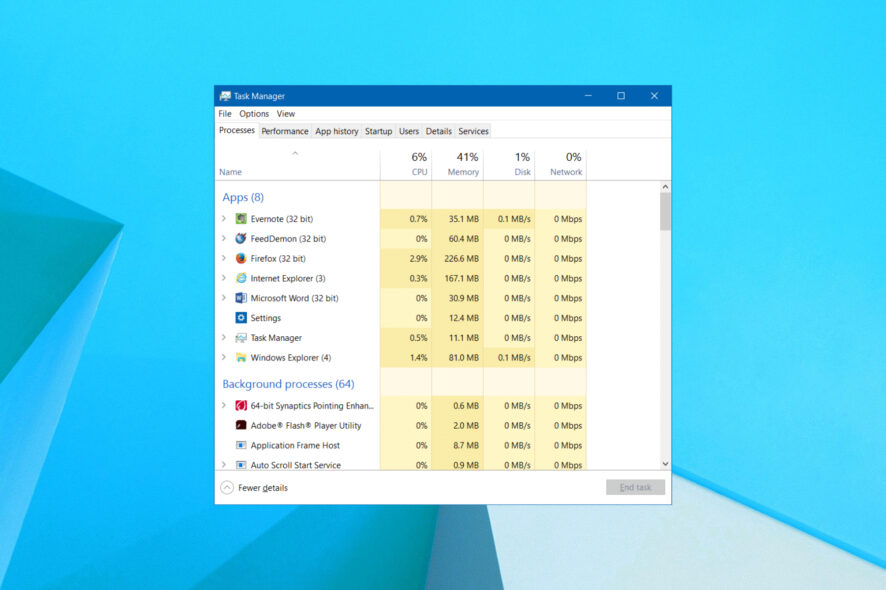
There are multiple user reports that claim that from nowhere a new process, remsh.exe started to appear on their Task Manager, and also has high CPU usage. There is also debate about whether one should get rid of it or not.
In this guide, we will give you a proper guide on how what is remsh.exe and how you can fix the high usage issue associated with it. Let us get right into it.
What is remsh.exe?
Remsh.exe is available on a few Windows 10 machines. It was introduced with Microsoft KB4023057 update for Windows 10 versions 1507, 1511, and 1607.
Regarding this Microsoft has stated that only certain builds of Windows 10 Versions 1507, 1511, and 1607 require this update. Devices that are running those builds will automatically get the update downloaded and installed through Windows Update.
So, for those who have questions regarding what is remsh.exe? or if is it malware, the answer is no. Remsh.exe is not malware but in fact a file by Microsoft itself. Remsh.exe file was introduced to certain versions of Windows 10 to address the update processes in Windows 10.
However, the remsh.exe file is susceptible to being used in the phishers scheme because of its requirement for certain Windows 10 versions. You can check the legitimacy of the file by following the steps in the next section.
How can I verify the signature of remsh.exe?
- Press Ctrl + Shift + Esc to open Task Manager.
- Click on the Processes tab.
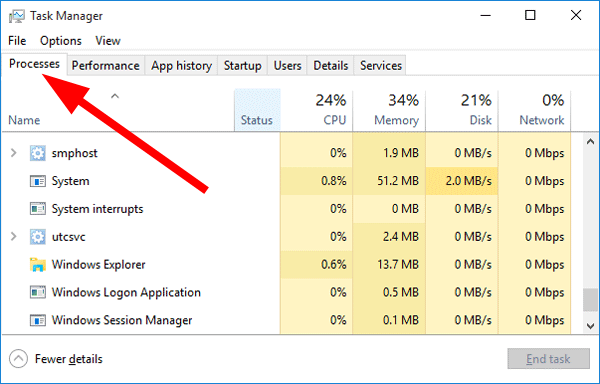
- Locate the remsh.exe process, right-click on it and select Properties.
- Go to the Digital Signatures tab.
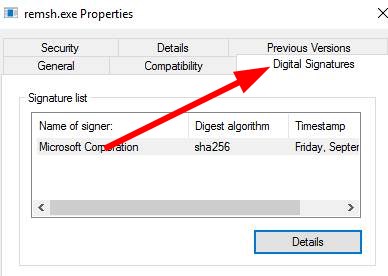
- See the Name of the signer and check if it corresponds with Microsoft or not.

If it does, then it is safe, and if it does not, then it is malware. You can run a malware scanner or any other antivirus software to remove the file from your PC.
We have a list of some of the best and tested antivirus and malware scanners that will help you check if the remsh.exe file on your system is legit or not.
Now let us check out how can we fix the high CPU usage error with the remsh.exe file in the below section.
How can I fix the high CPU usage issue with remsh.exe?
1. Uninstall the Windows Update KB4023057
- Press the Win + I buttons to open Windows Settings.
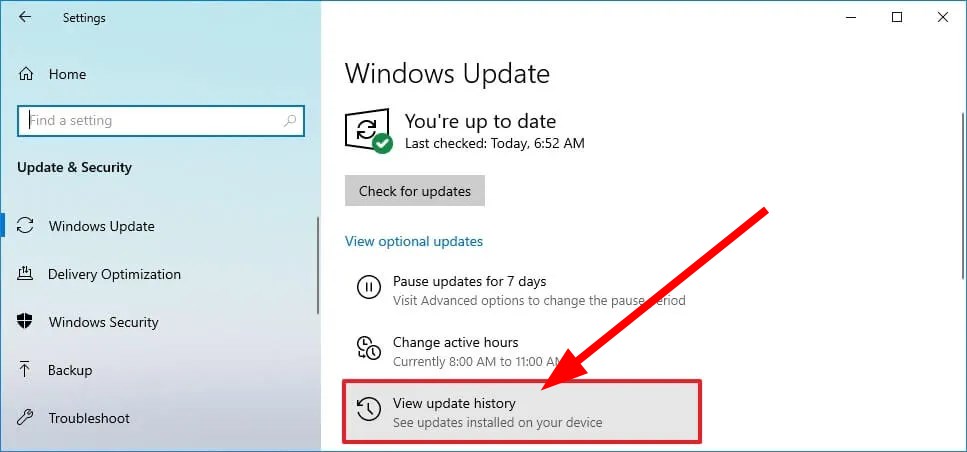
- Click on the Update & security option.
- Click on View update history.
- Hit the Uninstall updates option.
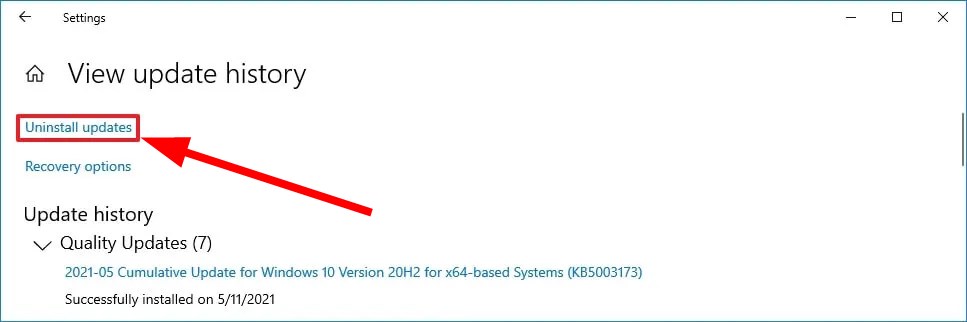
- Locate the KB4023057 update.
- Click on KB4023057 update and select Uninstall.
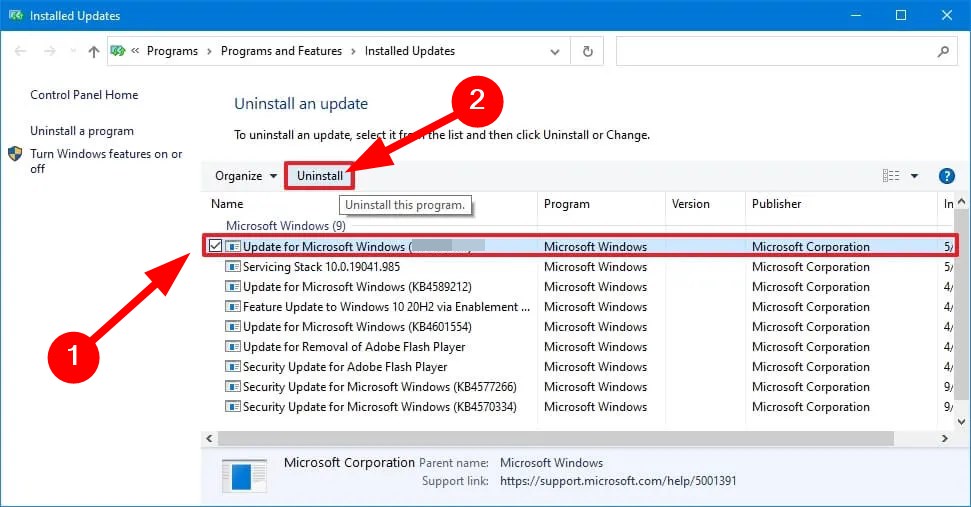
- Follow the on-screen prompts to completely remove the update from your PC.
- Restart your PC and see if this resolves the error or not.
This solution is primarily for users on Windows 10 since the remsh.exe high CPU usage has been reported by Windows 10 users. In case you are on a newer version, i.e., Windows 11, then you can check out the other solutions.
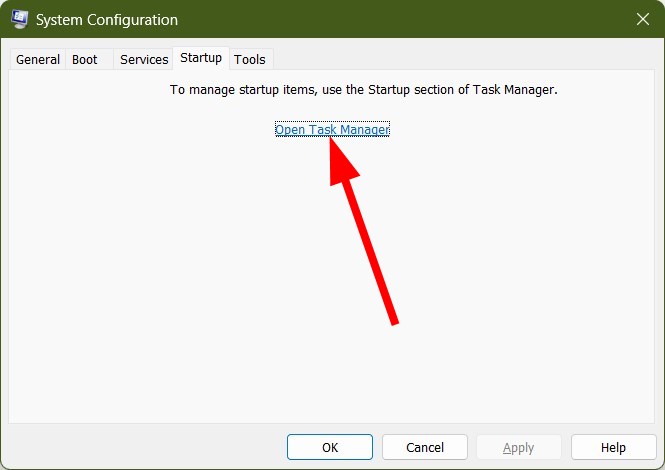
2. Disable startup applications
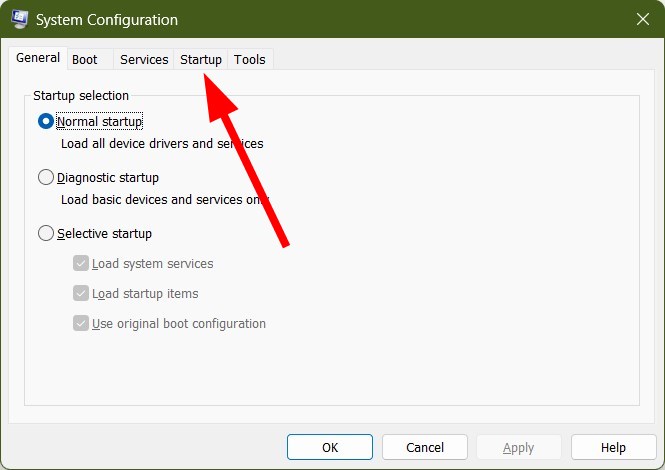
- Press the Win + R keys to open the Run dialog.
- Type msconfig and press Enter.
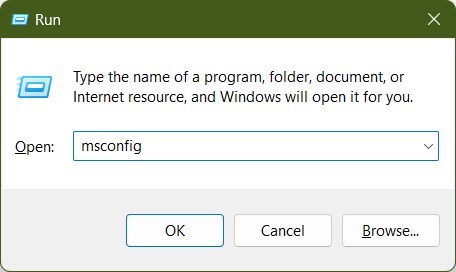
- Click the Startup tab.
- Click the Open Task Manager link.
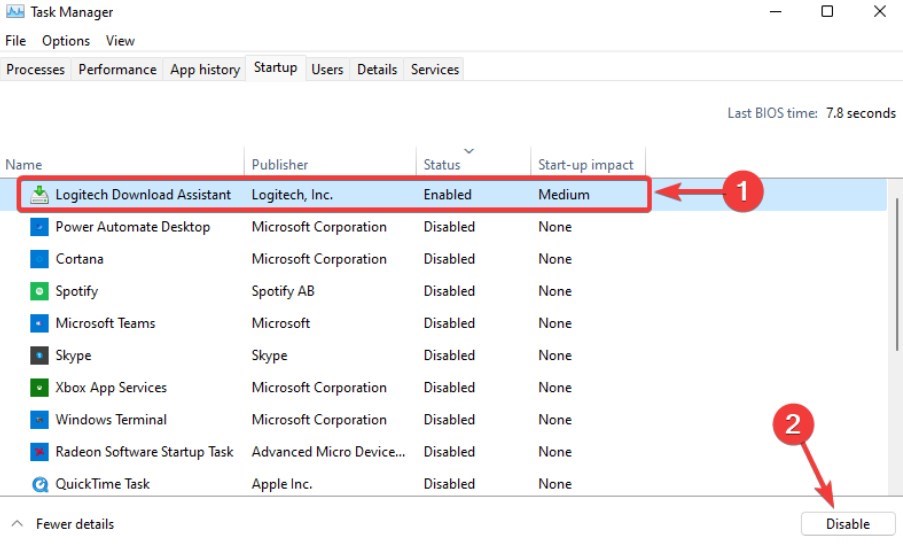
- Click on the Status row title twice to view enabled tasks.
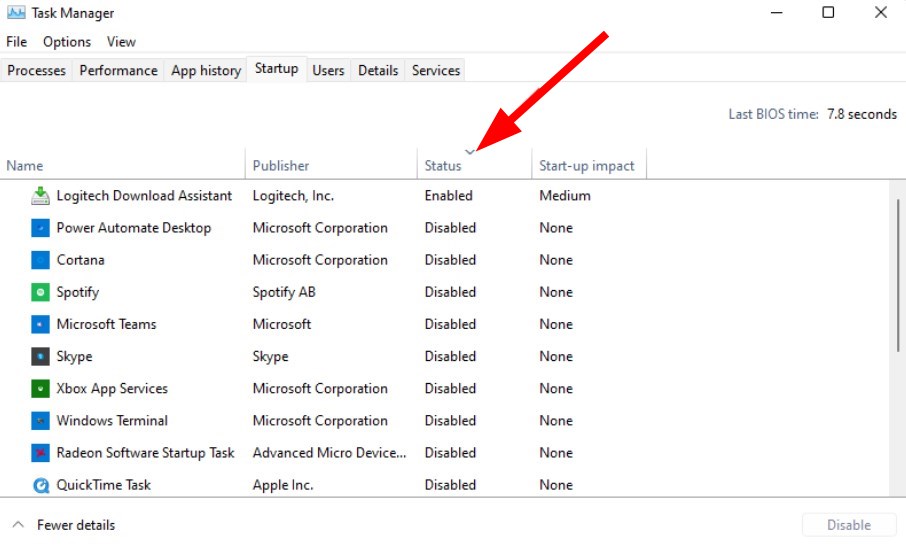
- Locate the applications that are Enabled, and Disable those that you don’t want starting at Windows startup.
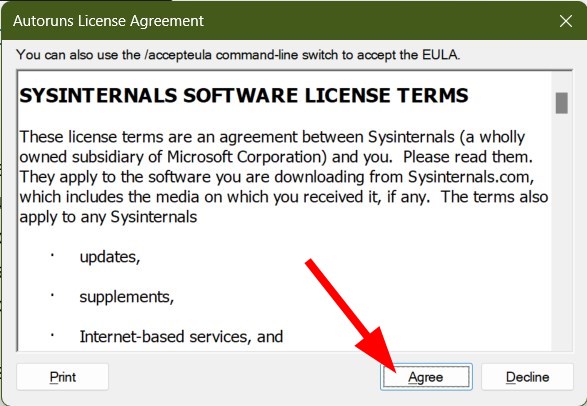
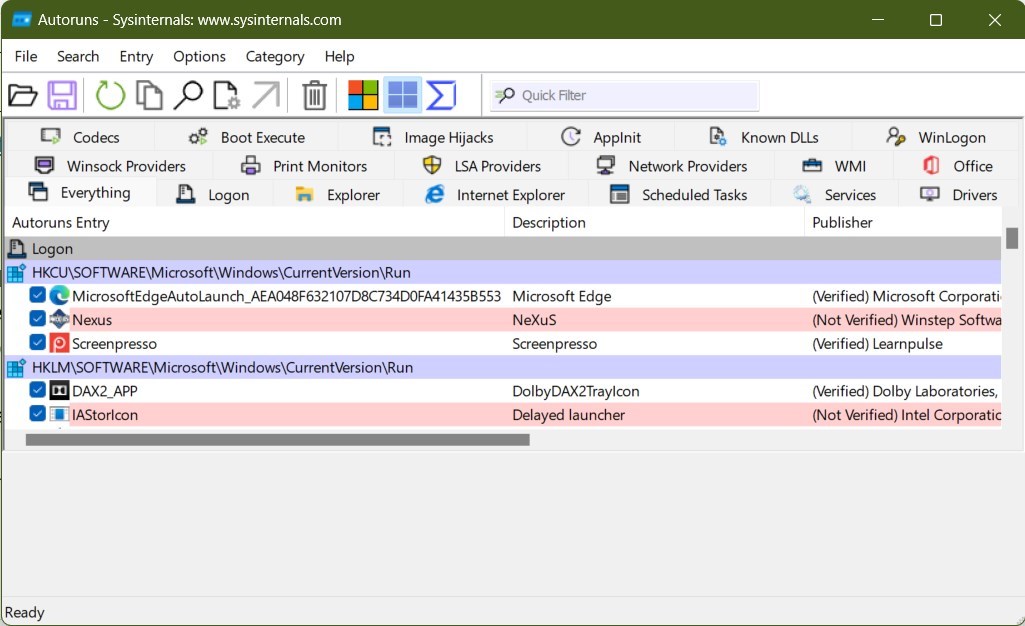
3. Use Autoruns to disable remsh.exe
- Download the Autoruns tool from the official website.
- Extract the ZIP file.
- Open the Autoruns.exe file.
- Agree to the terms.
- The list of Autoruns will populate, wait for it to get complete.
- Press Ctrl + F to bring the Search function.
- In the search box, type remsh.exe and press the Find Next button.
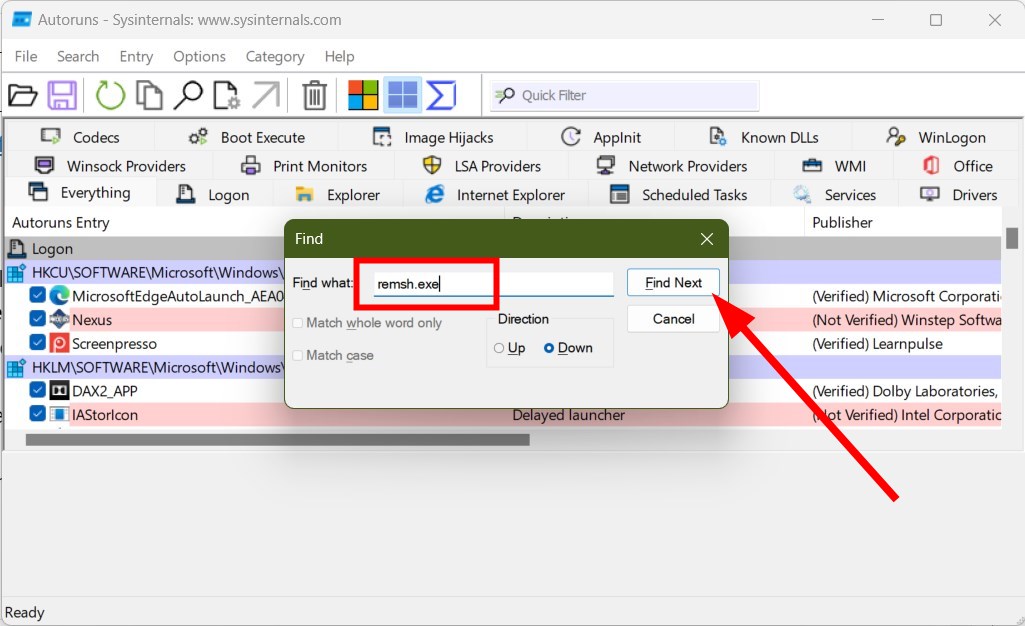
- Right-click on the highlighted entry and select Delete.
- This will remove the startup key associated with remsh.exe from your PC.
- Close Autoruns.
- Restart your PC and check if this fixes the high CPU usage because of the remsh.exe issue or not.
Autoruns is a freeware provided by Microsoft that allows you to know what processes will run after your PC boots up.
Here, you can use this tool to locate the processes associated with the remsh.exe and delete it so that it does run during the startup and gets rid of the high CPU error.
For other solutions to fix the high CPU usage error, you can refer to our guide, which lists some of the most effective solutions to resolve the problem.
You can also try disabling all the unwanted background processes running on your Windows PC. This has also helped users fix the issue.
Let us know in the comments below if you liked this comprehensive guide on what is remsh.exe file and how you can resolve the high CPU usage problem associated with it.
Read our disclosure page to find out how can you help Windows Report sustain the editorial team. Read more


Improve this guide


User forum
0 messages