How to Repair Windows 10 Using a USB [Easy Steps]
All the information you need to repair your PC
4 min. read
Updated on
Read our disclosure page to find out how can you help Windows Report sustain the editorial team. Read more
Key notes
- If you want to repair your Windows 10 with a USB, you need to create a bootable installation media.
- Booting into your PC with a USB allows you to repair corrupt system files by running some commands.
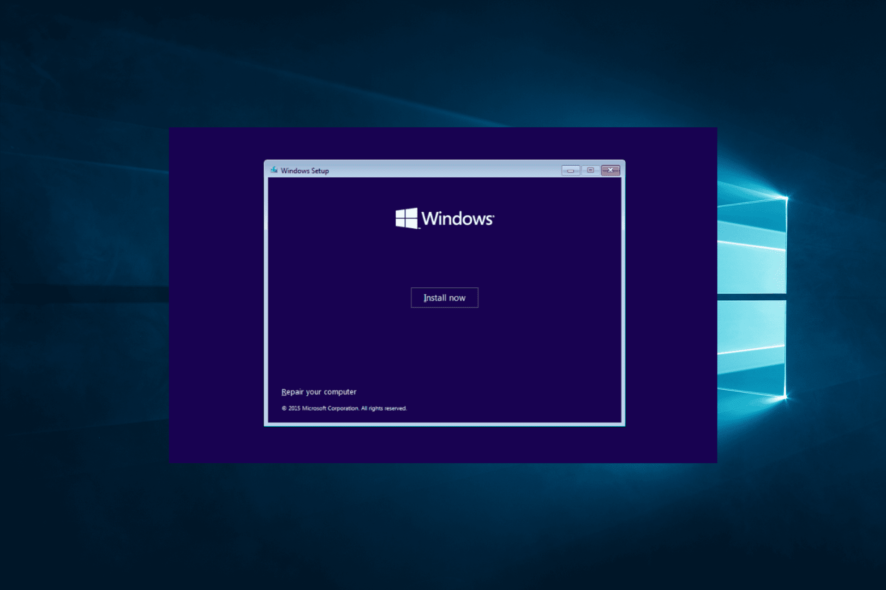
There are times your PC encounters issues like the dreaded BSOD, and you might find it hard to boot it. In this case, you are left with no option but to try to repair Windows 10 with a USB.
While this process might seem complex, it is actually straightforward with little guidance. In this guide, we will show provide you with detailed steps to follow to repair and restore your PC using a USB drive.
Can I repair Windows 10 corrupted files with USB?
More often than not, issues with Windows 10 are caused by problems with your system files. Fortunately, there are different options available to repair your system files, even with a USB drive.
You only need to run commands like the usual DISM or SFC scans or, in some cases, the bootrec command to fix your boot files. However, you still need to know how to go about this, and we will show you how to do it.
How to repair Windows 10 from USB?
1. Download and create the installation media
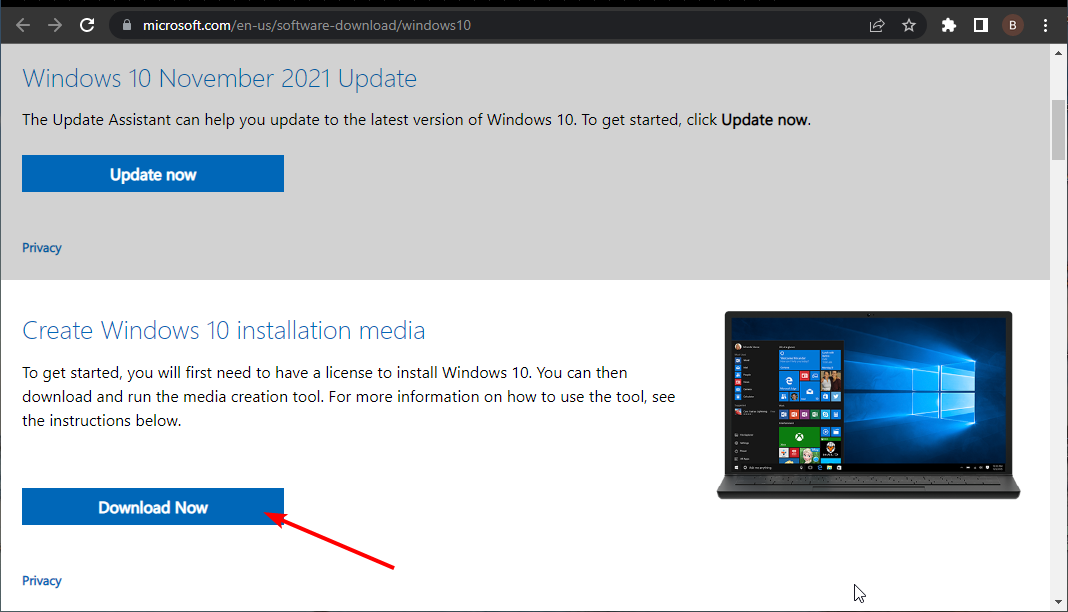
- Visit the official Windows 10 download website on another PC.
- Click the Download Now button under the Create Windows 10 installation media section.
- Now, open File Explorer, go to the Downloads folder and run the downloaded file.
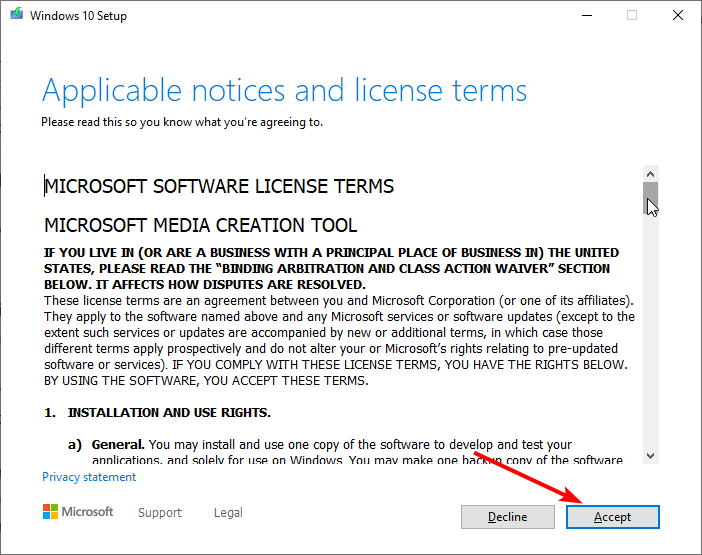
- Next, click the Accept button on the Agreement and license page.
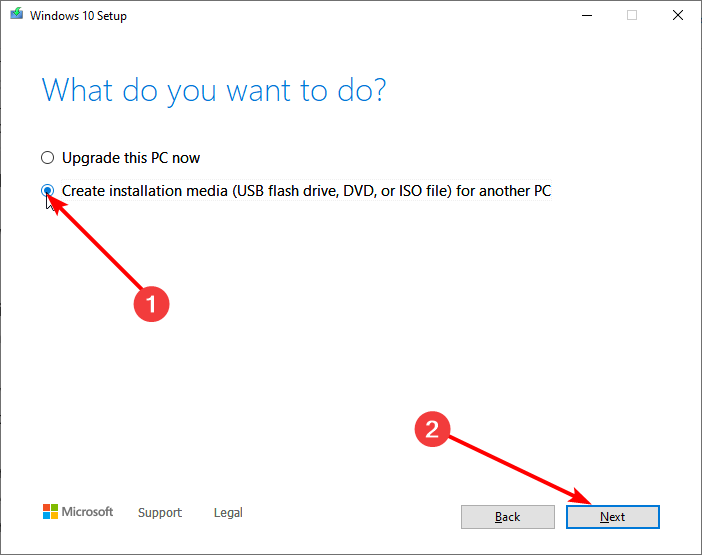
- Tick the radio button for Create installation media (USB flash drive, DVD, or ISO file) for another PC and click the Next button.
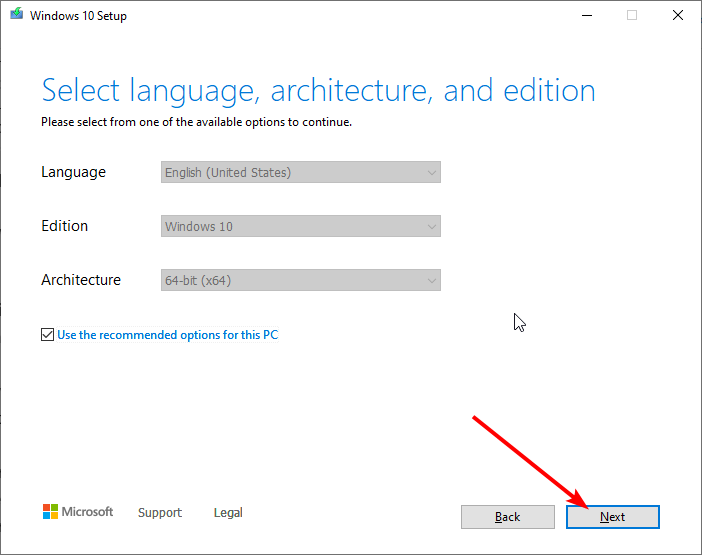
- Select your language, PC architecture, and other important information, and click the Next button.
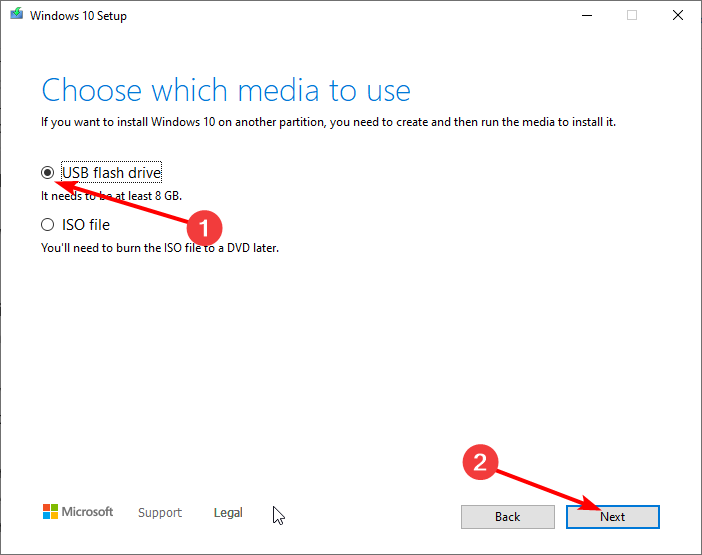
- Next, insert a USB flash drive (at least 8GB).
- Finally, choose the USB flash drive option, select your flash drive, and follow the onscreen instruction to complete the process.
The first thing to do in the quest to repair your Windows 10 PC using a USB drive is to create an installation media. However, you need to get a working system for this task.
Also, your USB drive should have at least 8GB of free space. Using a new and clean drive is advisable because this process will wipe the drive’s content.
2. Repair your PC
- Insert the Windows 10 installation media inside your PC and power it on. Your PC should boot from it automatically. If this does not happen, you need to enter your BIOS and change the boot order.
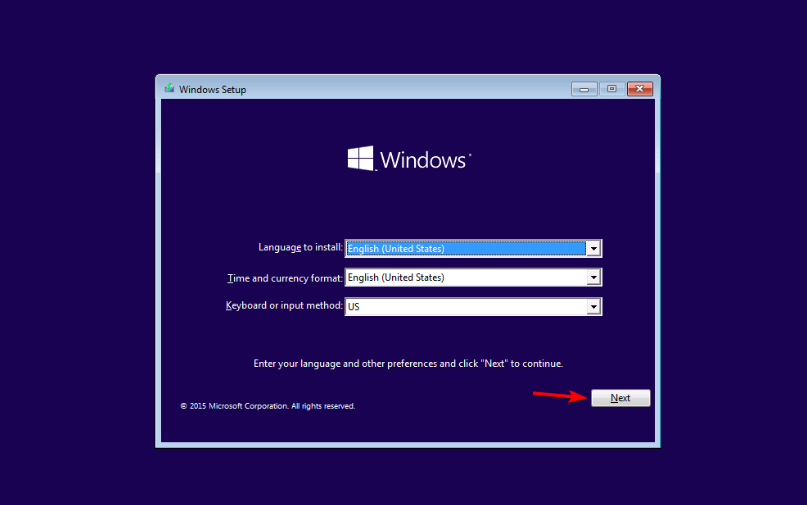
- Select your language and other information, and click the Next button.
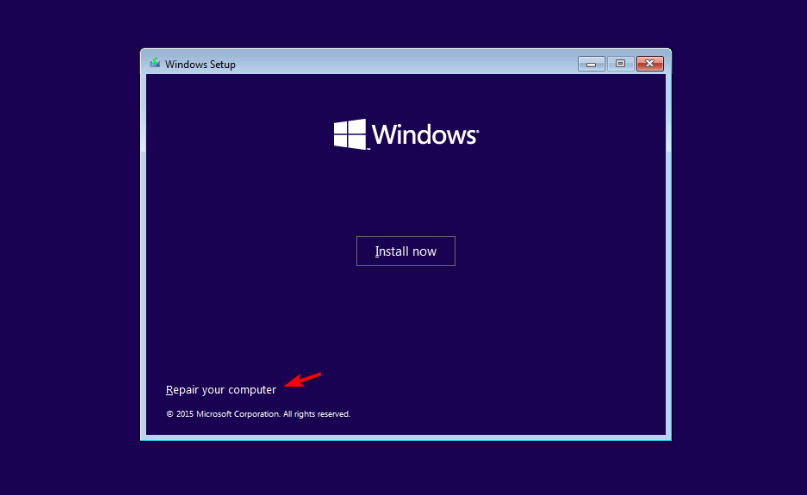
- Now, choose the Repair your computer option in the bottom left corner.
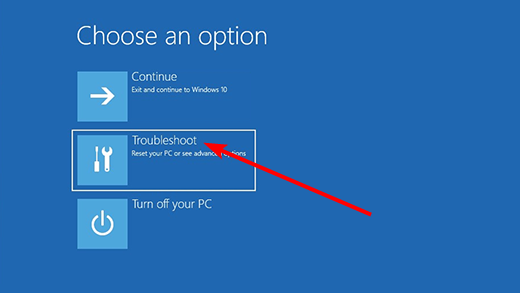
- Next, select Troubleshoot.
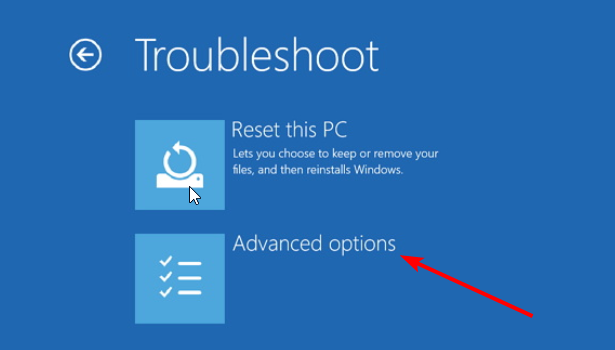
- Choose Advanced options on the next page.
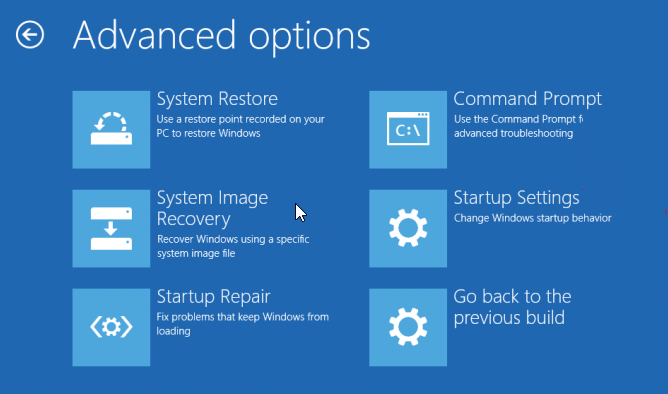
- Finally, you will be presented with different repair options.
At this stage, you can now choose from the repair options available to repair Windows 10. One option is to use Command Prompt to run some commands to repair your system files.
Also, you can use the System Restore option to restore your PC, while the Startup Repair option can help you fix startup-related problems.
Lastly, if you want to boot into Safe Mode, you can select the Startup Settings option and follow the onscreen instructions to complete the process.
How to repair Windows 10 from USB using Command Prompt?
- Follow the steps in the solution above and select the Command Prompt option in Step 6.
- To repair corrupt system files, type the command below and hit Enter to run it:
DISM /online /cleanup-image /restorehealth - Wait for the command to finish running. Now, run the command below:
sfc /scannow - If you want to repair your boot records, type the commands below and hit Enter after each:
bootrec /RebuildBcdbootrec /fixMbrbootrec /fixboot - Finally, to repair bad disk sectors, run the command (replace C with your drive letter) below:
chkdsk c: /f /r
That is how you can repair corrupt system files on Windows 10 from USB using Command Prompt. While we have listed the major forms of repairs you can perform, there is still so much more you can do.
With this, we can now conclude this guide on how to repair Windows 10 using USB. You should now be able to restore your PC and fix most issues with the details in this article.
If you want to know how to perform Windows 10 repair upgrade, check our detailed guide to do it quickly.
Feel free to let us know in the comments below if you encounter any issues performing the steps above.


User forum
0 messages