Windows 11 Boot Loop When Updates are Underway [Fix]
The error is easily solvable with the right approach
Key notes
- Several users have reported encountering the reboot loop problem in Windows 11 recently.
- It could be fixed by removing recent Windows Updates, uninstalling malfunctioning applications, and updating drivers, amongst other methods listed here.
- Also, find out how to boot Windows 11 in Safe Mode. You'll be required to enter this mode when applying some of our solutions.

Windows 11, the latest iteration from Microsoft, is the most advanced, though it is also prone to errors. The jury is still out on whether the frequency has gone up from the previous iterations. One such error users have reported encountering is Windows 11 is stuck in a reboot loop.
In this case, when you power on the device, instead of booting the OS and taking you to the sign-in screen, the system is stuck in a loop where it keeps loading Windows and crashing on each attempt.
In the following sections, we will walk you through the underlying causes of the reboot loop error in Windows 11, along with the most effective methods to fix it.
Why is Windows 11 stuck in a reboot loop?
You could be encountering the error due to several reasons. While some might be fixed within a minute, others will require a holistic approach and take time. Here are the common reasons behind the Windows 11 stuck in reboot loop error:
- Problems with the current version of Windows
- Corrupt system files
- Running an outdated driver
- System infected with malware or virus
- Secure boot disabled
- Incompatible or malfunctioning apps
Now that you know the various underlying causes, see if you can identify the one with your device. If you do, head to the relevant fix and execute it, or proceed with them in the sequence listed for quick troubleshooting.
How can I boot Windows 11 in Safe Mode?
- First, turn on the computer, and as soon as Windows starts booting, press and hold the Power button to shut it down.
- Again, follow the same steps by starting the system and turning it off when the OS is about to boot.
- Repeat the process thrice.
- When you boot Windows 11 for the fourth time, your computer will launch Startup Repair, a built-in utility that fixes problems preventing the OS from booting.
- Wait for the process to complete.
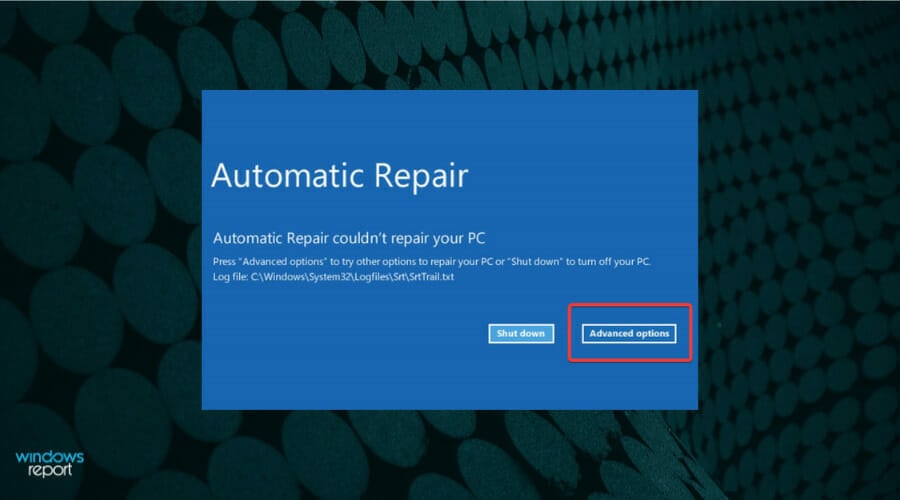
- Your device will most likely show the Automatic Repair couldn’t repair your PC screen. Now, click on Advanced options.

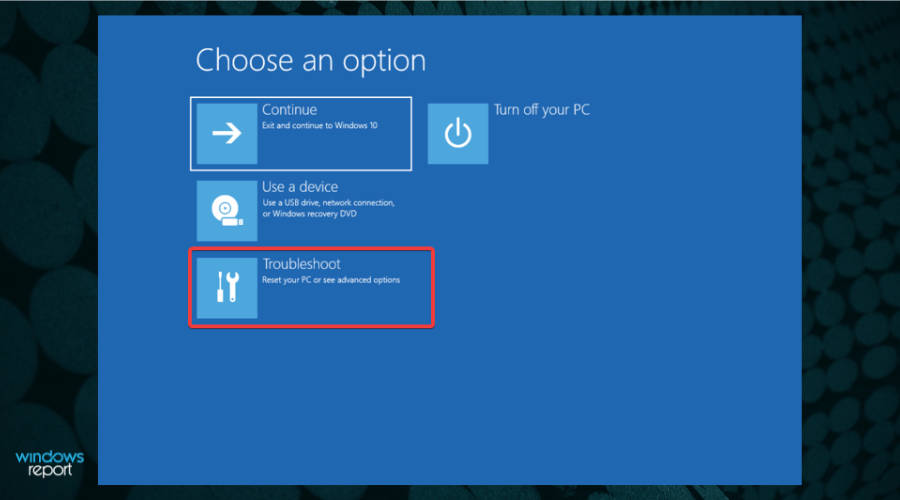
- Select Troubleshoot from the listed options.

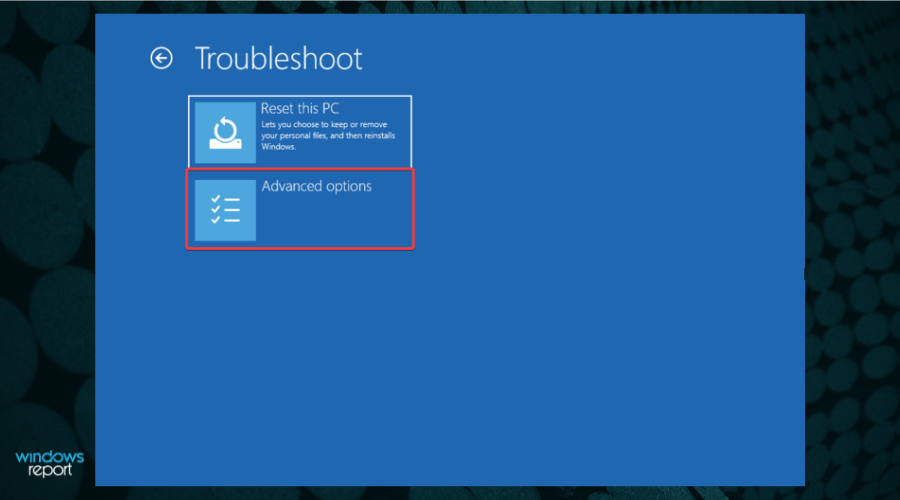
- Click on Advanced options.

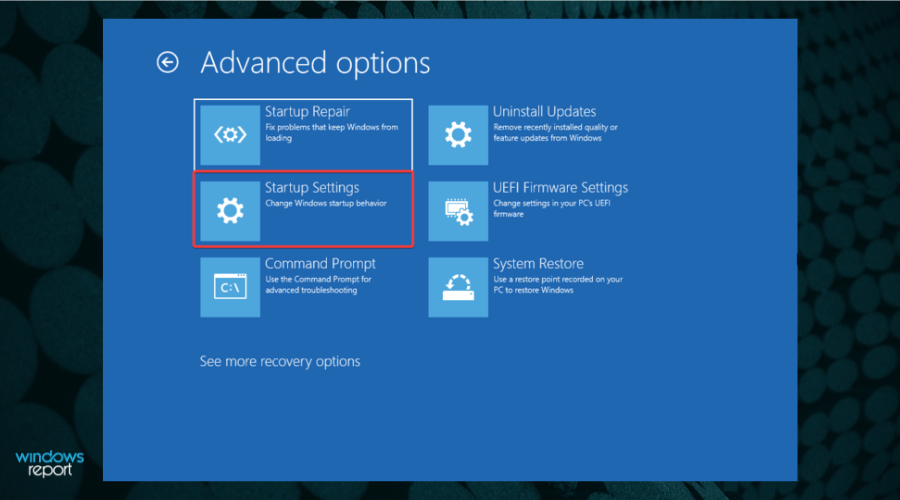
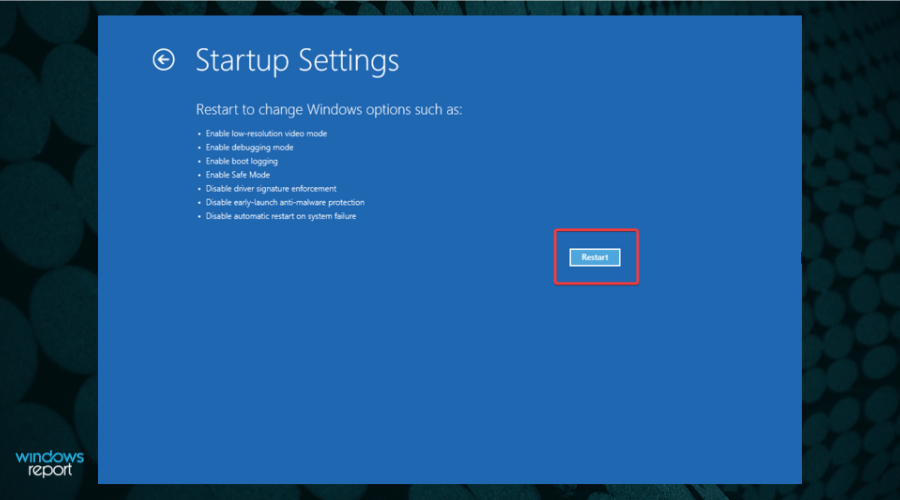
- Next, select Startup settings from the six options listed here.

- Click the Restart button.

- Now, click on any of the keys from either 4–6 or F4–F6, to launch the various types of Safe Mode.
 NOTE
NOTE
If you cannot boot Windows 11, most of the fixes listed here wouldn’t work. But, a quick way around the problem is to get into the Safe Mode and execute these.
Safe Mode is primarily a troubleshooting environment with minimum drivers, background apps, processes, and services running in the background.
There are multiple ways you can boot Windows 11 in the Safe Mode, but since you cannot access the system, the force shutdown method is your best bet.
What can I do if Windows 11 is stuck in a reboot loop error?
 Tip
Tip
1. Remove external peripherals or devices
In many cases, an external peripheral, such as the printer, speakers, or microphones, that’s causing the reboot loop error in Windows 11. If the connected peripheral is incompatible or malfunctioning, it may prevent the OS from loading.
A quick fix is to remove all such peripherals, with just the basic ones connected to the system. Now check if the reboot loop error in Windows 11 is resolved. If the problem persists, it lies elsewhere; hence, head to the following method.
2. Uninstall recent Windows updates
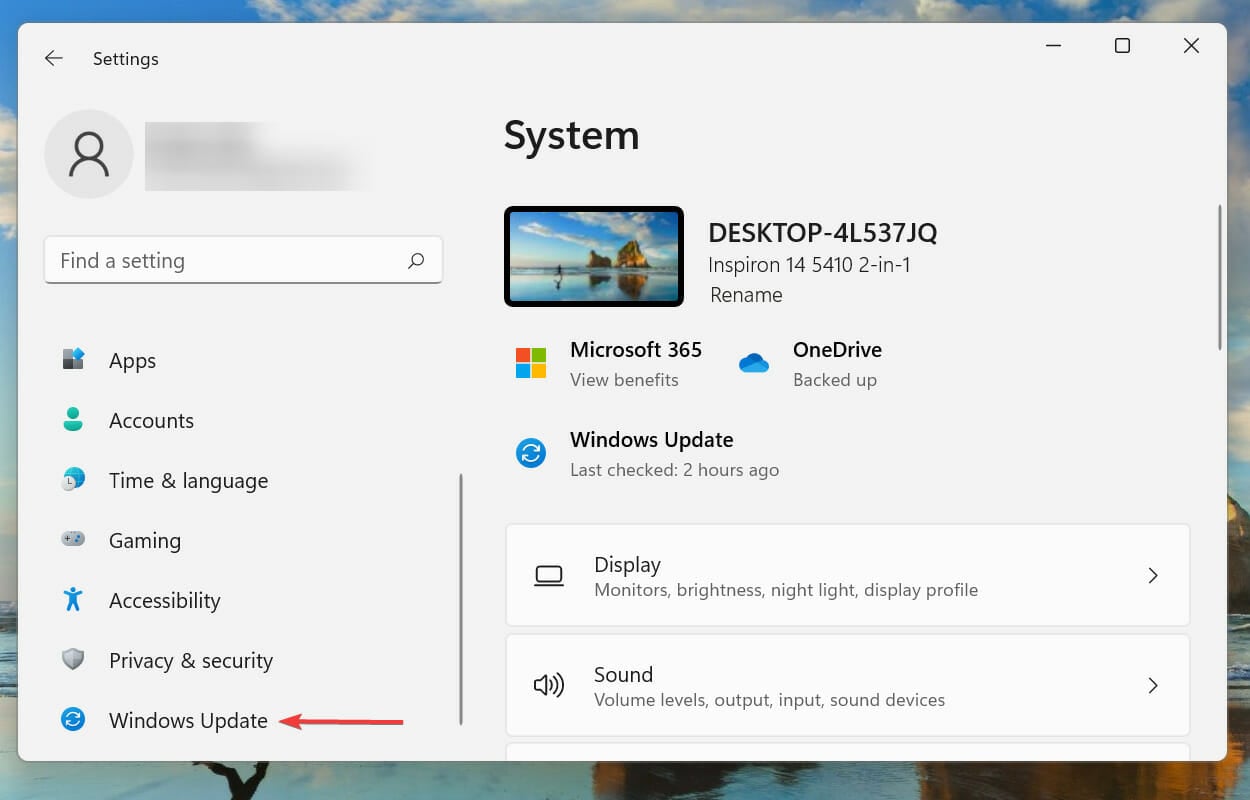
- Press Windows + I to launch the Settings app.
- Select Windows Update from the tabs listed in the navigation pane on the left.

- Click on Update History.

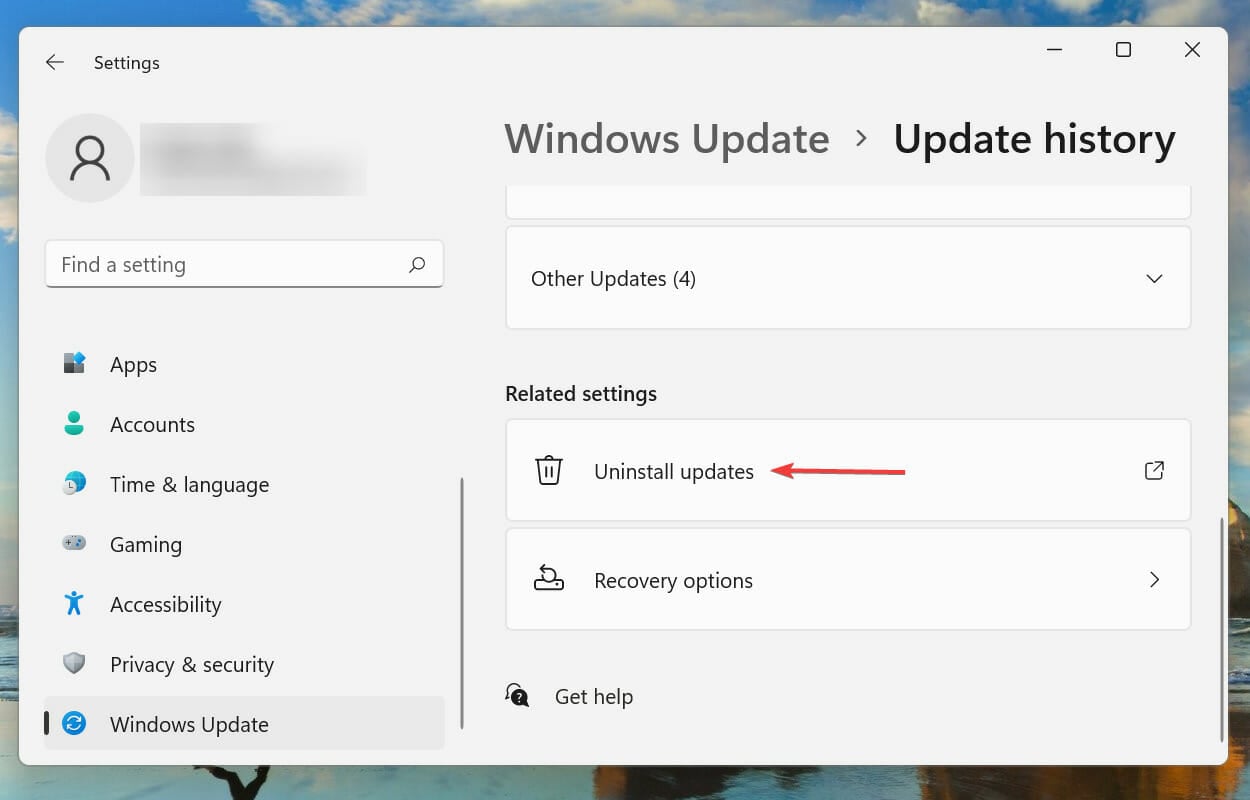
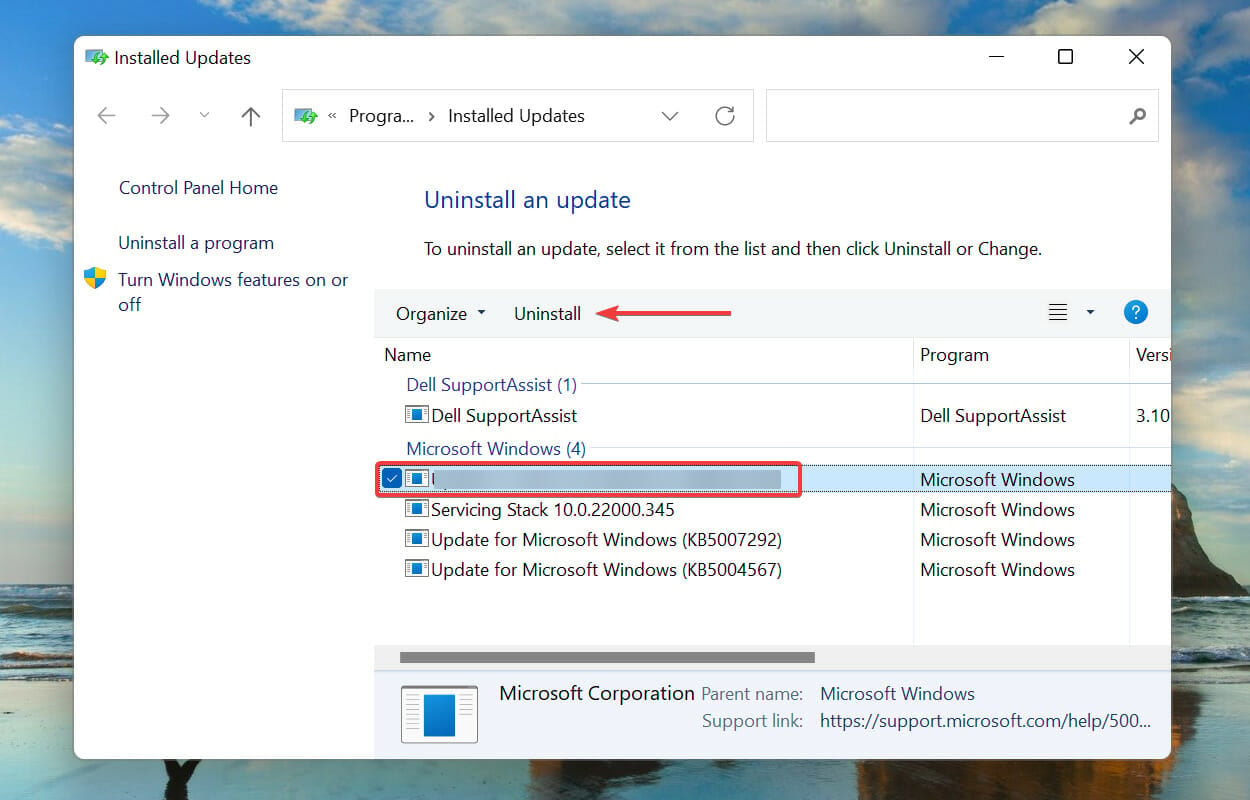
- Click on Uninstall updates under Related settings.

- Select the recent Windows update and click on Uninstall to remove it.

- Click Yes on the confirmation box that pops up.


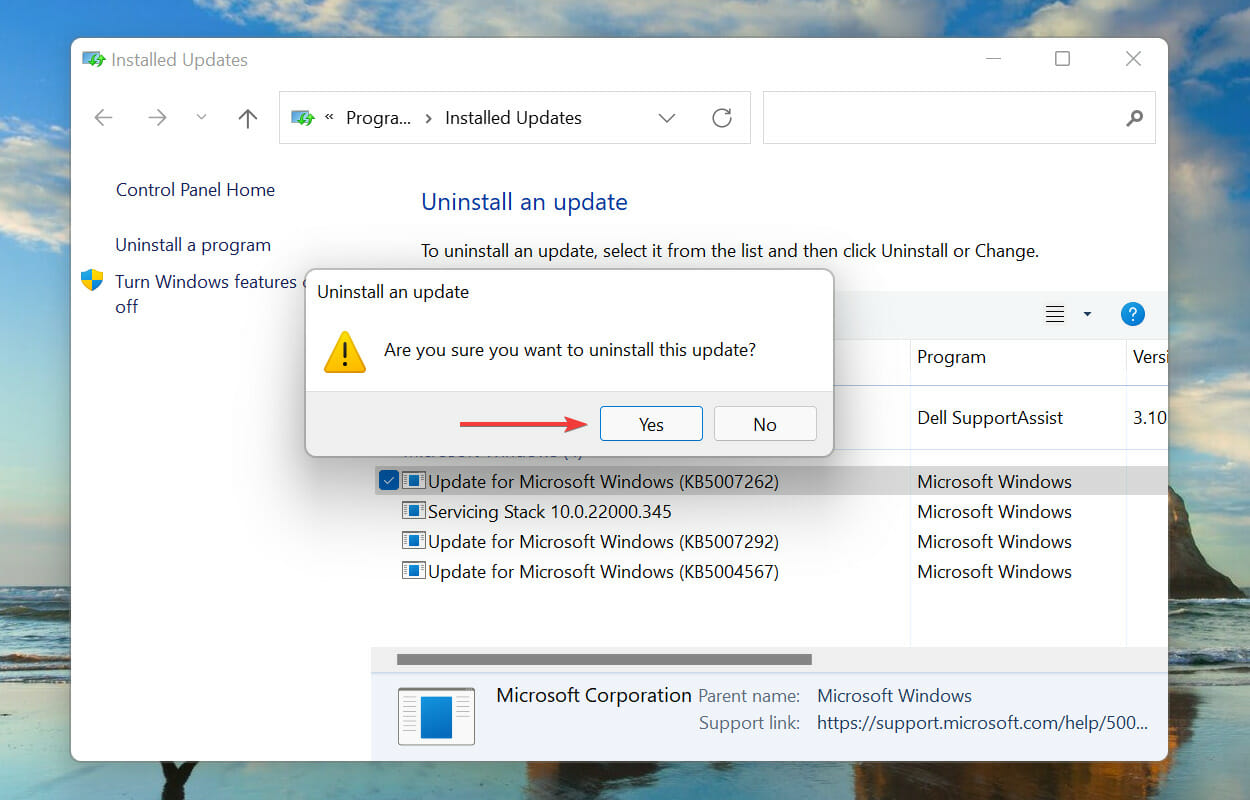
Problems with the recent Windows update also cause the reboot loop issue in Windows 11. In this case, it’s recommended that you uninstall the recent update and wait for a newer one to release before updating.
Although updates are meant to release new features and boost the system’s performance, they may sometimes act counterproductive and introduce instability. After uninstalling the update, check if the problem is resolved and if Windows 11 boots properly.
3. Enable Secure Boot
Secure boot is one of the critical system requirements, and you must enable it before installing Windows 11. If it’s somehow disabled while running the latest iteration, you might encounter the reboot loop error in Windows 11.
Although there’s no credible evidence to suggest that disabling Secure Boot may cause the reboot loop issue, re-enabling it worked for many users. Also, since Secure Boot is a system requirement, it makes no sense to disable it on Windows 11.
It’s pretty simple to enable Secure Boot on your computer, and you can follow our dedicated guide for the process. If you haven’t disabled Secure Boot or allowing it didn’t fix the issue, head to the following method.
4. Update Windows 11
- Press Windows + I to launch the Settings app.
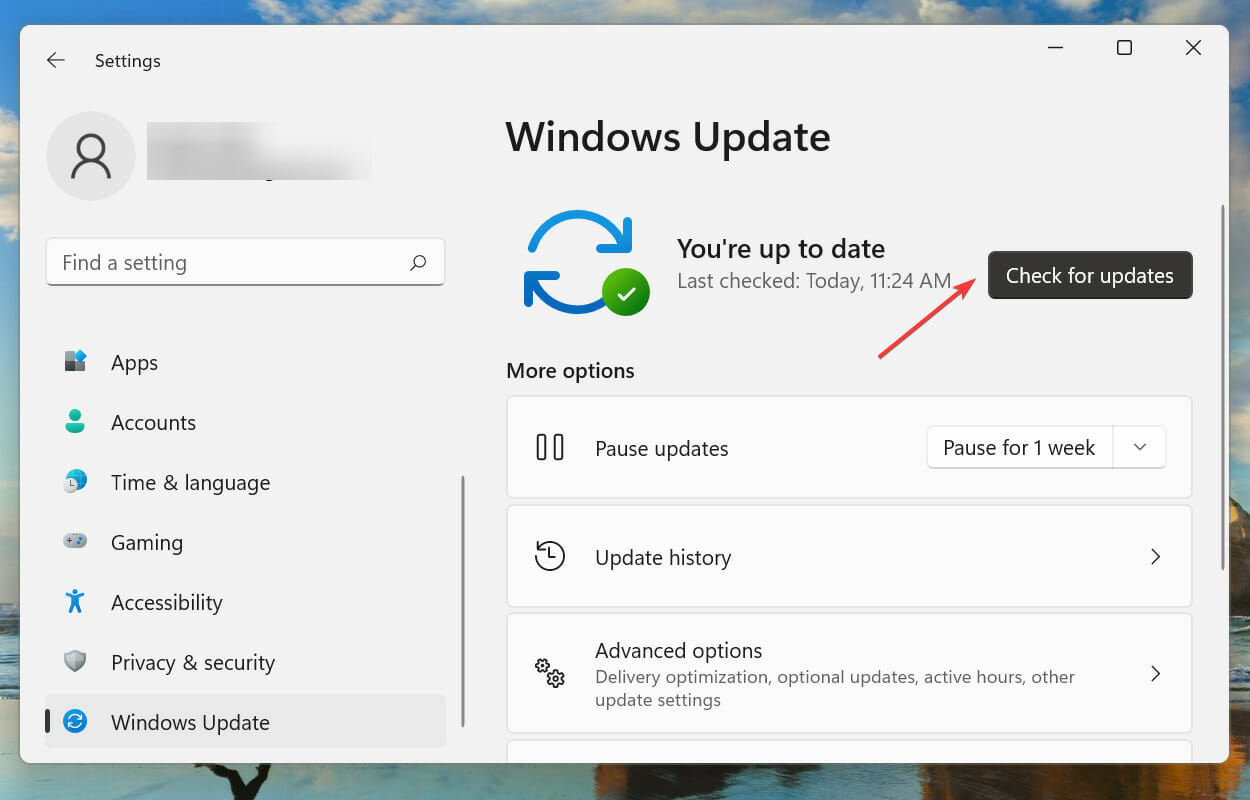
- Select Windows Update from the tabs listed in the navigation pane on the left.

- Click on Check for updates to look for any newer OS versions available for download.

- If one is available, install it.

As discussed earlier, a bug in the current version could be causing the reboot loop error in Windows 11. So, if there’s a newer version available, installing it should solve the problem.
Microsoft identifies the bugs in the recent versions and releases patches for them in the subsequent updates. Hence, in all likelihood, the latest version would have a patch for the bug causing the reboot loop error.
5. Delete files in the Software Distribution folder
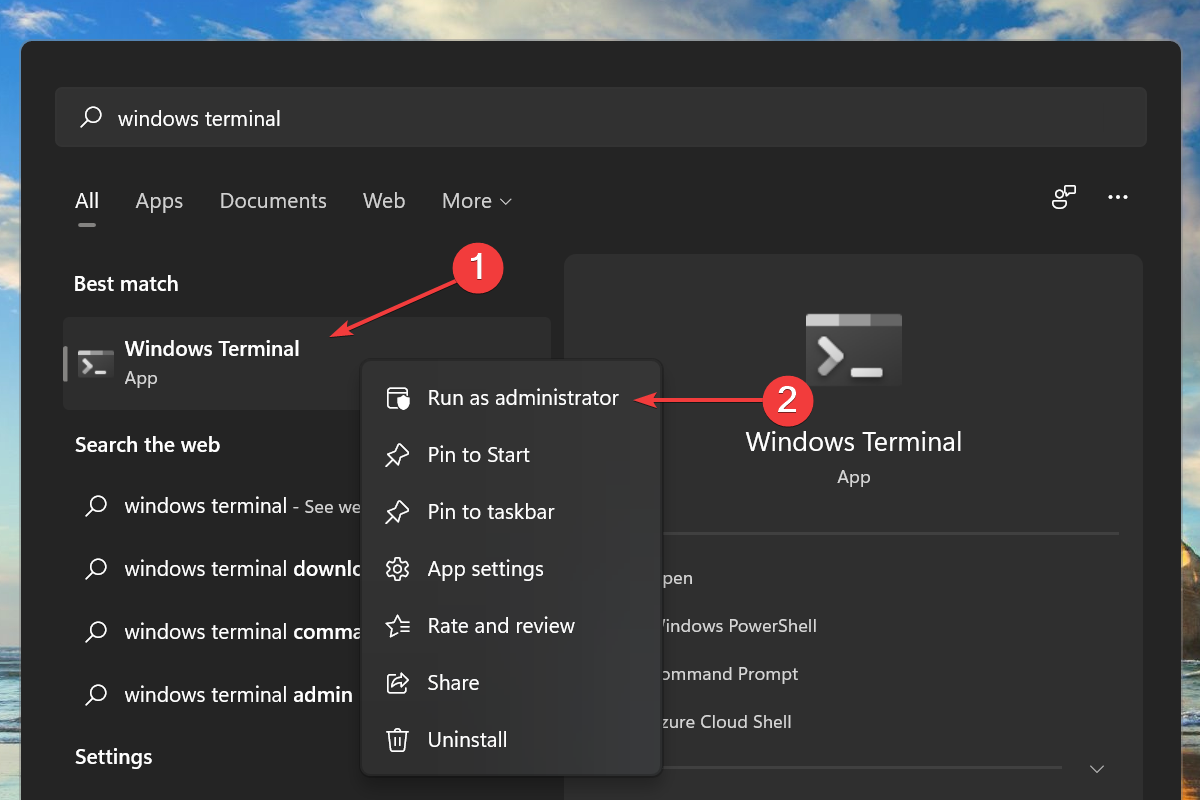
1. Press Windows + S to launch the Search menu.
2. Enter Windows Terminal in the text field at the top, right-click on the relevant search result, and select Run as administrator from the context menu.

3. Click Yes on the UAC (User Account Control) prompt that appears.
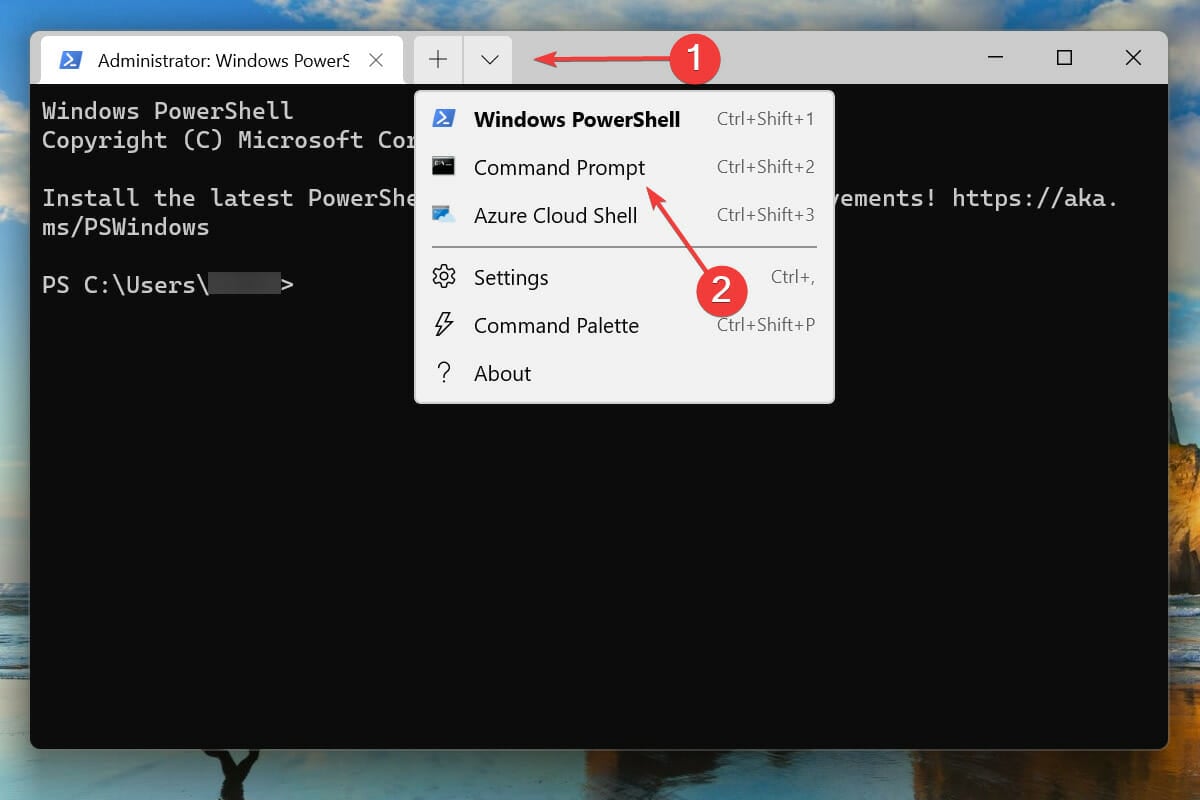
4. Then, click on the downward arrow at the top, and select Command Prompt from the list of options to launch it in a new tab. Alternatively, you can press Ctrl + Shift + 2 to launch the Command Prompt tab.

5. Type/paste the following command and hit Enter:
net stop wuauserv
6. Next, type/paste this command and hit Enter to run it:
net stop bits
7. After disabling the two services, press Windows + R to launch the Run command, enter the following address in the text field and click on OK:
C:\Windows\SoftwareDistribution
8. Press Ctrl + A to select all the files and hit the Del key to delete them.

9. Choose the appropriate response in case a confirmation box pops up.
10. Now, restart the computer and check if the reboot loop problem in Windows 11 is resolved.
If a Windows Update didn’t go all the way through and an error was encountered during the process, the OS may fail to load. To fix this, follow these steps to delete the relevant temporary files, and then try to update Windows 11.
6. Remove recently installed applications
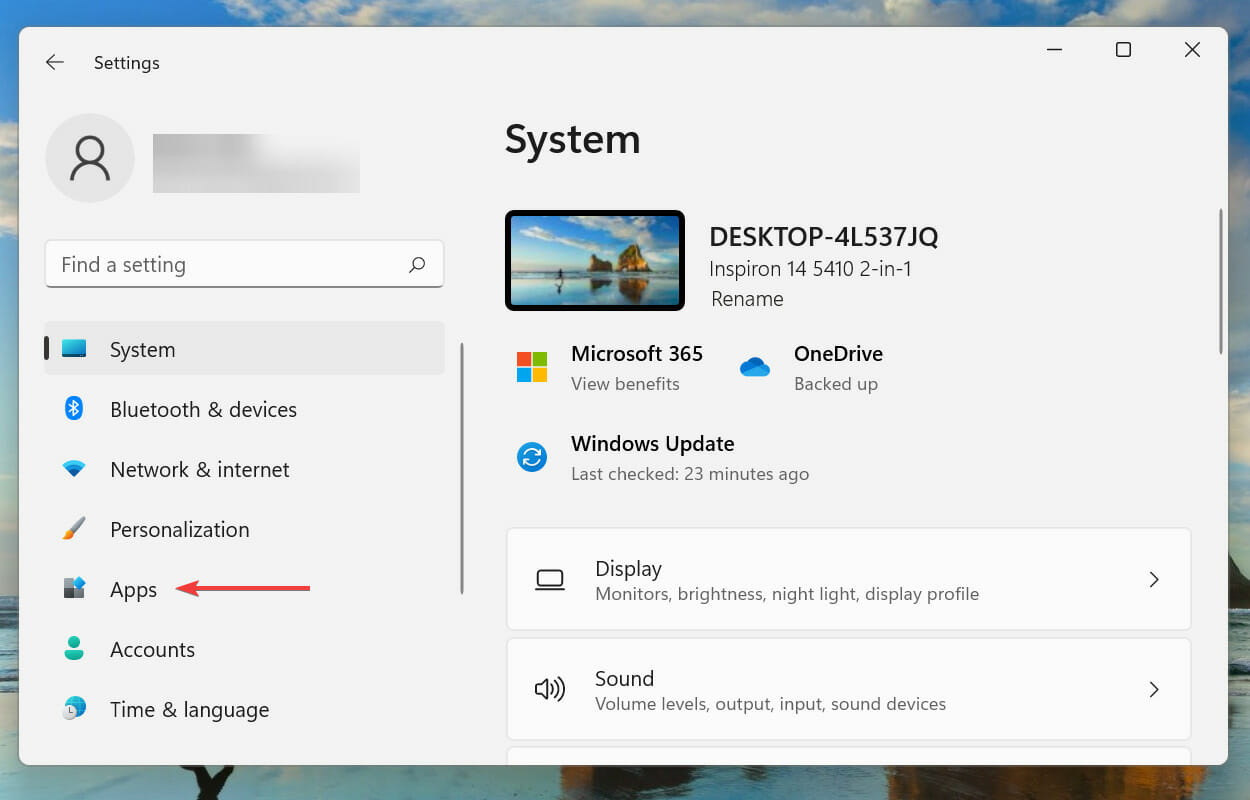
- Press Windows + I to launch the Settings app.
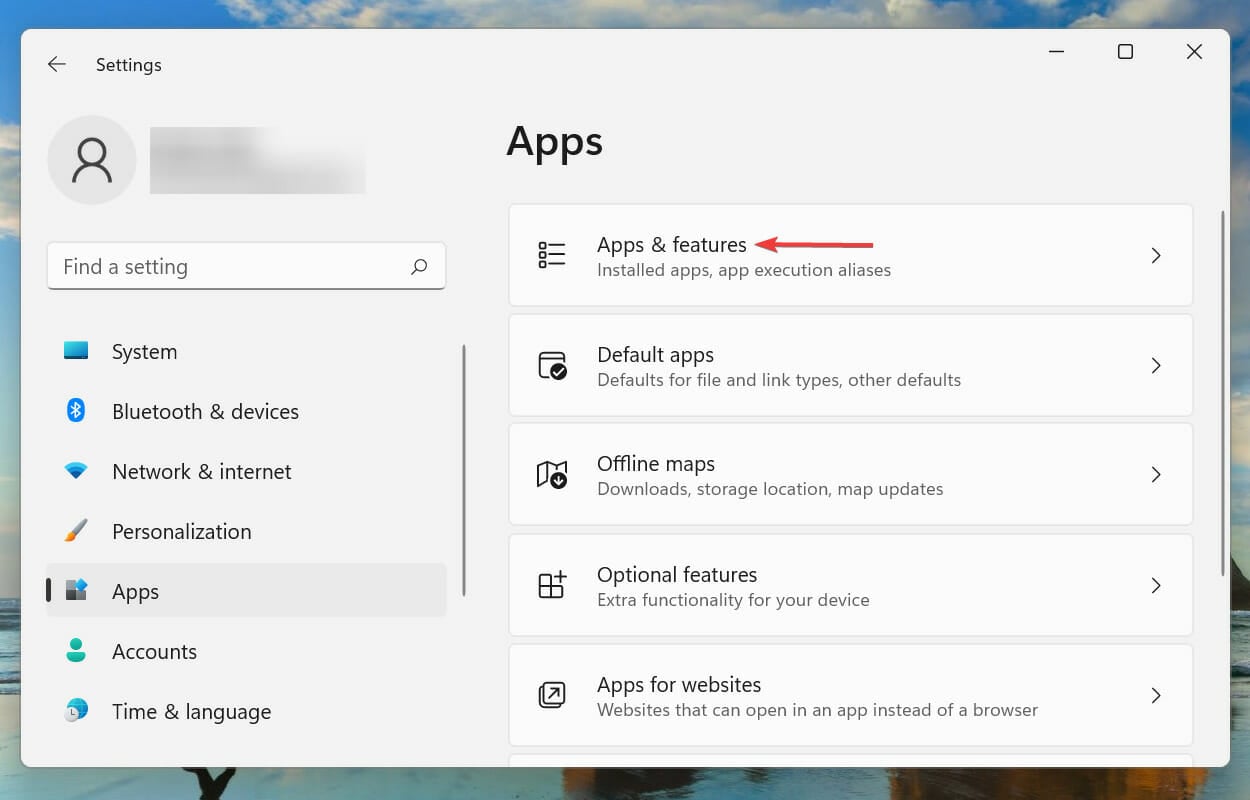
- Select Apps from the tabs listed in the navigation pane on the left.

- Click on Apps & features on the right.

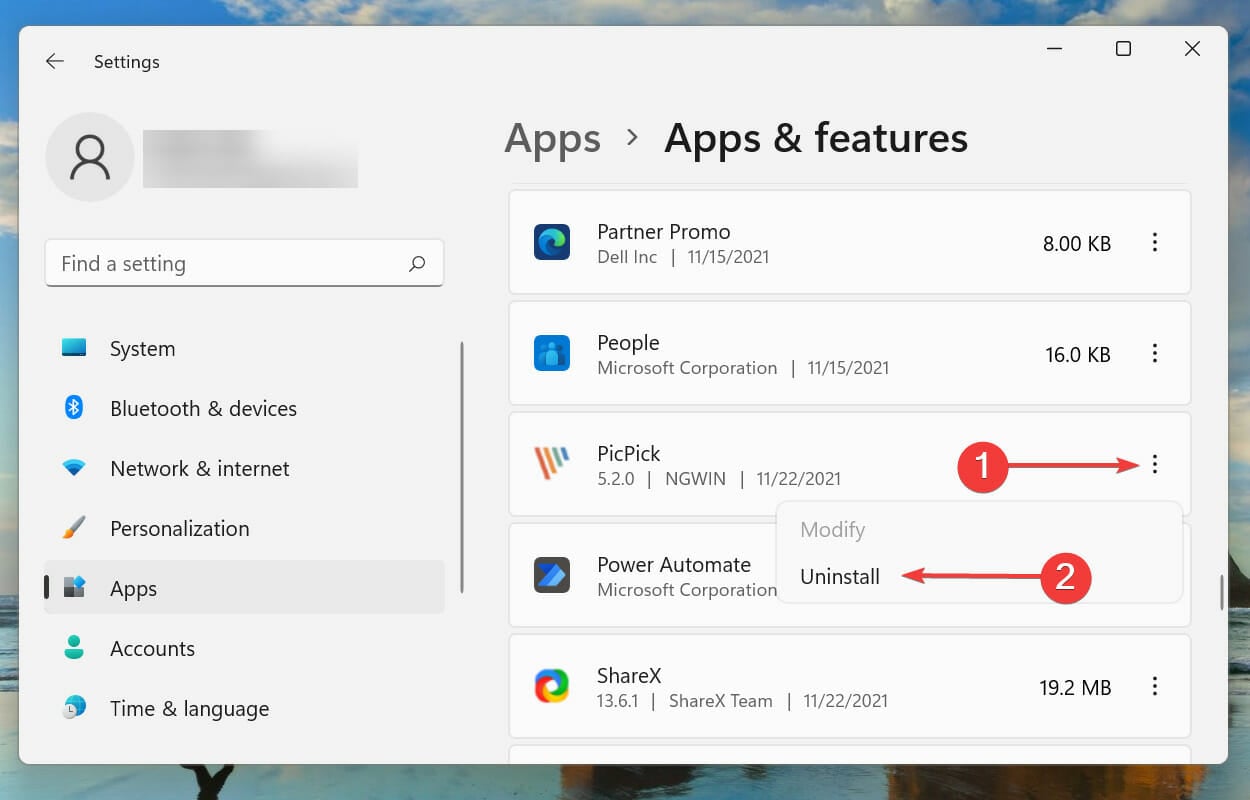
- Click on the ellipsis next to the recently installed app and select Uninstall from the list of options.

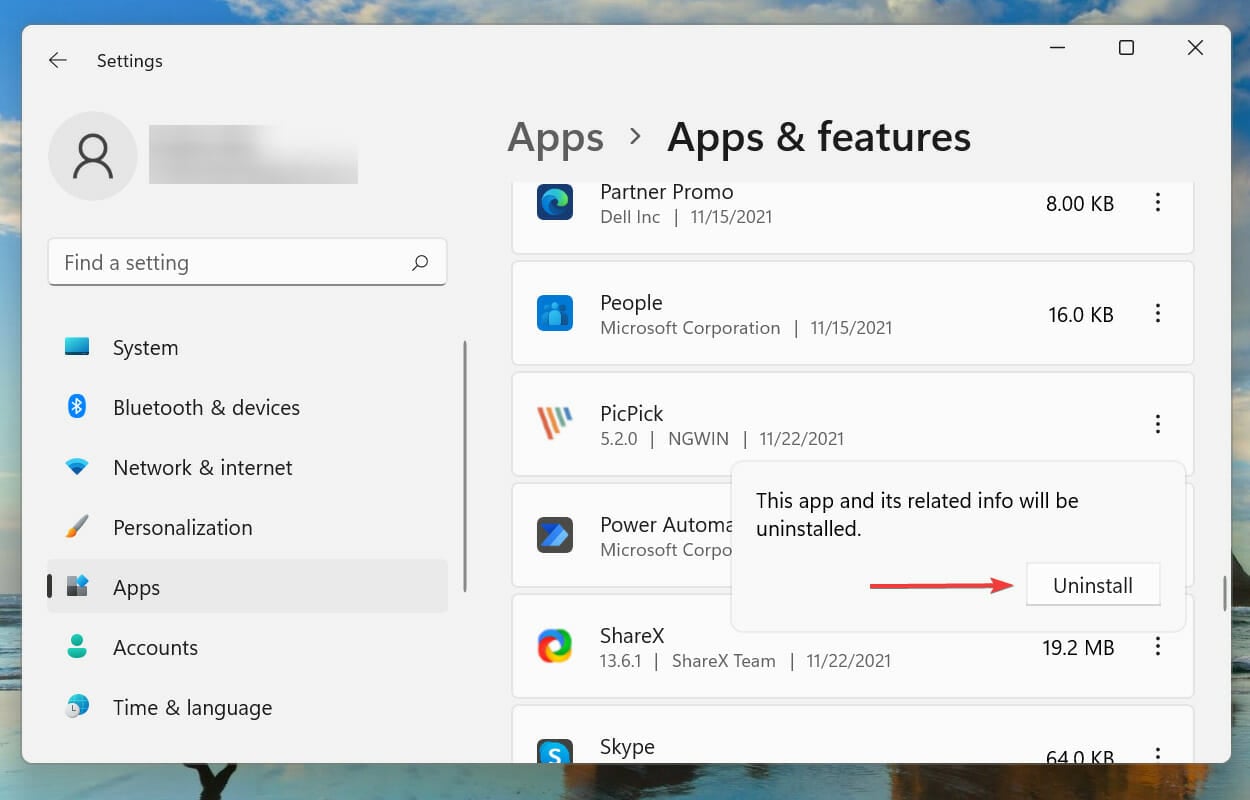
- Again, click on Uninstall in the confirmational prompt.

Certain apps are known to conflict with the functioning of the OS and could as well cause the reboot loop problem in Windows 11. If you encounter an error after installing a specific app, removing it from the system can fix the issue.
Removing these apps one at a time is best to verify if the error is fixed. This way, you will be able to identify the conflicting app and reinstall the others removed during the process.
If uninstalling the recent apps didn’t solve the issue, head to the following method.
7. Update drivers
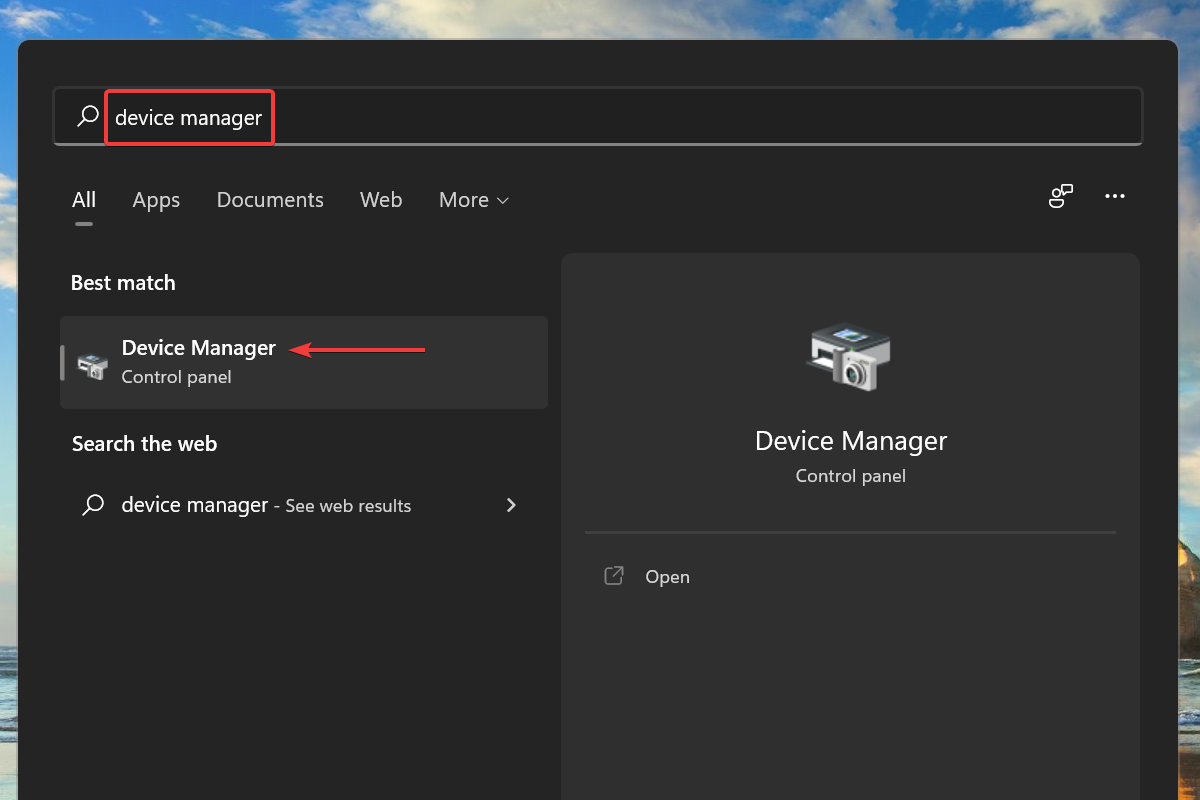
- Press Windows + S to launch the Search menu.
- Enter Device Manager in the text field at the top and click on the relevant search result that appears.

- Double-click on any of the hardware devices categories.

- Right-click on the device and select Update driver from the context menu.

- Next, select Search automatically for drivers from the two options in the Update Drivers window.

- Similarly, update the drivers for other external hardware devices connected to the system.
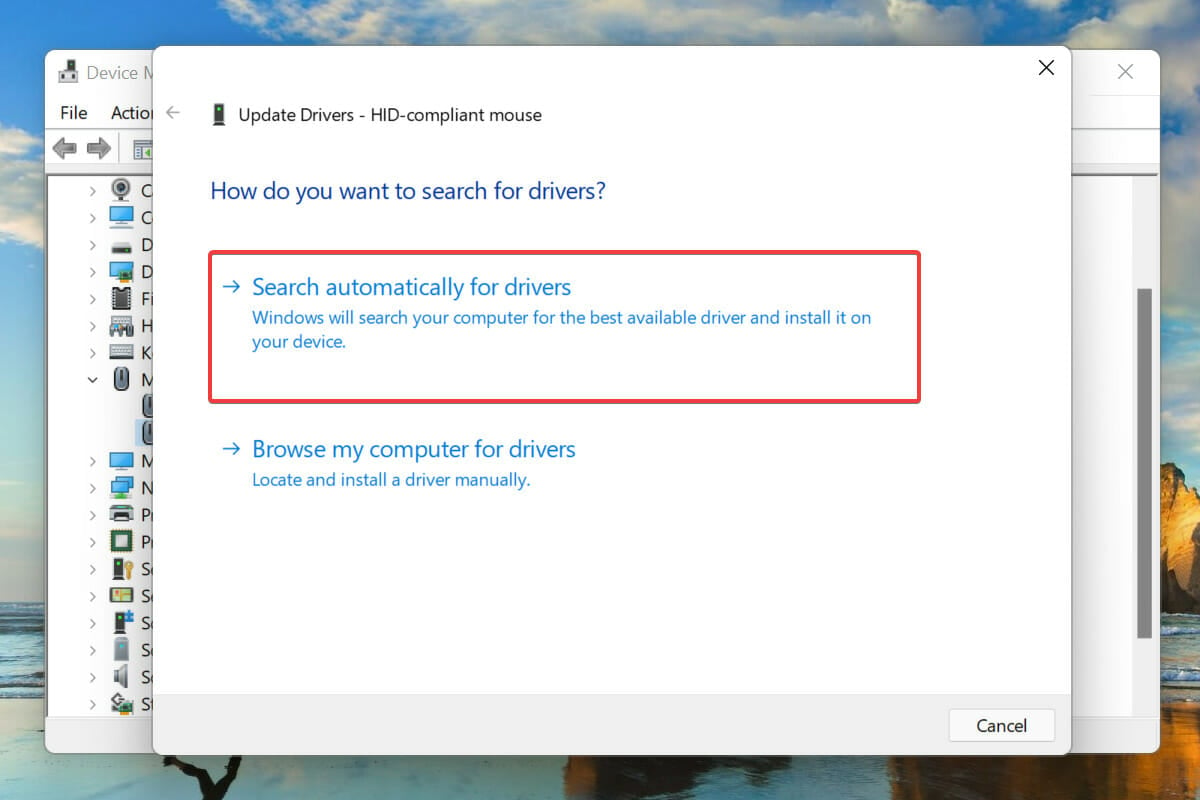
Running outdated drivers for connected hardware is also a known cause of the reboot loop error in Windows 11. Therefore, it’s recommended that you always keep the drivers up-to-date to eliminate the chances of encountering issues and boost the system’s performance.
The Device Manager method listed above only searches for an updated version of the driver already downloaded on the system, basically acting as an offline update.
If one cannot be found, you can always look for the latest driver version in Windows Updates or the manufacturer’s official website.
You can also use a dedicated third-party utility if the above methods sound too intricate. We recommend using Outbyte Driver Updater to scan the web for updates and keep the installed drivers up-to-date.
8. Run a quick SFC scan
- Press Windows + S to launch the Search menu.
- Enter Windows Terminal in the text field at the top, right-click on the relevant search result, and select Run as administrator from the context menu.
- Click Yes on the UAC (User Account Control) prompt.
- Next, click on the downward arrow at the top, and select Command Prompt from the list of options.
- Type/paste the following command and hit Enter to run the SFC scan:
sfc /scannow
- After the scan is done running, restart the computer.
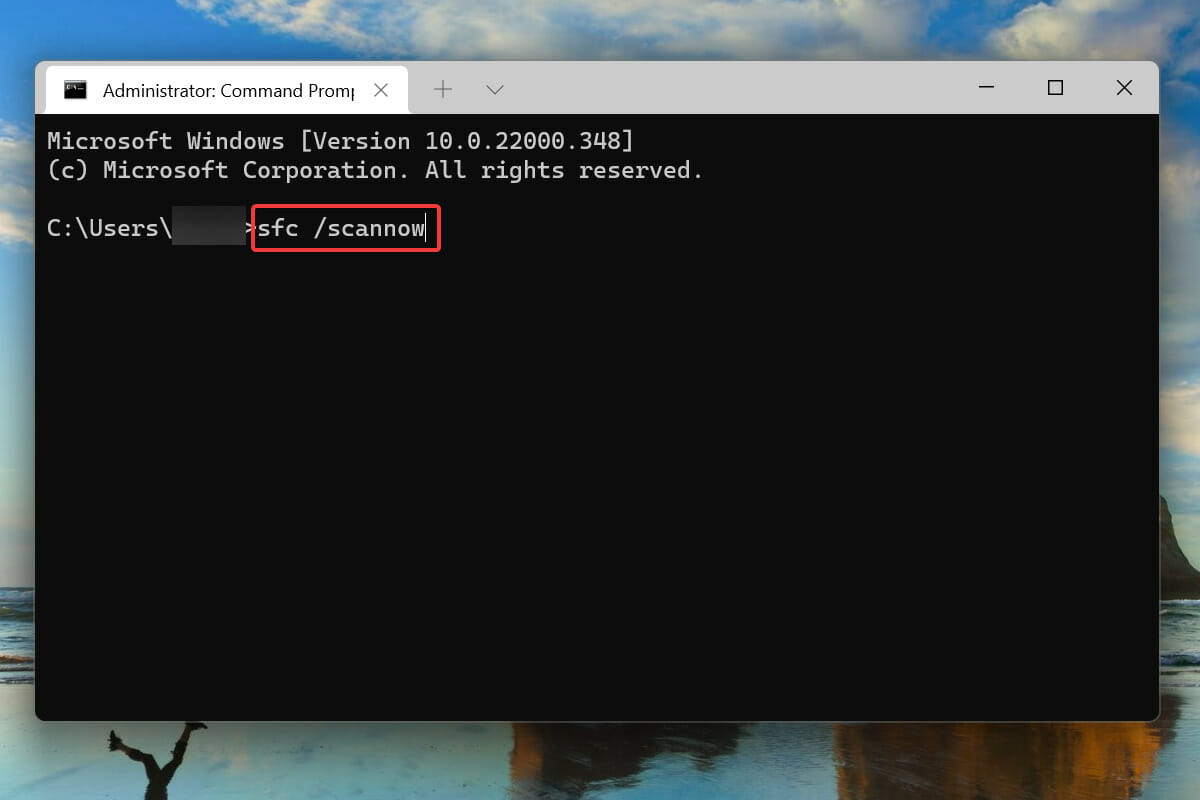
Corrupt system files are also known to cause problems with the functioning of the OS. And in this case, it’s the SFC (System File Checker) scan comes to the rescue.
An SFC scan locates the corrupt system files and replaces them with their cached copy stored on the computer. If the above fixes have not worked, running the scan might help fix the reboot loop problem in Windows 11.
9. Scan for malware and virus
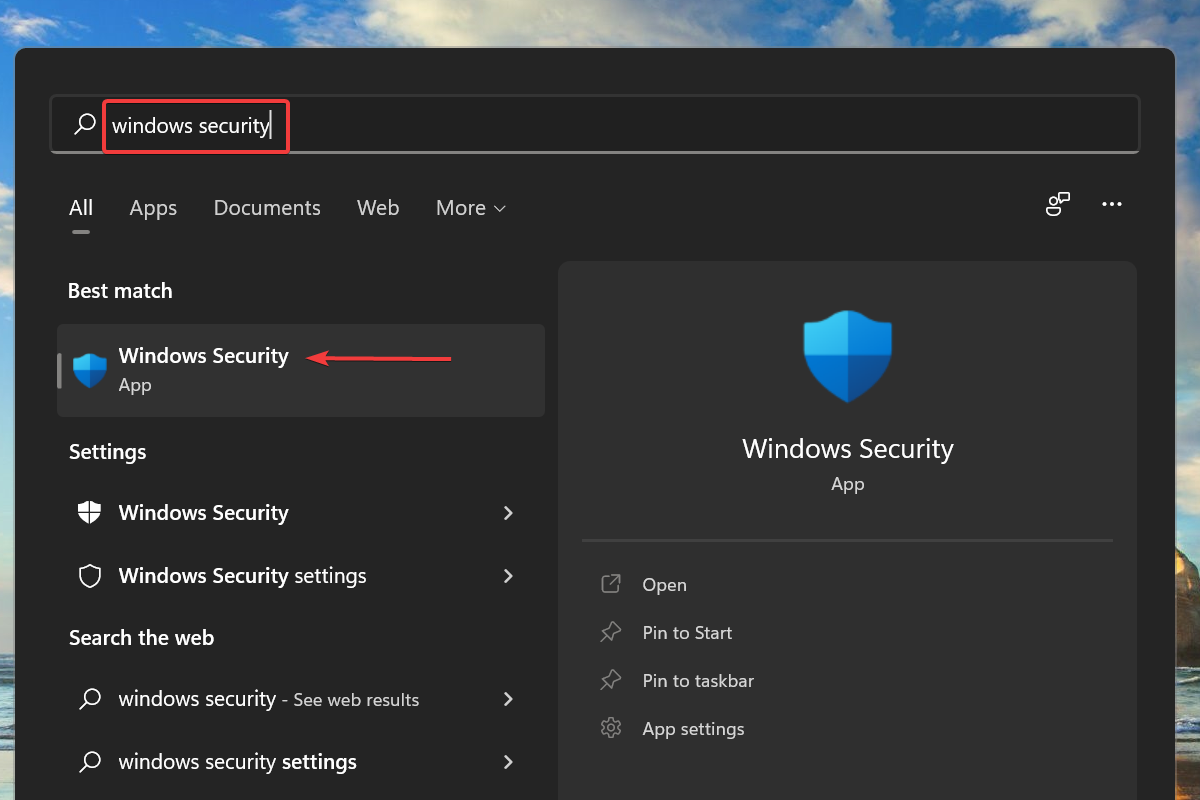
- Press Windows + S to launch the Search menu.
- Enter Windows Security in the text field at the top, and click on the relevant search result to launch the app.

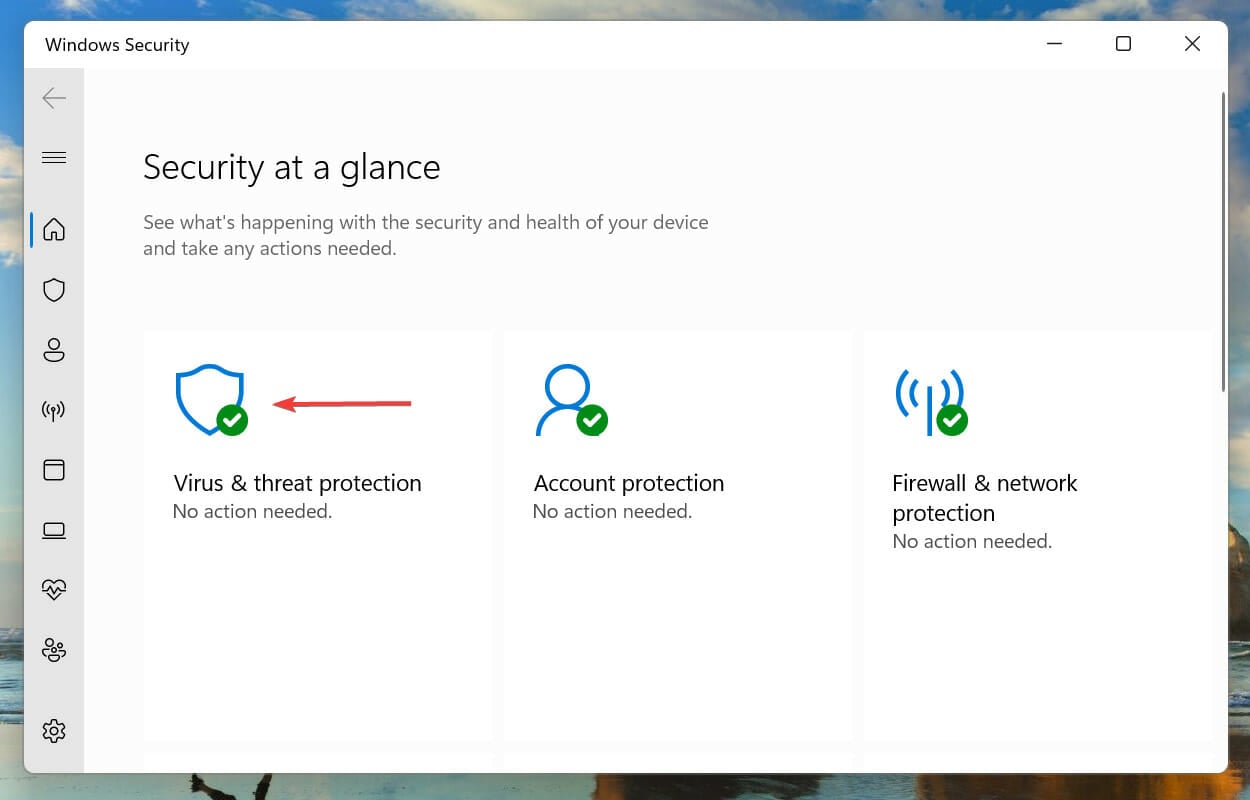
- Click on Virus and threat protection from the six options listed here.

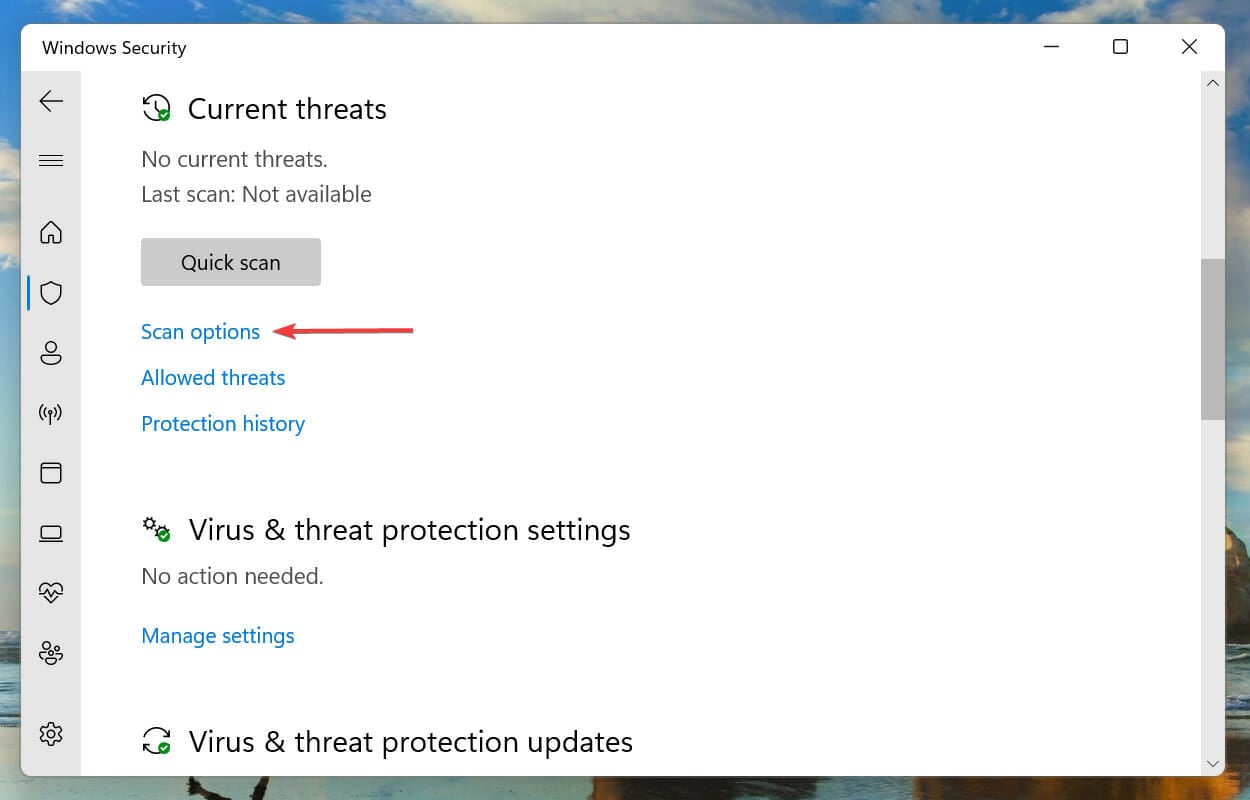
- Next, click on Scan options under Current threats.

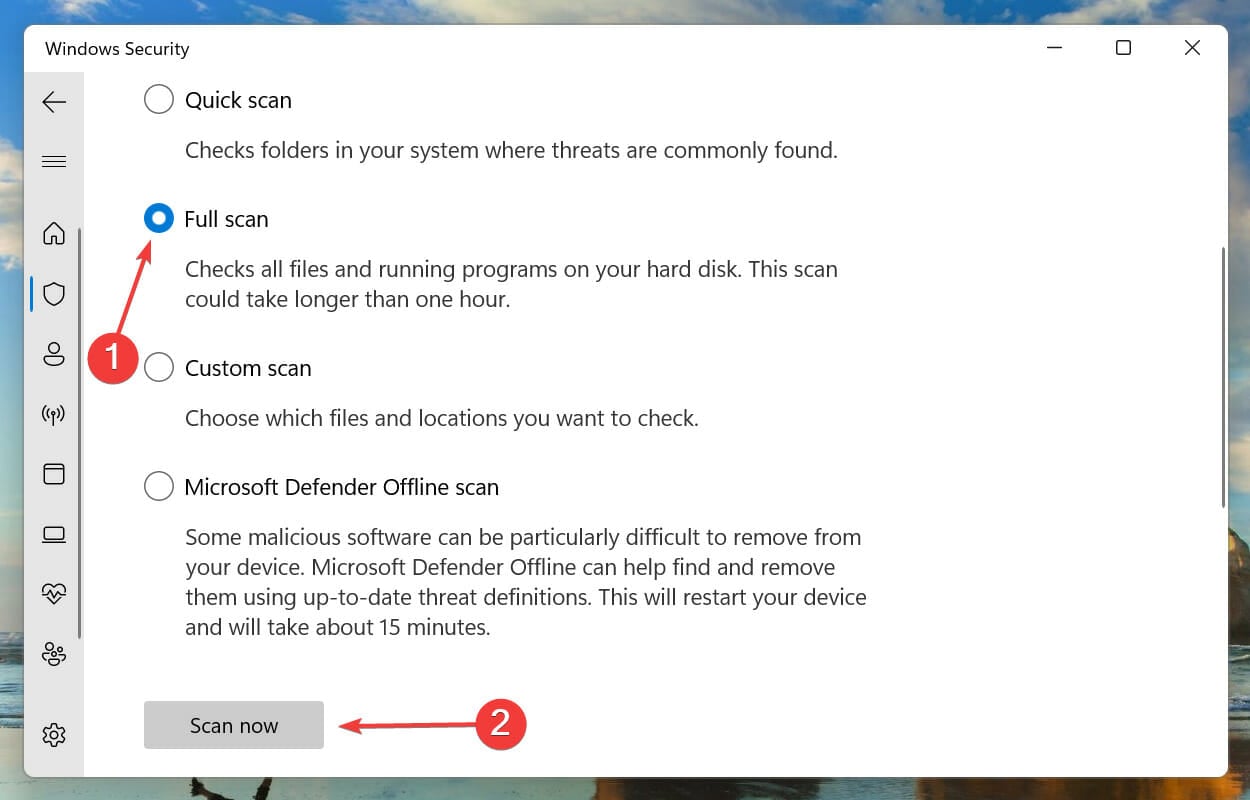
- Select the option for Full scan and click on Scan now.

- Wait for the scan to complete. Depending on the amount and size of files, it would take some time to be scanned.
If none of the methods listed above worked, it is most likely that your computer is infected with malware or virus, which is causing the reboot loop error in Windows 11.
We choose the built-in Windows Security to scan for viruses and malware, but you can use any third-party antivirus compatible with Windows 11.
After the scan runs, the reboot loop error in Windows 11 will be fixed.
What are other errors similar to Windows 11 stuck in the reboot loop?
Similar to the reboot loop error in Windows 11, users have also reported encountering the black screen with the cursor issue. Also, several users came across the sign-in screen missing problem.
Windows 11 stuck on the Preparing Windows screen is another everyday inconvenience users face.
Many also encountered another similar error where Windows 11 failed to boot. While the system didn’t automatically reload the Windows in this case, it couldn’t load it either.
If you are facing any other errors, check our linked guides for quick and effective troubleshooting.
That’s all there’s to the Windows 11 reboot loop problem. Next, execute the above methods in the same sequence as they are mentioned.
If nothing works, you can reset Windows 11 to its factory settings or roll it back to Windows 10.
Please tell us which fix worked for you and your experience of Windows 11 thus far in the comments section below.
Read our disclosure page to find out how can you help Windows Report sustain the editorial team. Read more


Improve this guide


User forum
0 messages