How to Change the Registered Owner Name in Windows 11
Use the Registry Editor to change Windows 11 owner
2 min. read
Updated on
Read our disclosure page to find out how can you help Windows Report sustain the editorial team Read more
Key notes
- Registered owner refers to the user or entity ownership rights over the Windows registry.
- It is possible for users who are selling or buying a new PC to alter the Registered Owner details.
- You can change the Registered Owner details using the Windows Registry Editor.
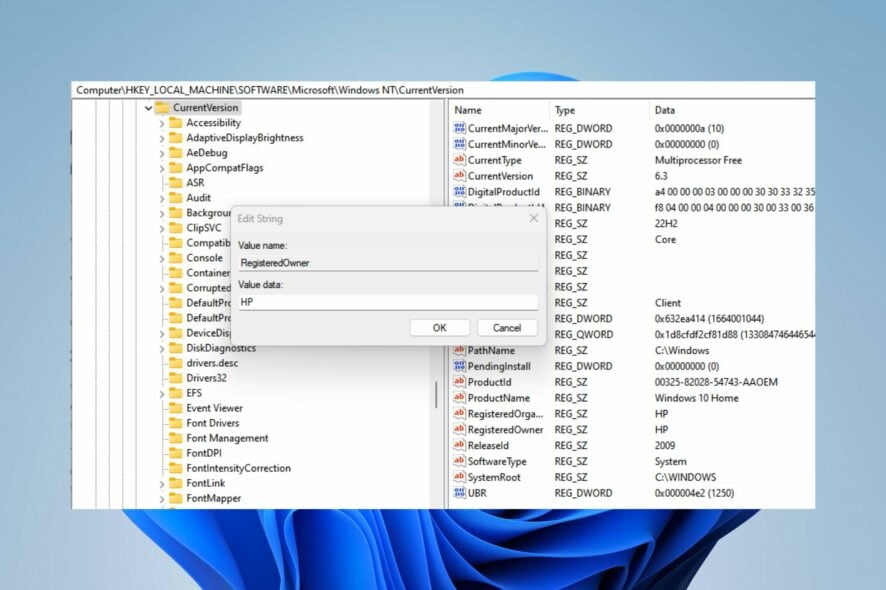
Windows 11 is a powerful operating system that provides users with numerous features and options to customize their experience. However, users might need to change the registered owner name for various reasons.
Therefore, this article will discuss the step-by-step process to change the registered owner name in Windows 11. Also, you can read about how to fix missing or corrupt service registration in windows.
Can I alter the registered owner name in Windows 11?
Yes, you can alter the registered owner name in Windows when selling or buying a used PC. The registered owner’s name is the information used by the operating system to identify the person or organization using the computer.
The registered owner personalizes the user experience and provides information about the user installation and software usage. Changing the Registered Owner’s details is a simple process and can be completed in just a few steps.
How do I change a registered owner name in Windows 11?
Use the Registry Editor
- Press the Windows + R button to open the Run dialog box, type regedit in the Run address dialog box and press Enter to open it.
- Select Yes to confirm the User Account Control prompt window.
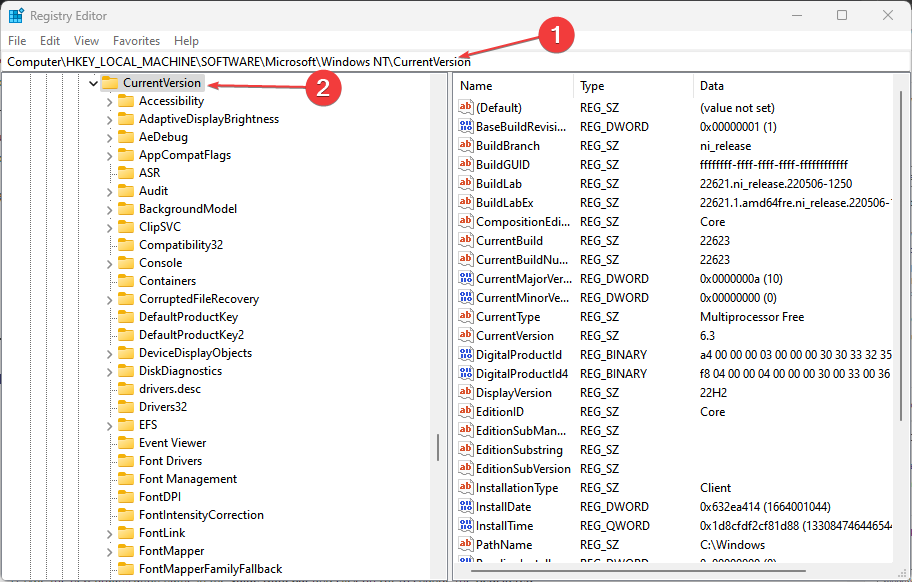
- Copy and paste the following path into the path address bar and press Enter:
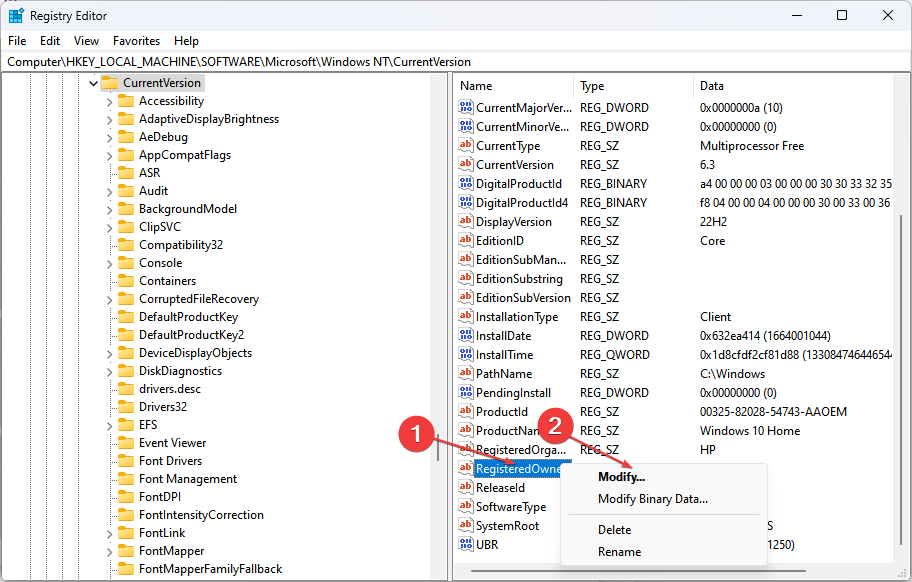
HKEY_LOCAL_MACHINE\SOFTWARE\Microsoft\Windows NT\CurrentVersion - Right-click on the RegisteredOwner and select the Modify option.
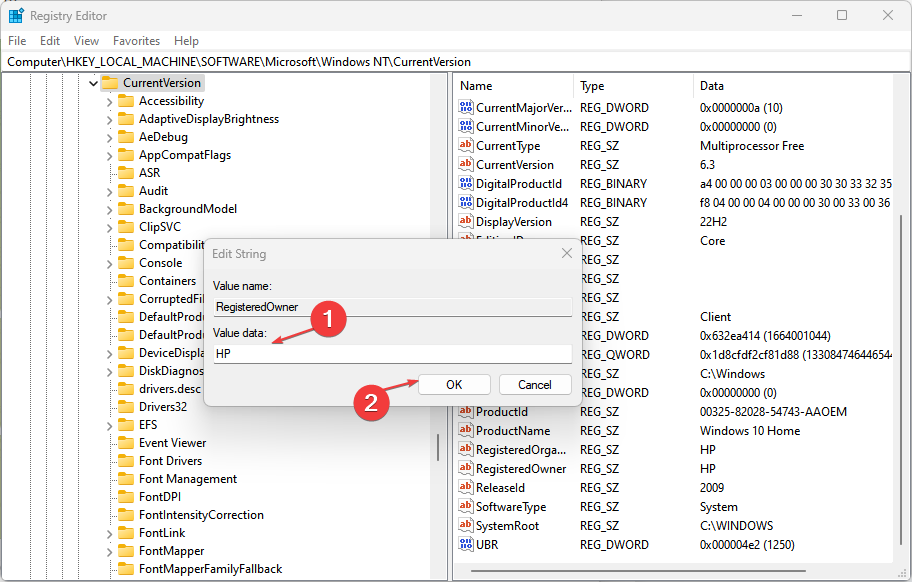
- Type the new owner name in the Value Data bar and click on OK to change the Registered Owner name.
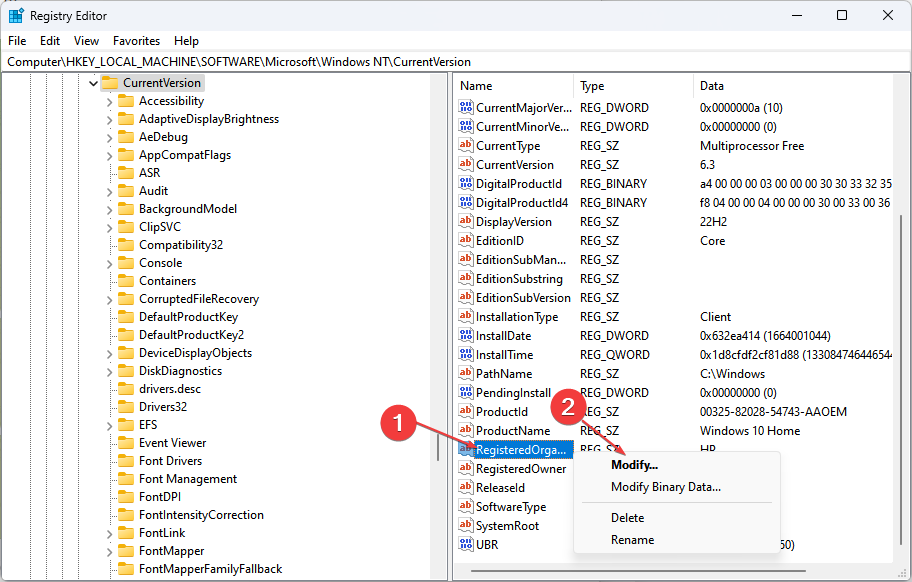
- Right-click on the RegisteredOrganization and select the Modify option.
- Type the new organization name in the Value Data bar and click on OK to change the Registered Organization name.
- Close the Registry Editor window and restart your PC.
Registry Editor gives users access to Renaming the Registered Owner details in Windows 11 and allows users to modify relevant information. You can read about how to fix a corrupt registry on Windows.
In addition, users can also read how to fix settings managed by organisation errors on their PC.
In conclusion, this is how to change Windows 11 owner via the Registry Editor. Should you have further questions or suggestions concerning this guide, kindly drop them in the comments section.

