Windows 11 Cumulative Update Failed: 6 Ways to Install It
You might have to download the update manually from Microsoft
5 min. read
Updated on
Read our disclosure page to find out how can you help Windows Report sustain the editorial team. Read more
Key notes
- Cumulative updates contain all the previous updates released for a particular Windows version are installed automatically to the devices.
- Sometimes they can fail because Windows Update may be having problems connecting to Microsoft's servers or there could be a problem with one of its services.

If you’re using Windows 11, you’ll want to install the latest updates as soon as possible. However, some users have reported issues installing the cumulative update on their PCs.
To help you troubleshoot these issues, we’ve put together this guide on what to do if the Windows 11 cumulative update fails.
Why is the cumulative update not downloading in Windows 11?
Sometimes the cumulative update (CU) is not available to download through the Windows Update or Microsoft Update. This can be caused by a myriad of issues, as listed below:
- The cumulative update is not available – The first reason your cumulative update is not downloading is that the cumulative updates are not available in your region yet. A reliable VPN should suffice in such a case.
- An issue with Microsoft’s servers – If there are any server issues or connectivity problems between Microsoft and your PC, then the Windows 11 cumulative update will not be downloaded at all.
- Internet connection – Your computer’s Internet connection may be the issue. If you have a slow Internet connection, then it will affect the downloading process.
- Bandwidth limits – Some ISPs have bandwidth limits on their subscriptions, which could prevent you from downloading a large file like an OS update in one go.
- Antivirus/firewall settings – You may have a third-party firewall installed on your computer that blocks downloads and installation of new programs, including Windows cumulative updates.
- The Windows Update service is not running – It is possible that the Windows update service has been disabled or stopped running at some point.
- Insufficient RAM – If your computer does not have enough RAM memory, it will not be able to accommodate any downloads. This includes the Windows cumulative update or any other tasks without crashing.
How do I fix Windows 11 not updating?
As always, it is important to start with some preliminary checks before jumping to the advanced solutions:
- Make sure that your PC meets the minimum requirements for installing the update.
- Ensure you have enough storage space to accommodate the new update.
- Test your connection by connecting directly to your modem or router with an Ethernet cable.
- Verify that the Microsoft server status is up and running.
- Check if there are any pending reboots required after installing the update and try again after those have been completed successfully.
1. Run the Windows update troubleshooter
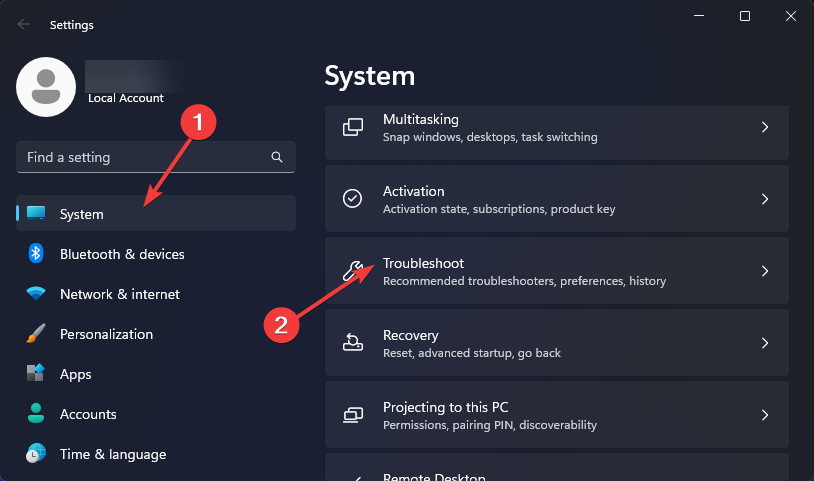
- Hit the Windows key and click on Settings.
- Click on System and select Troubleshoot.
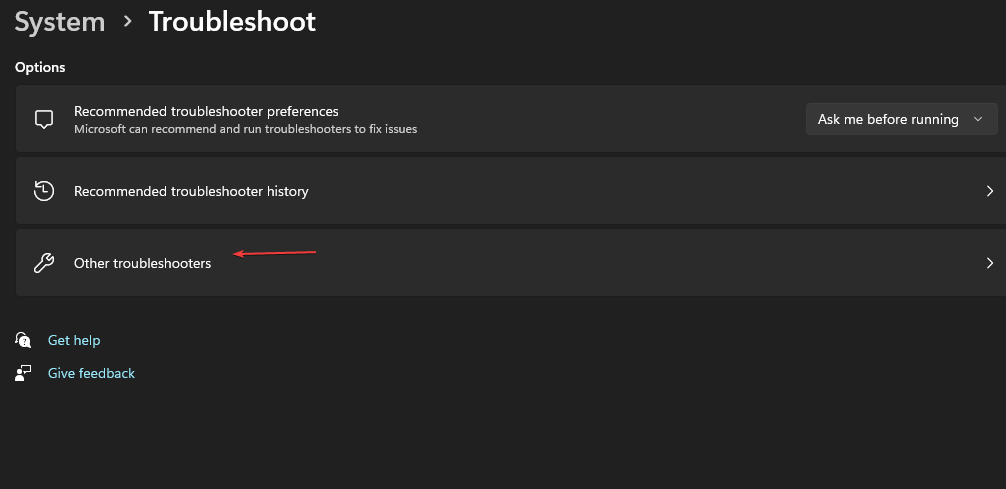
- Navigate to Other troubleshooters.
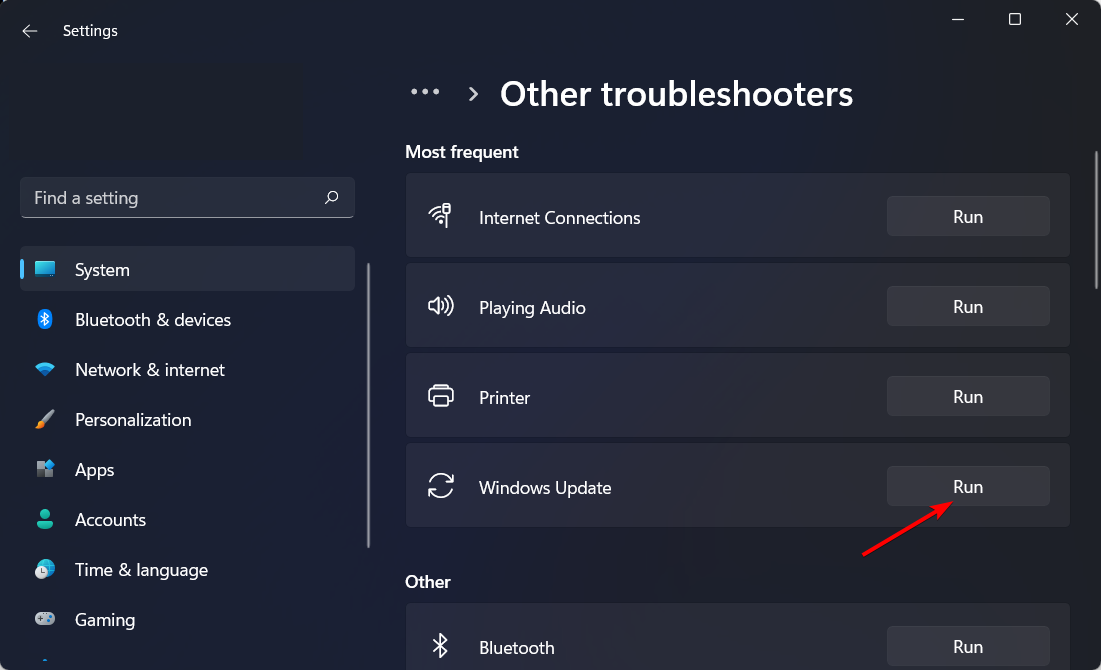
- Click the Run option for the Windows Update troubleshooter.
2. Run the DISM and SFC scans
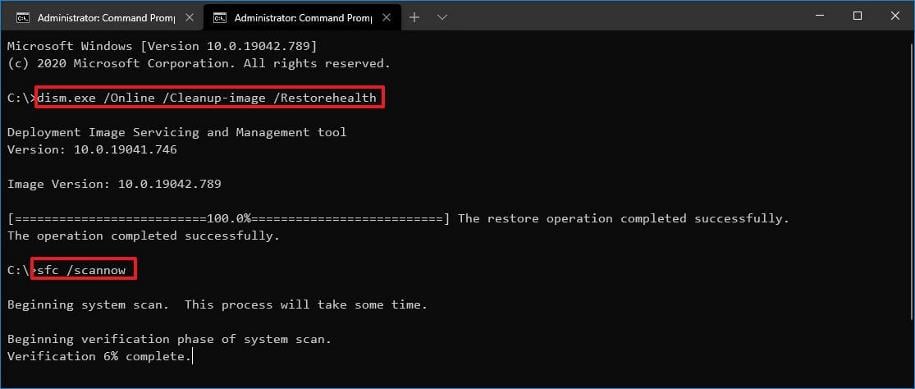
- Hit the Start menu icon, type cmd in the search bar, and click Run as administrator.
- Type the following commands and press Enter after each one:
DISM.exe /Online /Cleanup-Image /Restorehealthsfc /scannow - Restart your PC.
3. Disable the antivirus temporarily
- Hit the Windows button, type Windows Security in the search bar and click Open.
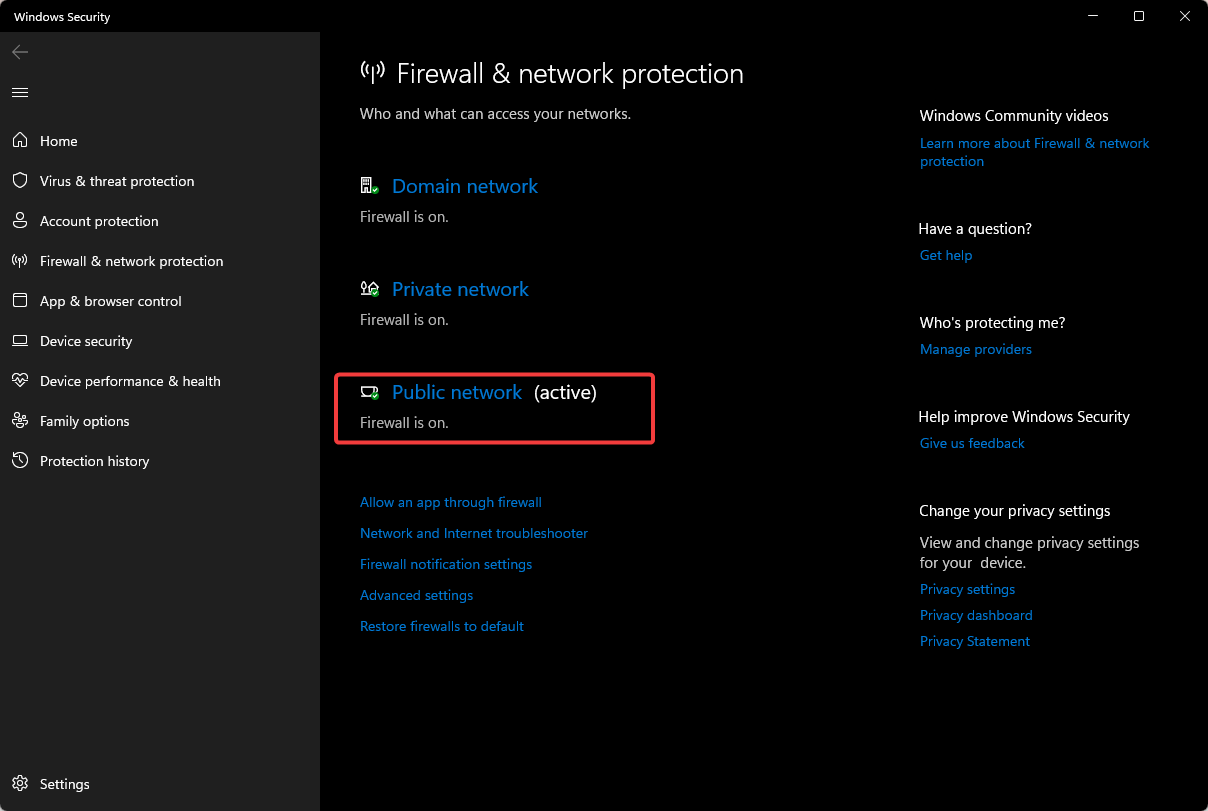
- Click on Firewall & network protection then select Public network.
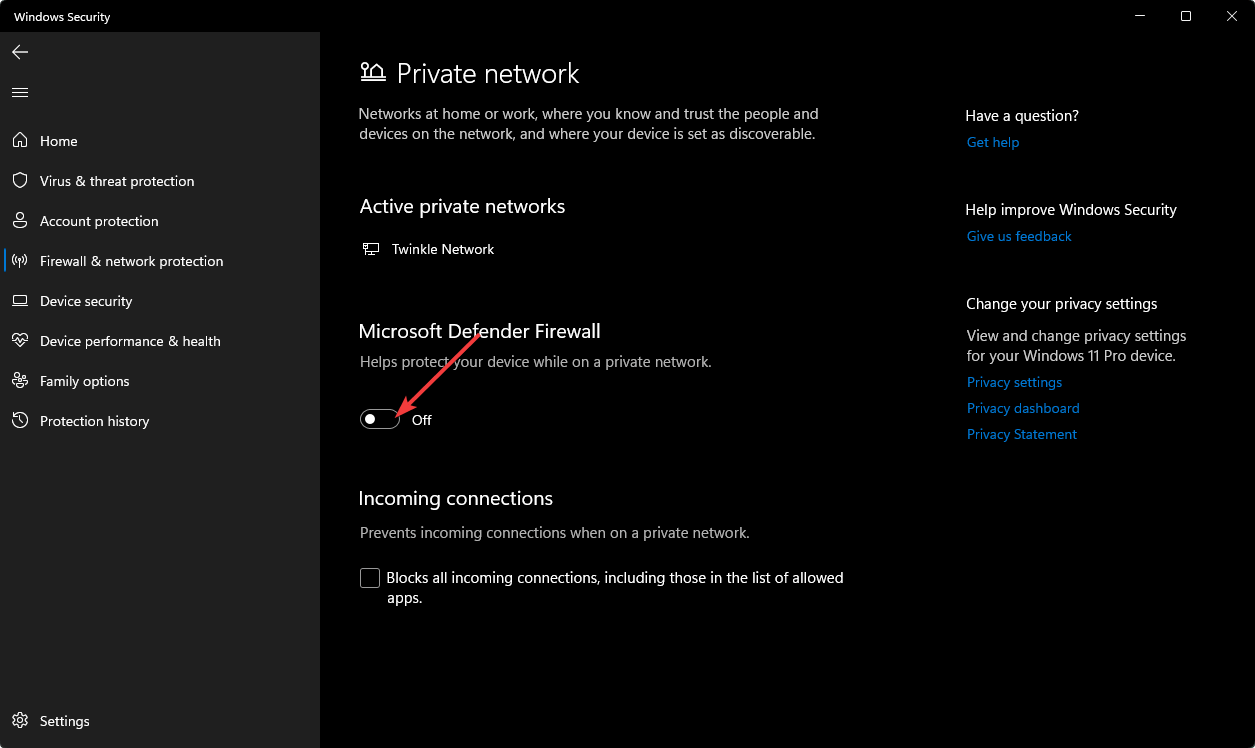
- Locate Microsoft Defender Firewall and toggle the off button.
4. Restart the Windows update service
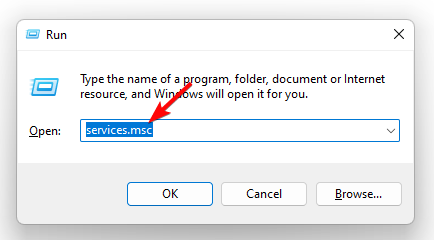
- Hit the Windows + R keys to open the Run command.
- Type services.msc and hit Enter.
- Locate Windows Update service, double click on it and select Properties.
- Navigate to the General tab, under Startup type select Automatic from the drop-down options and click on the Start button.
- Next, click Apply and then OK.
5. Rename the software distribution folders
- Hit the Windows key, type cmd in the search bar and click Run as administrator.
- Type the following commands and press Enter after each one:
net stop bitsnet stop wuauservnet stop cryptsvcren %systemroot%\softwaredistribution softwaredistribution.bakren %systemroot%\system32\catroot2 catroot2.baknet start bitsnet start wuauservnet start cryptsvc
6. Download the update manually
- Navigate to your browser and go to the Microsoft catalogue page.
- Search for the problematic cumulative update and hit the Download button.
- Click on the downloaded file and follow the on-screen prompts to install the update.
Is a cumulative update for Windows 11 necessary?
Cumulative updates are released on a regular schedule and contain fixes for any issues that may have been found since the previous update was released.
Microsoft releases these cumulative updates to fix bugs, make Windows 11 more stable and improve performance. They also include any new features that were not previously released in a feature update.
In most cases, Microsoft recommends installing cumulative updates as soon as they become available. Installing them ensures your computer is protected from all known vulnerabilities. In case you are not able to install the latest CU update KB5029263, refer to this guide.
However, if you’re running an older version of Windows 11, it’s worth checking with your IT department before installing the latest CU, as some updates tend to bring up more problems instead of solving them.
If all else fails and the Windows 11 cumulative update failed message is still present, consider performing a clean install of Windows. To prevent future cumulative update install issues, refer to our detailed article for some tips.
That’s all for this article, but keep the conversation going in the comment section below.








User forum
0 messages