0x800f0830 on Windows 11: How to Fix This Error
6 min. read
Updated on
Read our disclosure page to find out how can you help Windows Report sustain the editorial team Read more
Key notes
- The Windows 11 error code 0x800f0830 occurs when one is trying to install the OS on their devices.
- You can correct the issue by either using the SFC and DISM or by clean booting your system.
- When trying to install previous versions of Windows, you may encounter the CBS_E_IMAGE_UNSERVICEABLE error.
- If you’re having a 0x800f0830 – 0x20003 error on Windows 11, you will be able to fix it by adjusting certain settings.
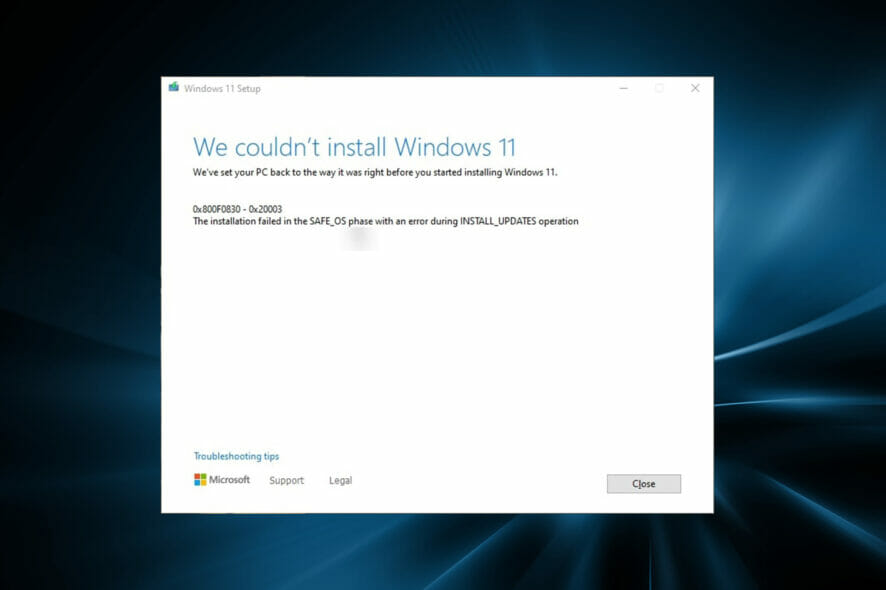
This is one of the errors that are caused by Windows 11. To be more precise, the 0x800f0830 error is commonly seen when people try to install the latest OS on their PCs or laptops.
There are many similar errors that you might encounter on Windows 11: error code 0x800f0835, error code 0x800f0805, error code 0x800f0900, error code 0x800f0930, error code 0x800f0902, error code 0x800f0A04, to name a few.
As such, there are several methods for fixing them and the error code 0x800f0830 is no exception.
Is the Windows 11 0x800f0830 error serious?
If you have recently downloaded and installed Windows 11 on your computer, then you might have come across a few problems.
Therefore, if you are one of those users who have just installed the previous version of Windows, you might have received the Windows 11 CBS_E_IMAGE_UNSERVICEABLE error.
Furthermore, this is one of the most common errors that occur during the process of installing Windows 11. The users who have come across this error message say that it is a minor problem and can be easily fixed by performing some troubleshooting steps.
However, many people ignore this error message and continue with the installation process hoping that it will eventually be complete. But this does not happen as the installation process never completes.
The error could be referring to anything from a challenge with the service, an update, or even the process of installing software on your computer.
Why does the error code 0x800f0830-0x20003 occur?
This is a very common Windows 11 error code and is usually caused by misconfiguration of the system settings or incorrect hardware/software.
In fact, there are several reasons behind it. One of the main causes is a problem with your computer’s memory. If you have installed more than 4 GB of RAM into your computer, you will most likely experience an error message pointing to 0x800f0830 as your source of concern.
This is due to the fact that Windows 11 cannot recognize more than 4 GB of RAM, which is why it will not be able to load any programs or even display your desktop correctly. In order to fix this issue, you must remove some of the RAM from your computer and try to reboot your system again.
Another possible cause for this error is a malicious Trojan virus that has infected your operating system. This virus can take over control of your computer and essentially disable all processes on your PC at will.
This includes the one responsible for running Windows 11. As long as the virus is active, there is no way to repair it other than to reform it. That’s why you should use one of the best antivirus solutions for Windows 11 to protect your computer.
If the issue is still persistent, then remember that the error 0x800f0830 is found in Windows 10 as well and it can be solved. We’re also going to tell you how to fix the Windows 11 0x800f0830 error code in a few simple steps.
How can I fix the Windows 11 error code 0x800f0830?
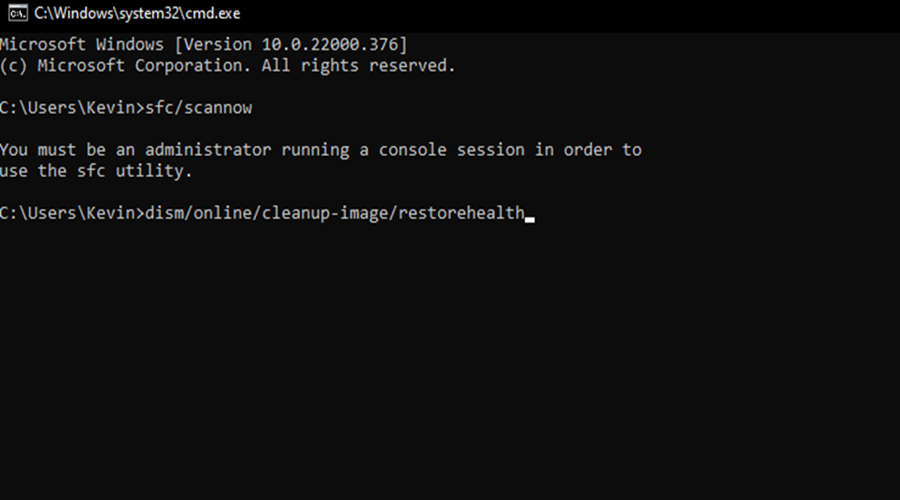
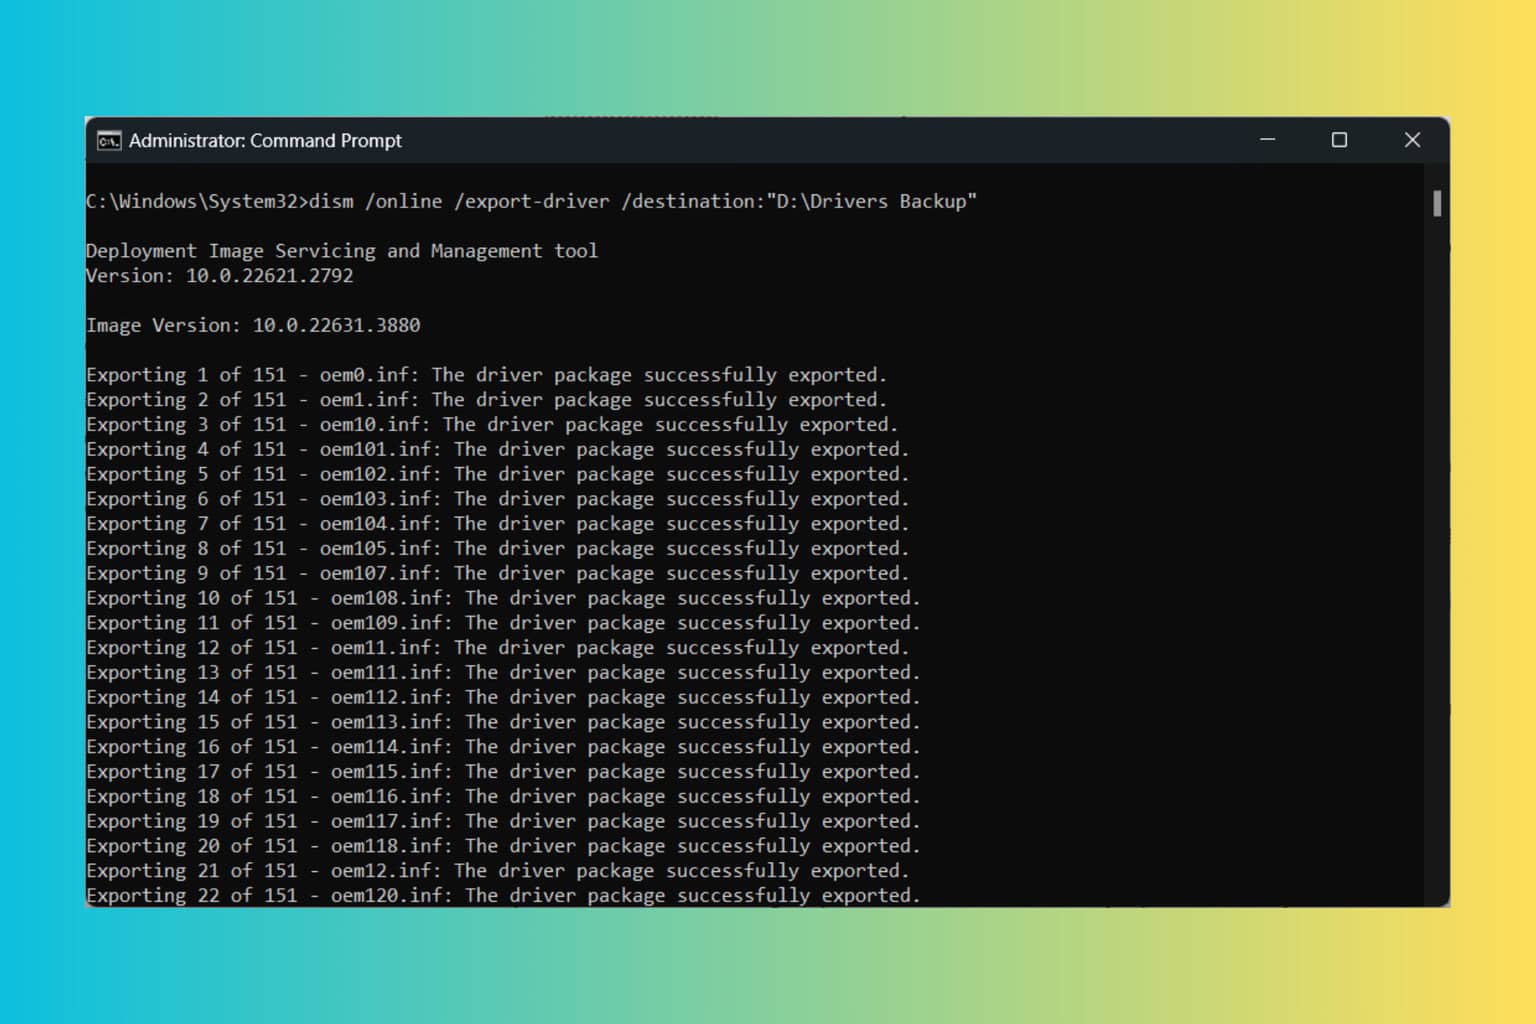
1. Run SFC and DISM scans
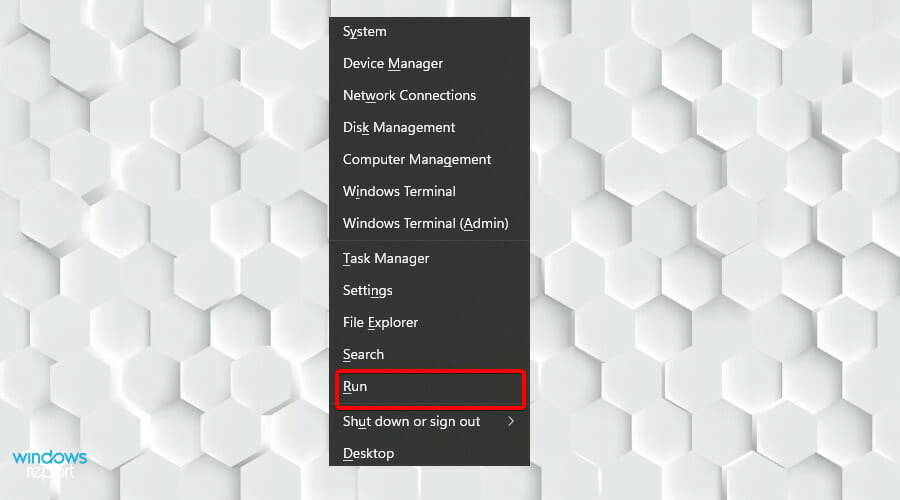
- Press Windows key + X key and select Run.
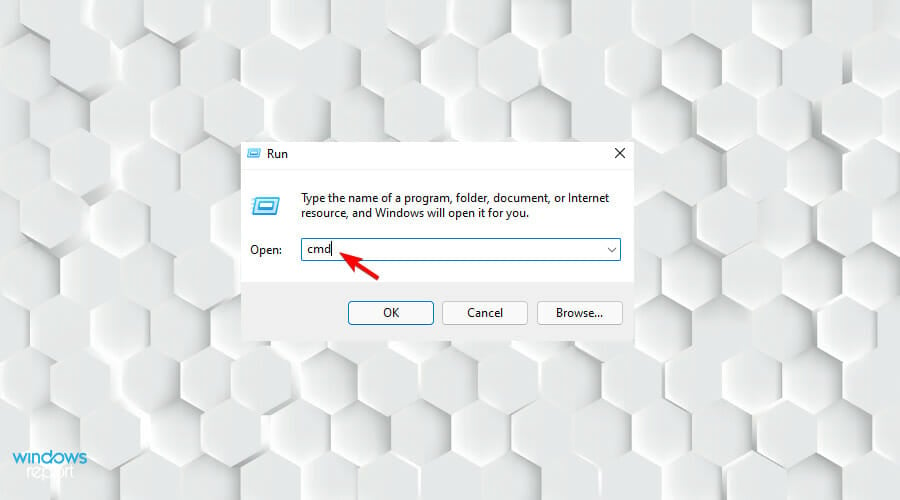
- Then, key in the following command and press Enter:
cmd.exe - Press Ctrl+Shift+Enter simultaneously.
- When the User Account Control pops up, click Yes.
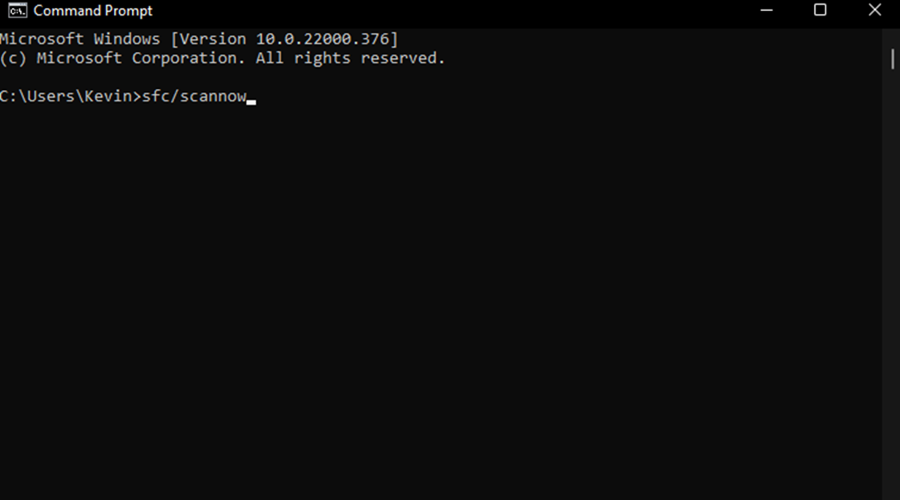
- Key in the following command and press Enter key:
sfc /scannow - Once the scan is complete, check if error 0x800f0830 persists while installing updates.
- In case it is persistent, you will then have to key in the following command in Command Prompt:
dism /online /cleanup-image /restorehealth
In case that did not fix the error, we recommend using a third-party repair software as the best option that scans your PC for corrupted or outdated files and replaces them.
2. Use the Windows Update troubleshooter
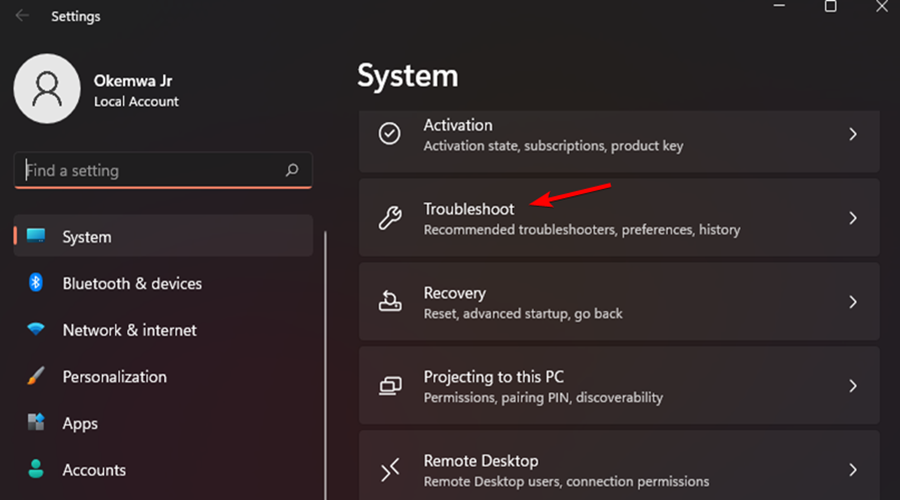
- Press Windows key + I key to open the Settings app, then select Troubleshoot on the leftside panel.
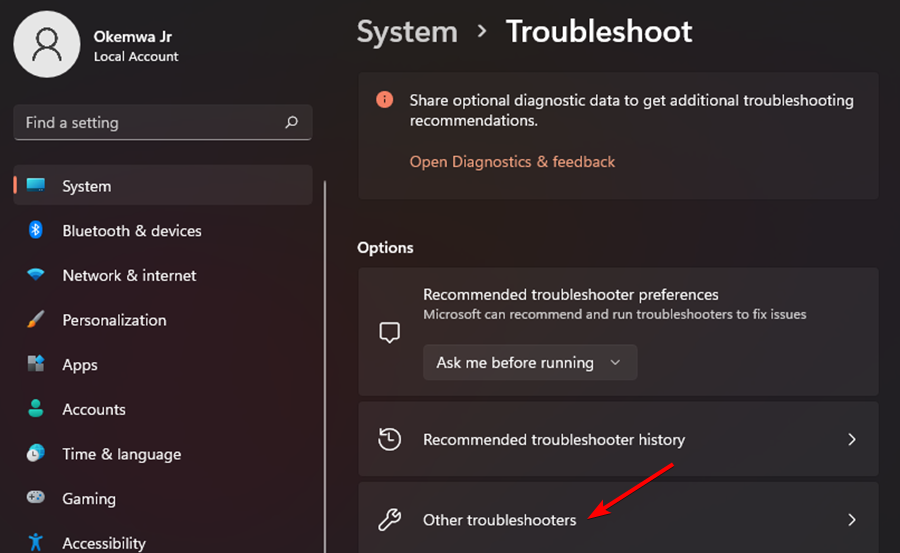
- Scroll down the subsequent window and click on Other troubleshooters.
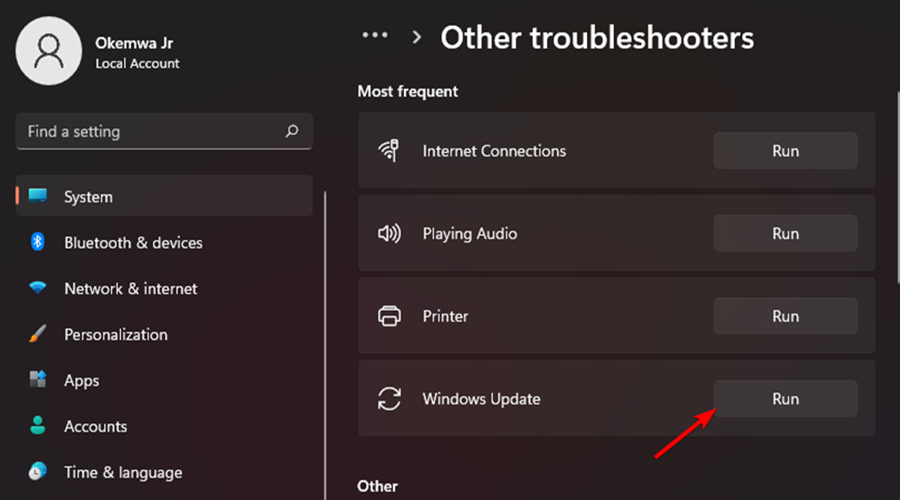
- Select Windows Update and then click on Run.
3. Clean Boot your system
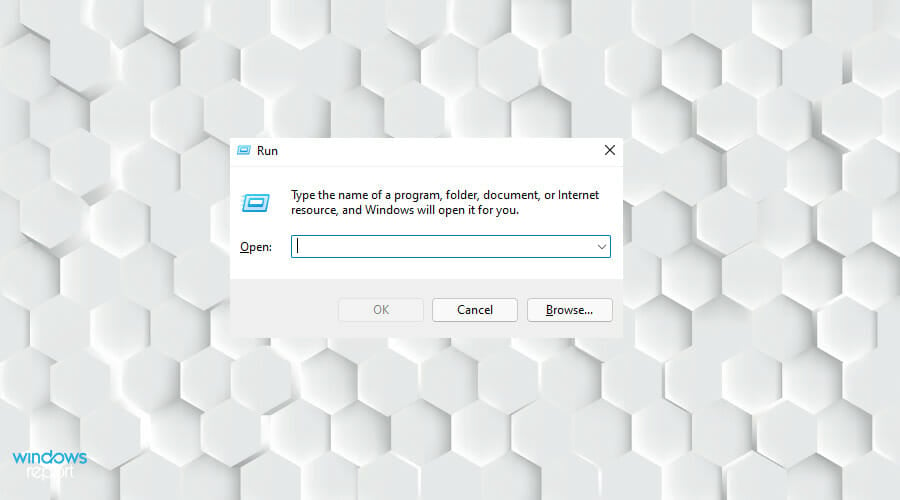
- Press the Windows key + R key to open the Run dialog box.
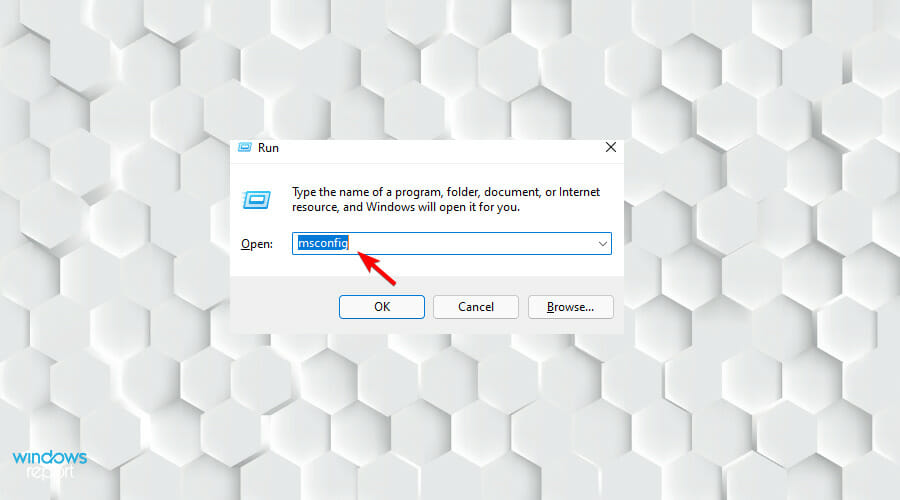
- Key in the folllowing command in the dialog box and press Enter key:
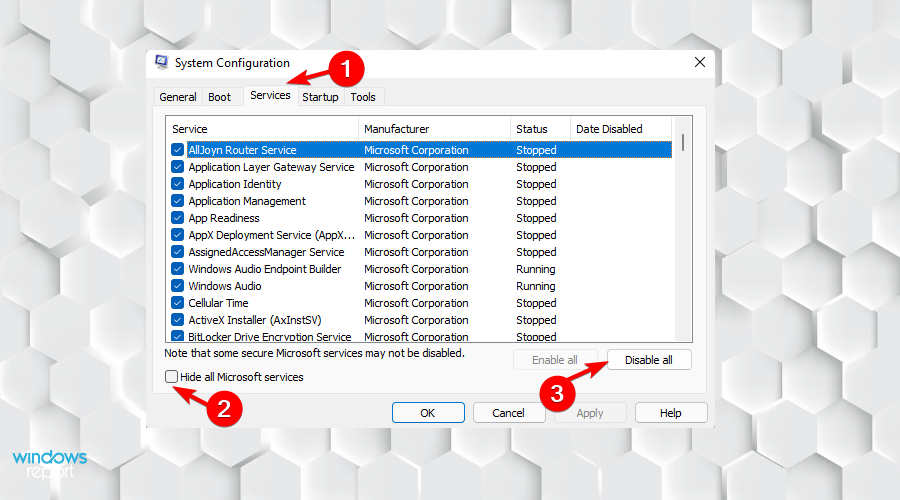
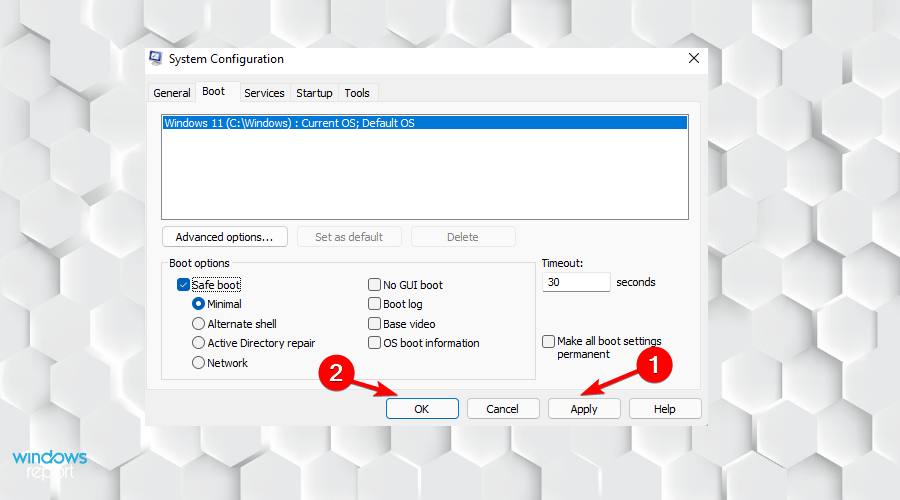
msconfig - Select the Services tab, then uncheck the box marked Hide all Microsoft services, and click on Disable all.
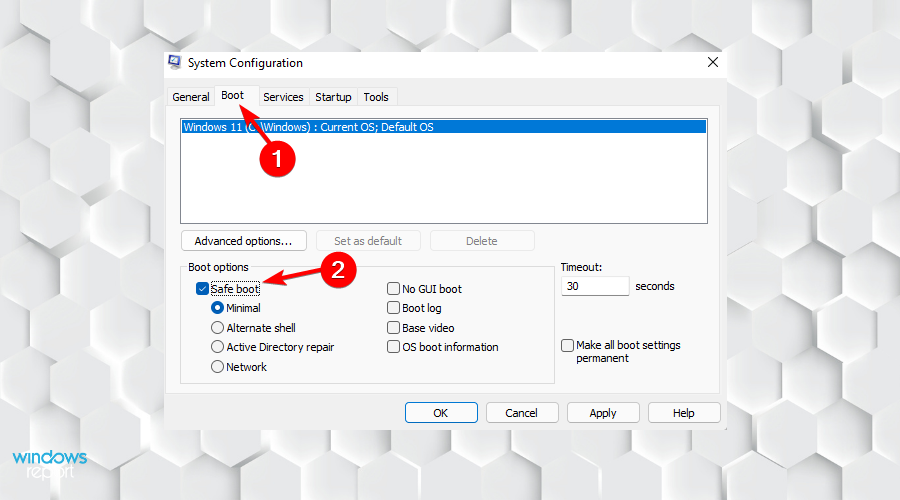
- Shift to the Boot tab next and check the box left of Safe boot.
- Then, select Apply then OK.
- Restart your PC and the system will boot into the Safe Mode.
4. Update your system
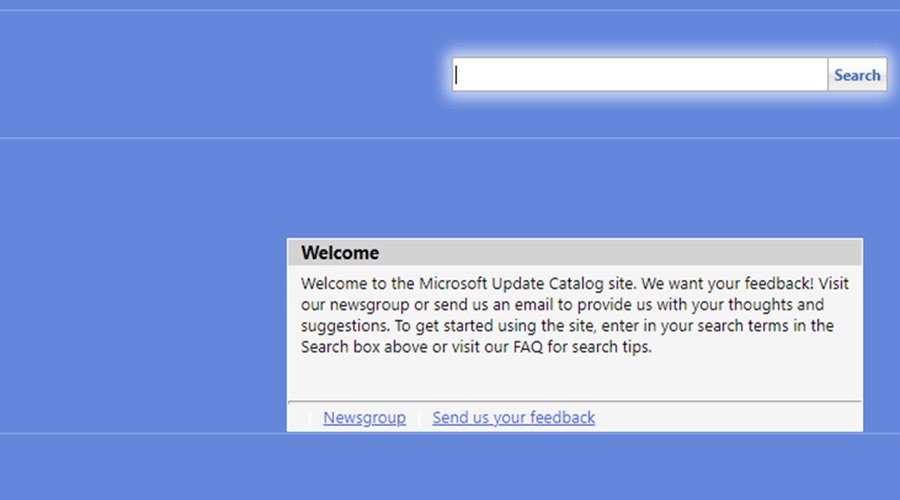
- Visit the official webpage of Microsoft’s Update Catalog.
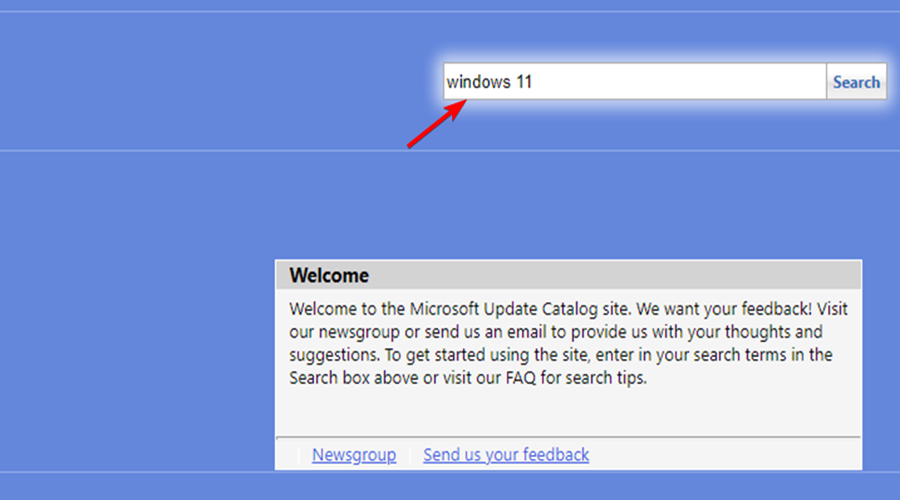
- Click the search bar and write the patch ID you are having problems with, then hit Enter.
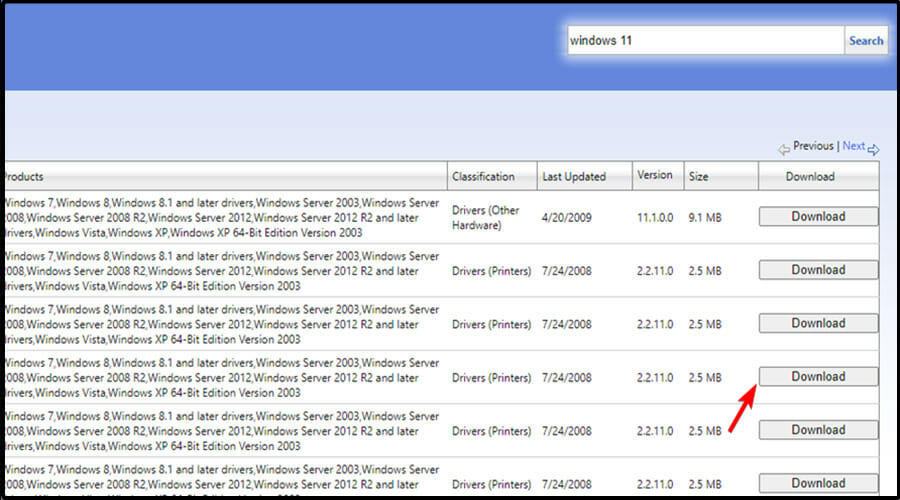
- Download the package matching with your system BIT and then Install it.
Usually, Microsoft automatically provides cumulative updates when you’re connected to the Internet via an Ethernet or Wi-Fi connection.
However, if your computer is on a metered connection and has slow Internet speeds, these files can be corrupted or broken. This can lead to unexpected error messages popping up.
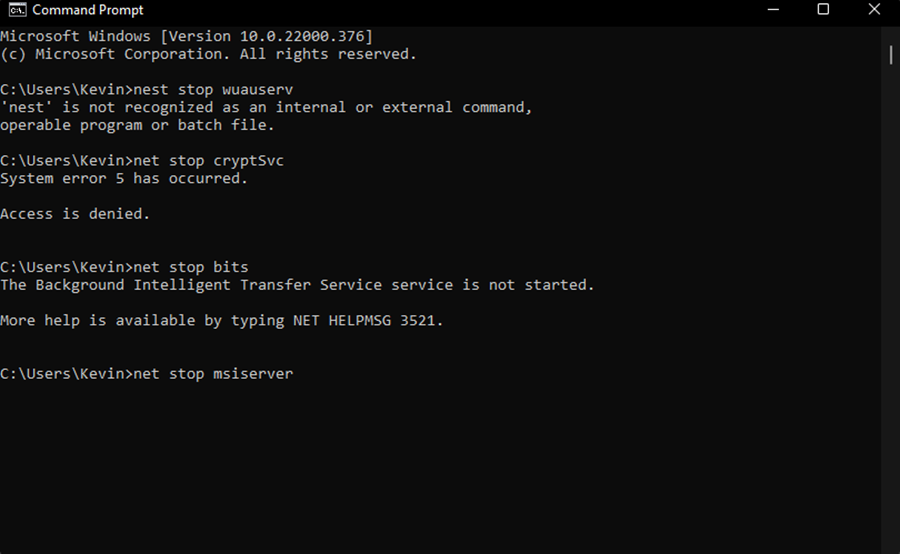
5. Reset Windows update
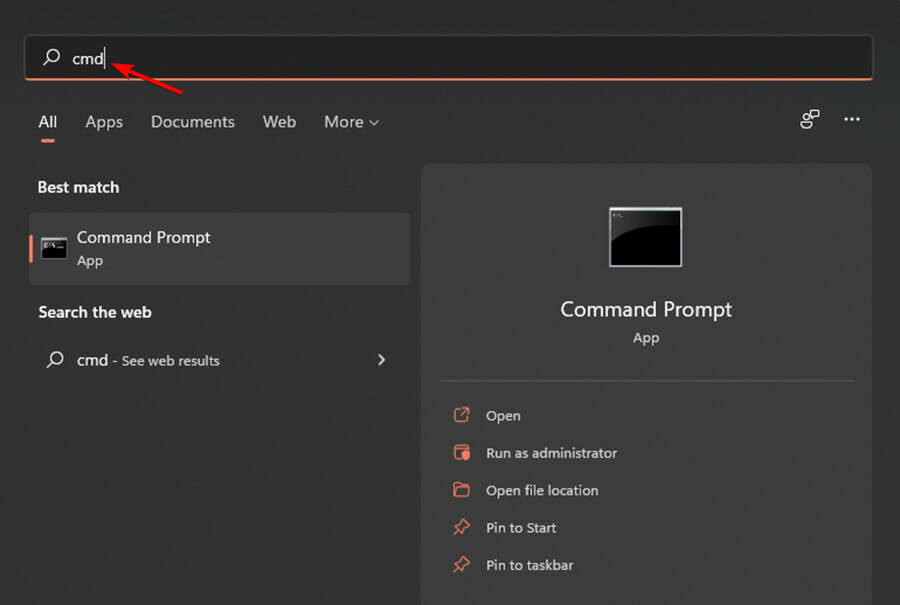
- Click the taskbar search icon and type in cmd.
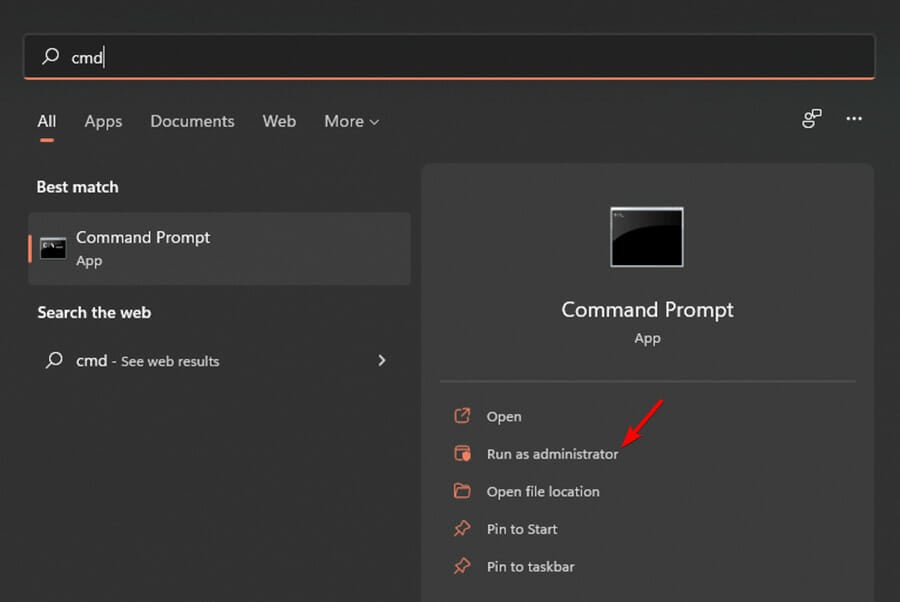
- The Command Prompt will apper, click Run as administrator.
- Click the Yes button for the User Account Control.
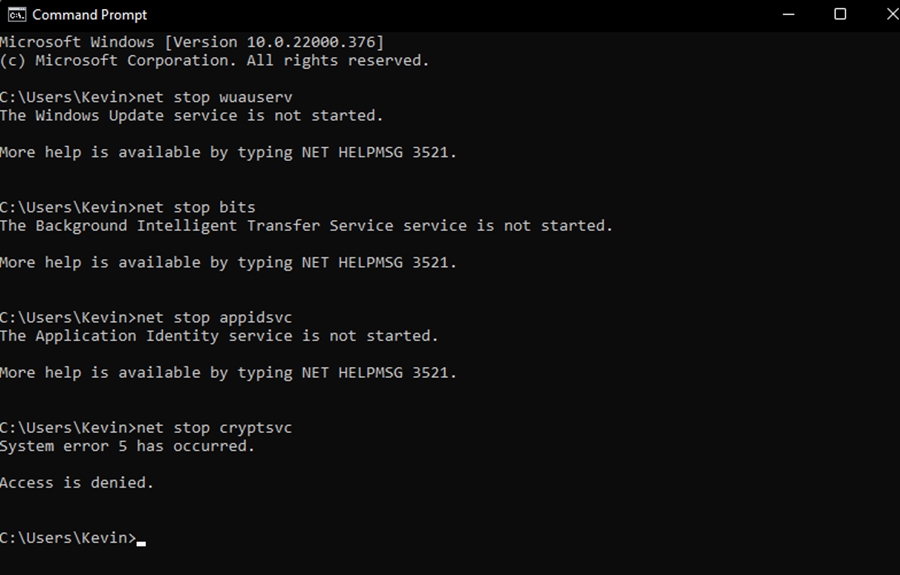
- Key in the following one at a time and press Enter after each one:
net stop wuauserv
net stop bits
net stop appidsvc
net stop cryptsvc
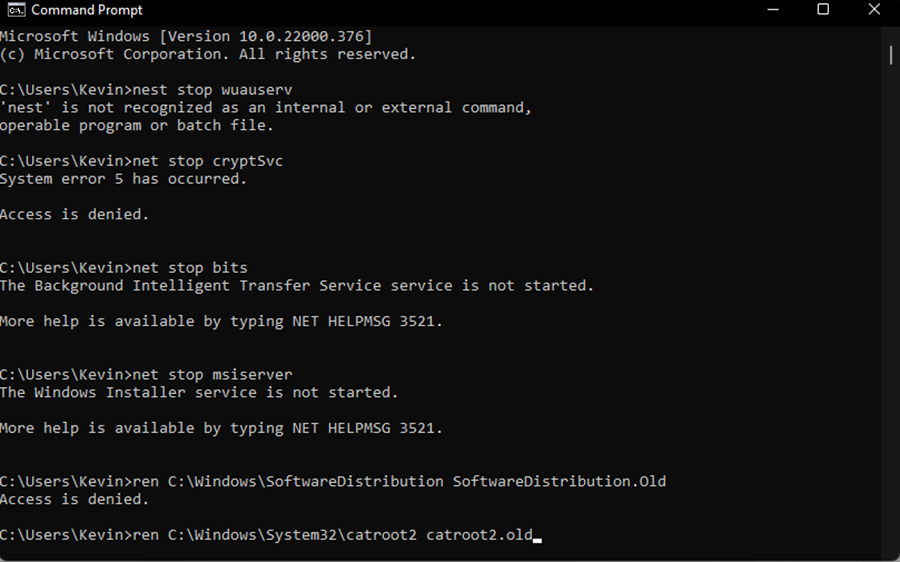
- Then, key in the following code:
ren C:\Windows\SoftwareDistribution SoftwareDistribution.old - Key in the following code:
ren C:\Windows\System32\catroot2 Catroot2.old
- Lastly, you need to run the below commands subsequently:
net start bits
net start appidsvc
net start wuauserv
net start cryptsvc
- Once the scan is complete open the Settings App, check for Windows Update, and install the recent patch in the usual way.
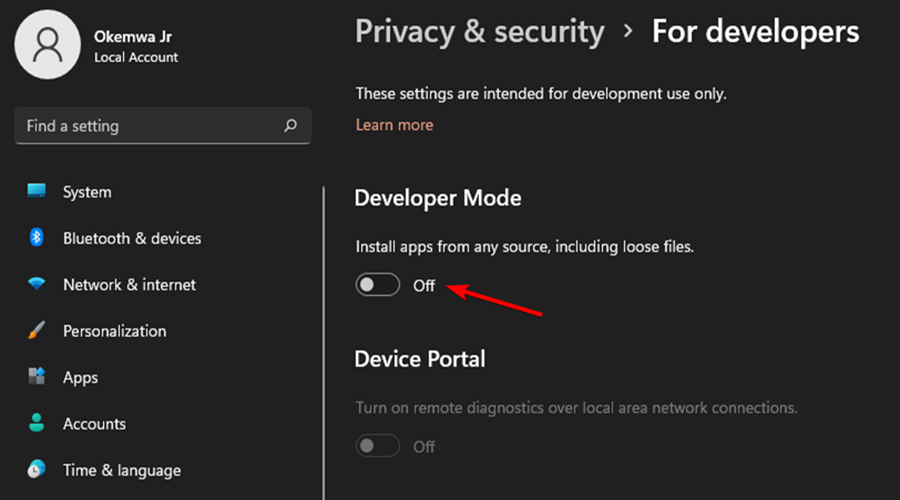
6. Turn off Developer Mode
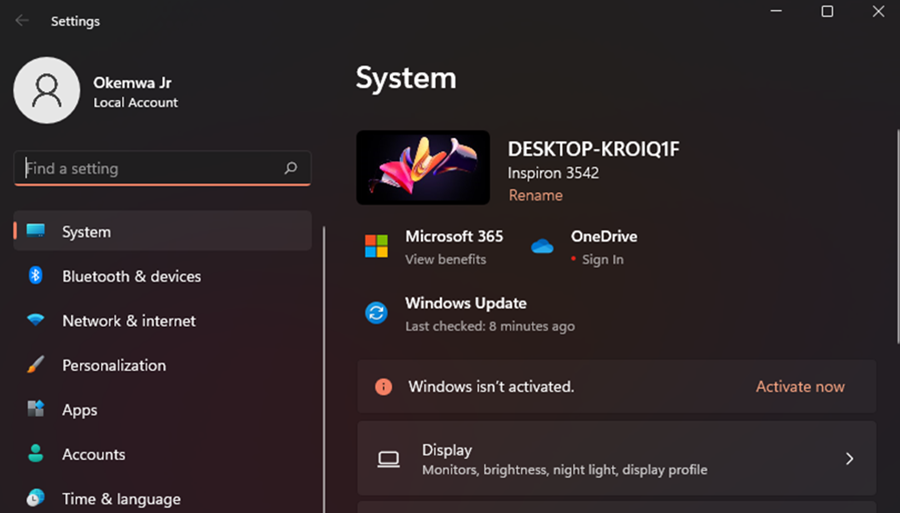
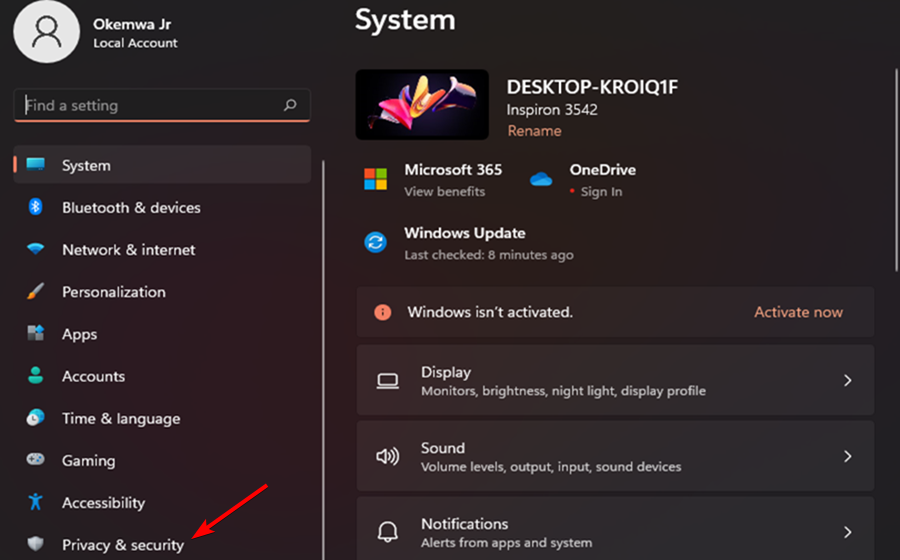
- Press the Windows key + I key to launch the Settings App.
- Then, click on Privacy & Security.
- Scroll down the window and turn the Developer Mode OFF.
- Finally, restart your computer and check if it the issue has been resolved.
As you know by now, there are several other Windows Update issues that can arise for some users. For example, our guide on how to solve error 0x80070002 will help you resolve this problem in no time since the solutions may be applied in Windows 11 as well.
Were you able to resolve the issue with either one of the fixes listed above? Let us know which one worked for you in the comments section below.

