Windows 11 Not Printing In Color: 6 Quick Fixes
Learn to print in color and bypass any existing issues
Key notes
- If Windows 11 is not printing color copies through your printer, it's likely an incompatibility issue or a bug in the OS.
- First, update the printer driver to the latest version.
- Also, you can run the built-in troubleshooter, uninstall the recent Windows update, or try the other methods here.
A printer is an important device in most offices as well as some homes. Though many offices are making a transition to a paper-free workspace, the printer must work effectively until then. But several users have reported that Windows 11 is not printing color copies.
Whenever you upgrade the OS, there’s a good chance of encountering compatibility issues. Maybe the installed printer driver or the relevant applications are not compatible with Windows 11.
Also, there are a few critical services that must be running for the printer to work effectively. Other than that, it could be a conflicting background process or problems with the cartridge behind the issue.
Now that you have a basic understanding of the causes, it’s time to find out what to do if Windows 11 is not printing in color.
What can I do if Windows 11 is not printing in color?
1. Restart the computer and the printer
Before we delve into the complex troubleshooting methods, first, restart both the computer and the printer. Also, make sure to disconnect the power supply to turn off the printer rather than pressing the dedicated button.
This method has worked for a lot of users, particularly in situations where the problem lies with a background process or some minor malfunction with the printer. Once done, check if the printer is now printing color copies in Windows 11.
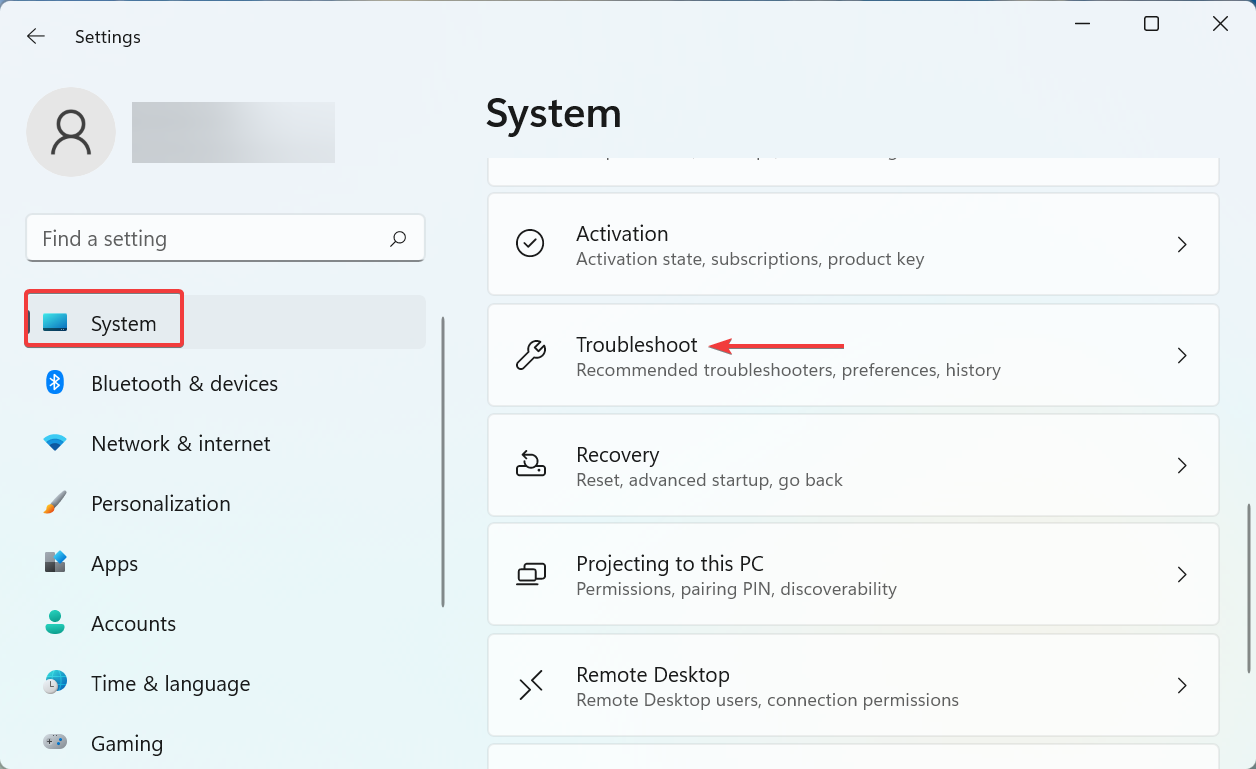
2. Run the Printer troubleshooter
- Press Windows + I to launch the Settings app, and click on Troubleshoot on the right in the System tab.

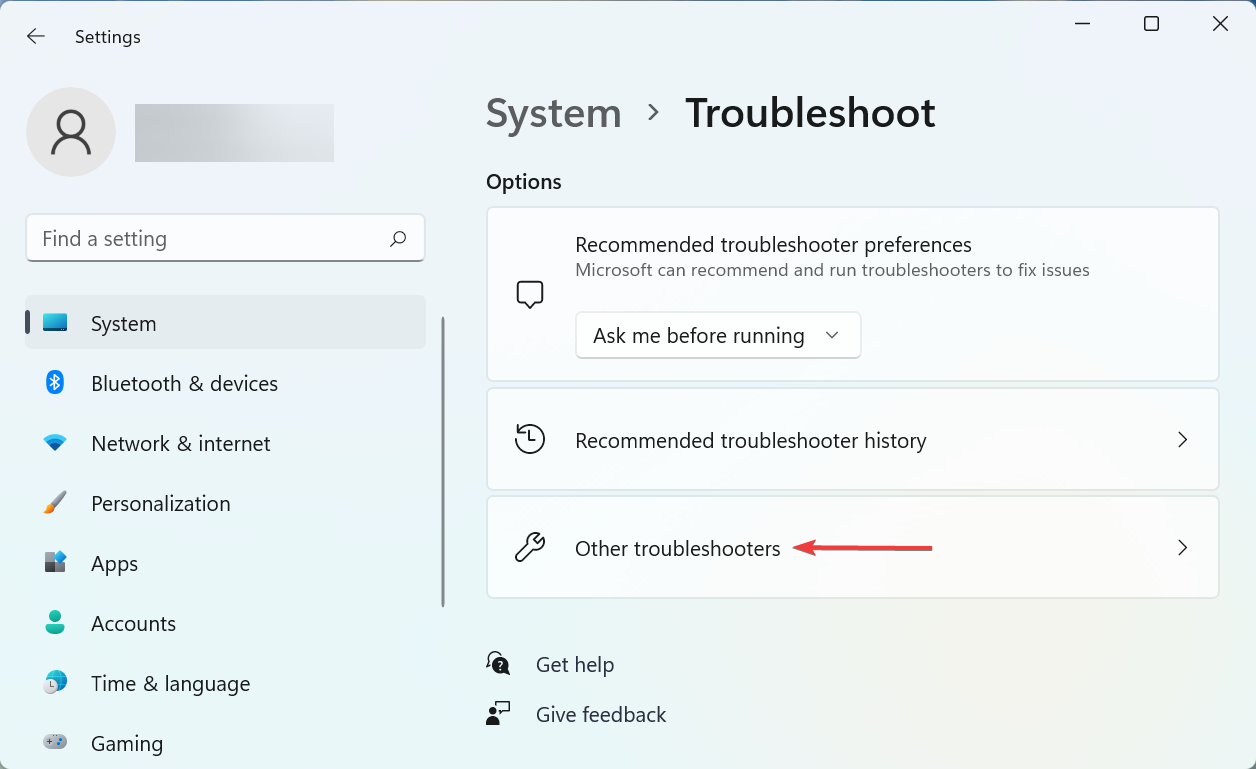
- Next, click on Other troubleshooters.

- Locate the Printer entry here, and click on the Run button next to it.

- Now, follow the on-screen instructions and choose the appropriate response when prompted to complete the process.

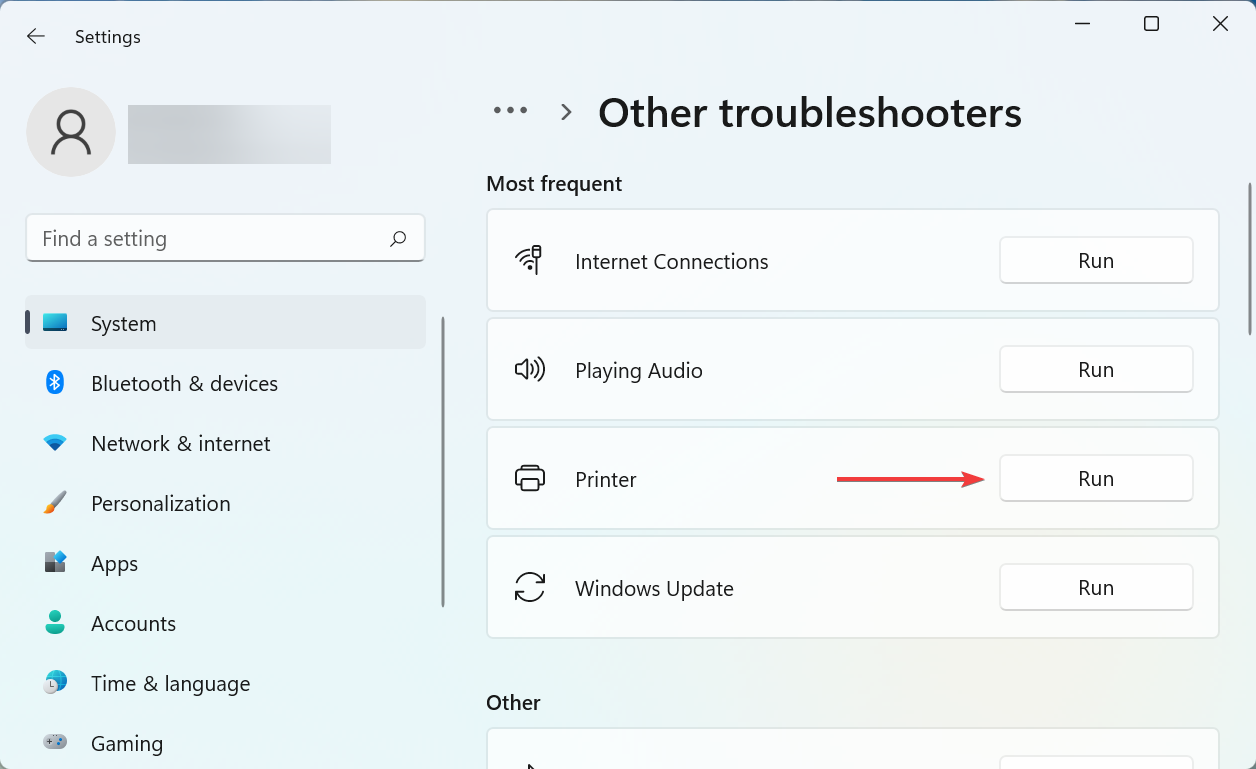
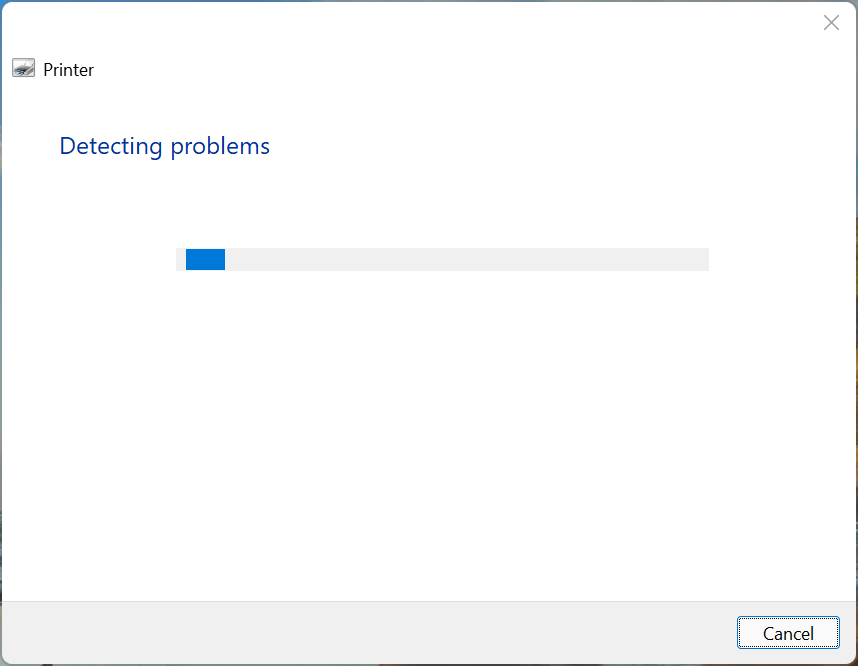
Another quick way to fix the Windows 11 not printing in color issue is to run the dedicated Printer troubleshooter. It will automatically identify what’s causing the problem and remove it.
3. Update the printer driver
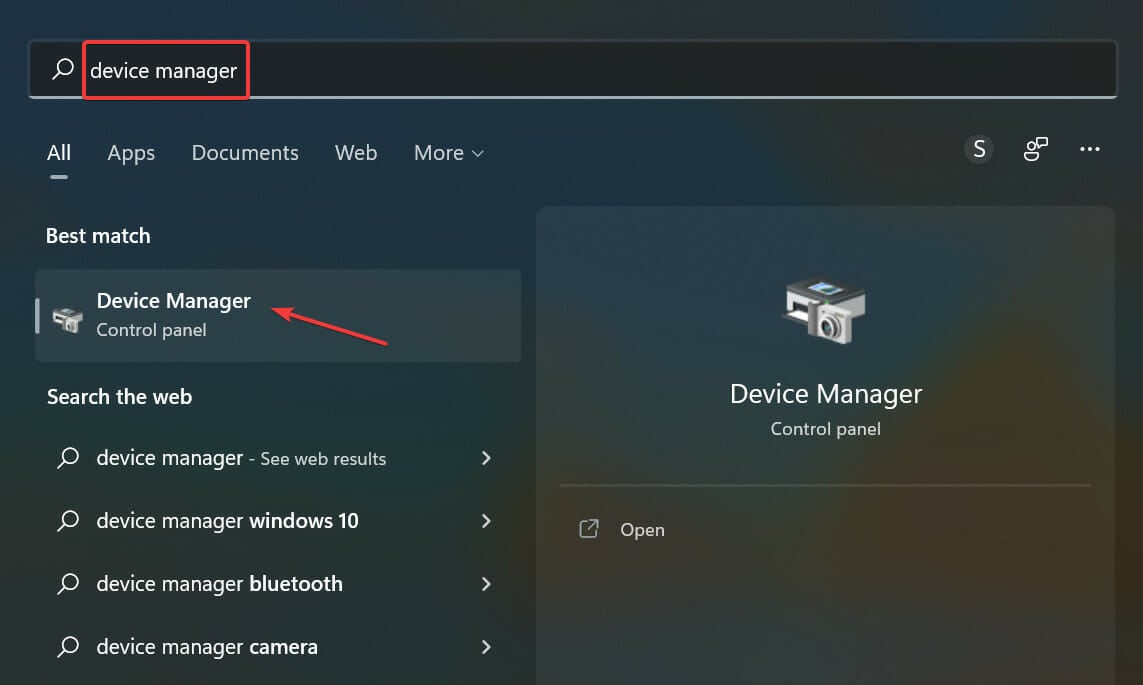
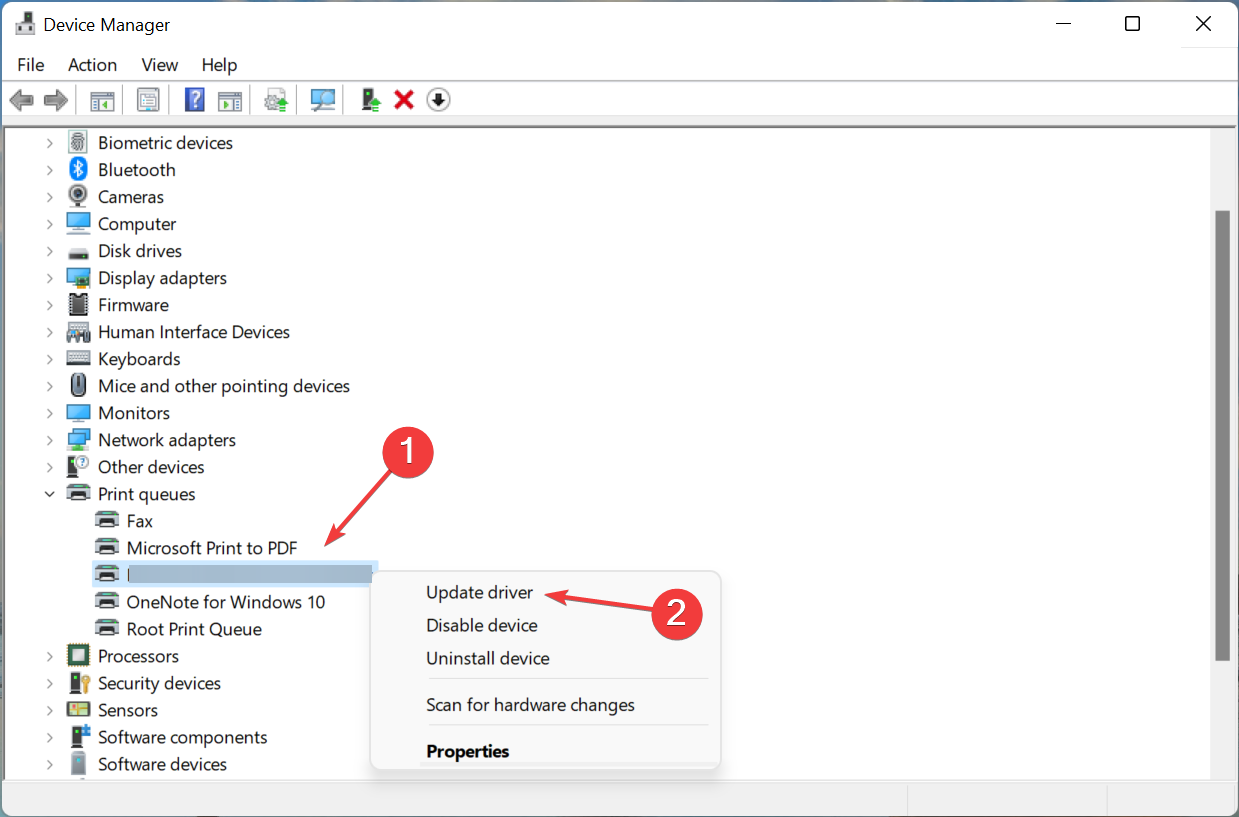
- Press Windows + S to launch the Search menu, enter Device Manager in the text field, and click on the relevant search result that appears.

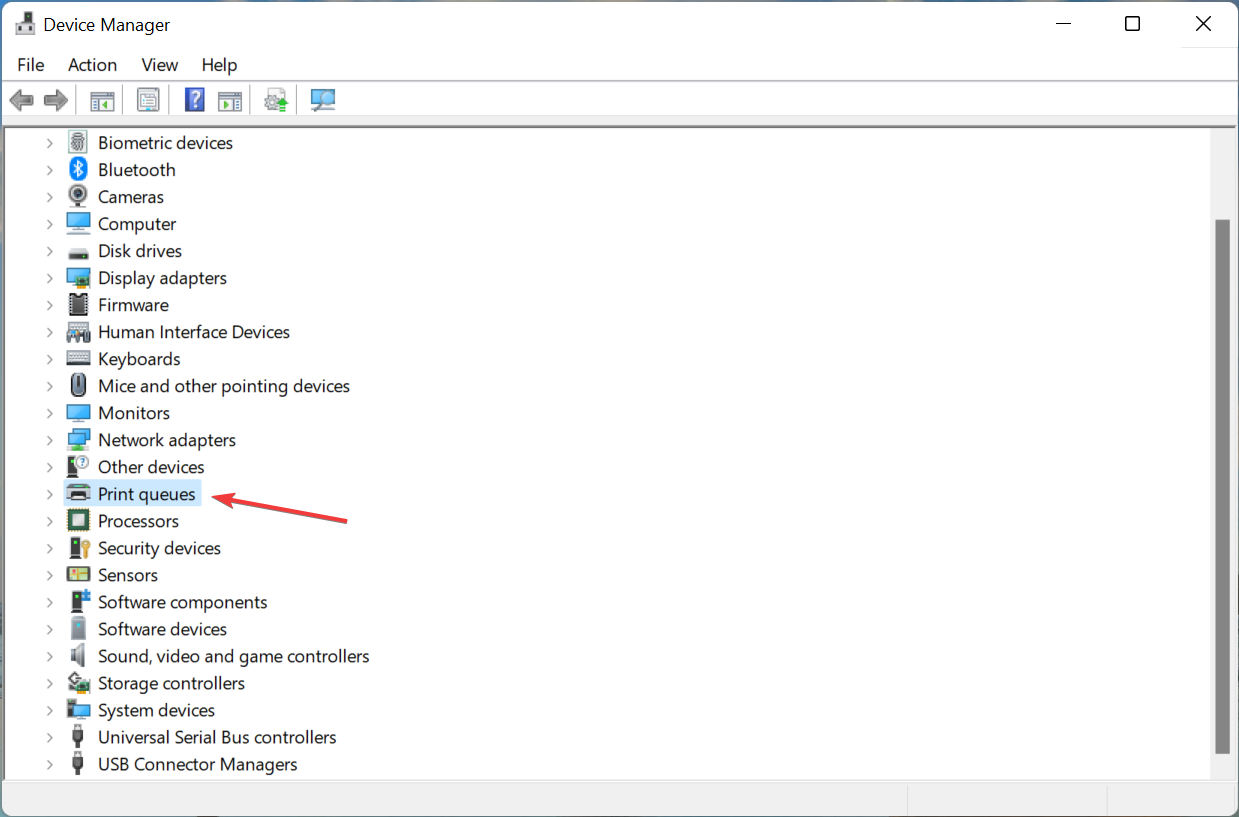
- Double-click on the Print queues entry here to expand and view the available printing devices.

- Locate the problematic printer, right-click on it, and select Update driver from the context menu.

- Next, select Search automatically for drivers from the two options here.
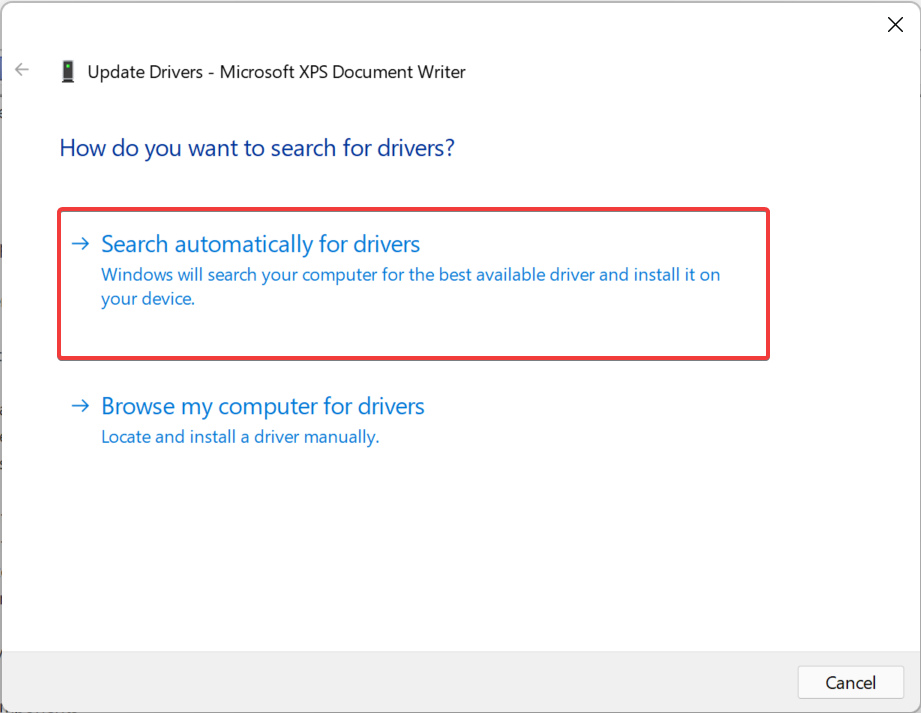

Windows will now scan for the best available driver on the system and install it for the printer. Though the method is simple and quick, a major drawback here is that it only scans the drivers available on the computer, and not the online sources.
In case a better driver couldn’t be found, try the other ways to update the driver in Windows 11. Or you could check our dedicated guide that explains how to install printer drivers in Windows 11.
If these methods sound like too much trouble, you can always use a reliable third-party app. We recommend Outbyte Driver Updater, a dedicated tool that will automatically install the latest version for all the drivers installed on your computer, thus keeping them up-to-date.
4. Run the Print Spooler service
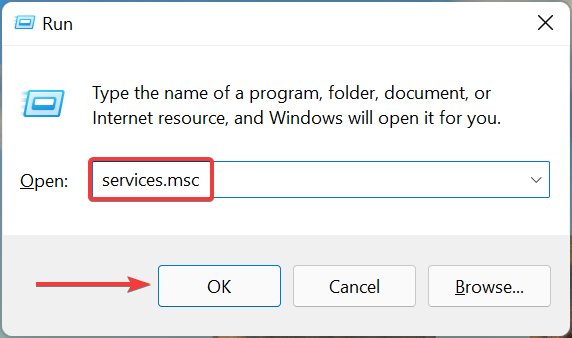
- Press Windows + R to launch the Run command dialog box, type services.msc in the text field, and either click OK or hit Enter to launch the Services app.
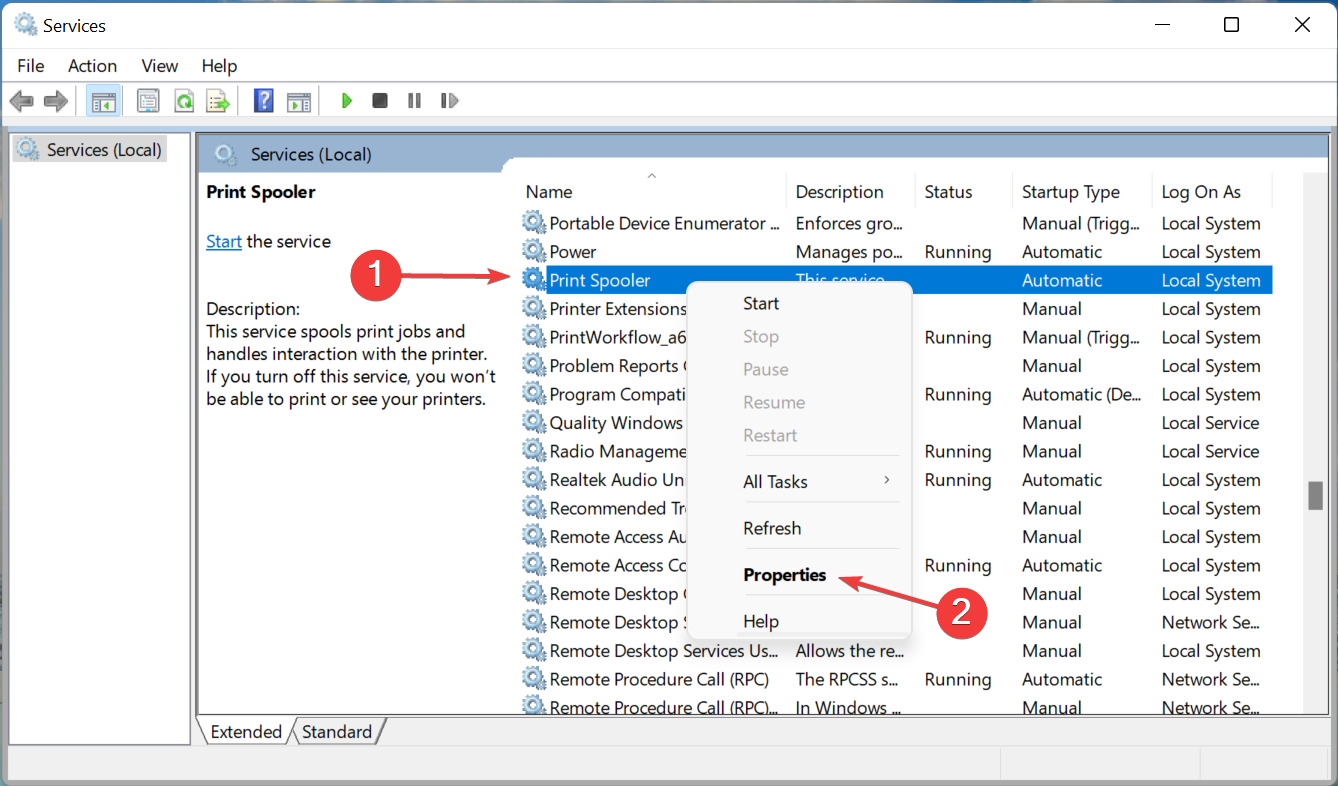
- Locate the Print Spooler service, right-click on it, and select Properties from the context menu.
- Now, click on the Startup type dropdown menu, and select Automatic from the list of options.

- If the service is not running, click on the Start button under Service status.
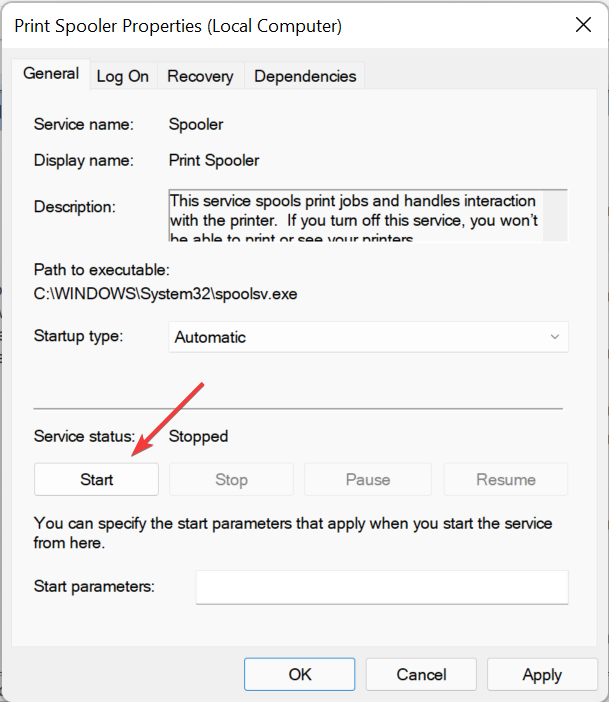
- Click on OK at the bottom to save the changes.
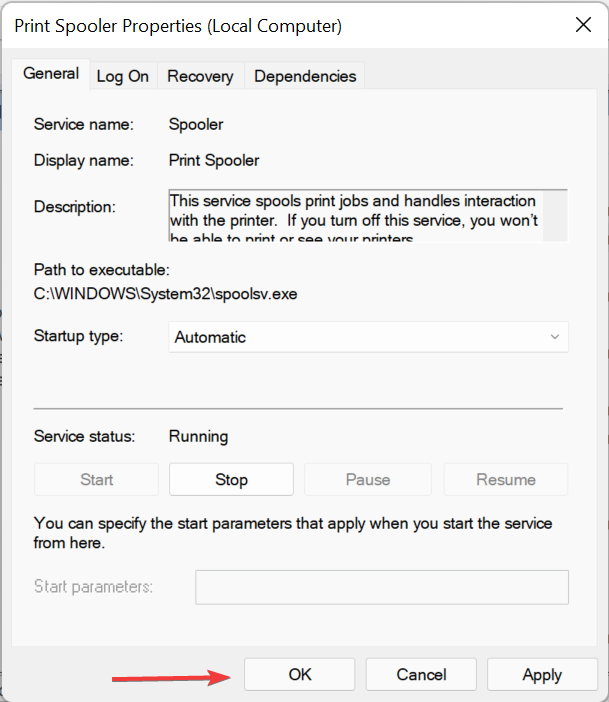
- Finally, restart the computer for these to fully come into effect.


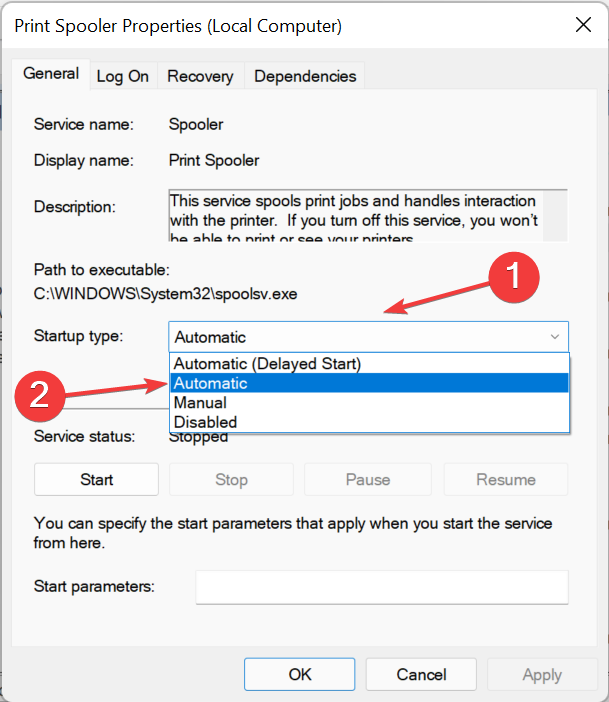


The Print Spooler service is critical for the effective functioning of the connected printer. It stores the tasks in the system’s memory until the printer is ready to execute them. Also, if the service is not running, you may not be able to access or see your printer.
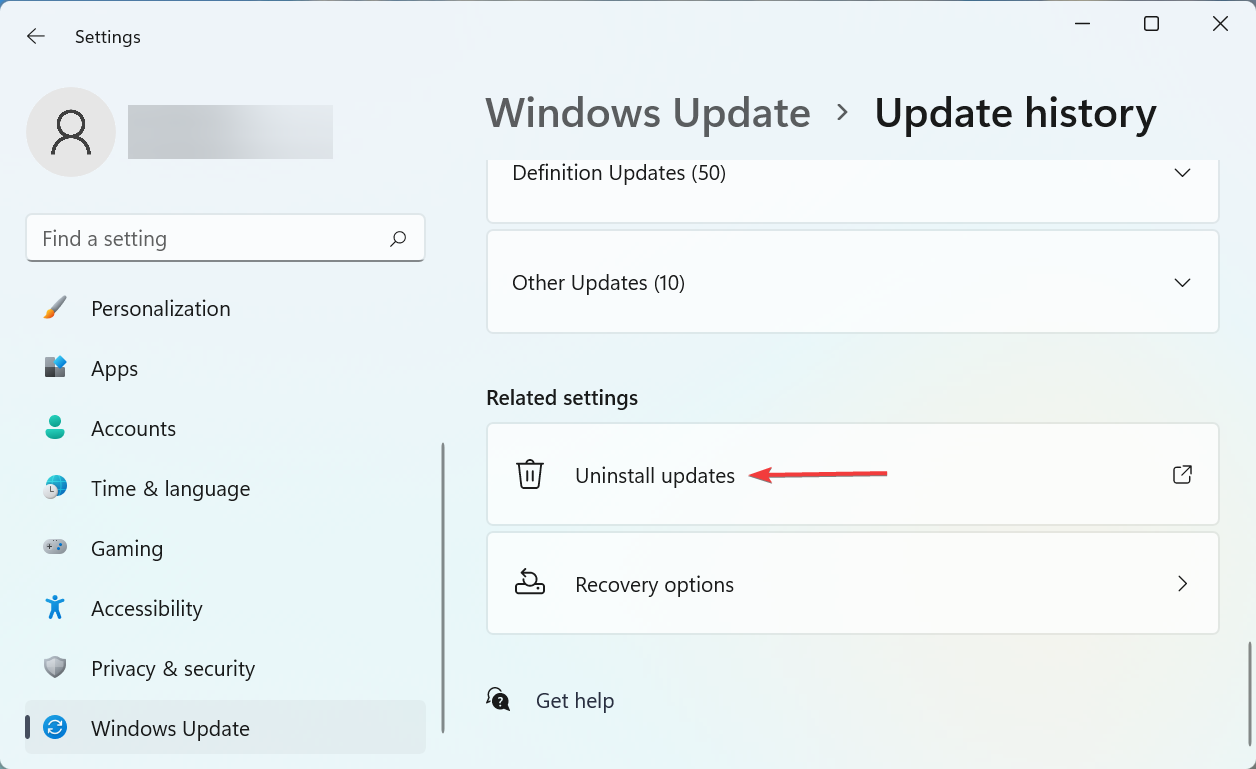
5. Uninstall a recent Windows update
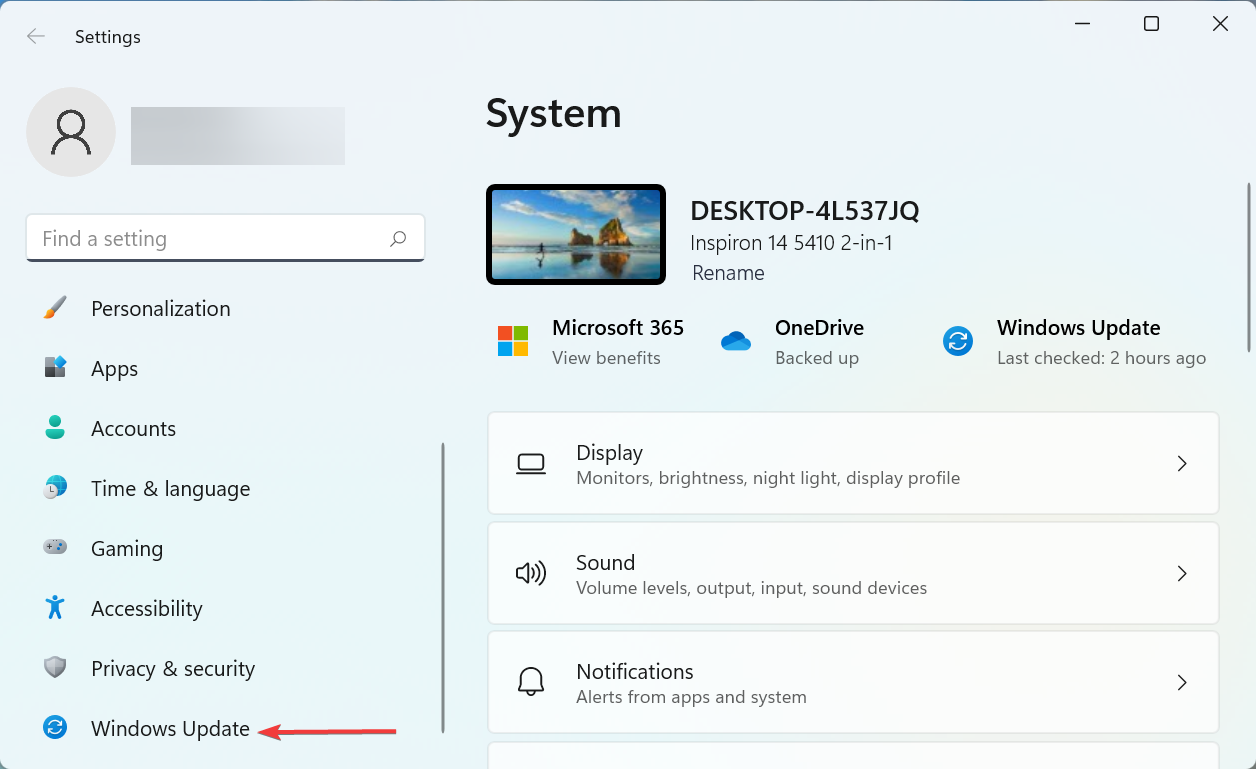
- Press Windows + I to launch the Settings app, and select Windows Update from the tabs listed in the navigation pane on the left.

- Click Update history on the right.

- Next, click on Uninstall updates under Related settings.

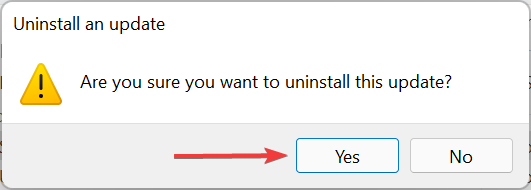
- Locate the recent OS update, select it, and click on Uninstall.
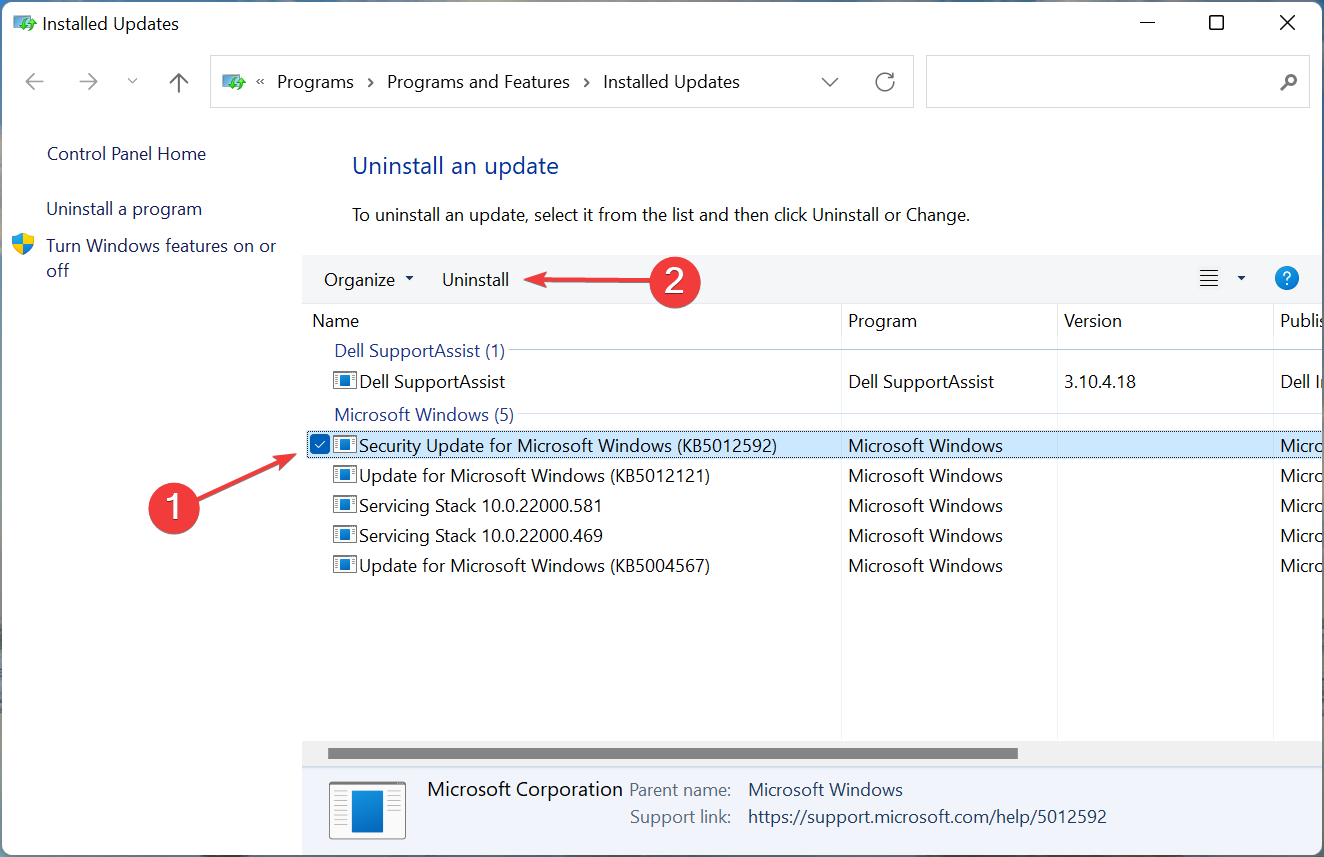
- Click Yes in the confirmation prompt that pops up.


If you started encountering the Windows 11 not printing in color problem after installing a particular update, there could be a bug in that particular version causing the problem.
To fix it, uninstall that update, and wait for the next version to release. In all likelihood, Microsoft would release a patch for the bug in the subsequent updates, and you shouldn’t face any more trouble.
6. Reinstall the printer
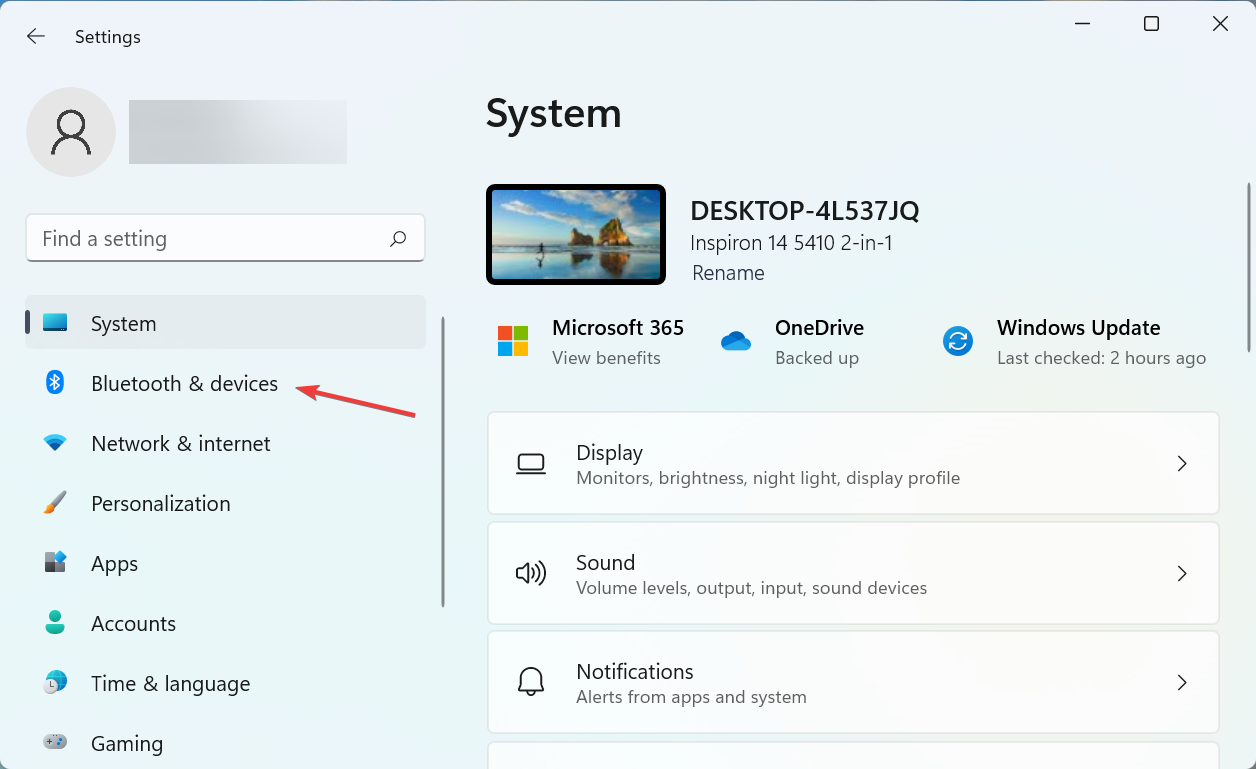
- Press Windows + I to launch Settings, and select the Bluetooth & devices tab from the navigation pane on the left.

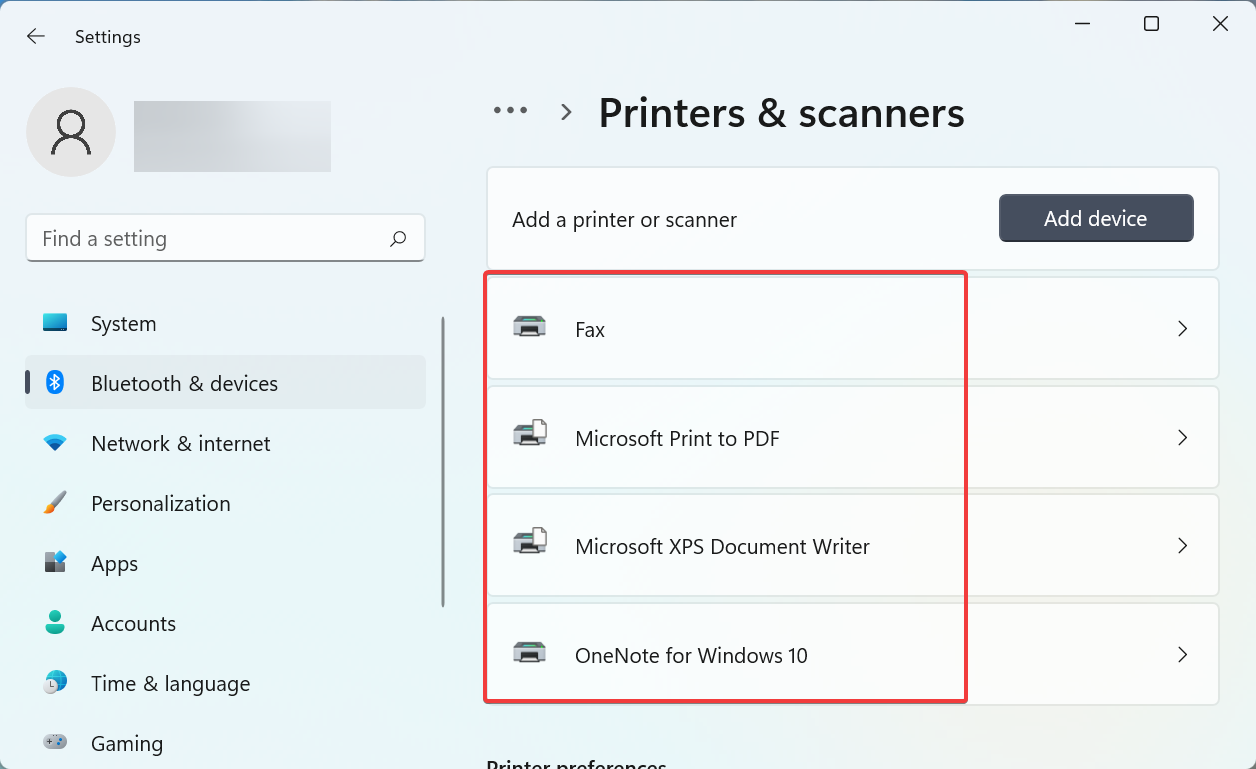
- Click on Printers & scanners on the right.
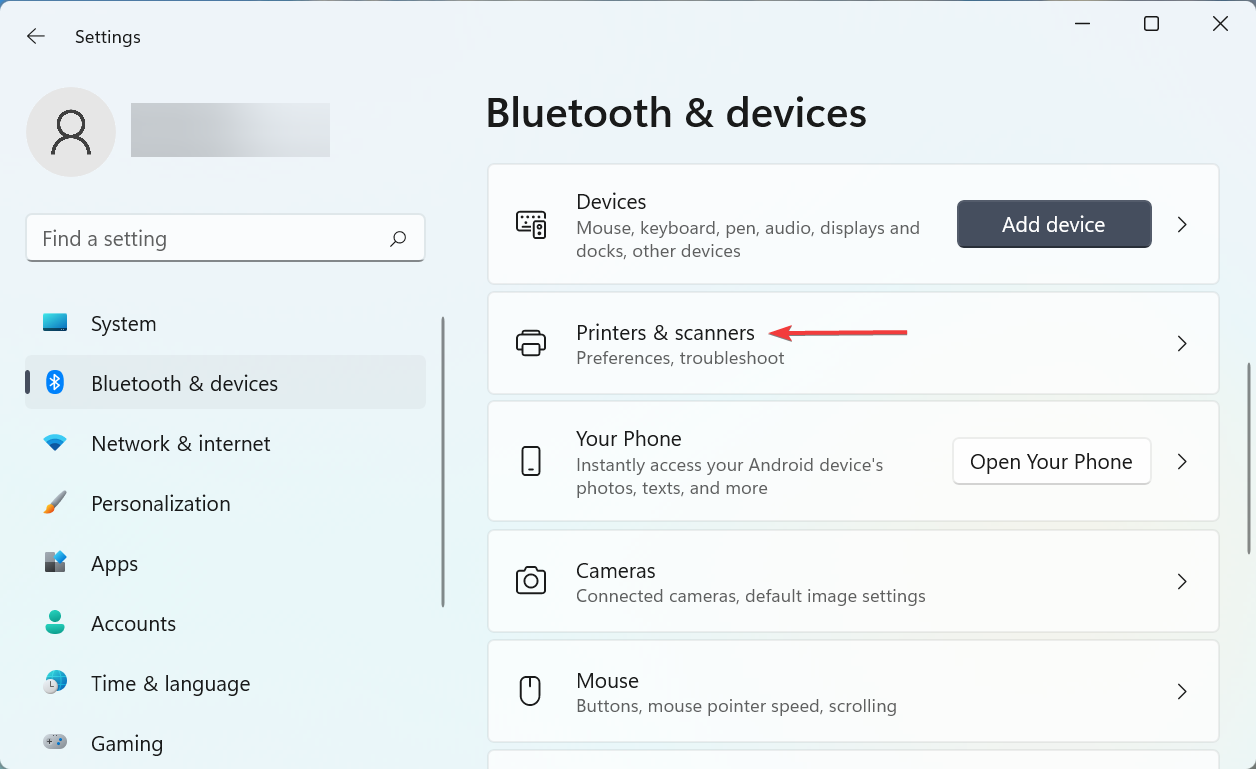
- Select the problematic printer from the list.

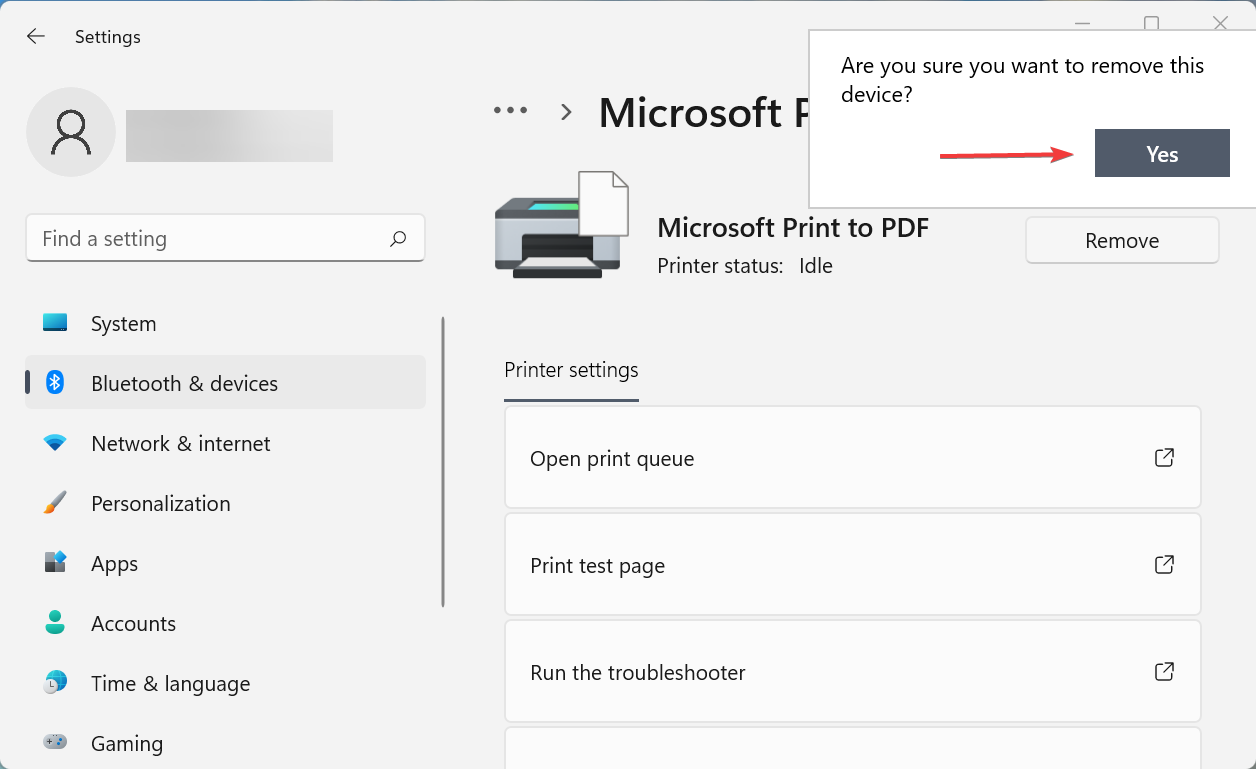
- Click on the Remove button.
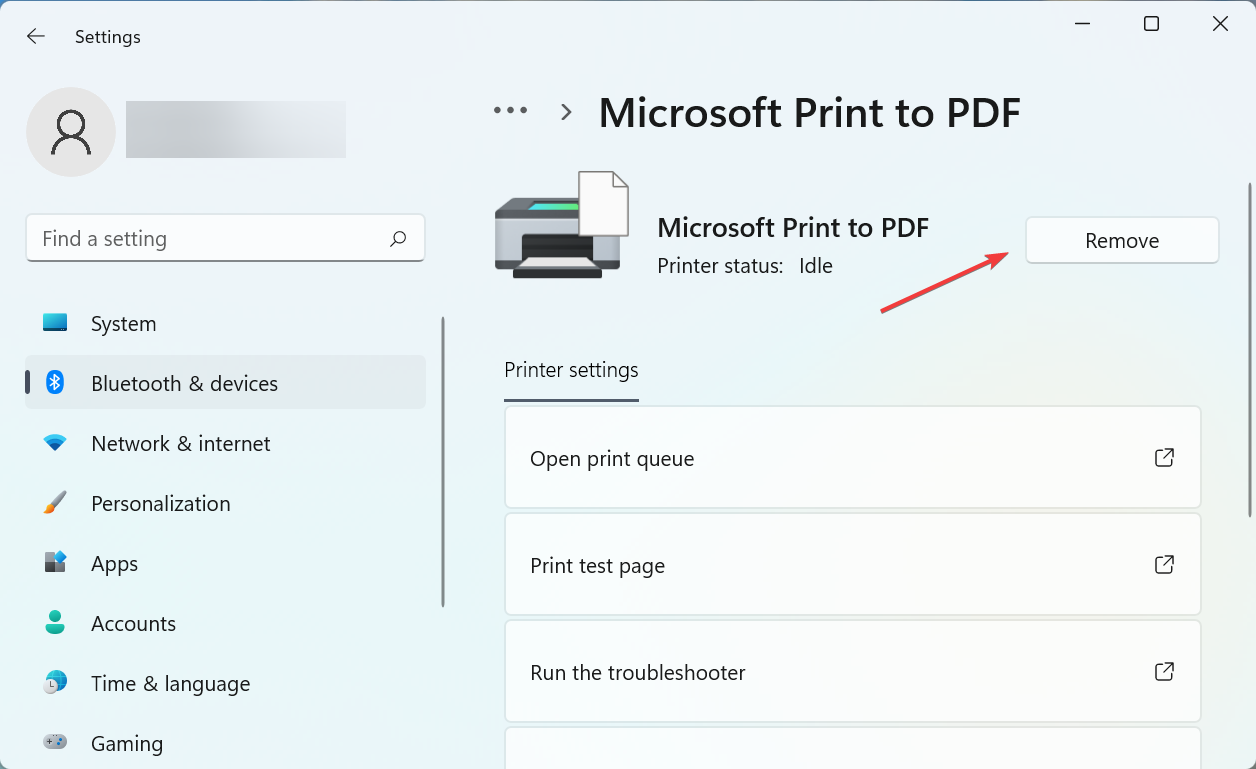
- Click Yes in the confirmation prompt that appears.
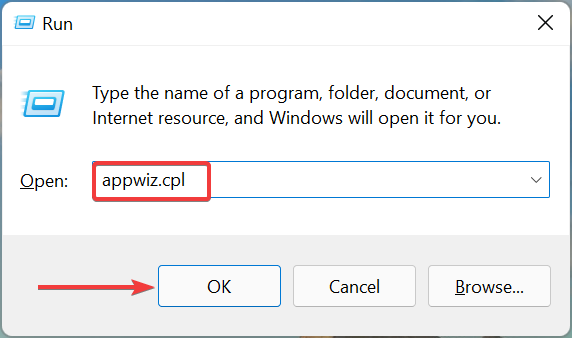
- Now, press Windows + R to launch the Run command, enter appwiz.cpl in the text field, and click on OK to launch the Programs and Features window.
- Locate all the programs related to the printer, select them, and then click on Uninstall at the top.

- Click Yes in case a UAC (User Account Control) pops up, and then follow the on-screen instructions to complete the process.


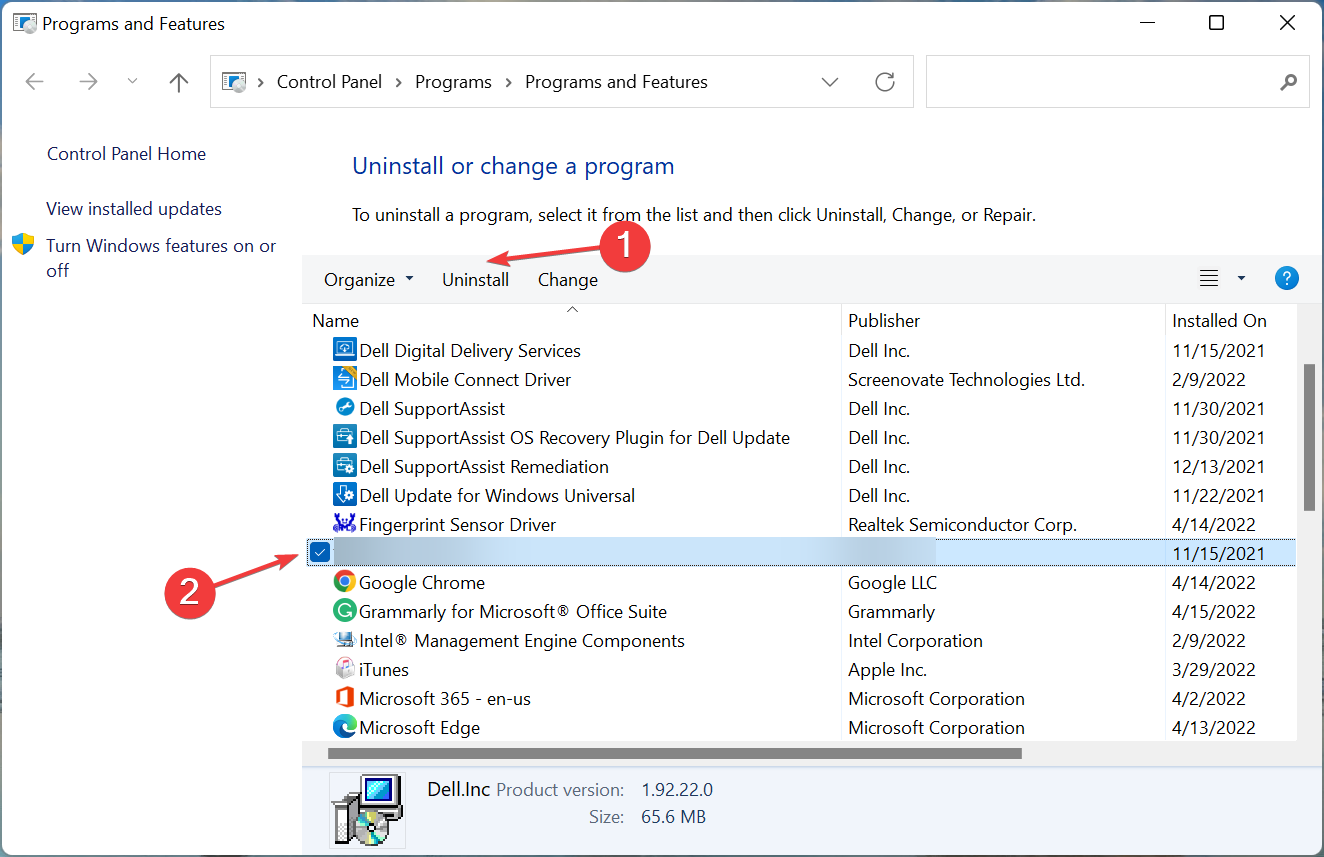

After you have removed the printer, and uninstalled all related programs and drivers, reinstall it just like you did last time. And once it’s set up, you would be able to print color copies in Windows 11.
For most users, the first couple of methods should help fix the problem. And for the others, the last method is bound to get things up and running, provided there is no hardware issue. The fixes should also work if Windows 11 is not printing double-sided copies.
Also, find out what to do if your printer stops working in Windows 11. In case you are looking to purchase a new one, here’s our curated list of the best printers for Windows.
Tell us which fix worked for you in the comments section below.
Read our disclosure page to find out how can you help Windows Report sustain the editorial team. Read more


Improve this guide

User forum
0 messages