Windows 11 Remote Desktop Not Working: 6 Ways to Fix It
Everything you need to regain your remote connection

Having trouble with Remote Desktop not working on Windows 11? We’ll show you how to deal with it. Problems usually stem from permissions, firewalls, and sometimes faulty updates.
Below, we’ll walk you through all possible fixes no matter the underlying issue. Just follow the step-by-step instructions.
How to fix Remote Desktop not working in Windows 11?
1. Edit your registry
- Press the Windows key + R, type regedit, and click OK.

- Follow the path below in the left pane:
Computer\HKEY_LOCAL_MACHINE\SOFTWARE\Policies\Microsoft\Windows NT\Terminal Services\Client - Now, right-click the Client folder and choose New > DWORD (32-bit) Value.

- Type fClientDisableUDP as the name of the new item.

- Finally, double-click it, set its Value data to 1 and click the OK button.
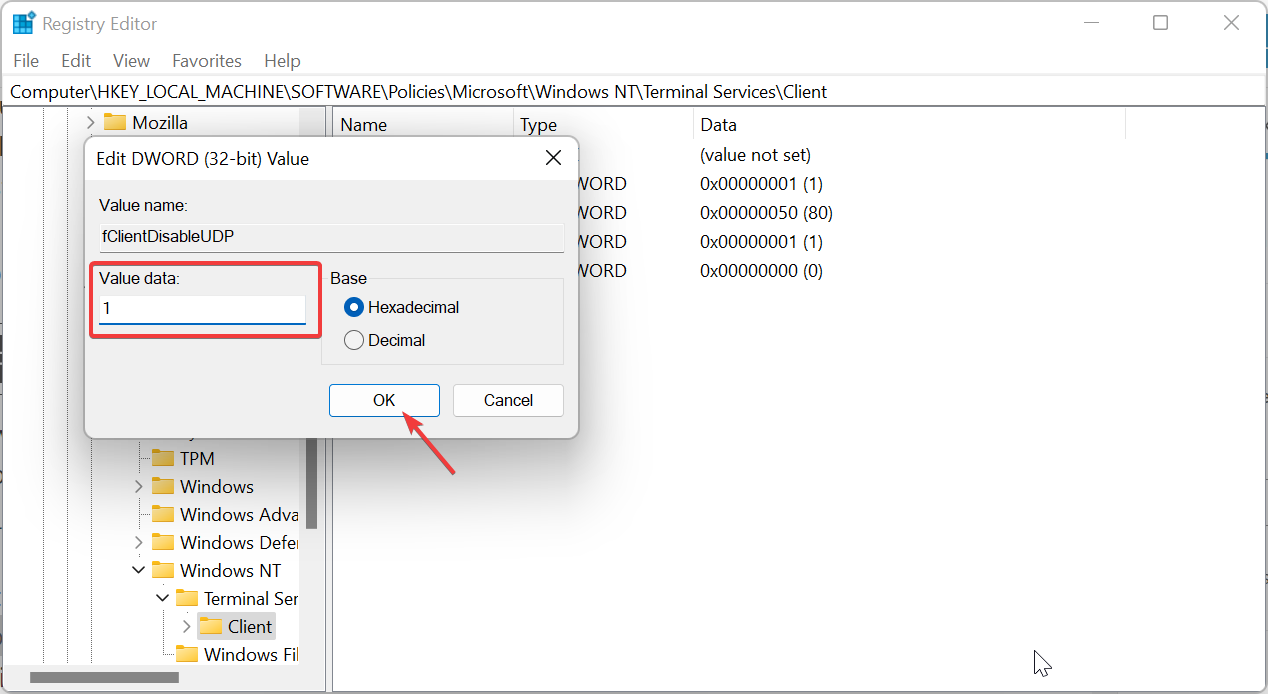
If you noticed that the Windows 11 Remote Desktop is not working after installing the 22H2 update, it is because the feature is trying to connect with UDP.
The solution here is to disable UDP by creating a new registry value.
2. Turn off UDP in Group Policy
- Press the Windows key + R, type gpedit.msc, and click OK.

- Navigate to the path below in the left pane:
Computer Configuration > Administration Templates > Windows Components > Remote Desktop Services > Remote Desktop Connection Client - Now, double-click Turn Off UDP On Client in the right pane.

- Finally, tick the Enabled radio button and click OK.

This is another excellent solution if the Windows 11 Remote Desktop feature stops working after the 2022 update. With the above steps, the UDP client should be completely disabled and allow your PC to connect.
3. Make sure Remote Desktop is enabled
3.1. Enable Remote Desktop in Settings
- First, click Start on the Taskbar and select the Settings option.
- Click Remote Desktop on the System tab.

- Then, toggle the switch for Remote Desktop forward to enable it.

- Select the Confirm option on the dialog box that opens.

After enabling this, you will be able to use the Remote Desktop feature, and other PCs will also be able to access your PC remotely.
3.2. Check Remote Assistance is enabled in System Properties
 NOTE
NOTE
- Open the search utility by clicking the magnifying glass button on Windows 11’s taskbar.

- Type Control Panel within the search tool’s box.
- Next, click the View drop-down menu’ and select the Category option.
- Select System and Security in the Control Panel.
- Then click Allow remote access.

- Select the Allow Remote Assistance connections to this computer checkbox if it’s unchecked.

- Also, click the Allow remote connections to this computer setting radio button to select it.
- Click Apply to save the new settings.
- Then press the OK button to exit System Properties.
If the Windows 11 Remote Desktop is still not working after the first two solutions, you need to check if the feature is enabled. You might have mistakenly disabled it in the process of troubleshooting.
4. Check that Remote Desktop Services is enabled and running
- Right-click the Start menu’s taskbar button and select Run to launch that accessory.

- Type this Run command within the Open text box:
services.msc - Select the OK option.
- Then double-click Remote Desktop Services to bring up its properties window.

- Select the Automatic option on the Startup type drop-down menu if the service is disabled.

- Press the Apply button.
- Now, click the Start button and select OK to exit the window.
- Repeat steps five to seven for the Remote Desktop Services UserMode Port Redirector service afterward.
Another factor that can stop the Windows 11 Remote Desktop from working is if it is disabled in Services. You need the service to run and startup automatically to enjoy a smooth connection.
5. Allow Remote Desktop through Windows Defender Firewall
- Press the Windows key + S, type firewall, and select Windows Defender Firewall.
- Then click Allow an app or feature through Windows Defender Firewall on the left side of the Control Panel.

- Press the Change settings button.

- Select the Private checkbox for Remote Desktop if it’s unchecked.
- Thereafter, click OK to exit.
6. Turn on network discovery
- Type Control Panel in the taskbar and open it.

- Select Network and Internet.

- Click on Network and Sharing Center.

- Select Change Advanced sharing settings.

- Pick toggle on the button next to Network Discovery.

For the RDP feature to work, you must let it pass through your Firewall. Hence, if the Windows 11 Remote Desktop is working or responding on your PC, check if your Windows Defender Firewall is not blocking it.
We have come to the end of this detailed guide. We believe you now have everything to connect to your computer remotely from your comfort zone.
Similarly, check our excellent guide to get it working quickly if the Remote Desktop is greyed out on Windows 11.
Feel free to share the solution that helped you fix this issue in the comments below.
Read our disclosure page to find out how can you help Windows Report sustain the editorial team. Read more


Improve this guide


User forum
4 messages