How to Remove File Association in Windows 11
4 min. read
Updated on
Read our disclosure page to find out how can you help Windows Report sustain the editorial team. Read more
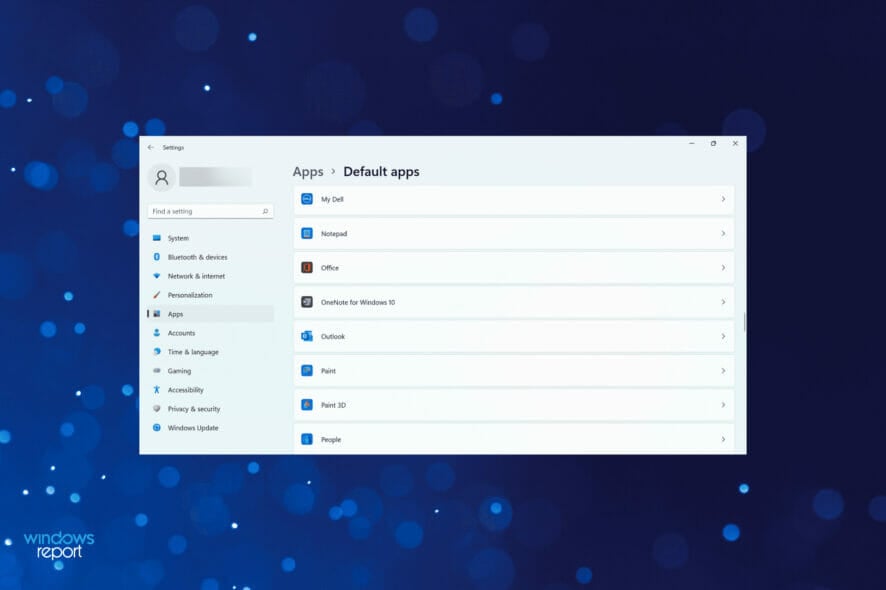
There are times when you install a new program more suited for a particular file type. Maybe, you install a photo editor and want to open all .jpg or .png files with it for editing. Under the current system settings, these formats will be opened using the default file associations.
This is why it’s imperative that you understand how to change, remove, or reset file association in Windows 11. In the following guide, we will tell you how to do that.
How do I remove file associations in Windows 11?
1. Via Settings
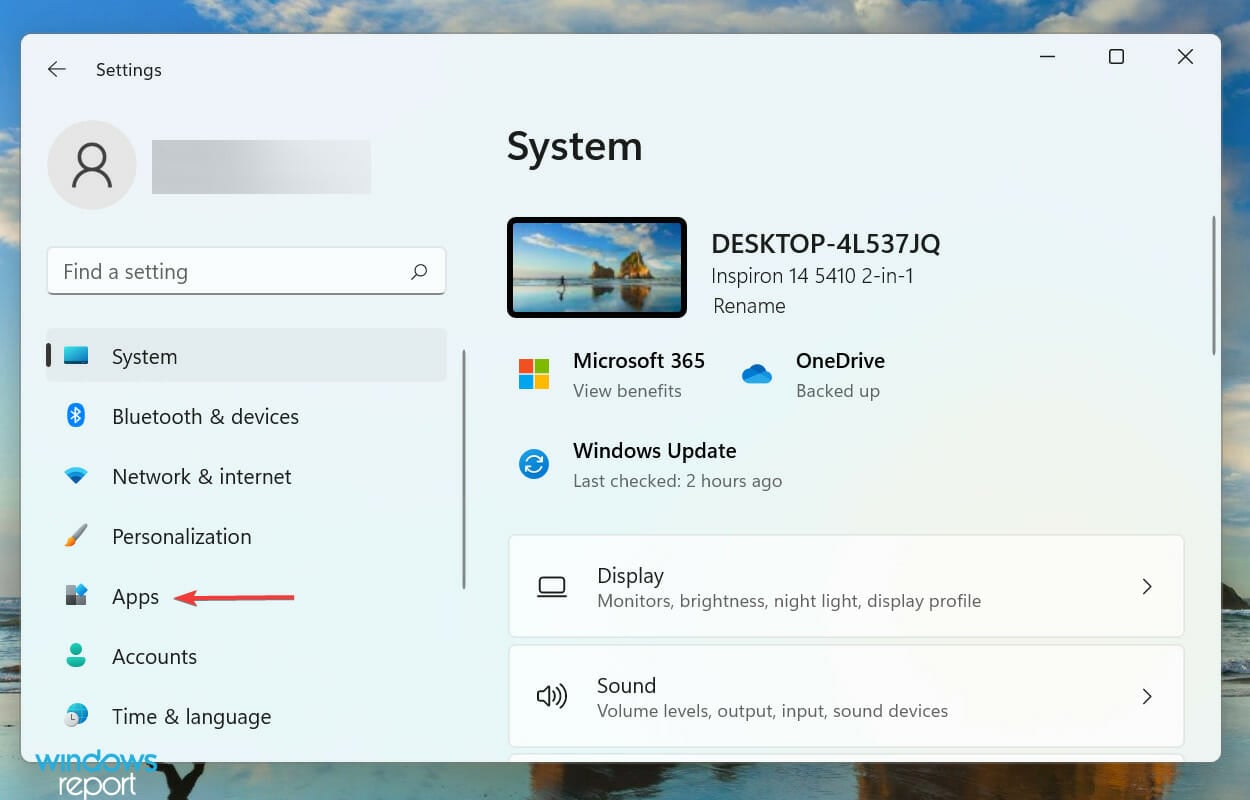
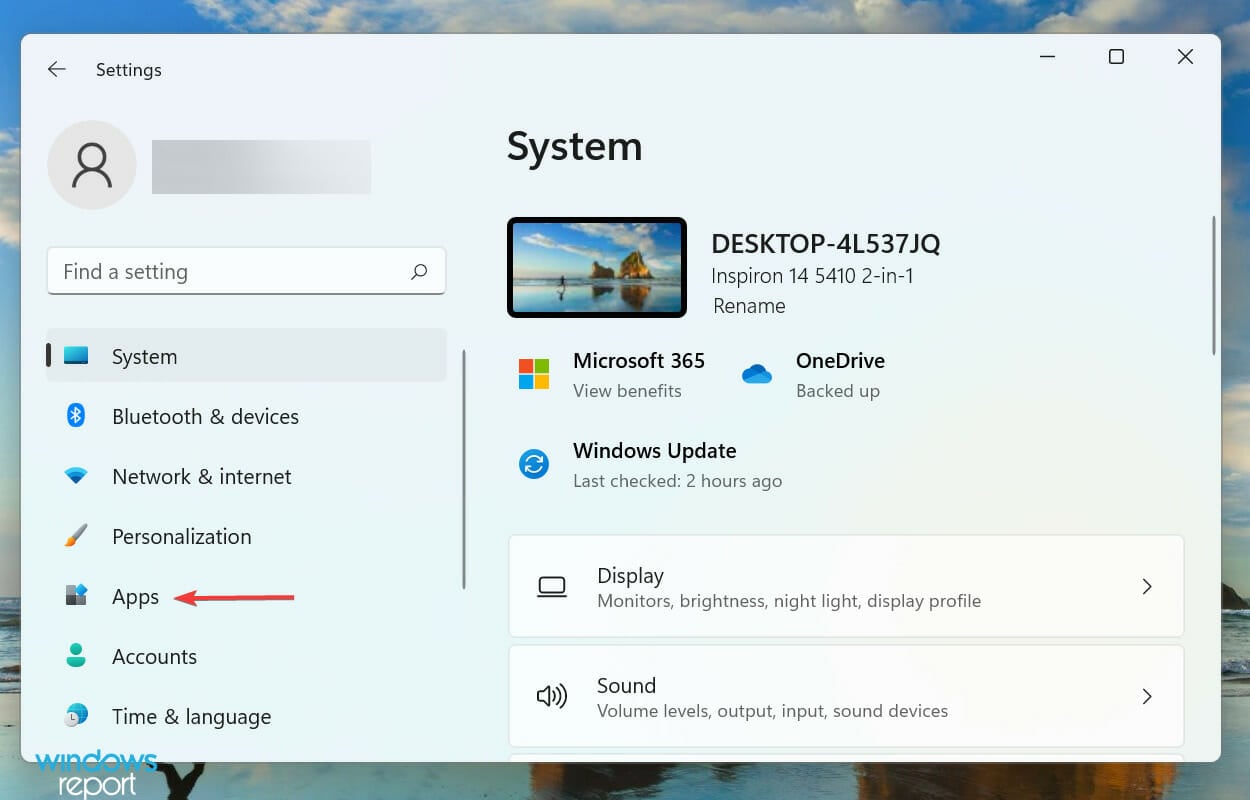
- Press Windows + I to launch the Settings, and select Apps from the list of tabs in the navigation pane on the left.
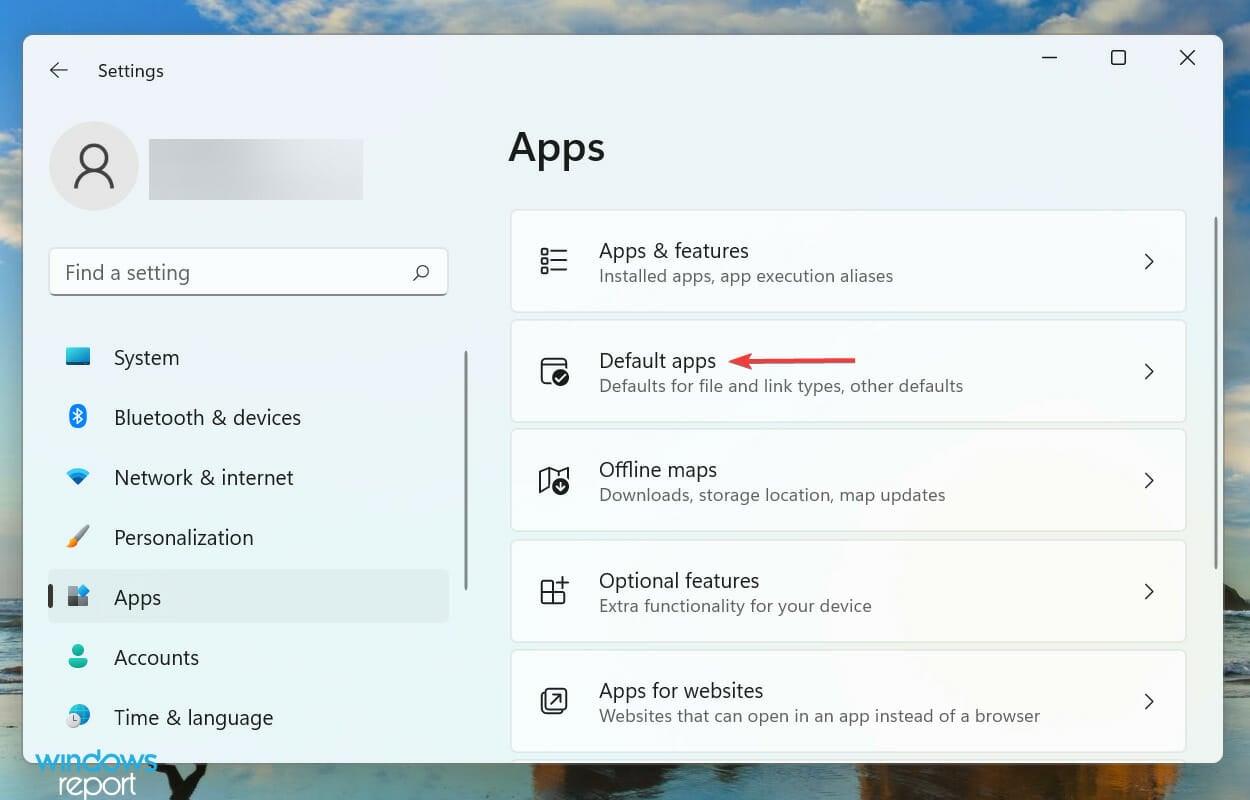
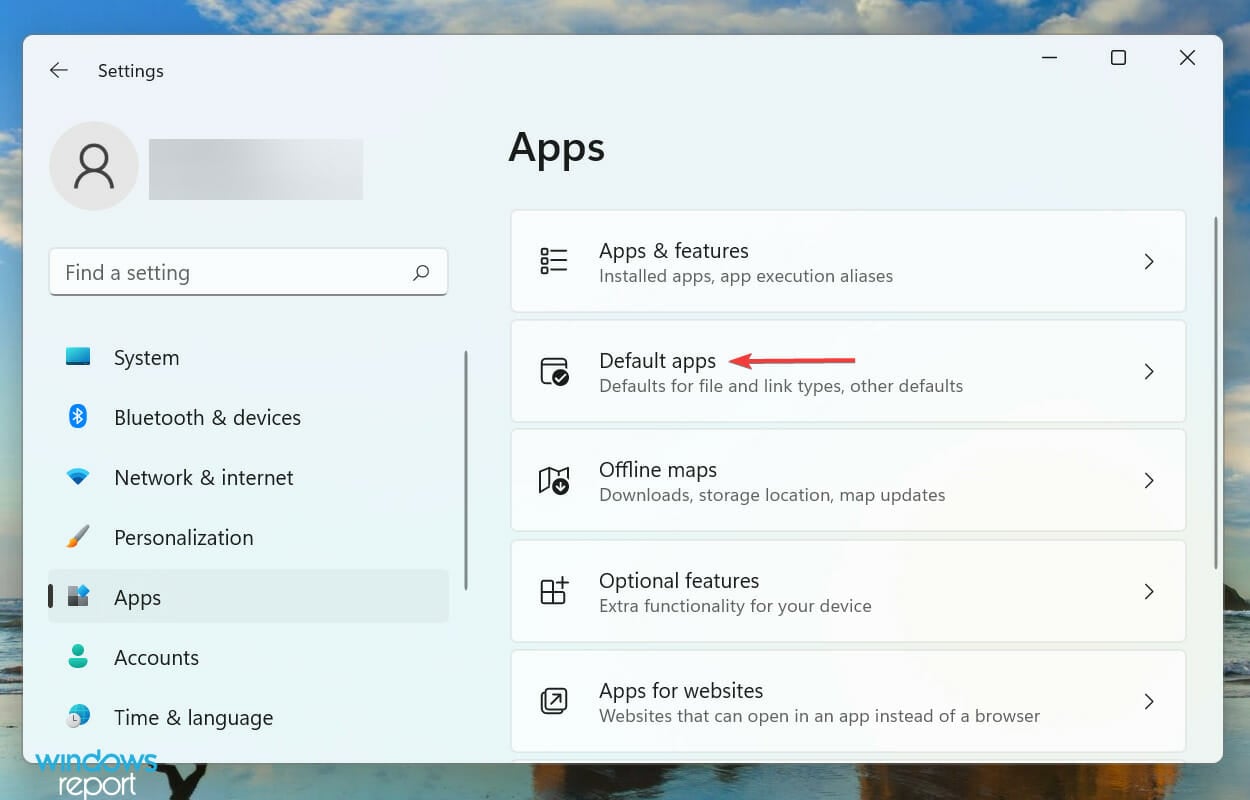
- Next, click on Default apps on the right.
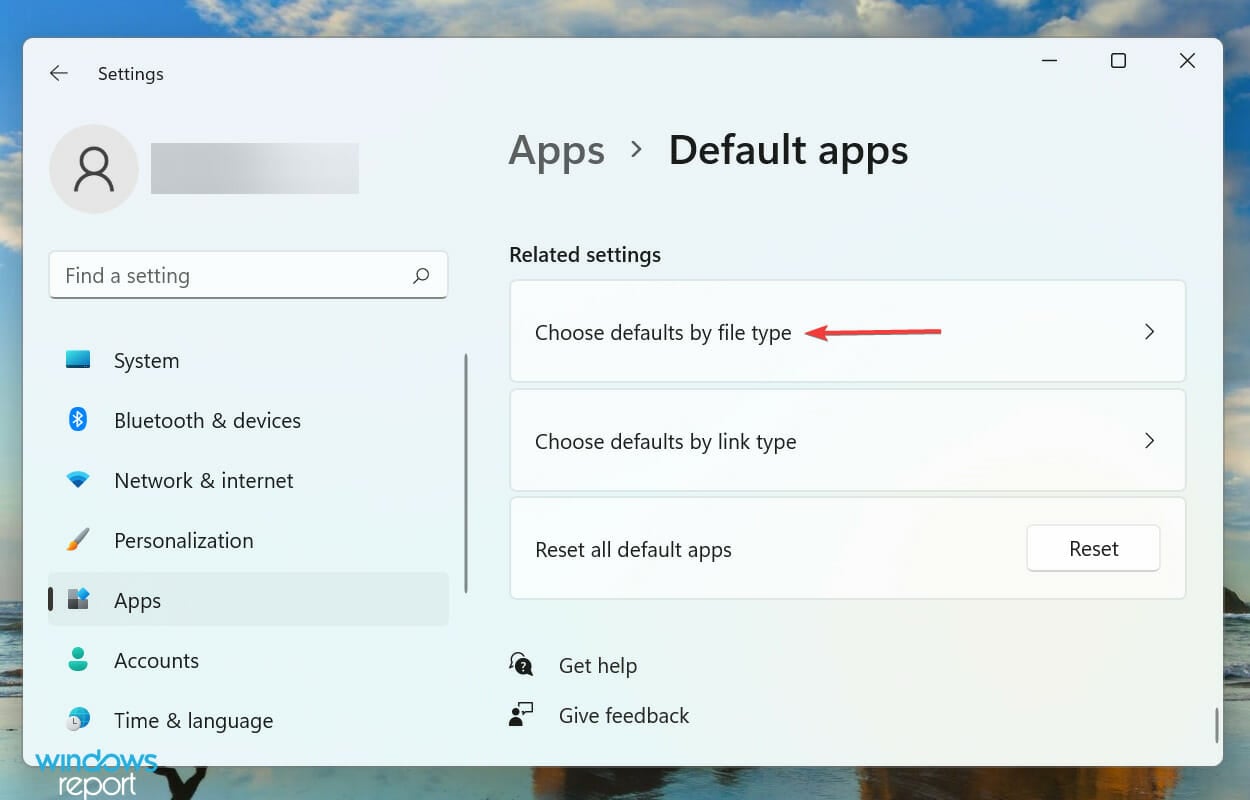
- Scroll down to the bottom and select Choose defaults by file type under Related settings.
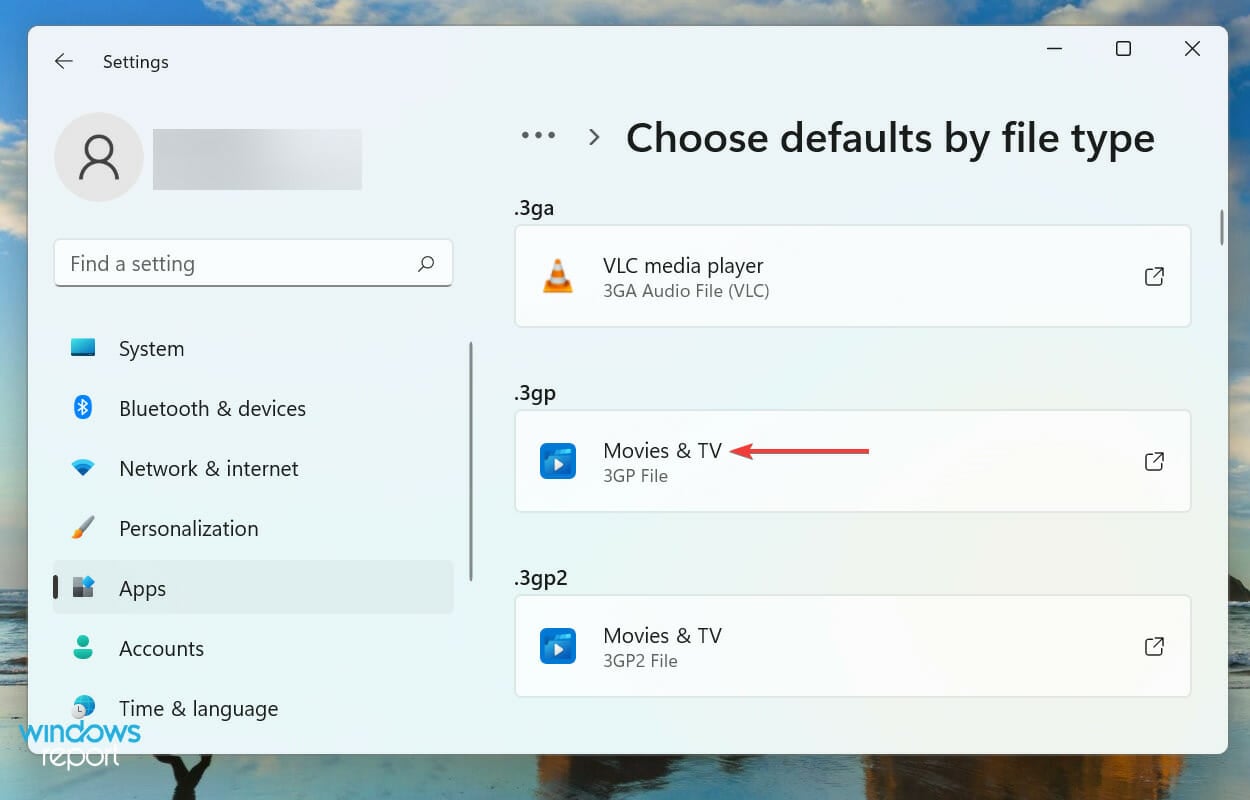
- Now, select a file type to remove the present and create new file associations in Windows 11.
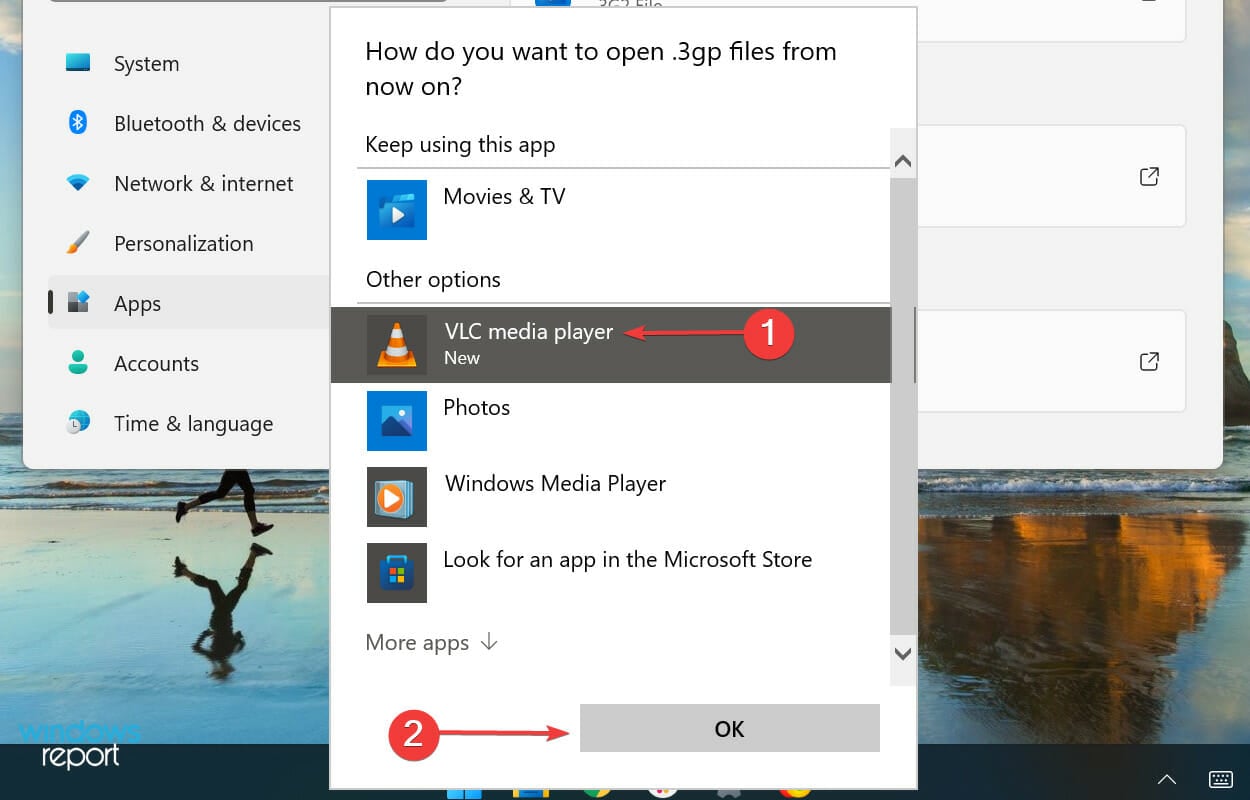
- Select the desired app that you want to use to open this particular file type from now on and click on OK.
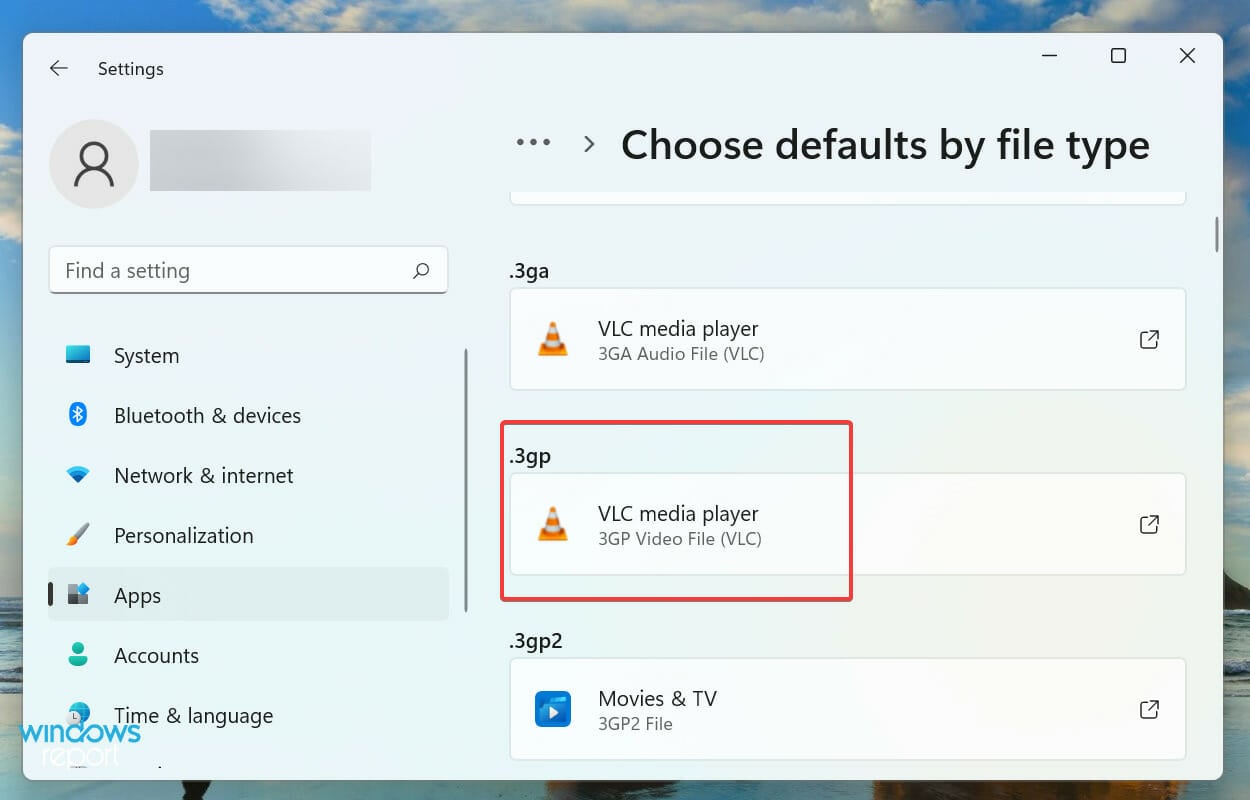
- The changes should reflect right away.
Using Settings is probably one of the easiest ways to remove and create new file associations in Windows 11. But, it’s certainly not the only one. We have listed the other ways in the following sections, go through them all and use the one that suits you best.
2. Via Control Panel
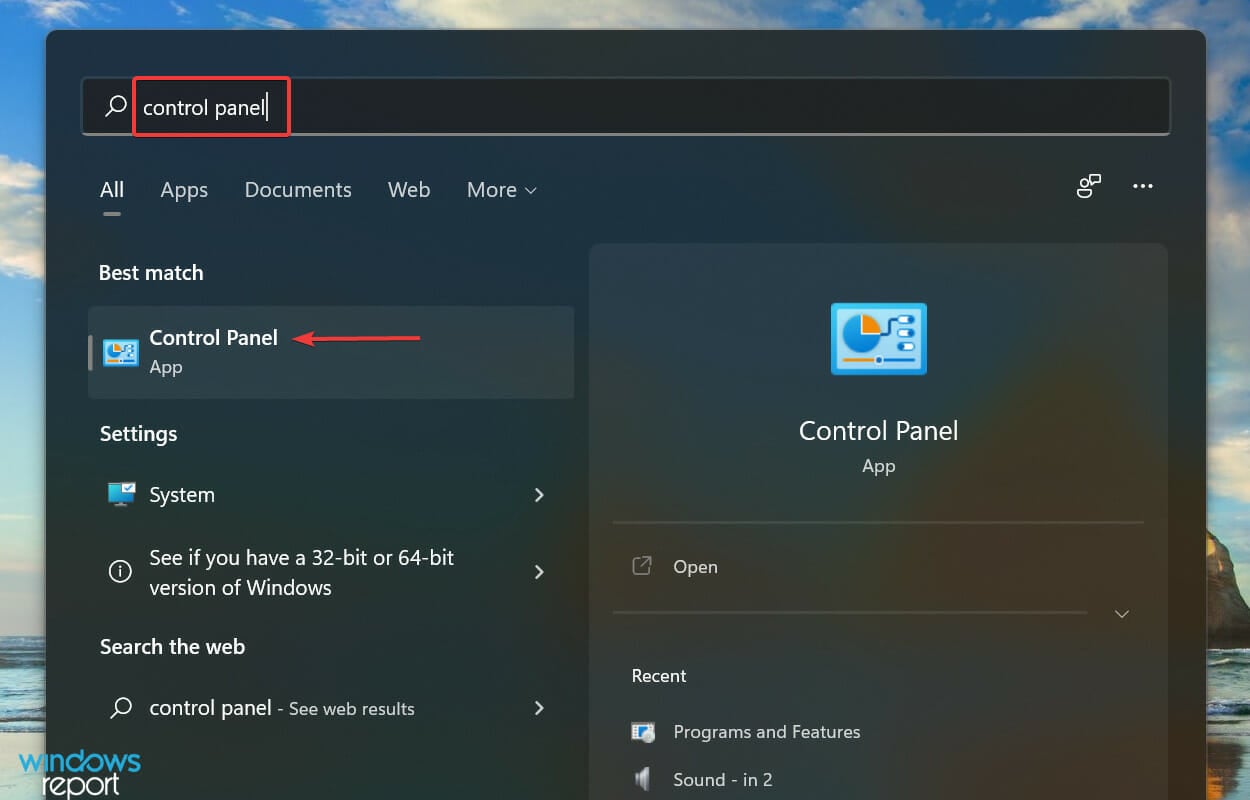
- Press Windows + S to launch the Search menu, enter Control Panel in the text field at the top, and click on the relevant search result that appears.
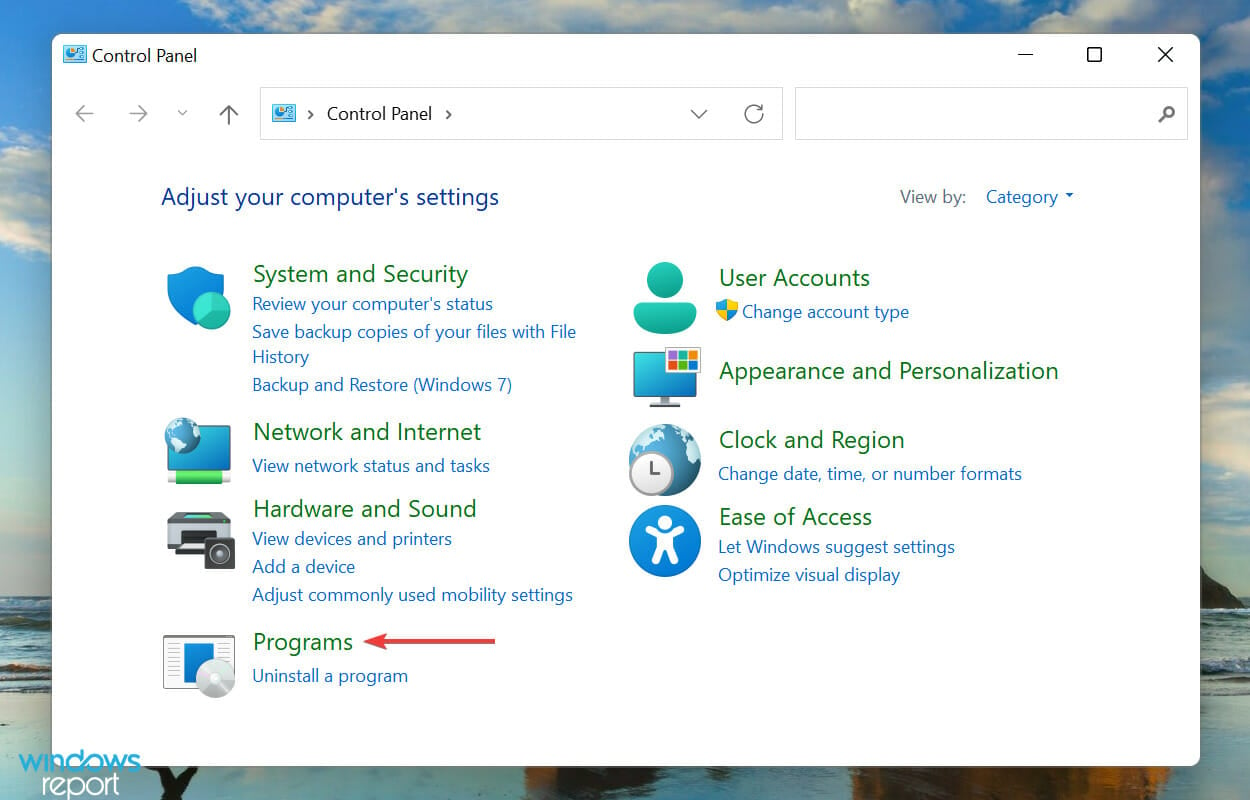
- Select Programs from the list of options here.
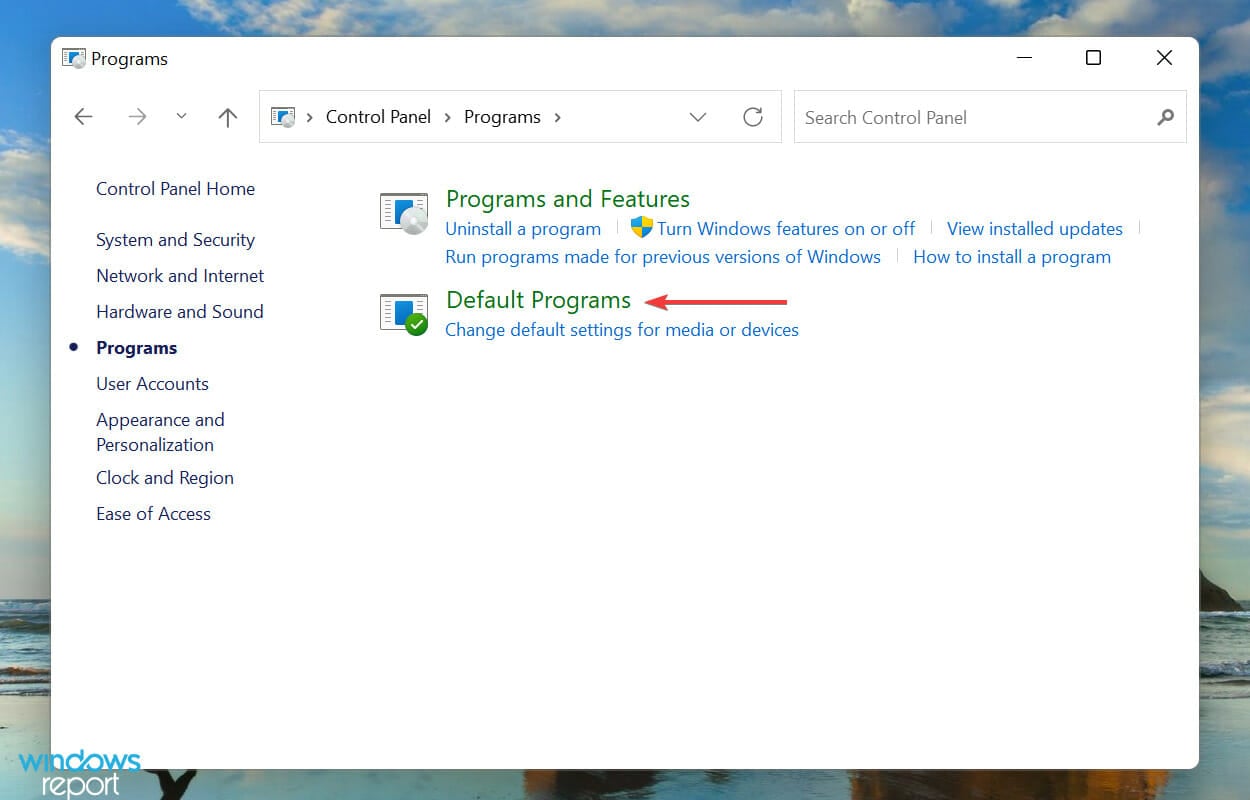
- Next, click on Default Programs.
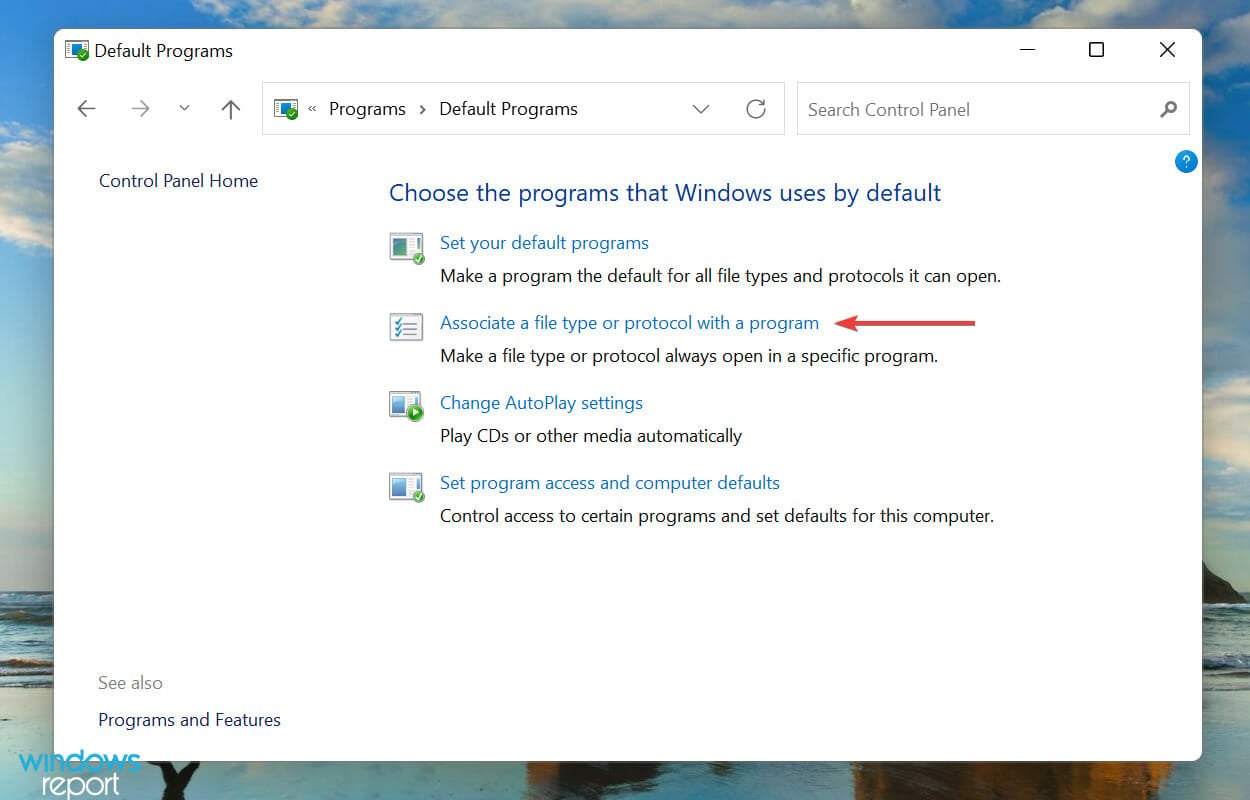
- Now, click on the Associate a file type or protocol with a program option.
You will now be redirected to the Settings window and can follow the steps listed in the previous method to remove file associations in Windows 11.
The Control Panel previously had a built-in option to remove file associations but it’s been removed and you are now redirected to Settings.
3. Via Registry
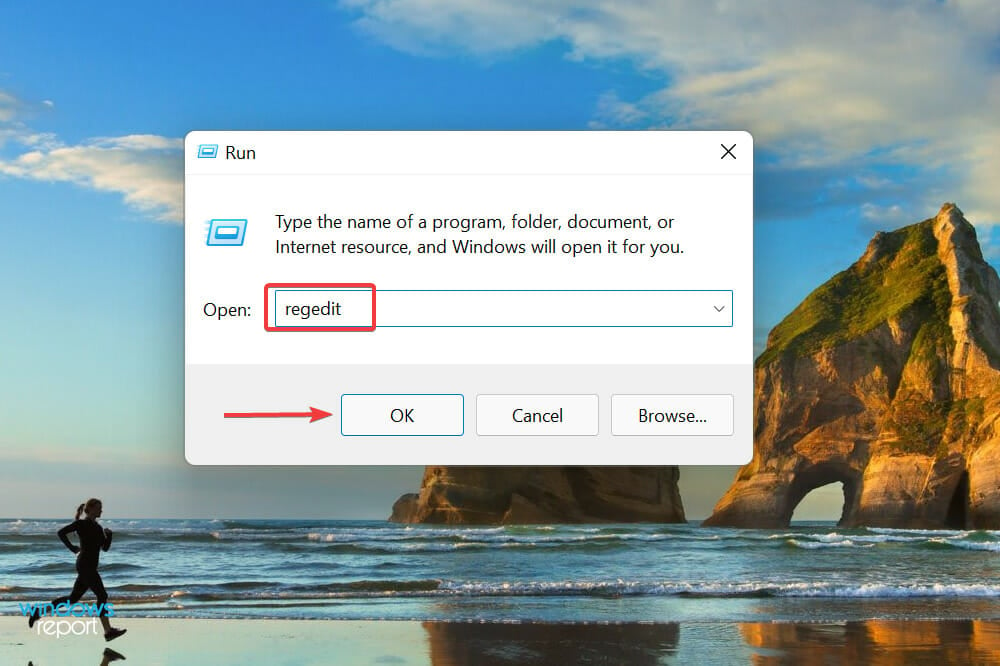
- Press Windows + R to launch the Run command, enter regedit in the text field, and either click on OK or hit Enter to launch the Registry Editor.
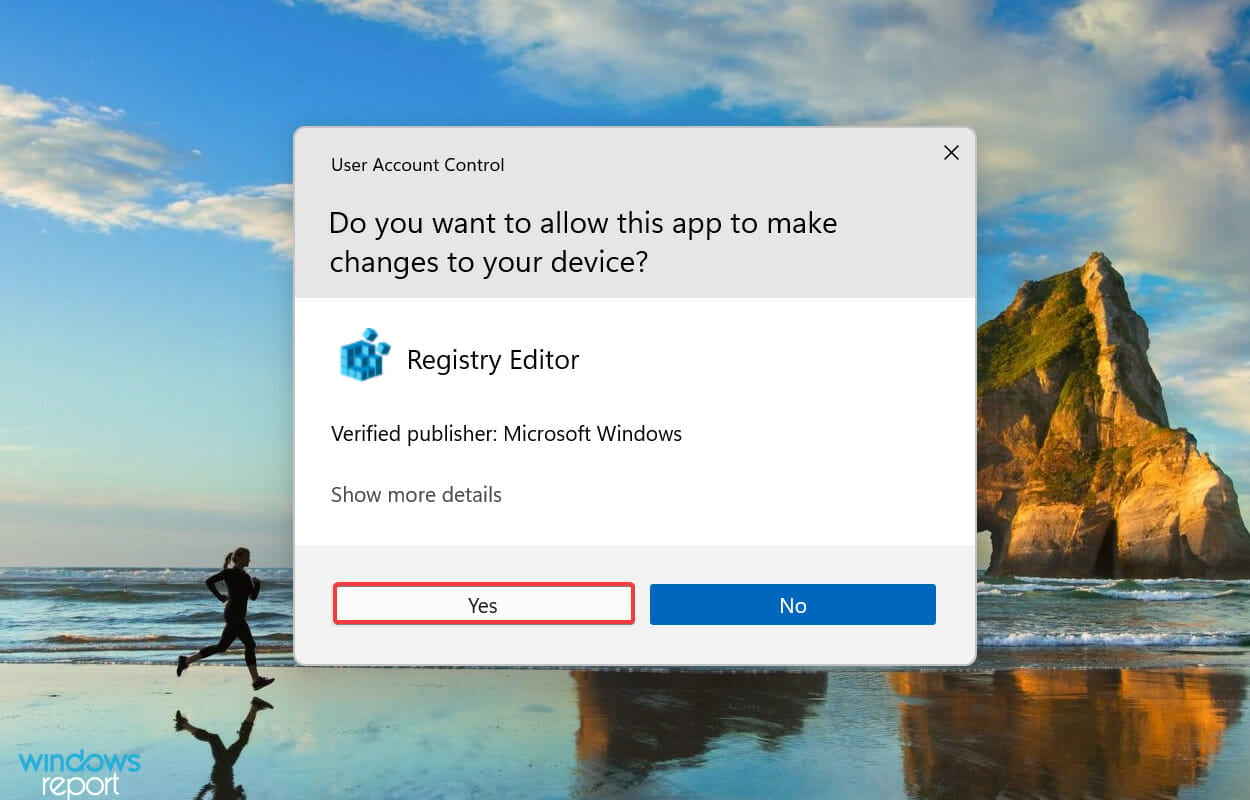
- Click Yes on the UAC (User Account Control) prompt that pops up.
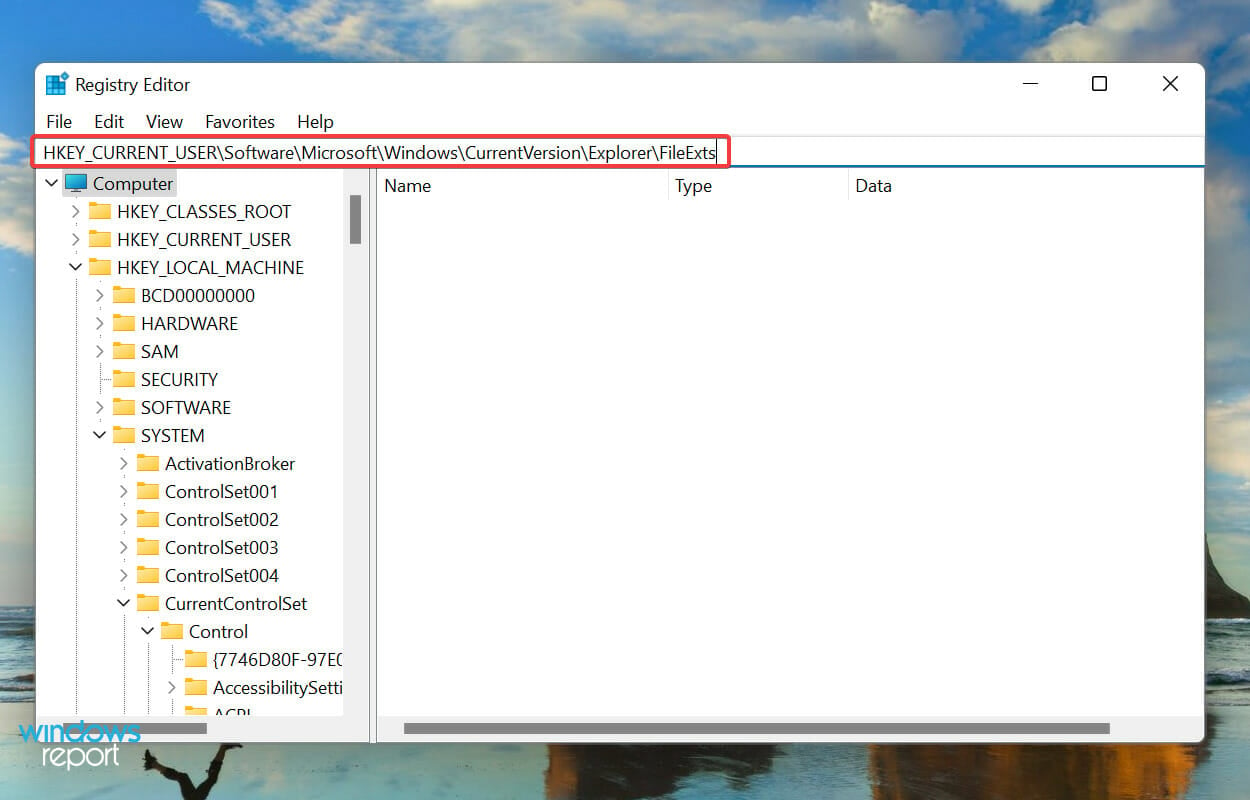
- Paste the following path in the address bar at the top, and hit Enter. Alternatively, you can navigate your way to it using the navigation pane on the left.
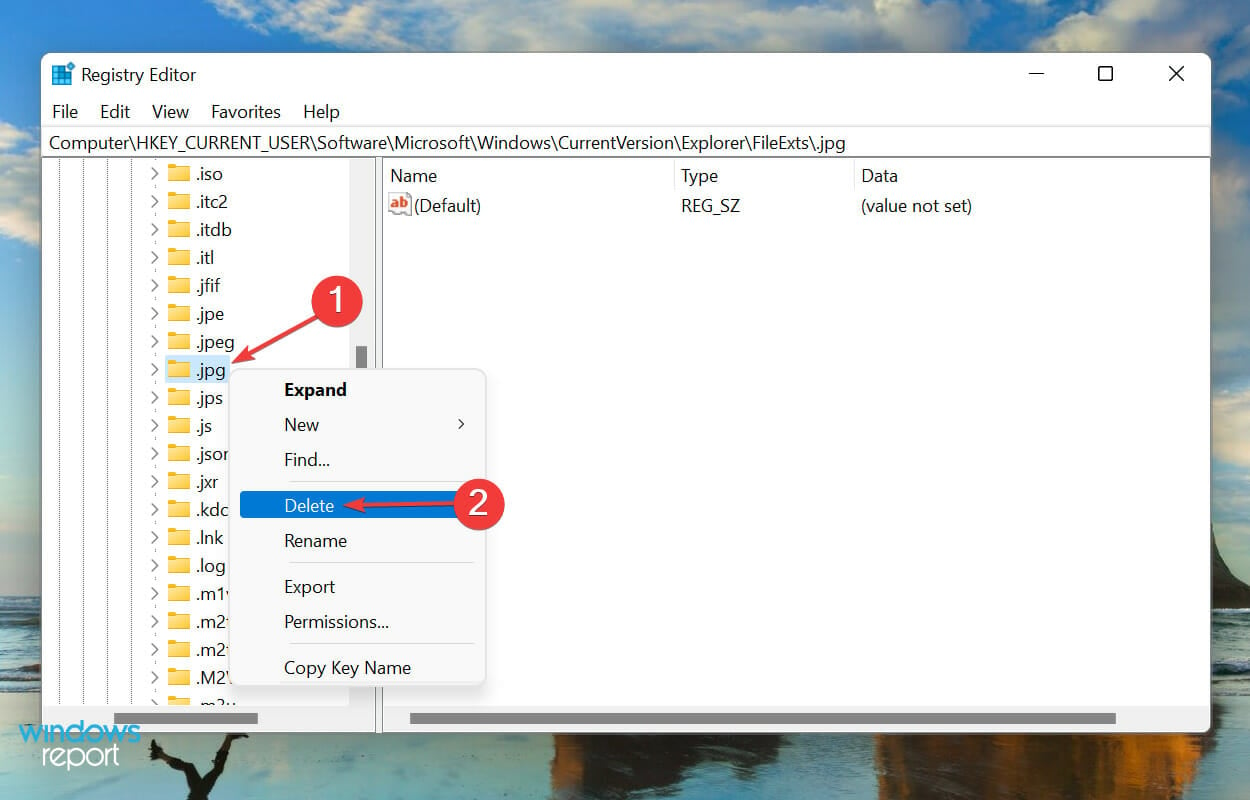
HKEY_CURRENT_USER\Software\Microsoft\Windows\CurrentVersion\Explorer\FileExts - All the file types will be listed in the navigation pane. Select the one for which you want to remove the file association, right-click on it, and select Delete from the context menu.
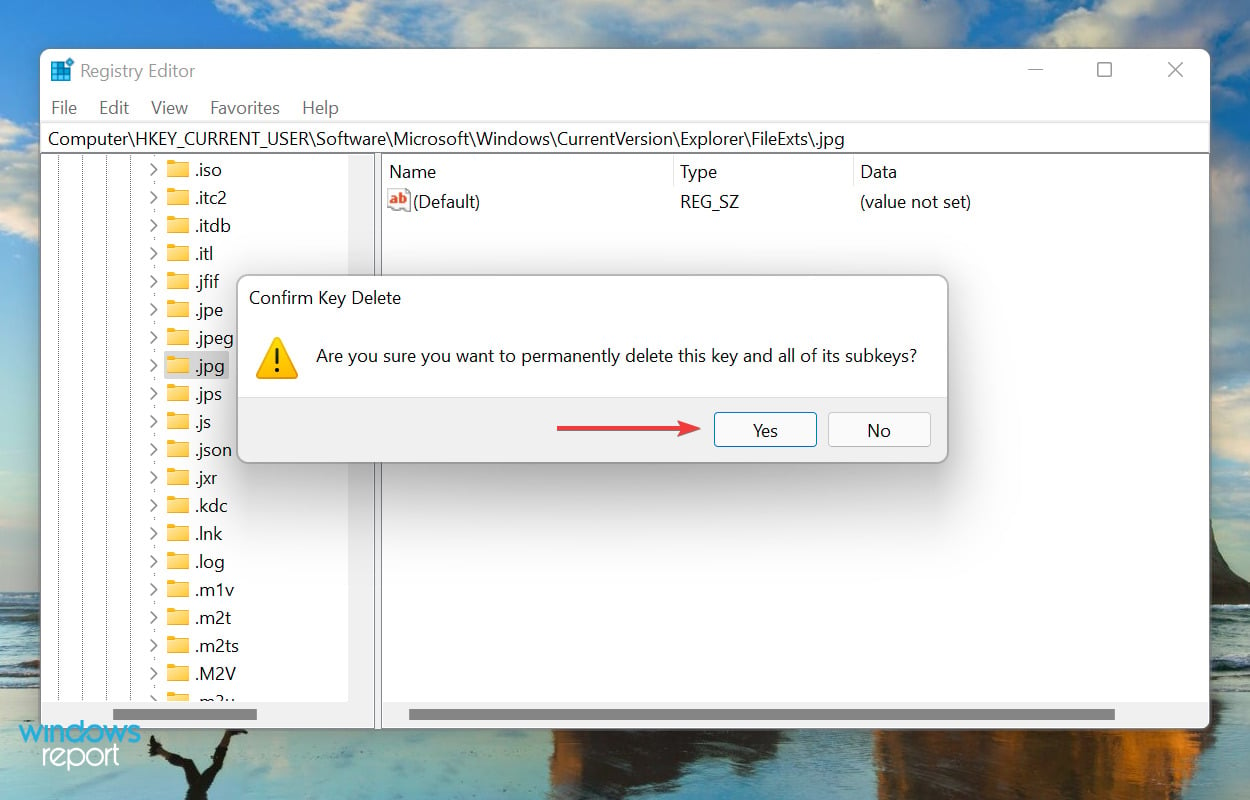
- Click Yes on the confirmation prompt to delete the key.
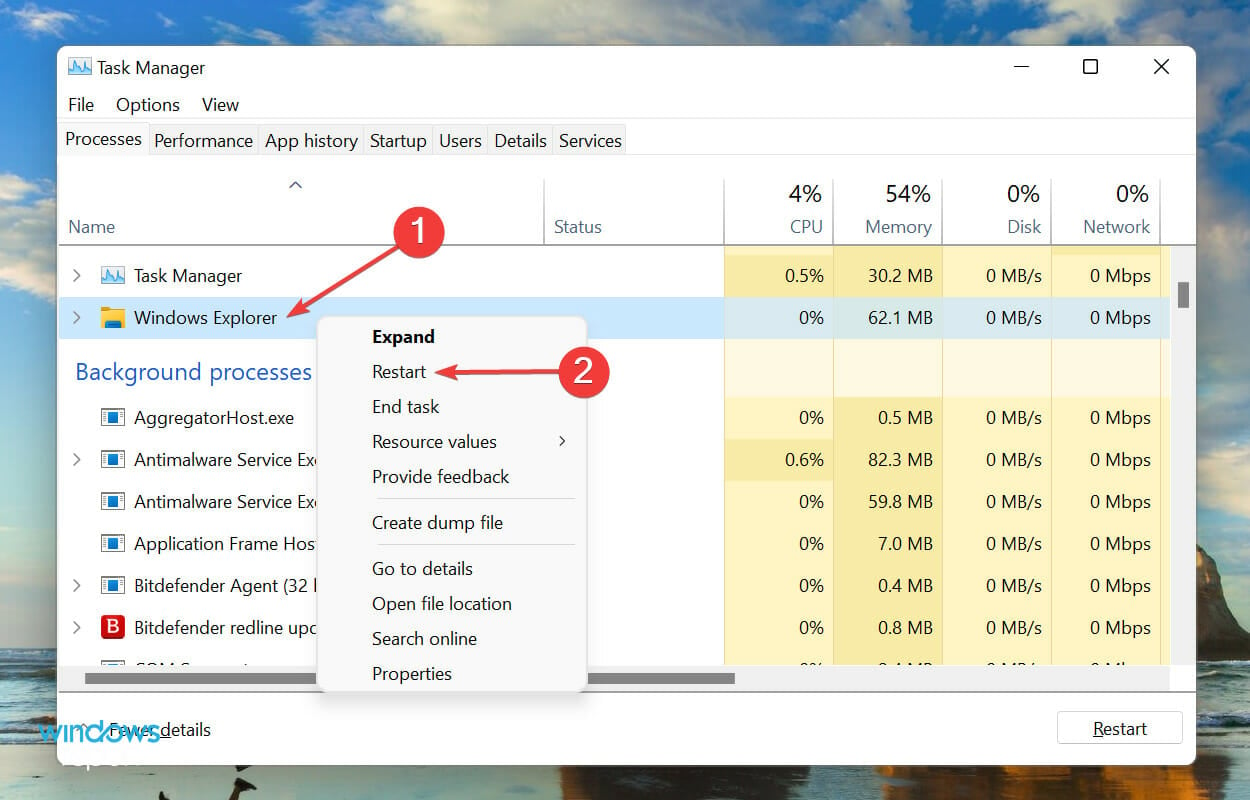
- Now, press Ctrl + Shift + Esc to launch the Task Manager, locate the Windows Explorer (explorer.exe) process, right-click on it and select Restart.
Once done, the changes will start to reflect and the file associations will revert to the default configurations. If you want to change the file association for that particular format in the future, follow the steps listed in the first method.
How can I reset file associations in Windows 11?
- Press Windows + I to launch Settings, and select the Apps tab from the navigation pane on the left.
- Click on the Default apps option on the right.
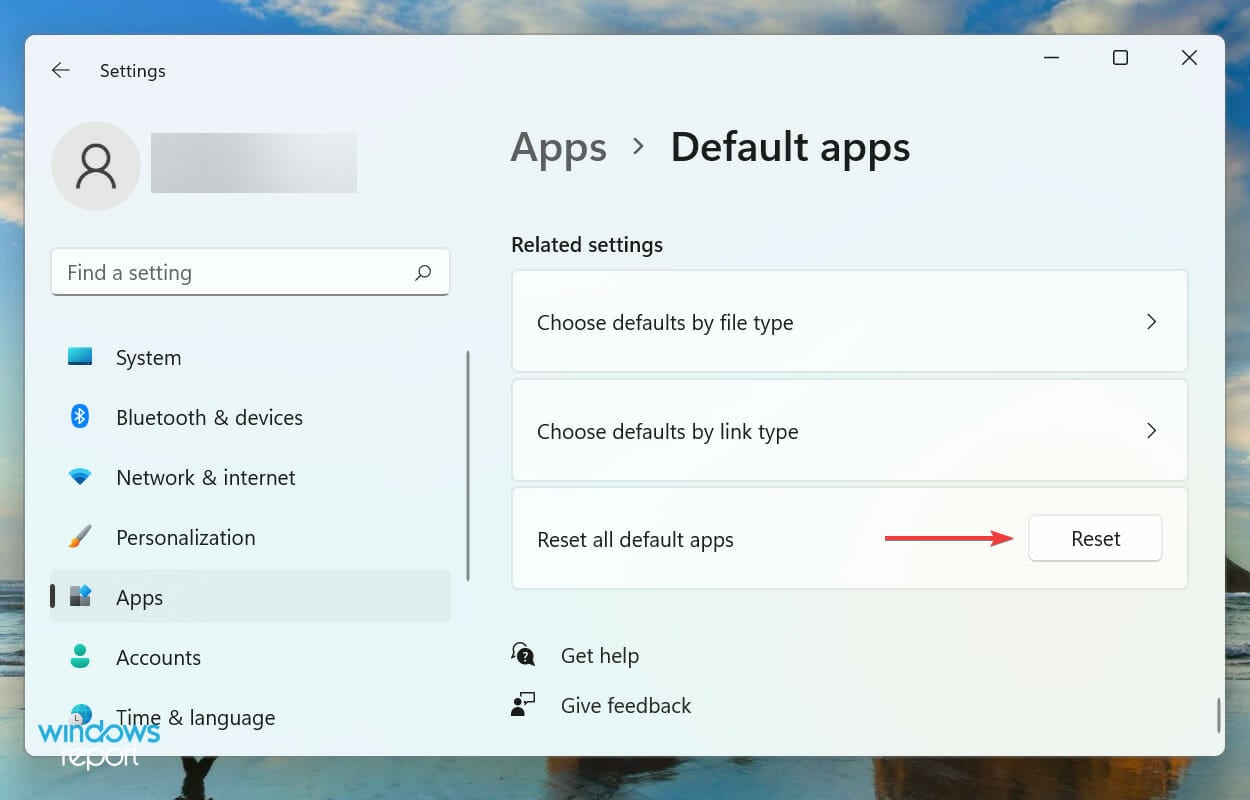
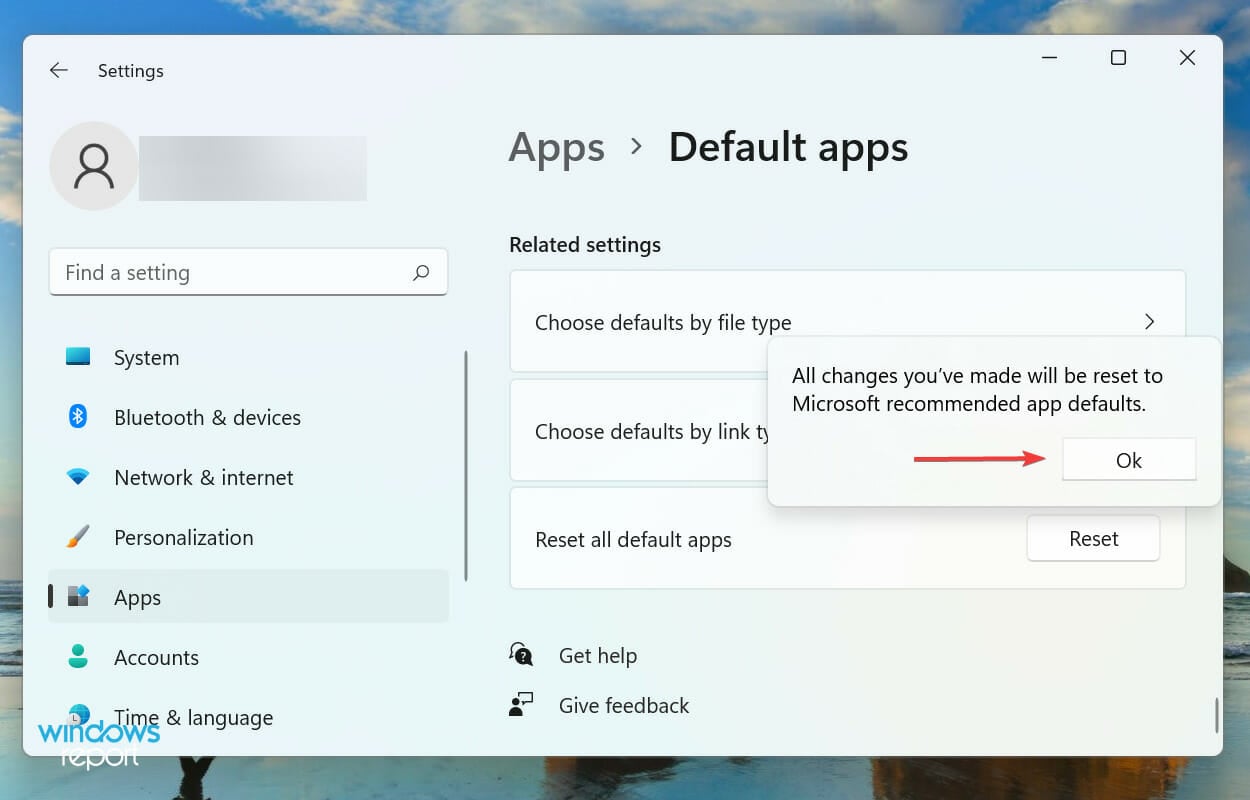
- Next, click on the Reset button next to the Reset all default apps option.
- Click on OK in the confirmation prompt that pops up.
After you have reset file associations in Windows 11, they will revert to the apps recommended by Microsoft. If you want to change the file association for a particular format, we recommend changing it individually, rather than resetting the whole lot.
These were all the ways you can remove file associations in Windows 11, along with resetting them in case they are misconfigured.
Also, check how to set the default applications on your Windows 11 system. Besides, if you find the File Association Helper software on your computer, learn all about it and the process to uninstall it.
Do not hesitate to tell us which of these methods you prefer to remove file associations in the comments section below.





User forum
0 messages