Windows 11 Security Settings: 15 Best to Enable or Change
Key notes
- Microsoft takes the security of their operating systems seriously, and Windows 11 brought many security improvements.
- The biggest change lies in the tampering protection, that is now required by default.
- The latest operating system also has a wide array of settings that you can change in order to improve your security.
Windows 11 has been out for a while, and many wonder about Windows 11 security and safety.
The good news is that the operating system brought some improvements in terms of security that should help users stay safe.
In today’s guide, we will answer all your security-related questions and show you all the security settings you need to change to maximize your protection.
To learn how Windows 11 security compares to its predecessor, read our Windows 11 vs Windows 10 guide.
Does Windows 11 have better security?
The short answer is yes, Windows 11 has better security than its predecessors. To understand the differences, you must know what security features Windows 11 offers.
Trusted Platform Module (TPM)
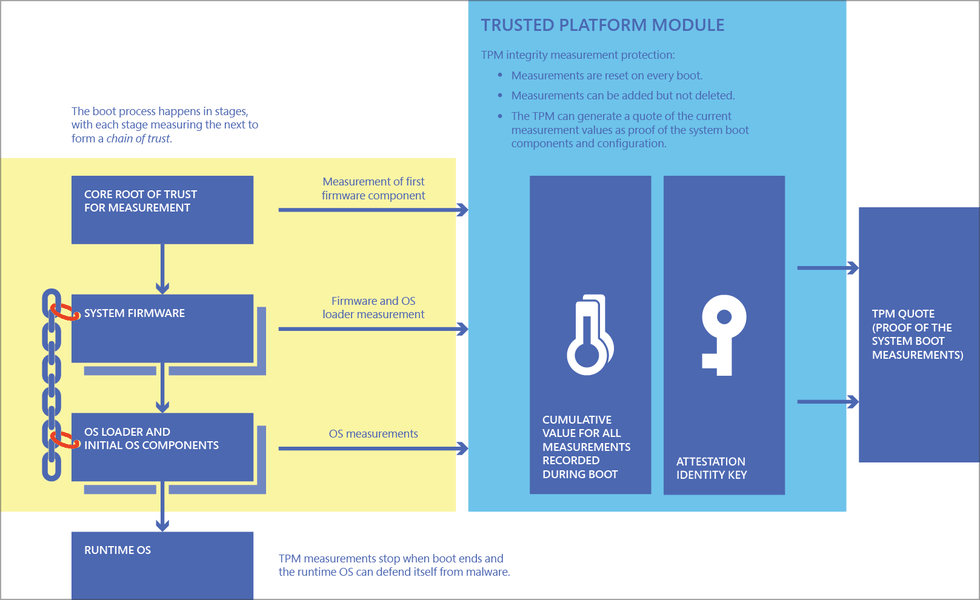
Windows 11 comes with a new requirement called TPM, and we wrote about Windows 11 and TPM in a separate guide.
TPM is a feature that verifies the integrity of your firmware, preventing unauthorized users from accessing your encryption keys or installing rootkits that will run before your operating system boots.
Virtualization-Based Security (VBS)
Next on our list is Virtualization-Based Security, and this feature creates a secure and isolated section in your memory.
By doing so, Windows can use this virtual secure mode to run various security solutions, thus providing better protection for your operating system.
Hypervisor-Protected Code Integrity (HVCI)
This feature is related to the VBS and secures the Windows kernel from malware. Many exploits tend to attack your kernel to access the operating system, and this feature prevents that.
Windows uses several internal protection components to support features like VBS and HVCI. You can learn more about how these Microsoft security agents work by visiting this detailed overview of Microsoft security agents.
UEFI Secure Boot
This isn’t a new feature, and it’s closely associated with TPM. Using the secure boot ensures that your firmware isn’t tempered, thus preventing malware from running as soon as you boot your PC.
Now that you know about Windows 11 features, let’s answer the most important question.
Is Windows 10 or 11 more secure?
Both operating systems support all of the features above. However, these features aren’t enabled on Windows 10 by default, plus Windows 10 doesn’t force you to use them.
On the other hand, TPM is required for Windows 11, and features such as HVCI can negatively affect performance on older CPUs, so Windows 11 has higher standards.
Overall, Windows 11 is more secure, especially if you’re a less experienced user who doesn’t know how to enable these security features manually.
If you want to avoid Windows 11 security issues, you need to make a few adjustments to your settings.
How can I improve security in Windows 11?
1. Keep your system up to date
- Press the Windows key + I to open the Settings app.
- Now go to the Windows Update section.
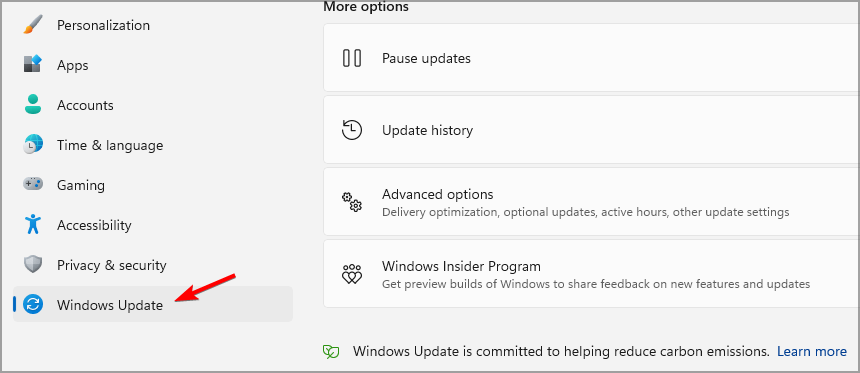
- Click on Check for updates.
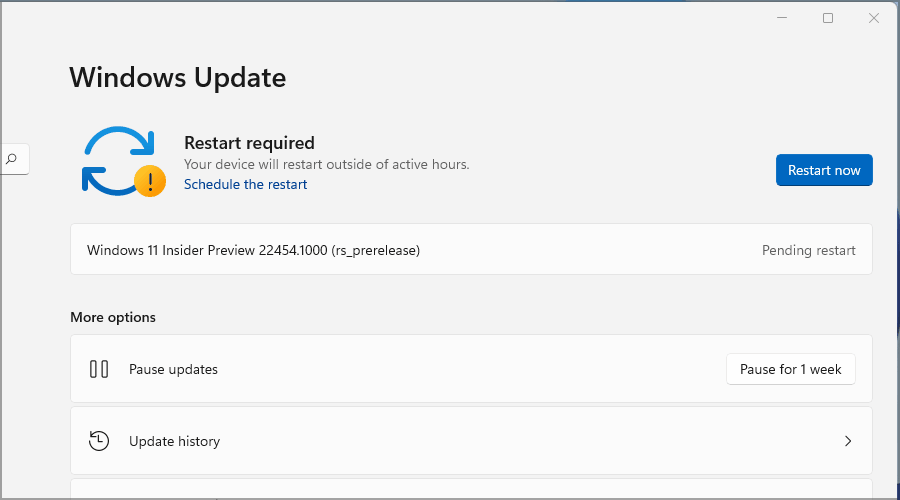
If any updates are available, they’ll start downloading. In most cases, Windows automatically checks for updates, so you won’t have to do this manually.
To keep your PC safe, it’s crucial to download Windows 11 security updates regularly.
2. Protect your account with a password
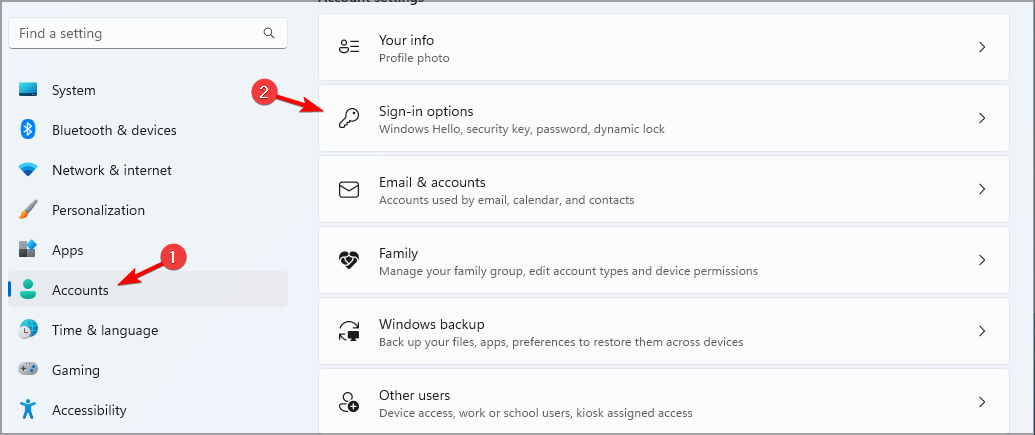
- Open the Settings app using the Windows key + I shortcut.
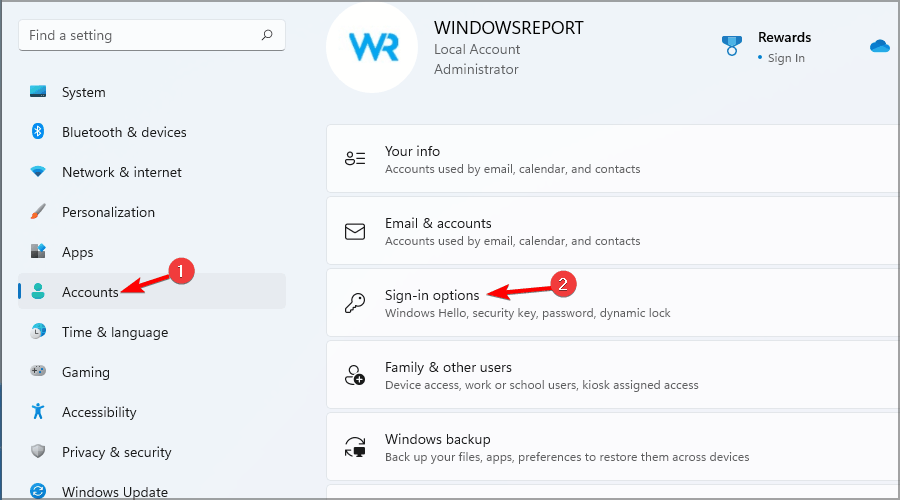
- Go to Accounts and then select Sign-in options.
- Expand the Password section and click on Add.
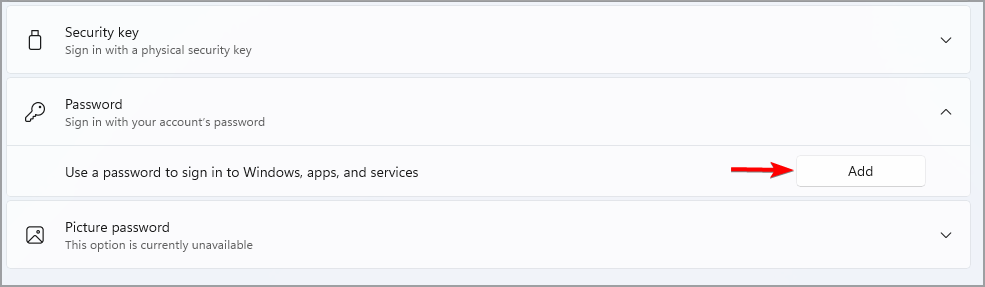
- Now enter the new password.
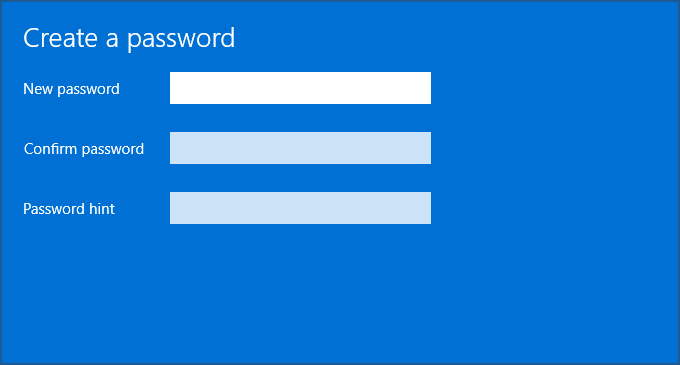
Adding an account password gives you basic protection from unauthorized access. This can be helpful if you’re sharing your PC with others or if somebody tries to access your device without your knowledge.
3. Add fingerprint or facial recognition
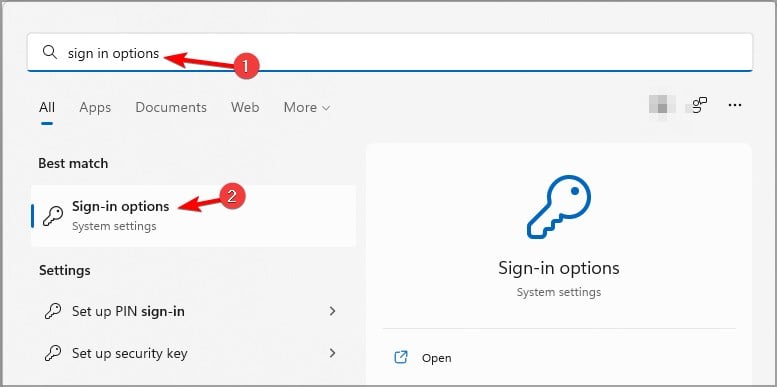
- Press Windows key + S and enter sign-in options. Select the Sign-in options from the list of results.
- Select Facial recognition or Fingerprint recognition and click on Set up.
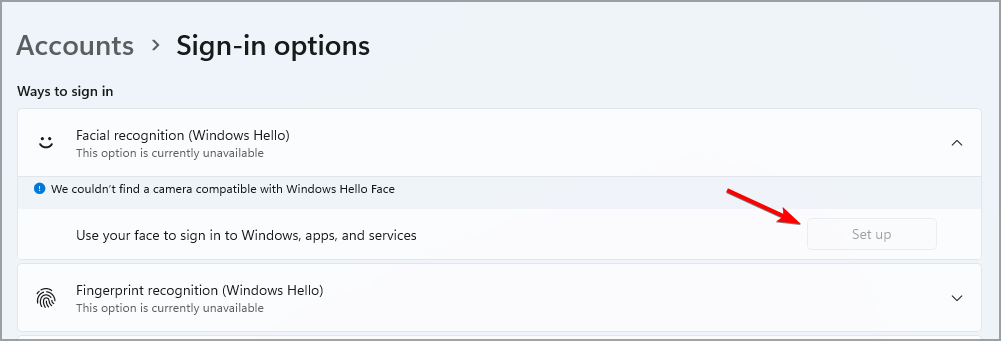
- Follow the instructions on the screen to complete the process.
This is a more convenient protection method, since only you will be able to unlock your device, so you don’t have to worry about someone knowing your password.
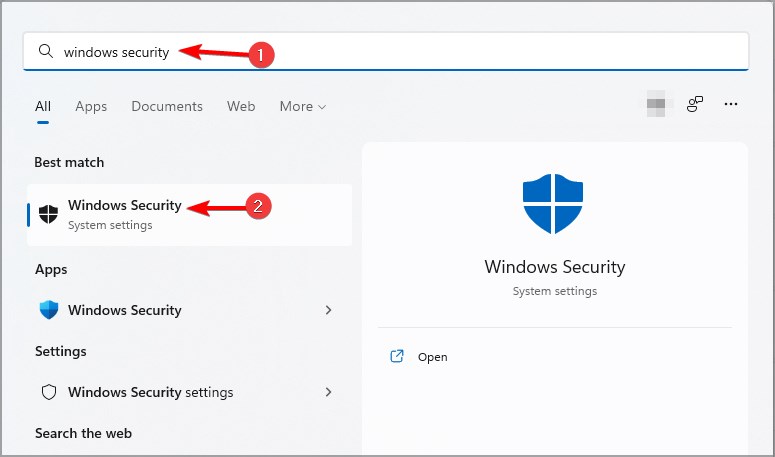
4. Make sure Windows Defender is running
- Open the Search by pressing the Windows key + S. Enter windows security and select Windows Security.

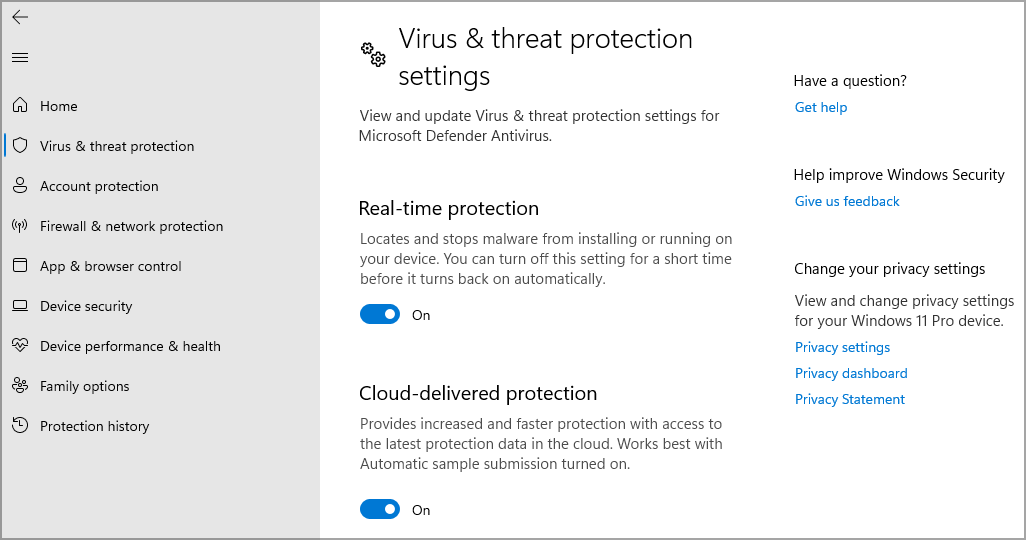
- Select Virus & threat protection and then go to Manage settings.
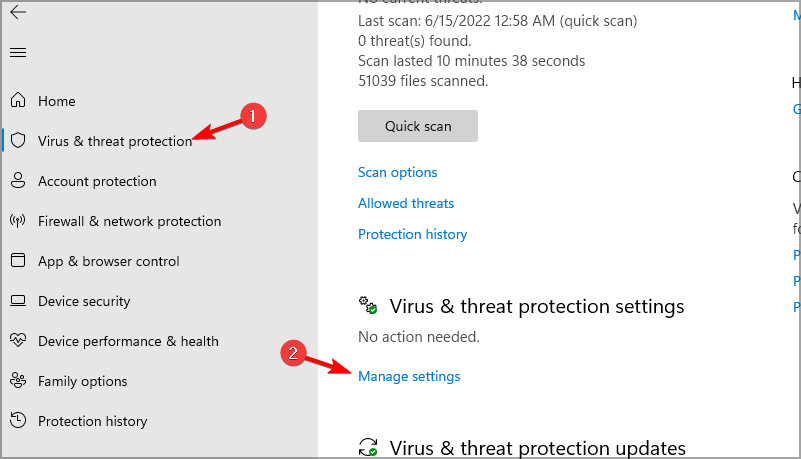
- Enable all options.
Windows 11 comes with Windows Defender pre-installed, but sometimes Windows Defender is turned off, and that can make your PC vulnerable.
A few users reported that Windows Defender isn’t installed on their PCs, which can be a major security concern.
You should never turn off Windows 11 security because it’s the only defense against malware. Therefore, checking if the application is enabled and properly running on your PC is important.
Once you verify that Windows Security is running correctly, take a look at this detailed guide on how to use Windows Security to make the most of its protection features.
Having trusted apps blocked after turning on Windows Security? Diagnose and adjust settings with this guide on Smart App Control blocking apps.
5. Use third-party antivirus
While Windows Defender is a great security solution, it’s not as advanced as other malware protection software, so many users are choosing third-party antivirus solutions instead.
We already did a comparison between Windows Defender and Avast, so you should check it out for more information.
If you’re having security concerns about Windows 11, be sure to visit our best antivirus for Windows 11 guide and pick the right protection for your PC.
Suppose you want to stay protected on all fronts and be able to run your antivirus in the background without it affecting your PC’s performance. In that case, we suggest you use ESET HOME Security Essential.
6. Use a Standard account
- Press the Windows key + I to open the Settings app.
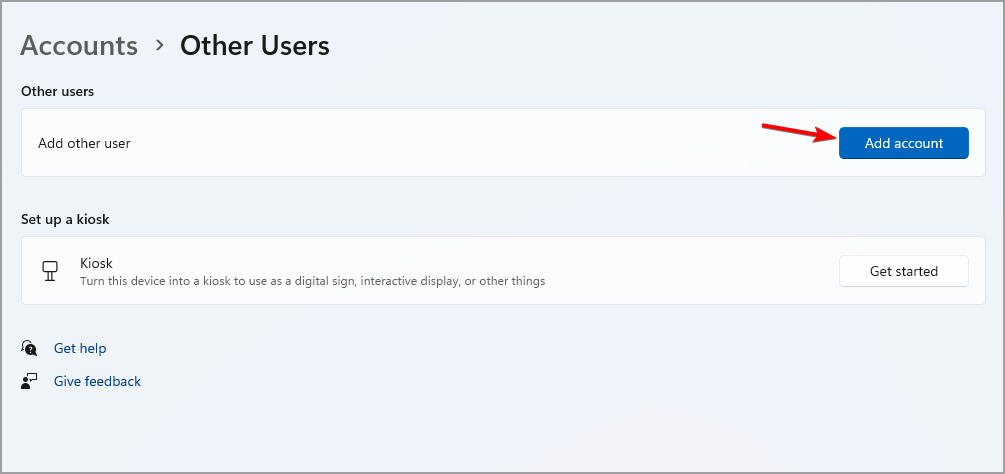
- Go to Accounts and select Other users.
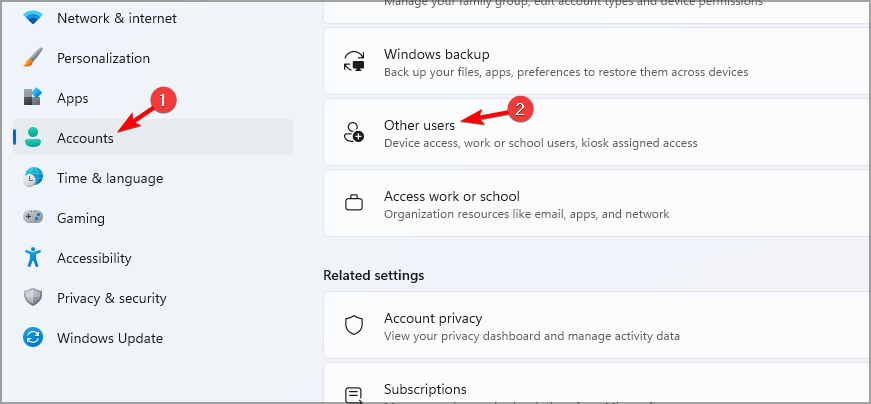
- Click on Add account.
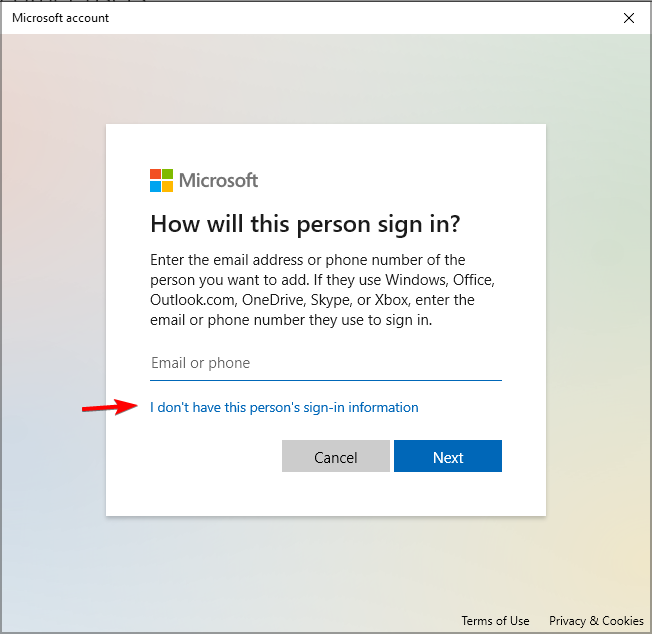
- Pick I don’t have this person’s sign-in information.
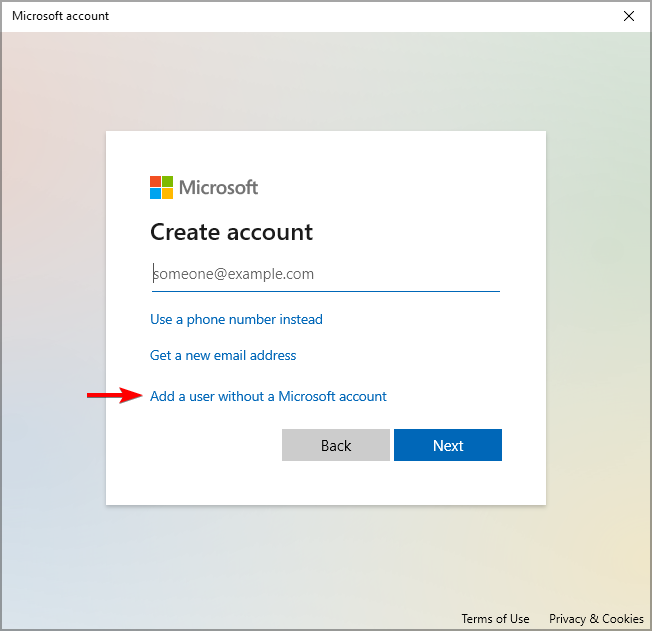
- Now select Add a user without a Microsoft account.
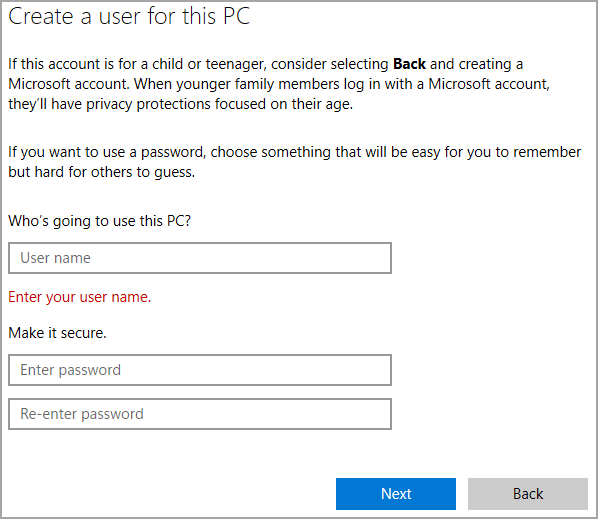
- Enter the username and password for the new account.
By using the Standard account instead of the Administrator, you’ll have to enter your administrator password every time you want to make a system change.
This is incredibly helpful if you’re sharing your PC with someone or using a business computer and don’t want users to have unrestricted access to the PC.
7. Make sure User Account Control is running
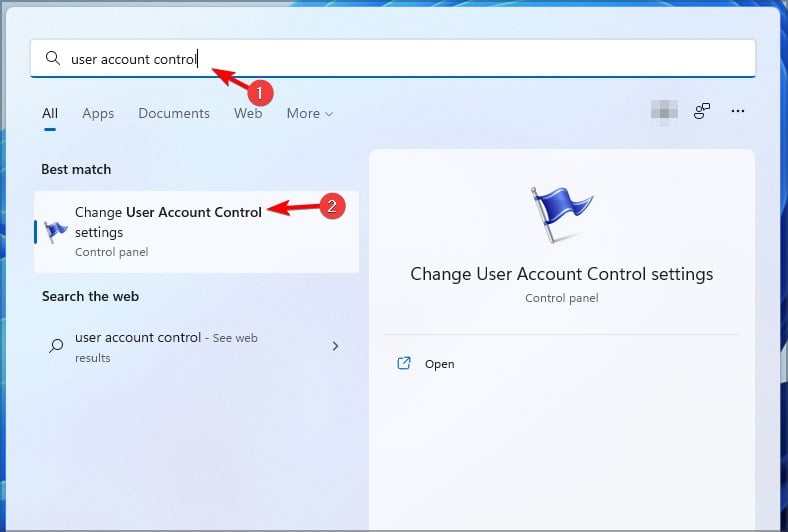
- Click the Search button and enter user account control. Select User Account Control Settings from the results.
- Make sure that User Account Control is set to a recommended value or the one above.
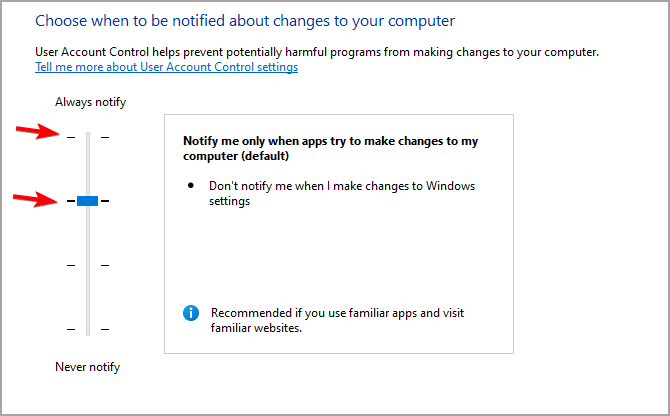
- Click on OK to save changes.
This feature works great if you have a Standard and Administrator account since it will ensure that users won’t be able to change system settings on their own.
8. Use Dynamic Lock
- Press the Windows key + I to open the Settings app.
- Go to the Bluetooth section and click on Add a device.
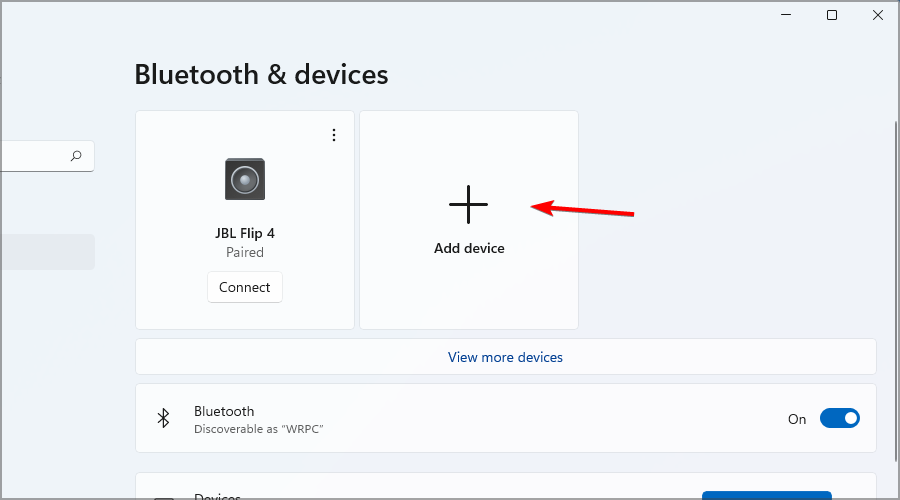
- Follow the instructions on the screen to connect your Bluetooth device to your PC.
- Once your device is connected go to Accounts and select Sign-in options.
- In the Dynamic lock section, enable Allow Windows to automatically lock your device when you’re away.
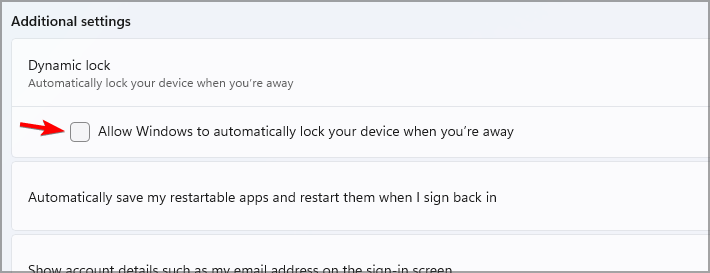
After enabling this feature, as soon as you step away from your PC for more than 30 seconds, it will automatically become locked.
9. Check if your firewall is enabled
- Click the Search icon and type windows security. Select Windows Security.

- Select Firewall & network protection and make sure that firewall is enabled for all types of connections.

- To change your firewall settings, click on Allow an app through firewall.
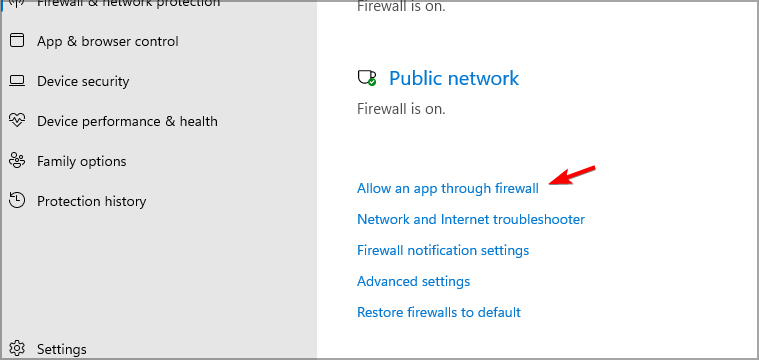
- Now you can choose which applications have access to the Internet.
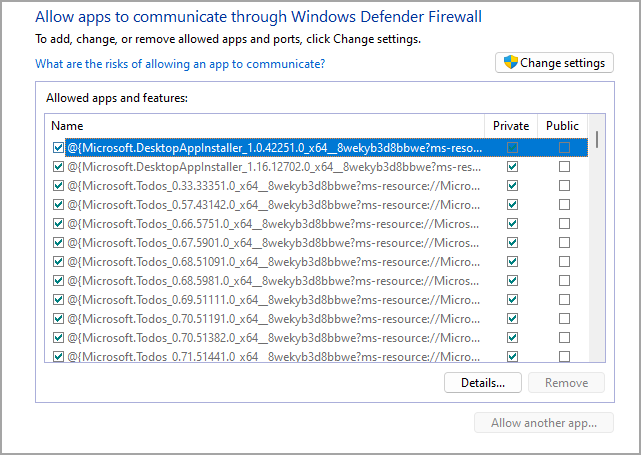
Modifying the firewall settings is an advanced procedure, so be sure to double-check the suspicious application before you prevent it from accessing the Internet.
10. Encrypt your drives
- Press the Windows key + I to open the Settings app.
- Navigate to Storage.
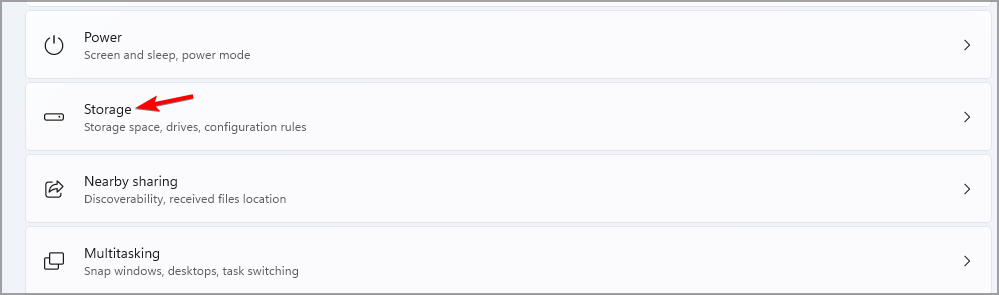
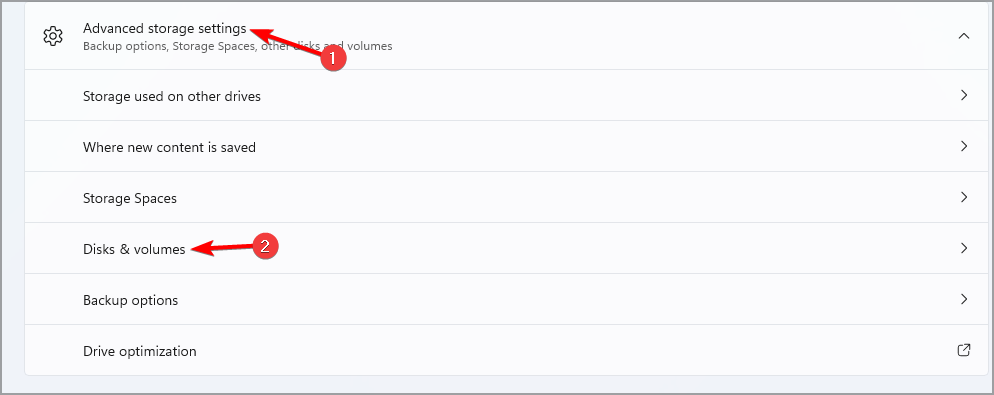
- Expand the Advanced storage settings section and click on Disks & volumes.
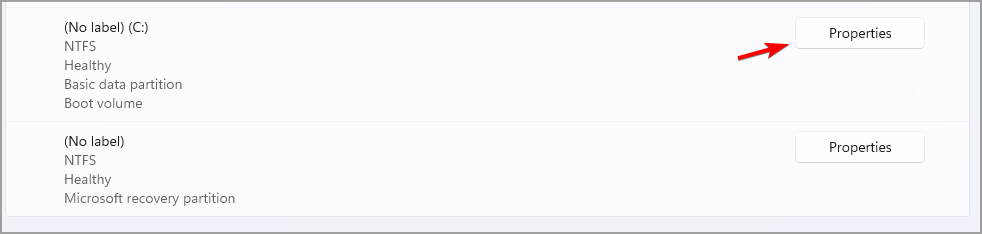
- Select the partition you want to encrypt and click on Properties.
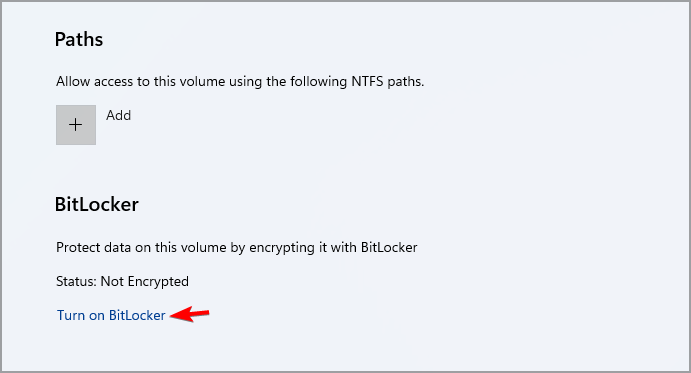
- Now click on Turn on BitLocker.
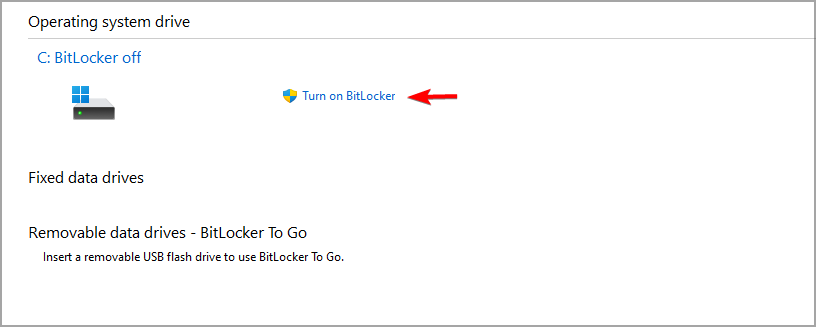
- Click on Turn on BitLocker.
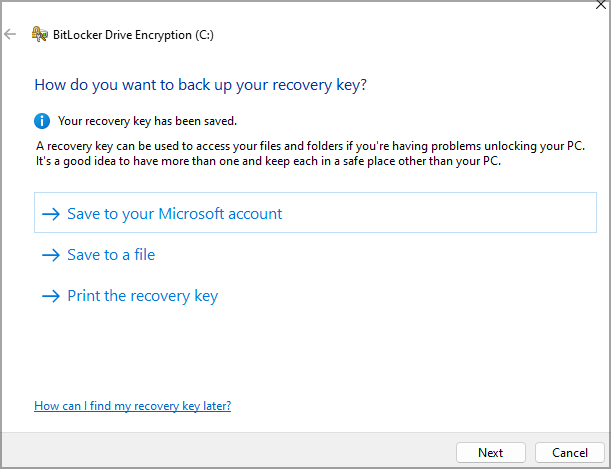
- Choose how you want to save your recovery key.
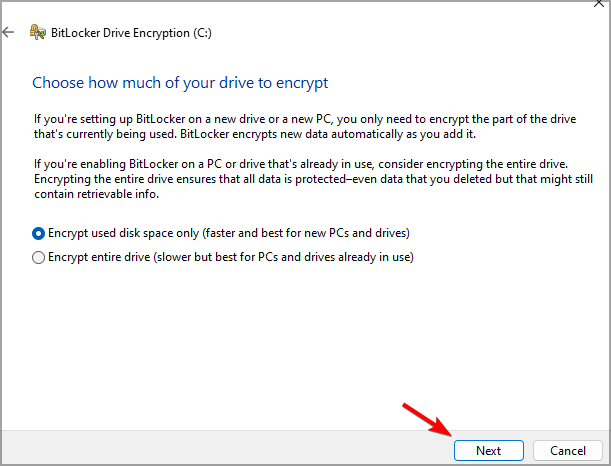
- Select how much of your drive you want to encrypt.
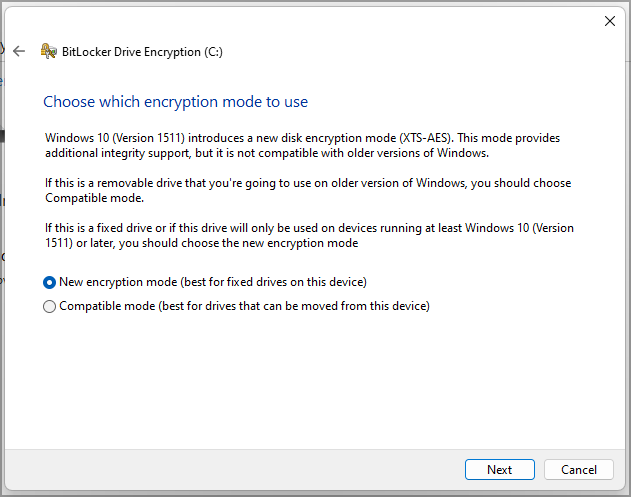
- Select the desired encryption mode.
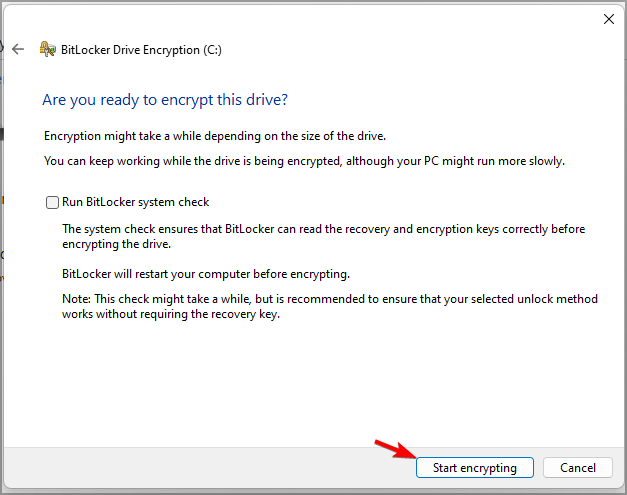
- Now click on Start encrypting and closely follow the instructions on the screen.
After your device is encrypted, nobody will be able to see your data without a password, which is great protection if your device gets stolen for example.
11. Make sure TPM and Secure Boot are enabled
- Restart your PC and keep pressing F2 to access BIOS.
- Go to the Miscellaneous tab. Locate TPM Device Selection and set it to PTT or fTPM
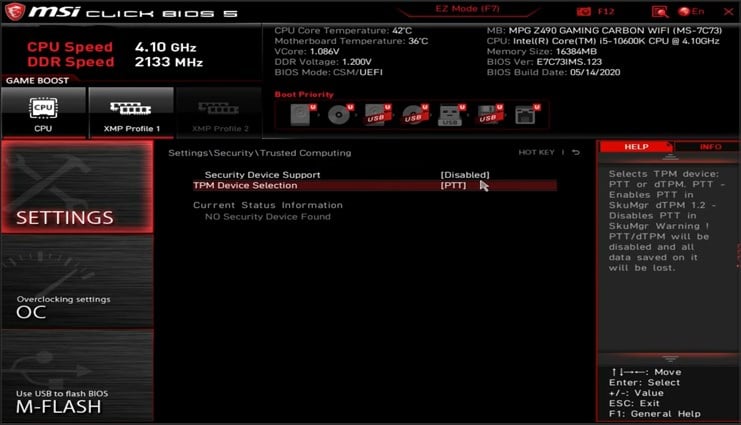
- Go to the Boot section and locate Secure Boot. Set it to Enabled.
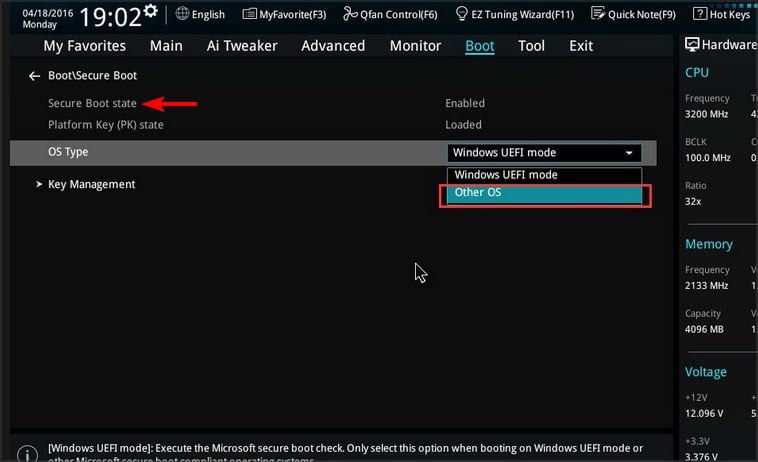
- Save changes and restart your PC.
For more information, we have a separate guide that focuses on how to enable TPM 2.0 in different versions of BIOS, so be sure to read it.
12. Scan your PC frequently
- Press Windows key + S and enter windows security. Select Windows Security from the list.
- Go to the Virus & threat protection and click on Scan options.
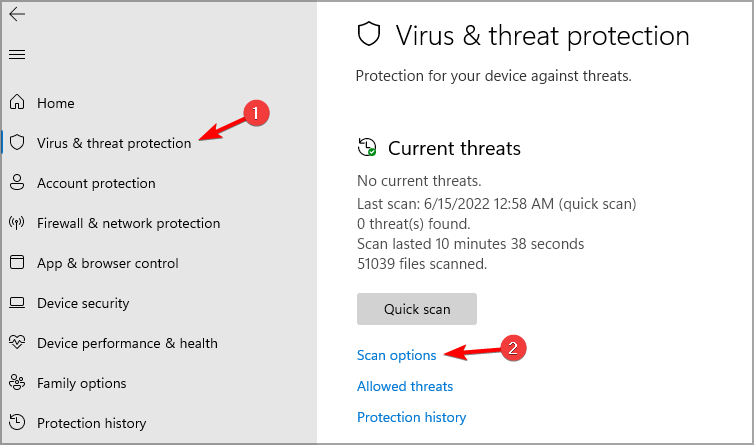
- Select the type of scan that you want and click on Scan now.
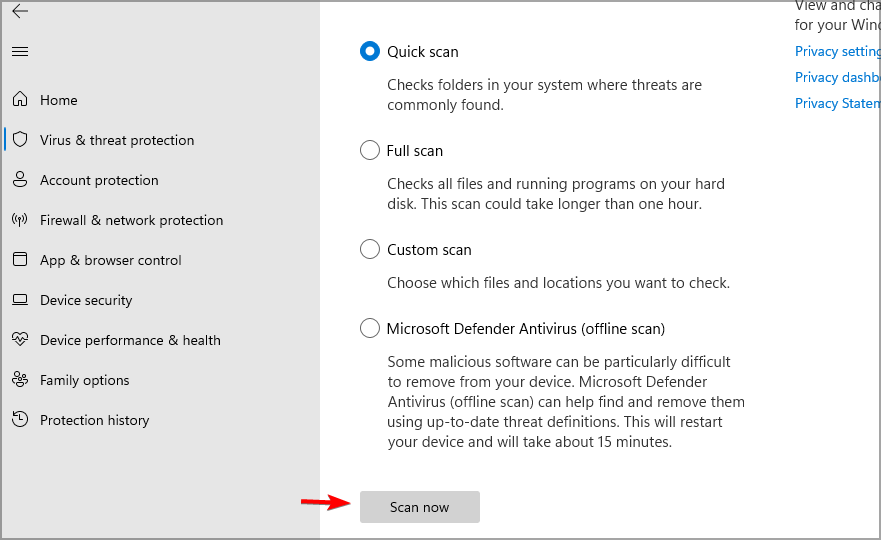
We suggest using a Full scan to scan all files on your PC, but this might take several hours to complete, so keep that in mind.
In most cases, your security software will detect the threats automatically, but it’s not a bad idea to manually scan your PC once in a while.
13. Enable Find my device feature
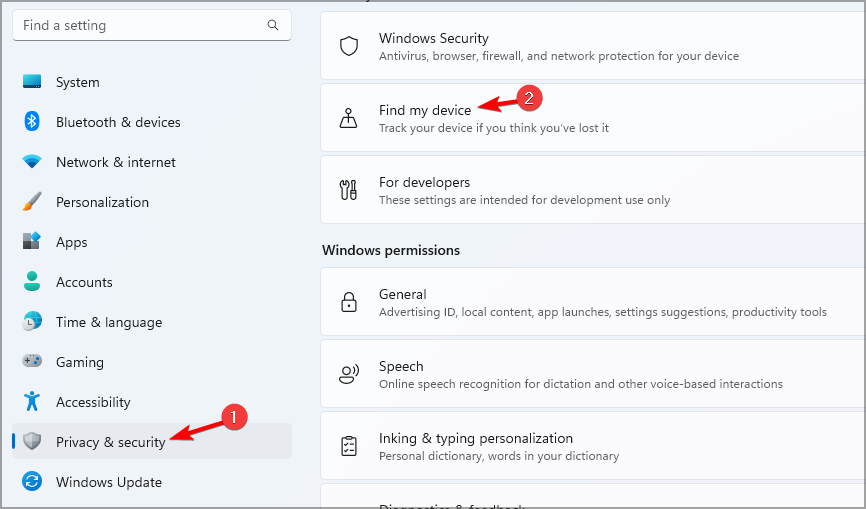
- Open the Settings app. You can use Windows key + I to do that quickly.
- Go to Privacy & Security and select Find my device.
- If you see a warning message, click on Location settings.
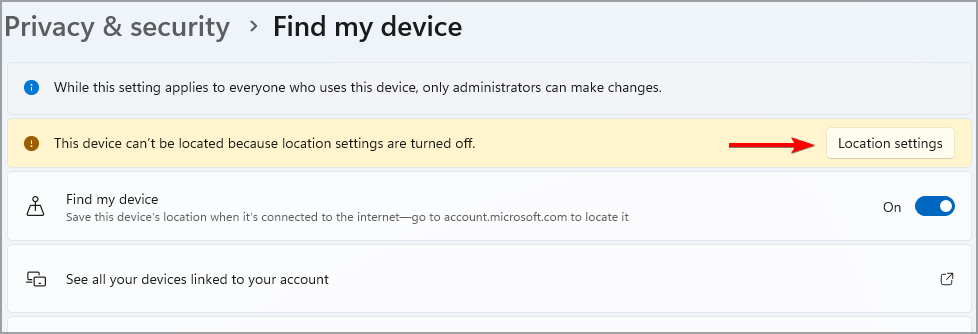
- Enable Location services and go back.
- Now you need to enable Find my device.
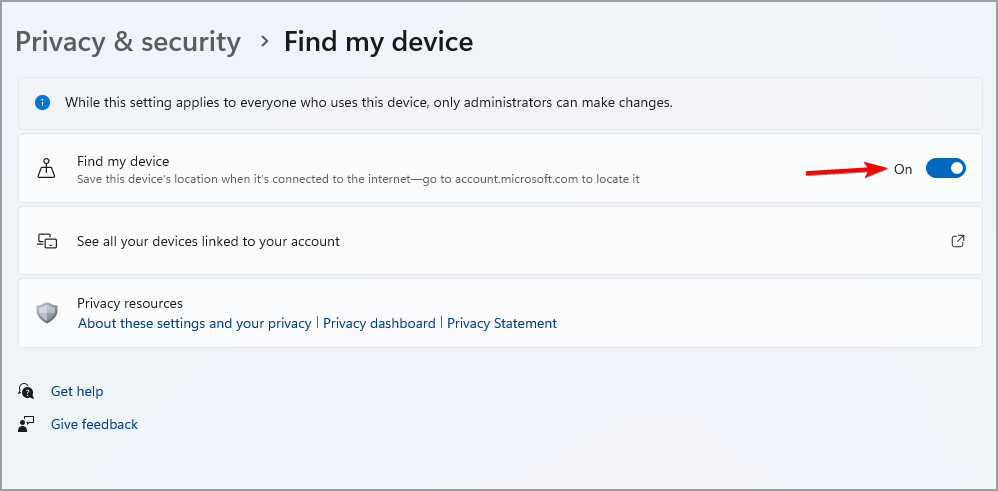
After doing this, you can track if your device gets stolen or lost via your Microsoft account.
14. Use a password manager
To ensure that you’re safe online, always use password manager software. By doing so, you’ll generate unique and strong passwords for every website that you log into.
This will prevent hackers from accessing your online accounts, plus you won’t have to remember your passwords anymore since the software will do that for you.
15. Use a VPN
VPN is extremely useful if you’re concerned about your privacy or if you tend to use a lot of open and insecure networks during the day.
VPN software will encrypt and hide all your traffic from third parties and your ISP, allowing you to browse the web privately.
If you want a good VPN with access to thousands of servers worldwide and that’s equipped with all the security features you need, we recommend Private Internet Access.
It’s compatible with all major platforms, including Windows 11, with an easy-to-use application. It’s able to circumvent geo-blocks and has dedicated servers for streaming.
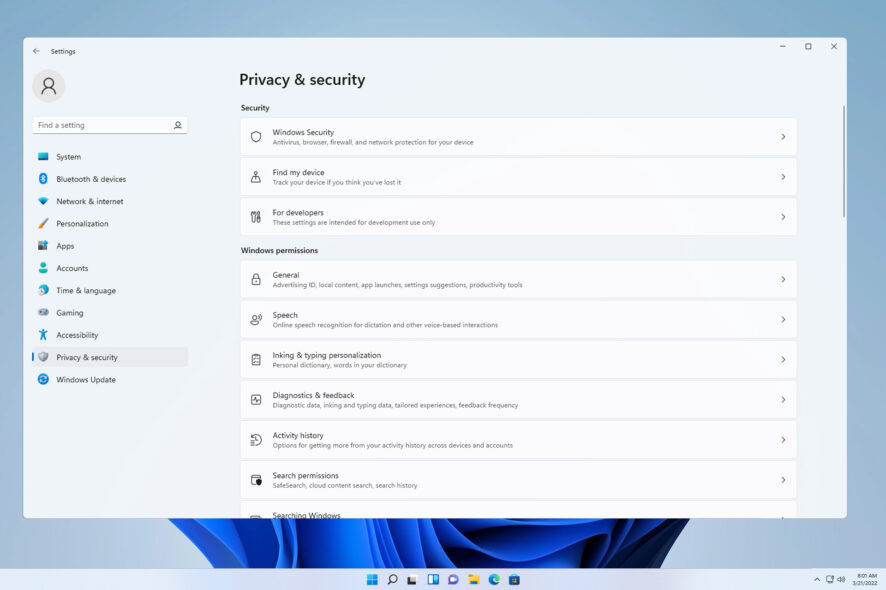
How do I protect my privacy on Windows 11?
Disable location tracking
- Press the Windows key + I to open the Settings app.
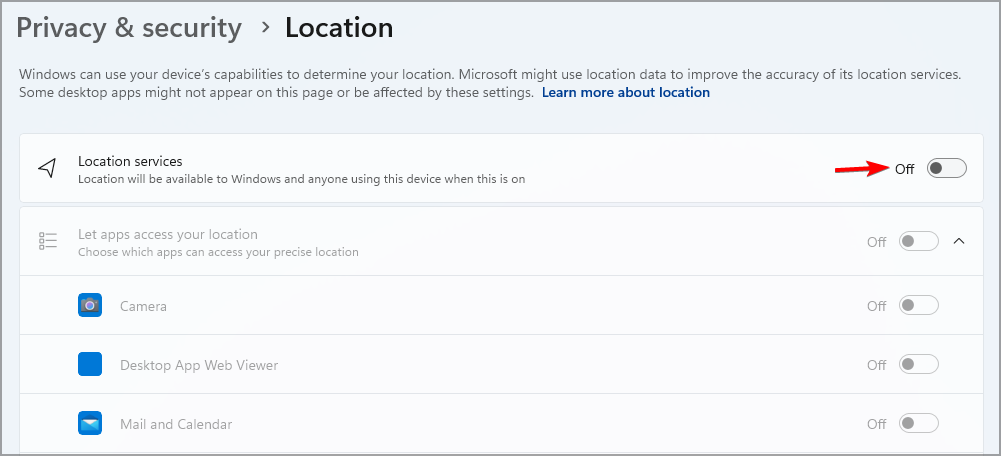
- Go to Privacy & security and select Location.
- Disable Location services.

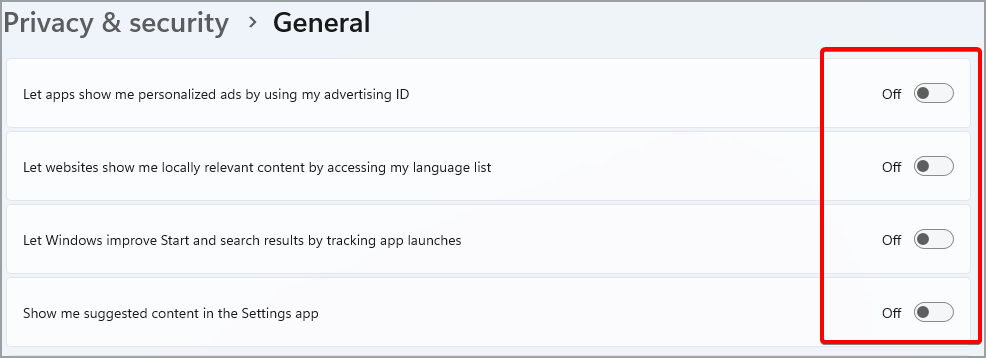
Disable Ad tracking
- Open the Settings app. You can do that with the Windows key + I shortcut.
- Go to Privacy & security and then select General.
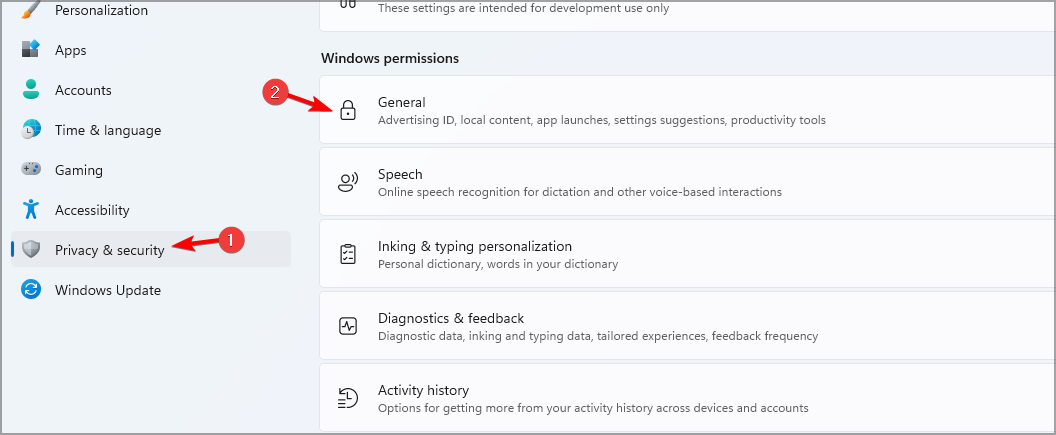
- Disable all available options.
Disable Diagnostics and Feedback
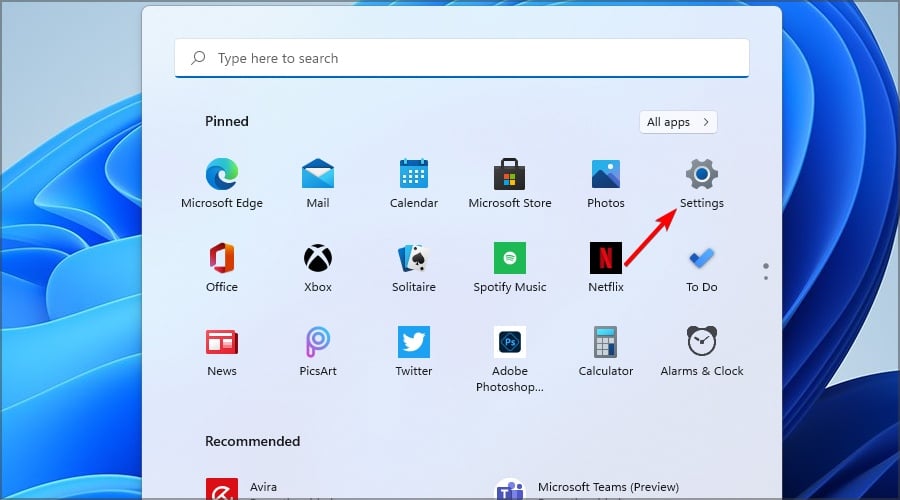
- Click Start and then Settings.
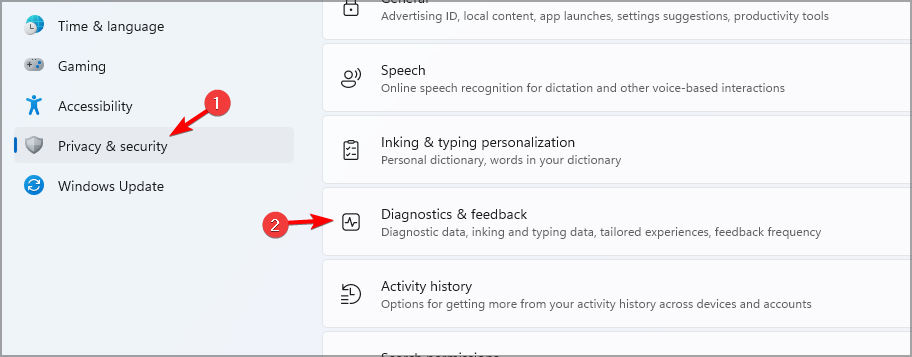
- Go to Privacy & security and select Diagnostics & feedback.
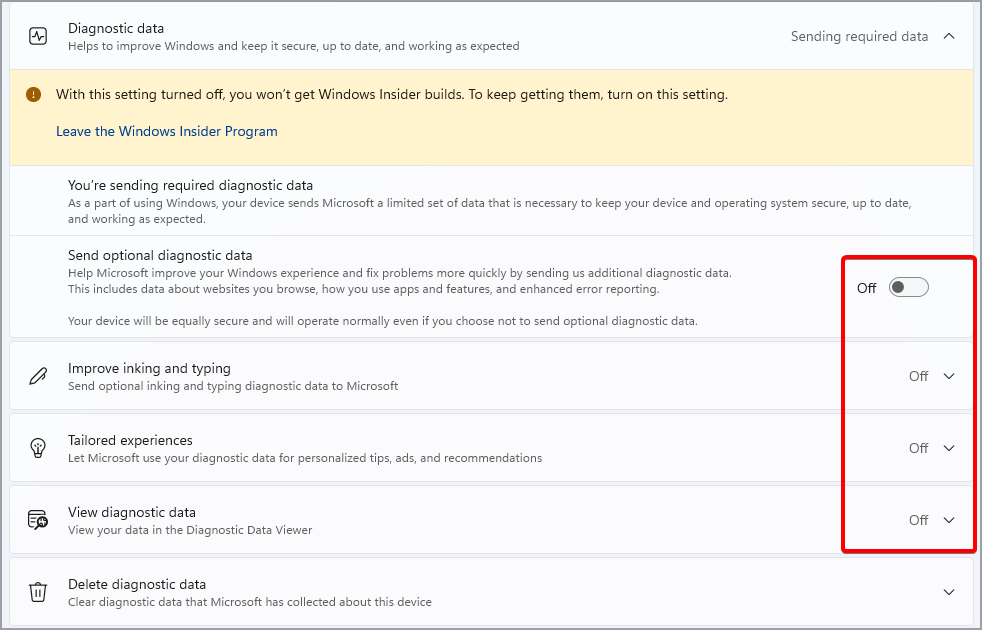
- Now set all the options to Off.
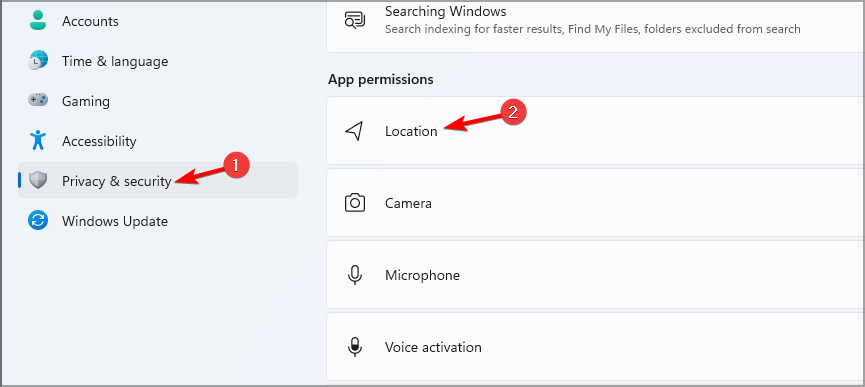
Disable app permissions
- Press the Windows key + I. This will open the Settings app.
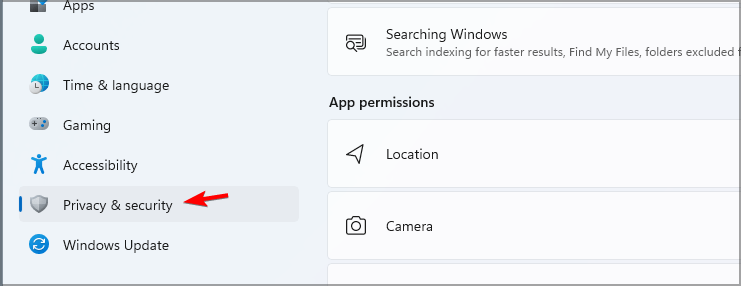
- Go to Privacy & security.
- Now scroll down to App permission settings and disable Location, Camera, Microphone, Voice activation, Call history, and Account info settings.
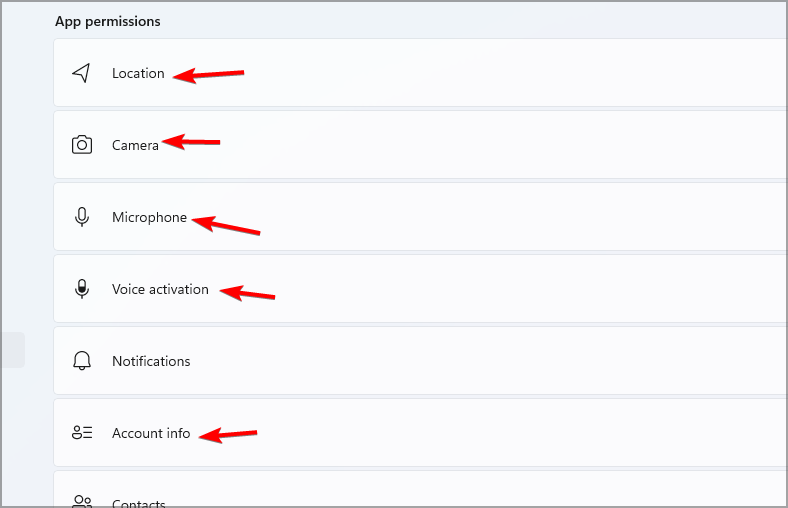
After adjusting these Windows 11 privacy settings, you’ll disable all features that are collecting personal information.
To keep your personal data under control and reduce tracking across apps and services, review the most important privacy options and follow this complete guide to Windows 11 privacy settings so you can decide what to allow and what to block.
Does Windows 11 Defender protect against malware?
Yes, Windows Defender protects against malware, ransomware, and other types of malware. The software is effective in dealing with the latest malware types out of the box.
However, some users prefer using third-party solutions since they offer more advanced features. Windows Defender lacks a reliable scheduling feature, and this is the main drawback for many.
The firewall configuration is powerful, but it feels unintuitive to use. Defender also lacks features such as Game Mode, webcam and microphone protection, banking protection, and vulnerability evaluation.
Does Windows 11 automatically encrypt?
No, Windows 11 doesn’t automatically encrypt your drives, and to encrypt them, you need to set up BitLocker protection.
Alternatively, you can use file encryption software to protect your data from unauthorized access.
Windows 11 brought some changes, and while it’s similar to its predecessor, it still has improved security with the TPM requirement.
Most security features are now enabled by default, thus providing additional protection to the users. Speaking of security, we also wrote a great guide on whether Windows 11 needs an antivirus, so be sure to check. And if you are going with the built-in antivirus, check the best Windows Defender settings!
You can enhance your security even further by creating a USB security key for additional protection.
What are your thoughts on Windows 11 security? Let us know in the comments section below.
Read our disclosure page to find out how can you help Windows Report sustain the editorial team. Read more


Improve this guide


User forum
0 messages