The PC Must Support TPM 2.0: How to fix This Error
Easy ways to get past the TPM 2.0 must be supported and enabled on this PC prompt
Key notes
- If you are getting the PC must support TPM 2.0 prompt while trying to upgrade to Windows 11, it might be because the feature is disabled.
- One quick solution to this issue is to clear your TPM keys and enable the feature in the BIOS.
- Another effective fix for the PC must support TPM 2.0 issue is to bypass the requirement using regedit.
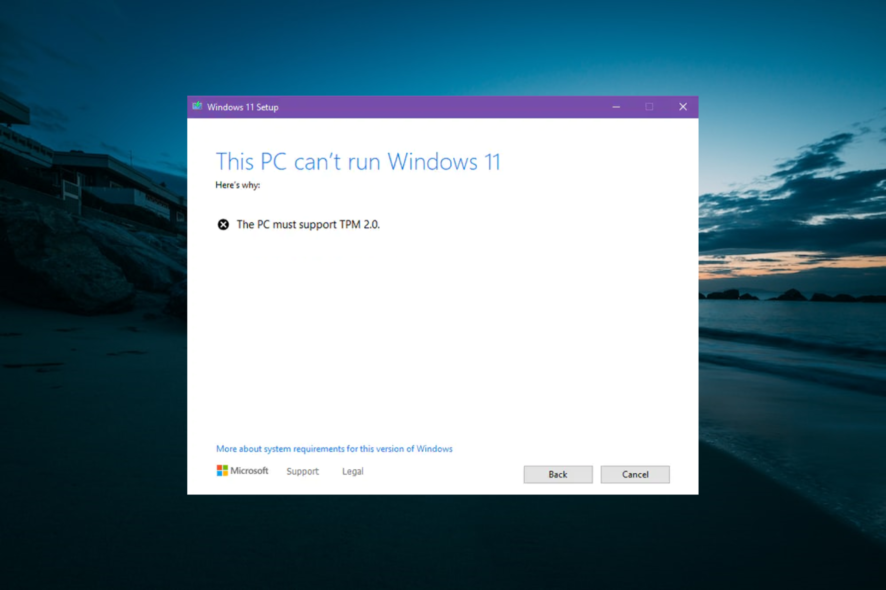
The PC must support TPM 2.0 is one of the most common errors users encounter when trying to update or upgrade to Windows 11. This can be frustrating, as some users feel their PCs meet the requirement but still get the error.
If you are getting this error, we will show you the best ways to fix it and make the upgrade in this guide.
What is TPM 2.0?
TPM 2.0 is a core part of your PC located on your motherboard. This small chip provides security features at the hardware level.
It generates the cryptographic keys used in the authentication of your PC. The TPM 2.0 works in a way that makes it difficult for malicious people to attack your PC.
This chip communicates with the security features when you turn on your PC. It then generates an unchangeable cryptographic key, which will be checked. If the authentication is successful, your PC boot up, and if it fails, it won’t startup.
How do I fix the TPM 2.0 error in Windows 11?
1. Check if the PC has TPM 2.0
- Press the Windows key + R, type tpm.msc, and click OK.
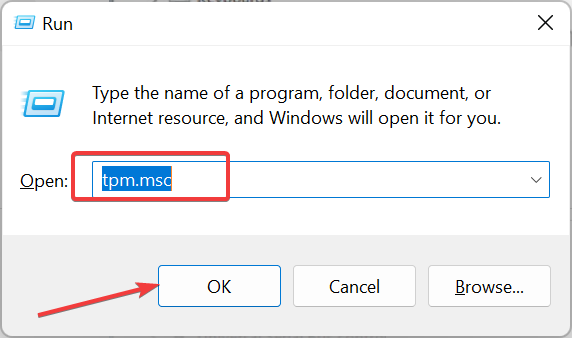
- Check under the Status section to see if your TPM is ready to use.
- Also, check the Specification Version under TPM Manufacturer Information for your TPM type.
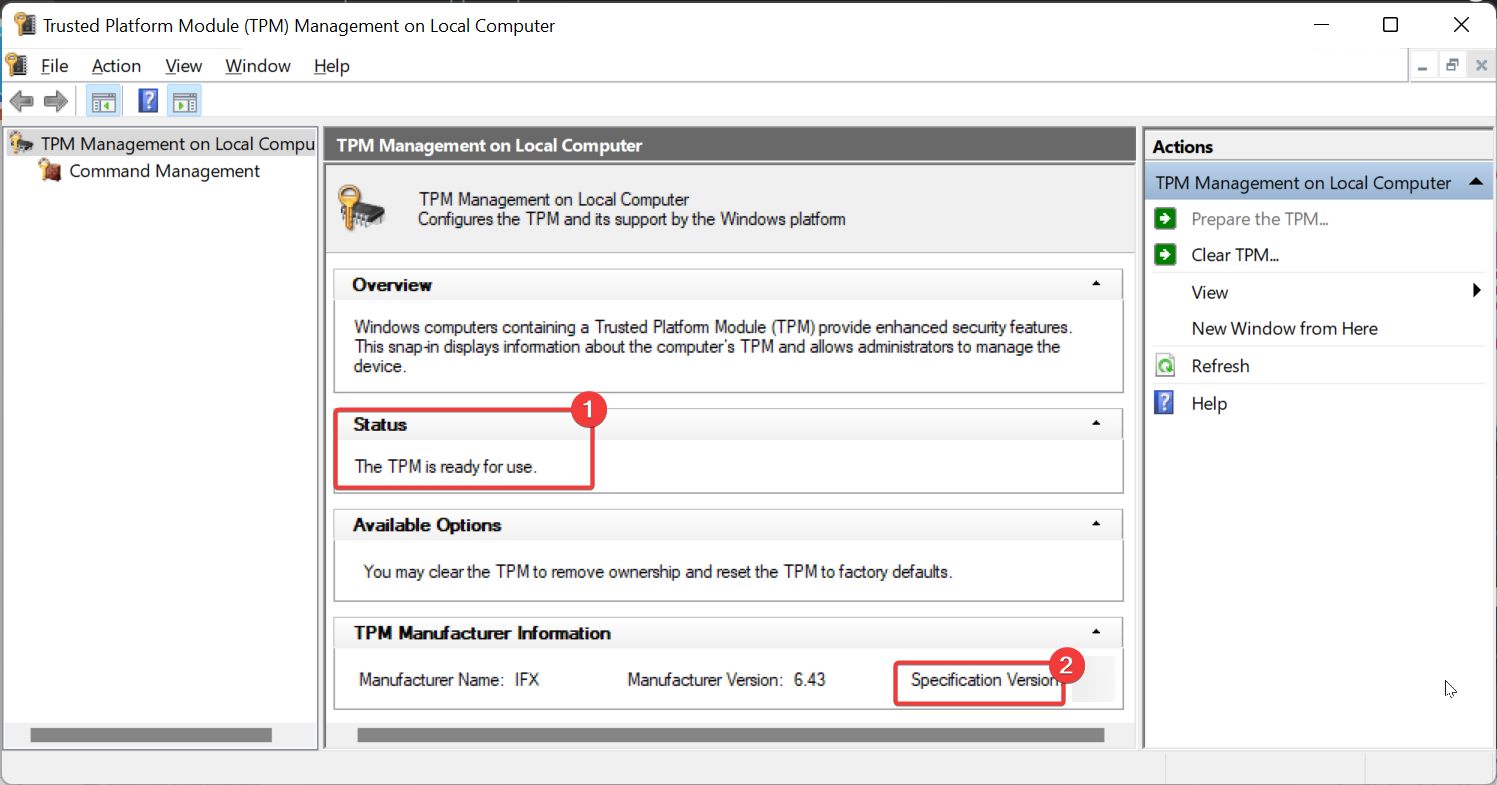
The first thing you need to do is to check if your PC supports TPM 2.0 to update to Windows 11. If the specification version is below 2.0, your PC does not meet the requirement to install Windows 11.
However, you can proceed to the ensuing solutions to still install the OS. Also, if Status states that a compatible TPM cannot be found, you need to enable it in the BIOS.
2. Reinstall TPM drivers
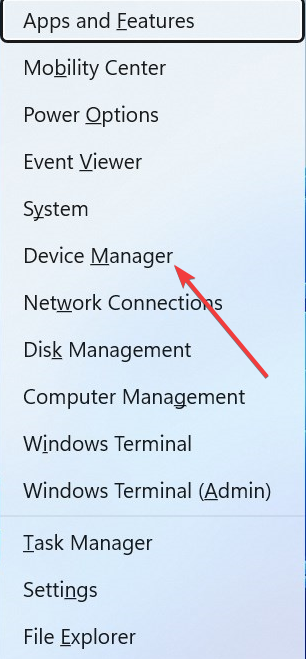
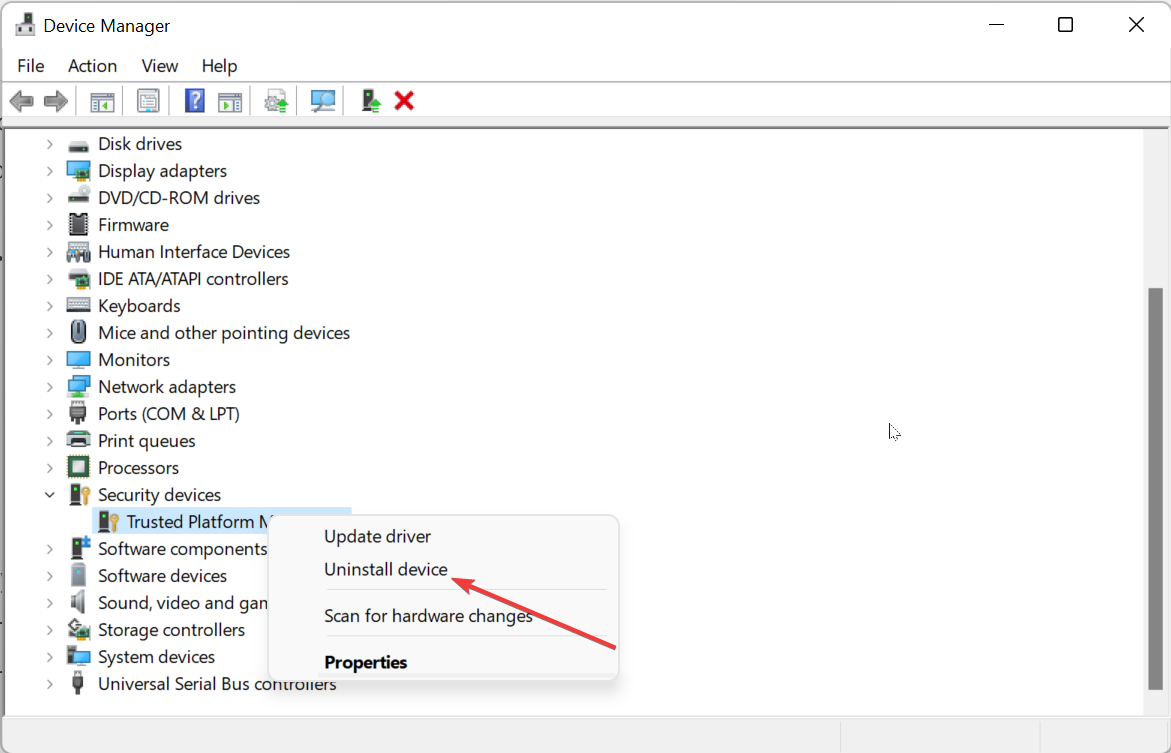
- Press the Windows key + X and select the Device Manager option.
- Double-click the Security devices option and right-click your TPM device.
- Now, click the Uninstall device option.
- Finally, click the Uninstall button to confirm the action and restart your PC.
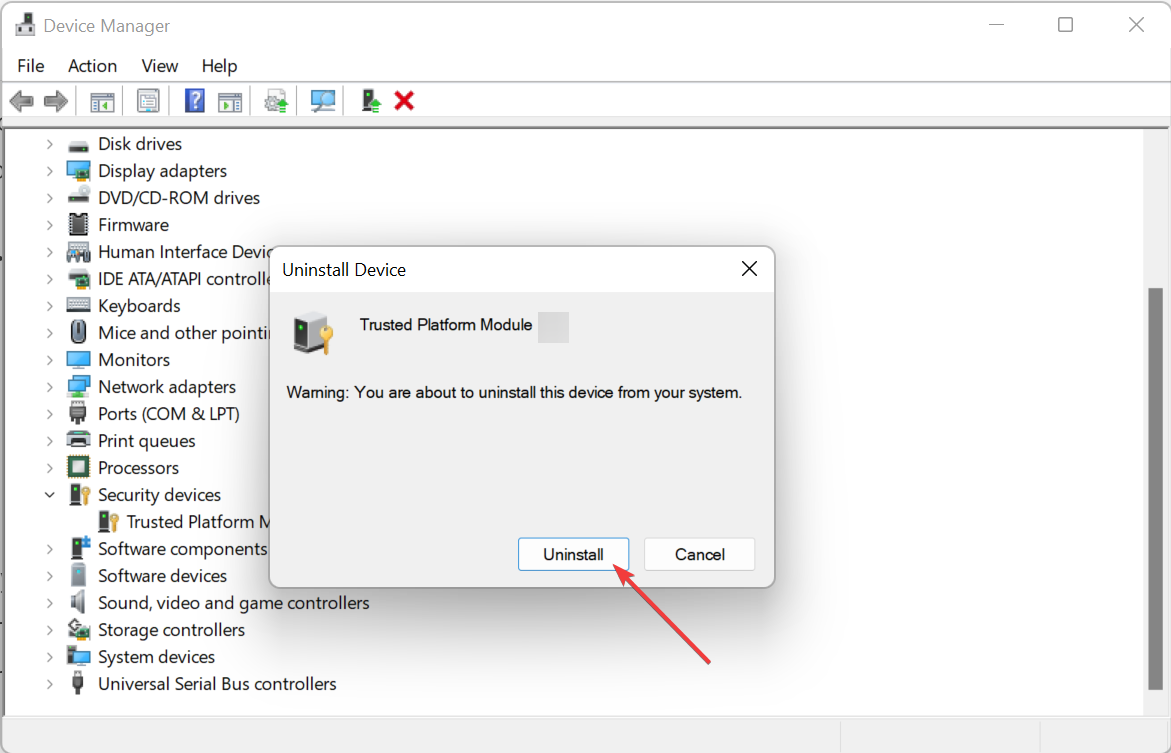
If you are sure your PC meets the requirements and you are getting the PC must support TPM 2.0 prompt, it might be due to issues with the TPM drivers. The solution here is to uninstall and reinstall the drivers.
3. Clear the TPM keys
- Press the Windows key + R, type tpm.msc, and click OK.
- Click the Clear TPM option in the right pane.
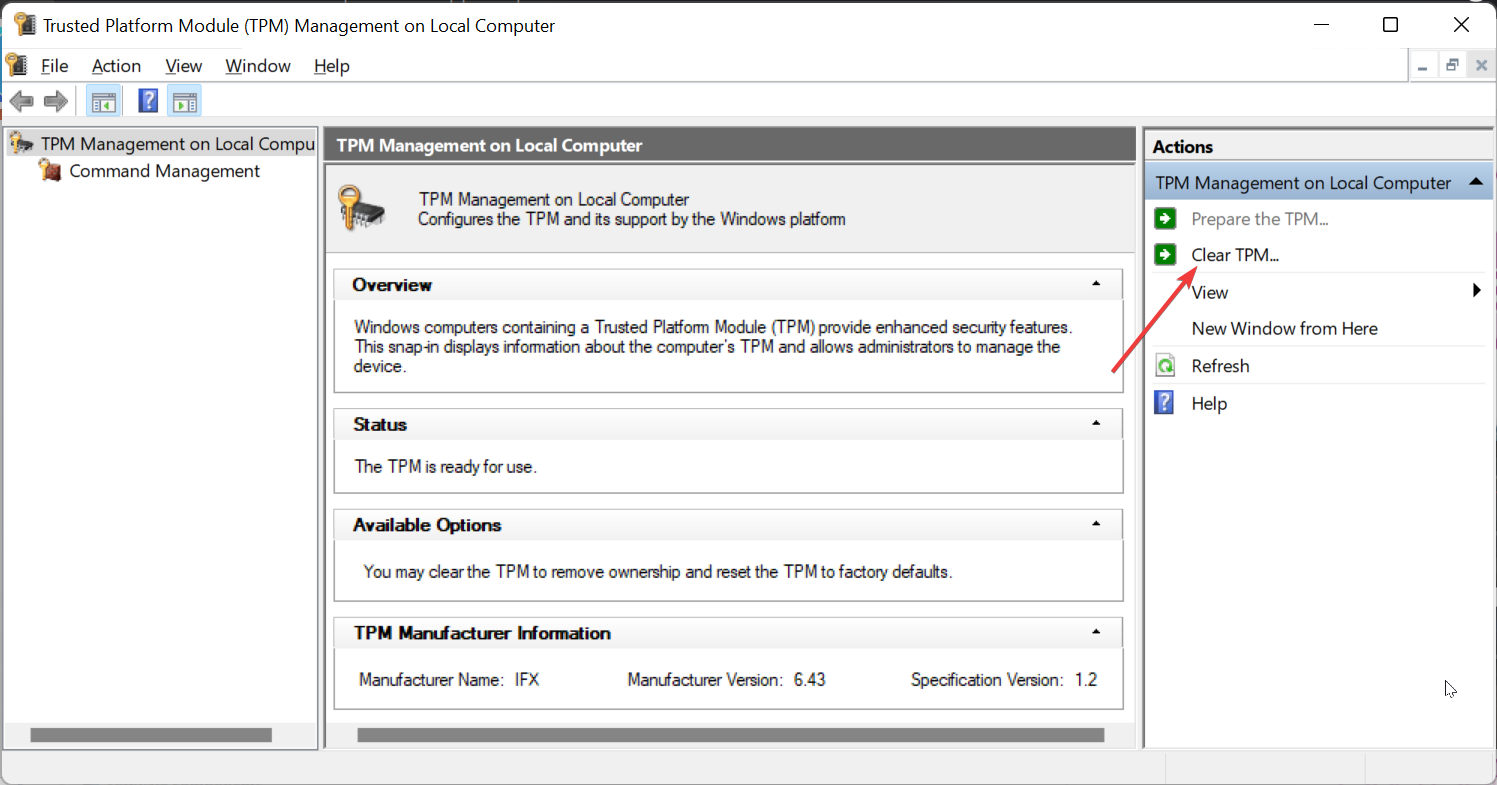
- Finally, click the Restart button to confirm the action and follow the onscreen prompts after your PC restarts.

If you are getting the Valorant needs TPM 2.0 error on Windows 11 or you can’t update your PC, it might be because of faulty keys. Clearing the keys and allowing your PC to generate new ones should restore normalcy here.
4. Bypass TPM requirements
- Press the Windows key + R, type regedit and click OK.
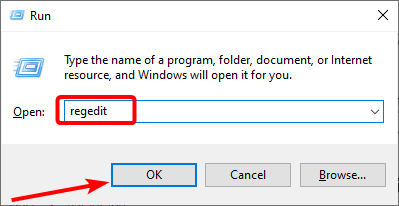
2. Navigate to the following path in the left pane:
Computer\HKEY_LOCAL_MACHINE\SYSTEM\Setup\MoSetup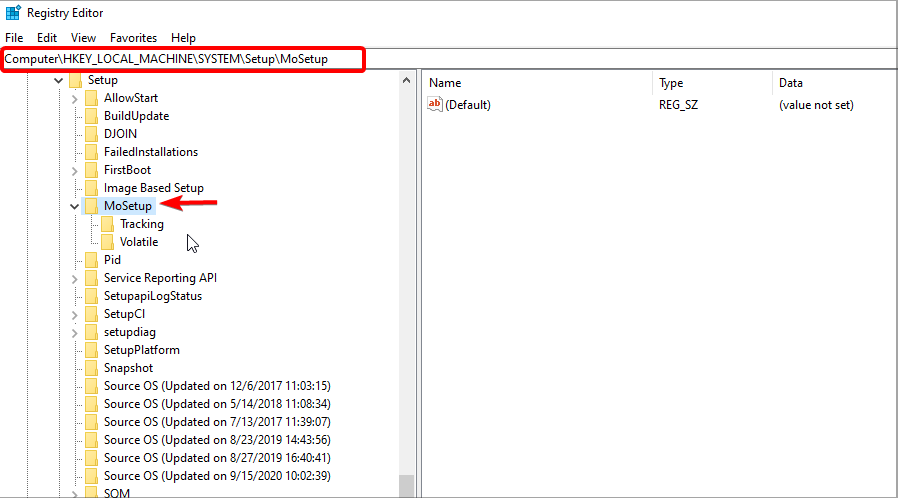
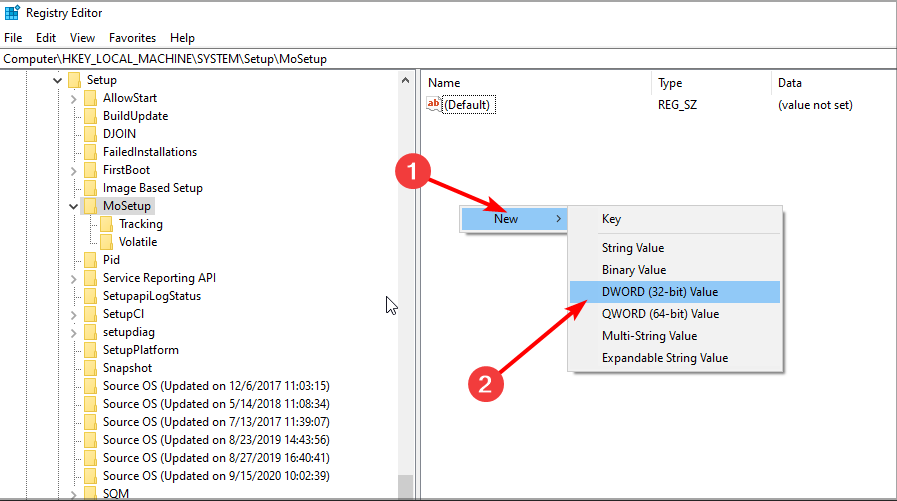
3. Right-click the space in the right pane and choose New > DWORD (32-bit) Value.
4. Type AllowUpgradesWithUnsupportedTPMOrCPU as the name of the new value and hit Enter.
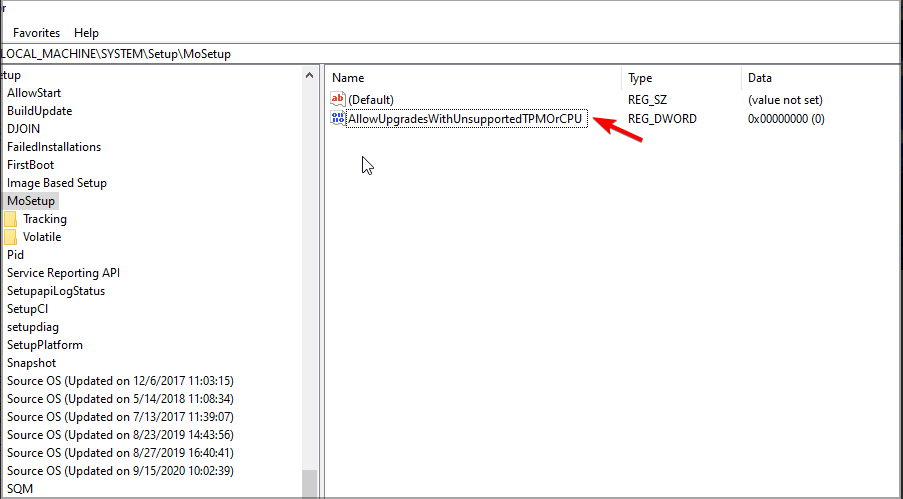
5. Double-click the value that you just created.
6. Set its Value data to 1 and click OK to save the changes.

If you are dealing with the PC must support 2.0 or Safe boot to upgrade to Windows 11, and your PC does not meet the requirement, this method will allow you to bypass the TPM check. This is the recommended method by Microsoft, so you should feel safe using it.
You can check our detailed guide for more ways to install Windows 11 without TPM.
5. Use a TPM 2.0-supported motherboard
If you still can’t install Windows 11 because your PC does not support TPM 2.0, you need to go for broke and get a motherboard that supports the feature.
This will get rid of the problem altogether. Check our detailed guide for a list of the best TPM 2.0 motherboards.
How do I get TPM 2.0 in BIOS?
- While your system boots, keep pressing the Del key.
- Click the Advanced tab at the top.
- Now, choose PCH-FW Configuration.
- Click the dropdown before PTT and set it to Enable.
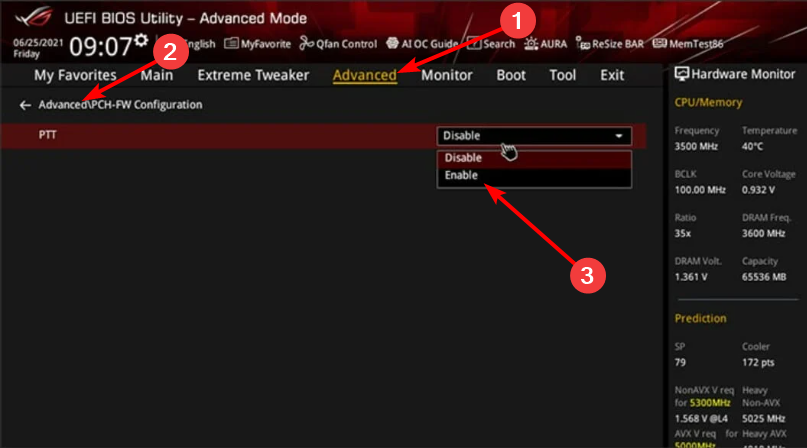
- Next, click the OK button to confirm the action.
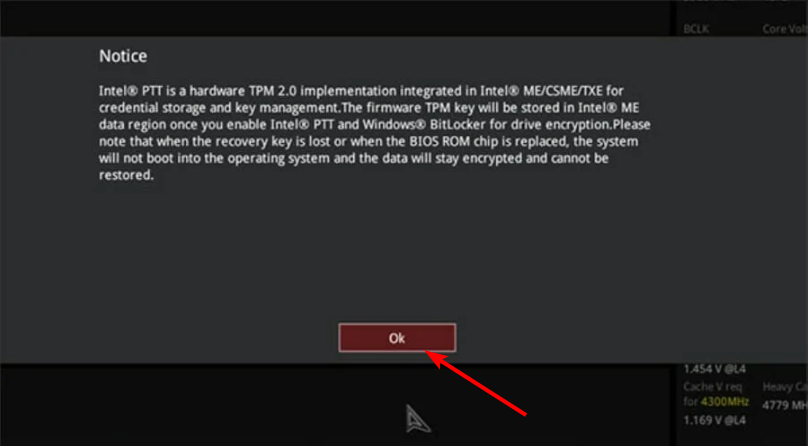
- Finally, press F10 to save the changes and restart your PC.
Enabling TPM 2.0 in BIOS depends on your motherboard and your PC model. The method above ASUS PCs using the Inter motherboard.
For ways to enable TPM 2.0 on different PCs and motherboards, check our excellent guide on the topic.
With this, we can conclude this article on the PC must support the TPM 2.0 prompt. We believe you now have everything to tackle this issue and update or upgrade your PC to Windows 11 effortlessly.
If you want to know how to install Windows 11 on an unsupported CPU, check our detailed guide for the easiest methods to do it.
To learn why TPM is necessary for Windows 11, we have a great guide on TPM on Windows 11, so don’t miss it.
Feel free to let us know the solution that helped you fix this issue in the comments below.
Read our disclosure page to find out how can you help Windows Report sustain the editorial team. Read more


Improve this guide


User forum
2 messages