How to Fix What Needs Your Attention on Windows 11
Key notes
- Incompatible devices or outdated drivers could be causing the what needs your attention error in Windows 11.
- Disconnect all external devices as a first step to ensure that no malfunctioning hardware is the root of the problem.
- This issue might also be caused by dodgy apps, which can be resolved by installing them.

Users who want to upgrade their PC to Windows 11 might encounter the What needs your attention prompt. If this error appears on your screen, your device cannot upgrade, and the Windows 11 installation will terminate.
Windows 11 appears to be exciting, with major changes in user experience and system performance, making it reasonable to download and install for free.
However, many users experience incompatibility issues during the process. One of the issues you might run into is that the installation process gets stuck at 35% or 80%.
In certain circumstances, Windows will notify you which software or driver requires attention so that you can remove or update it and resolve the problem, but in our case, the installer will not explain why the error is being displayed. So, in this situation, you’ll have to double-check a few things.
Why do I get the What needs your attention error?
As you may be aware, there are a lot of factors that contribute to an error occurring, whether it’s related to Windows updates or the installation of new software, and the What needs your attention issue is no exception. In order to address the problem, we must first understand where the problem originates, which we will discuss in this section.
- Incompatible devices – you can fix this issue by removing external devices and drives or updating the drivers to the latest version
- Corrupted system files – some apps change the setup of your system files, and thus can cause system instability
- Clutter of caches, cookies and older program parts – these files refer to remnants of uninstalled programs and data caches remaining from usual activities
Now that we’ve identified some of the main culprits, and we understand our circumstances better, we can move on to the actual fixes for this problem.
How can I fix the What needs your attention issue on Windows 11?
1. Remove external hardware
As we already mentioned, some hardware connections to your Windows 11 device can cause conflicts which can result in the error appearing.
To resolve this problem, all external hardware needs to be disconnected from the PC, and then after each of them attempts to perform the same task that resulted in the error.
Here are the type of devices that will need to be disconnected from your PC:
➡ Scanners and printers
➡ Wireless keyboards, speakers, microphones, and webcams
➡ External devices such as HDD, DVD-RW, etc
➡ Bluetooth devices such as mouse and keyboard
Ensuring that these devices are removed from the PC will allow you to eliminate the possibility that their connection is causing the issue in the first place.
After removing them all, try again to see if the same issue appears. If it does, feel free to follow the next method presented in this guide.
2. Uninstall suspicious applications
Some applications or remaining files from them can also cause this issue to appear on Windows 11, and for this reason, removing any apps that you’re not familiar with can possibly help with this problem.
As not all applications are built the same, users have reported that there are some that seem to be directly connected to the problem described in this guide.
Here are some of the most common applications that should be removed:
- VirtualBox
- VMware Workstation Player
- BlueStacks
- LDPlayer
- Team Viewer
- Dnplayerext2 (this file is installed with LDPlayer but won’t delete when you uninstall LDPlayer, so you have to delete it manually)
- NOX Player
- UxStyle
- LinuxLive USB creator
Even though in your case you might have these apps or not, looking through the list of apps installed on your PC should help you identify any that you don’t use.
Below you can see how to remove any unwanted apps:
- Click on Start menu and then select Settings from the menu that appears.
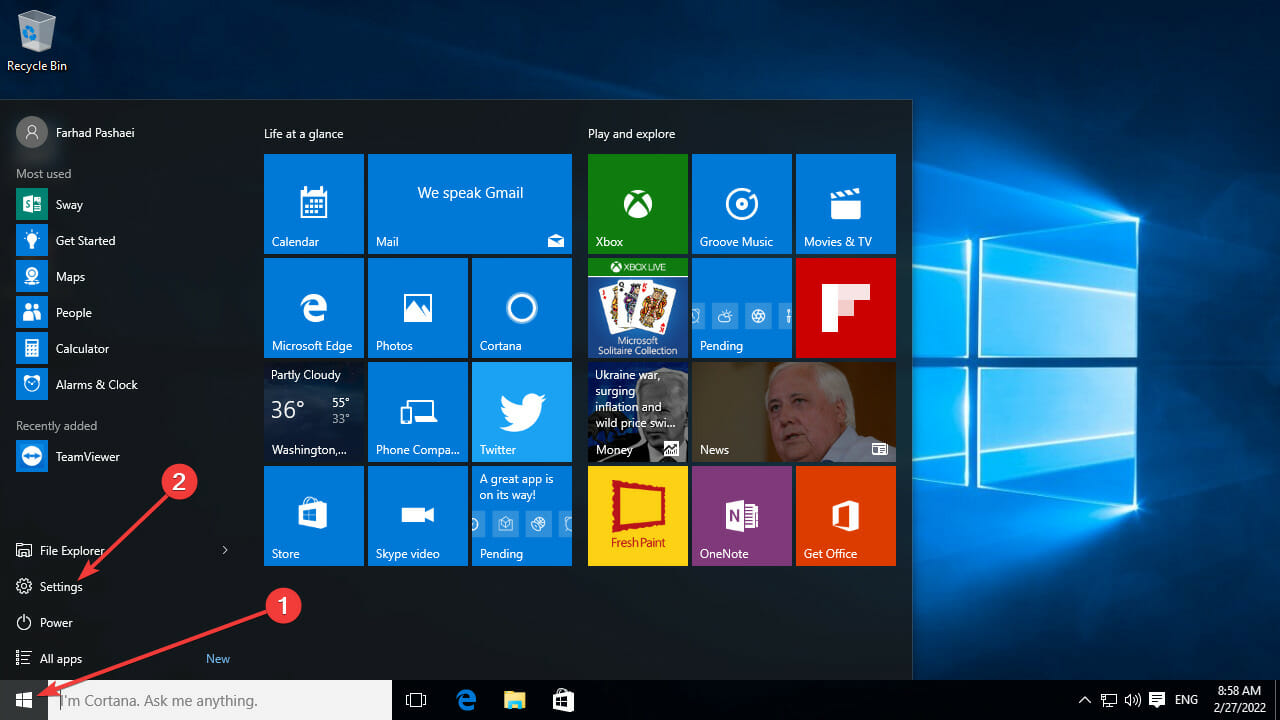
- Select System from the Settings menu.

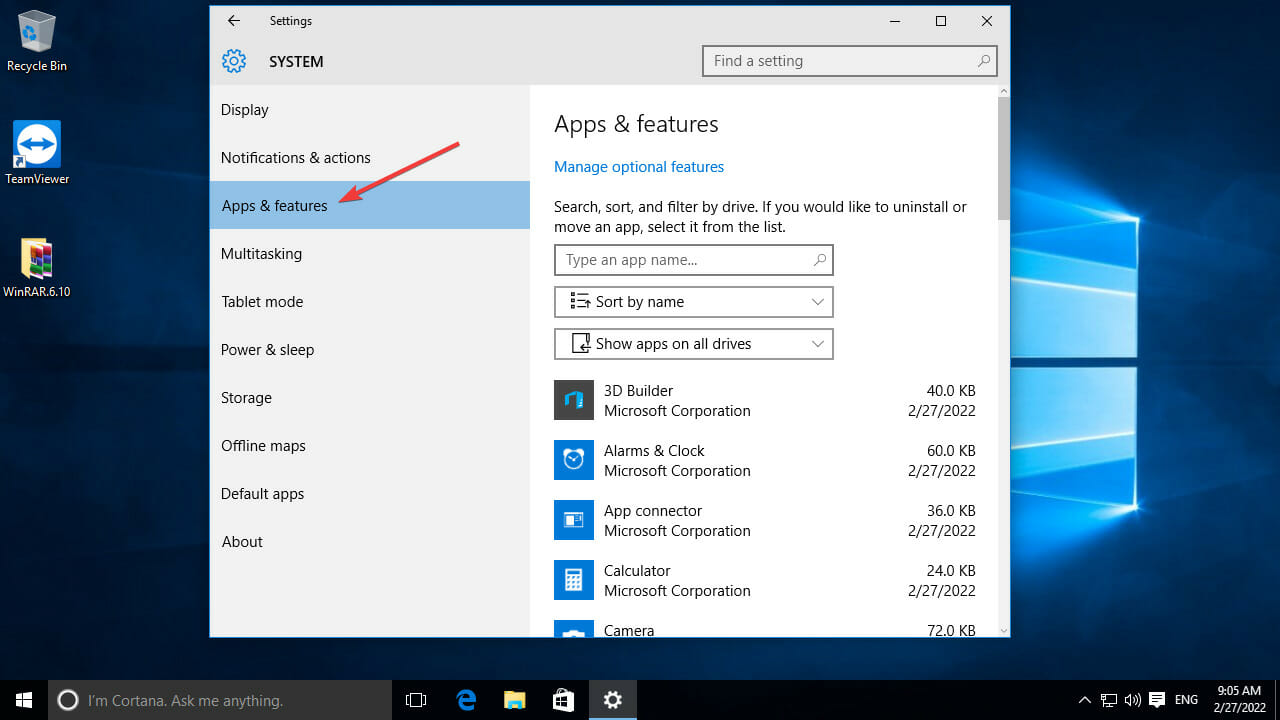
- After that, from the left pane, select the Apps & Features option.
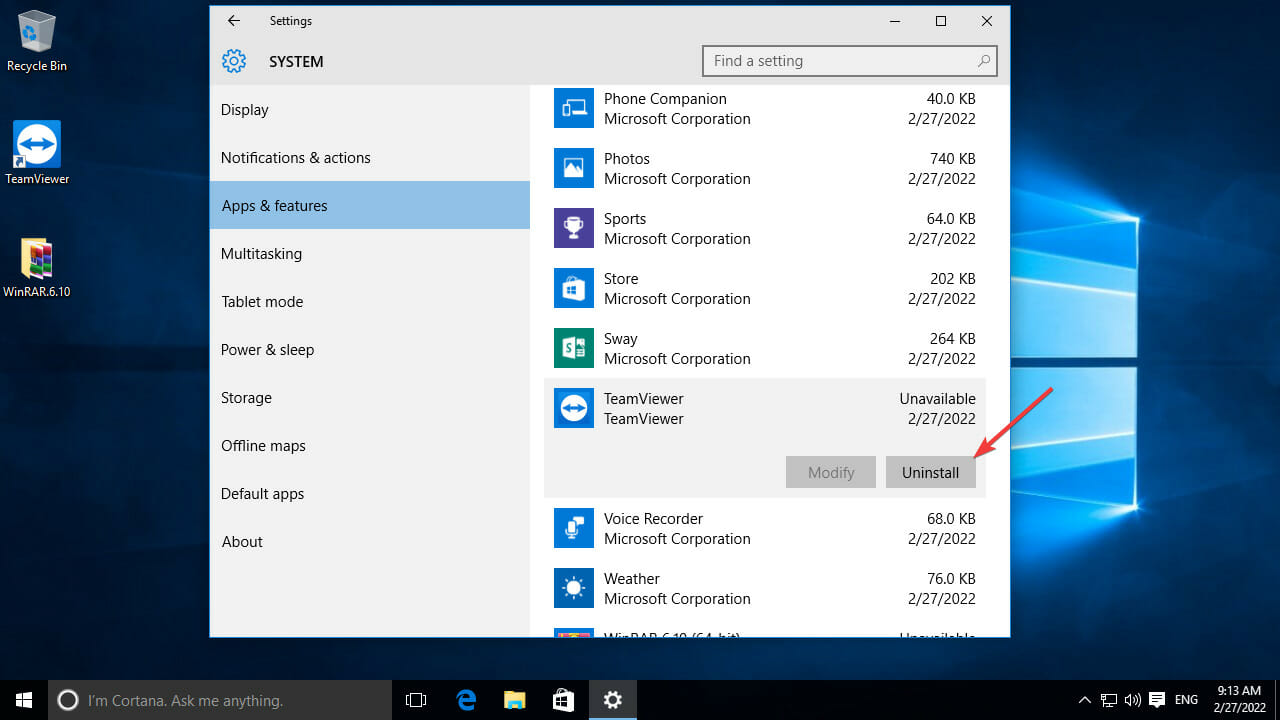
- Scroll through the list of installed apps until you find the ones that aren’t compatible. For example, we want to get rid of TeamViewer, which is listed among the suspicious apps above.
- After you’ve found the app you want to uninstall, click on it and then select Uninstall. You can also use uninstaller apps to erase all of their files completely.
- Then select the option to Remove settings and click Uninstall.
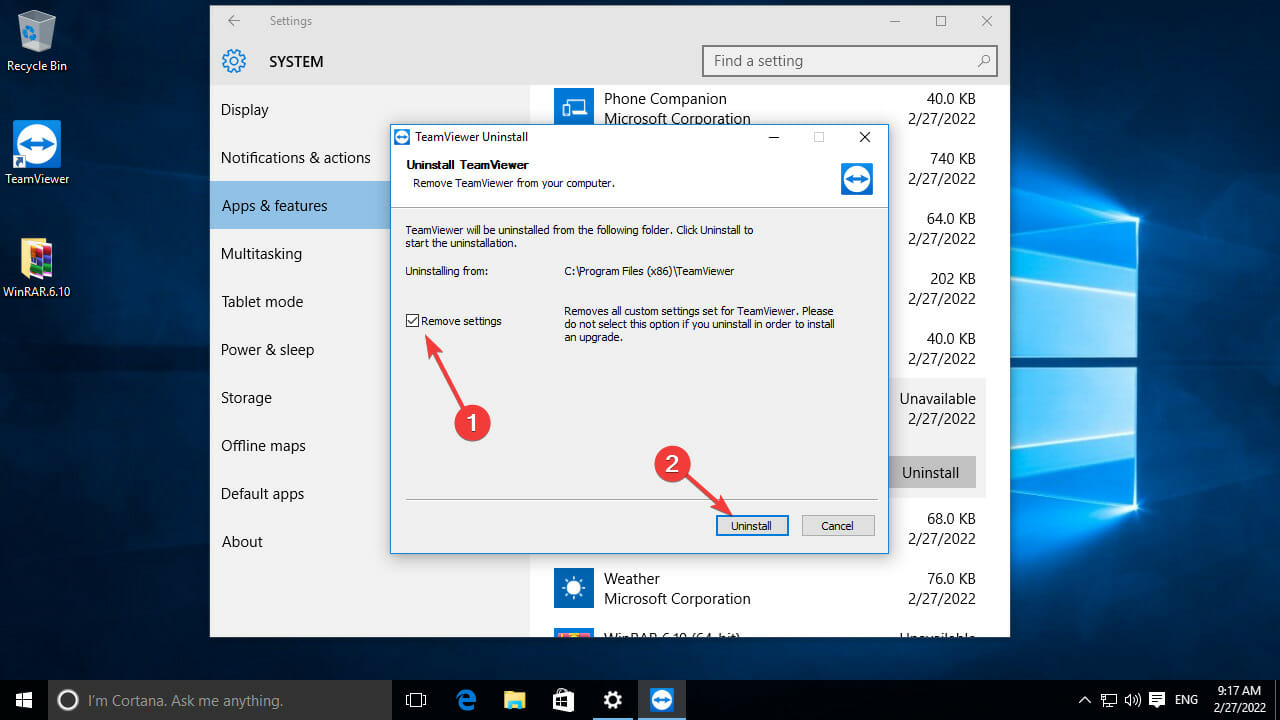
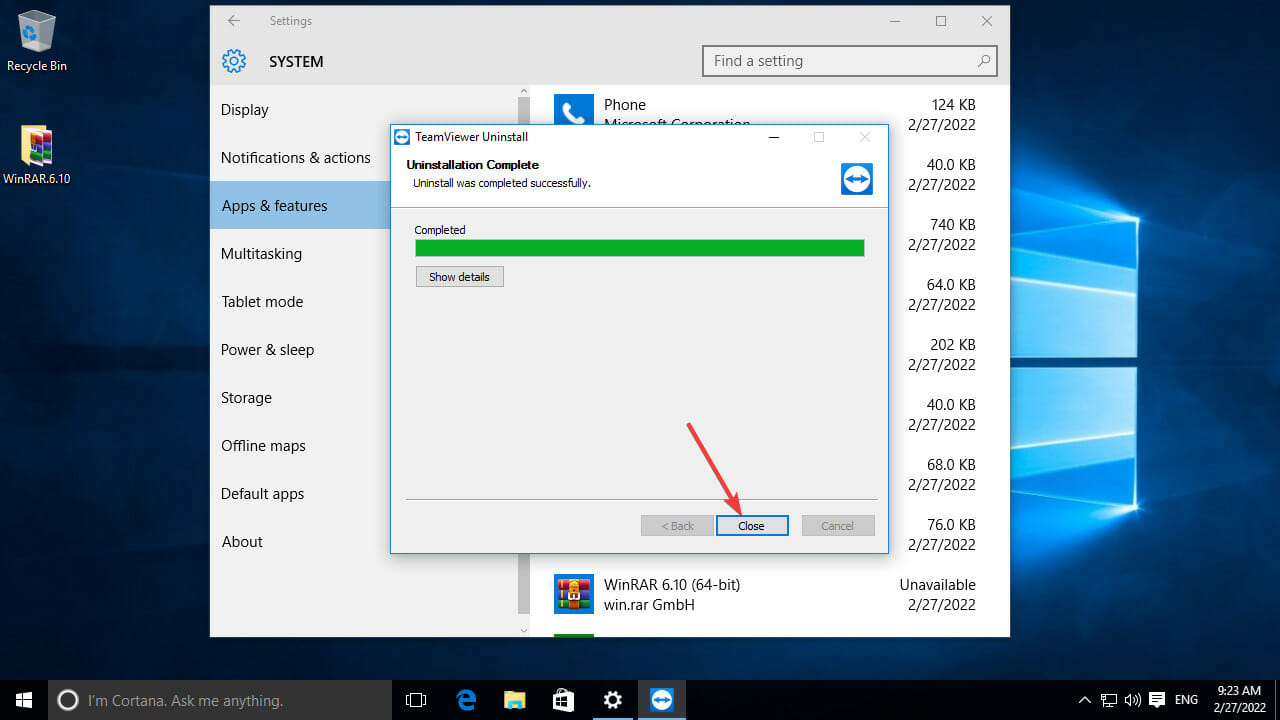
- Wait a few moments for TeamViewer to uninstall, then click Close to complete the procedure.
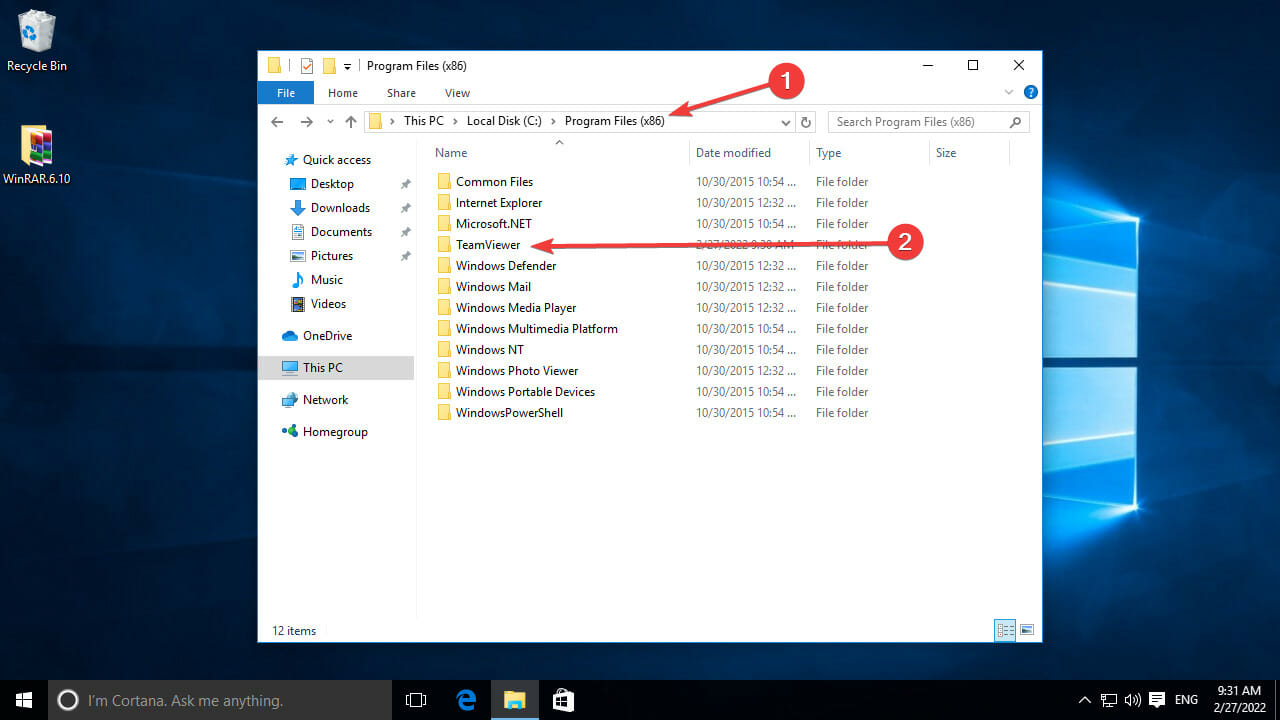
- Now, navigate to the program’s directory in Program Files to confirm that all of the files have been deleted.
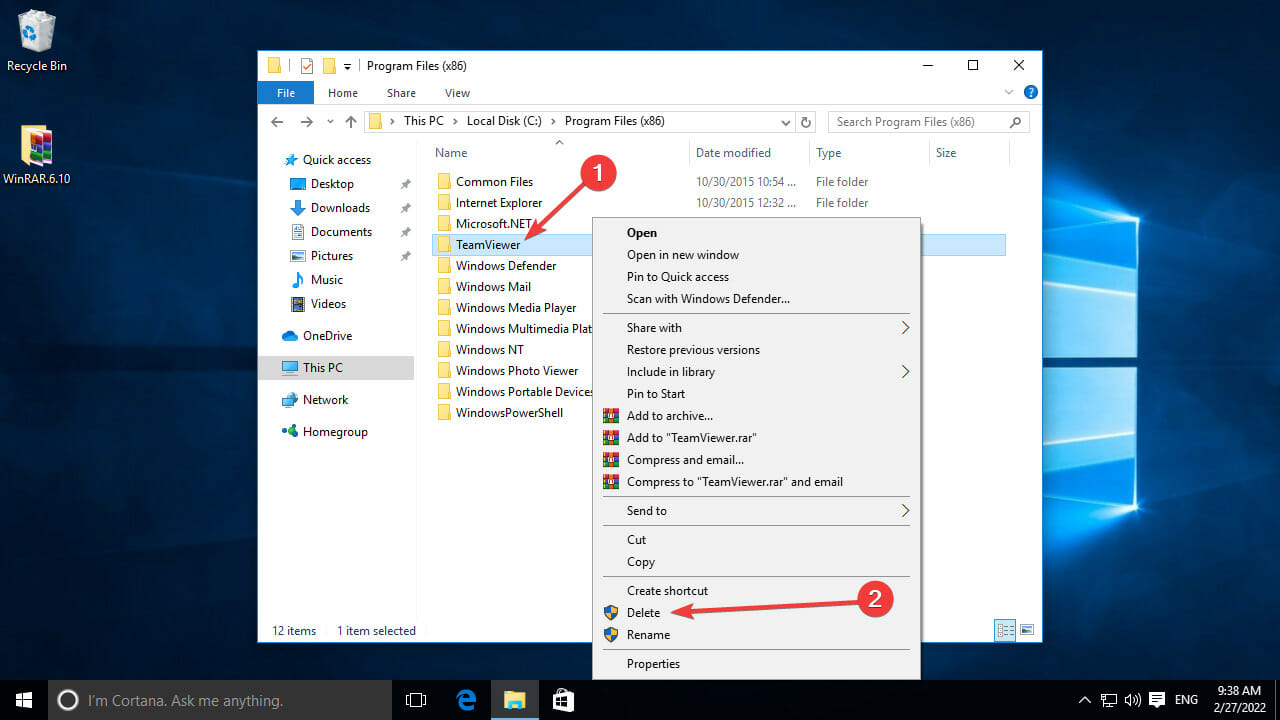
- If a folder with the app’s name still exists, as in the example above, click on it first, then press Delete on your keyboard or right-click on it and select Delete.
- Return to the Windows 11 Update window and click on Refresh to see if the problem has been addressed. If not, move on to the next step.
If you can’t uninstall an app through Apps & Features, you can use third-party apps or command prompts.
 NOTE
NOTE
3. Update drivers
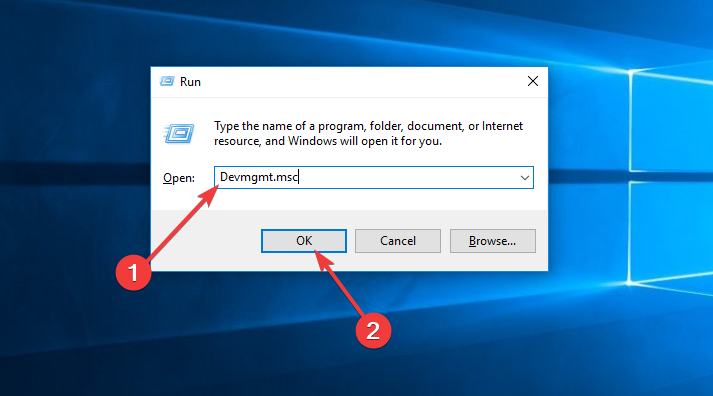
- Press the Win + R keys simultaneously to open the Run dialog box.
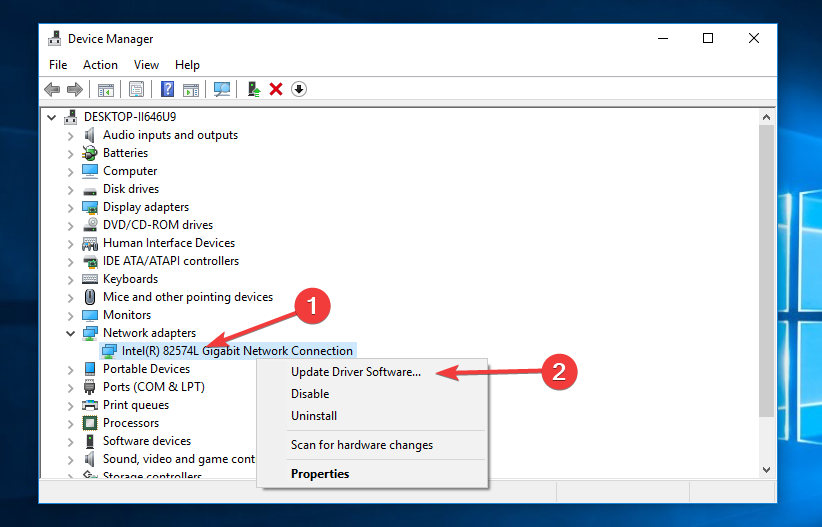
- Type Devmgmt.msc and press Enter or click on OK to open the Device Manager.
- Following that, right-click each driver and select Update driver from the context menu.
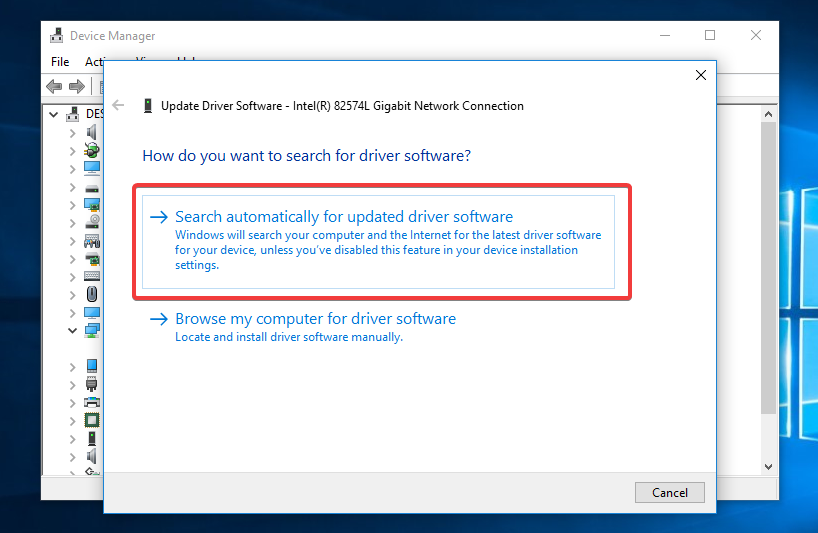
- Select Search automatically for updated driver software from the update driver wizard.
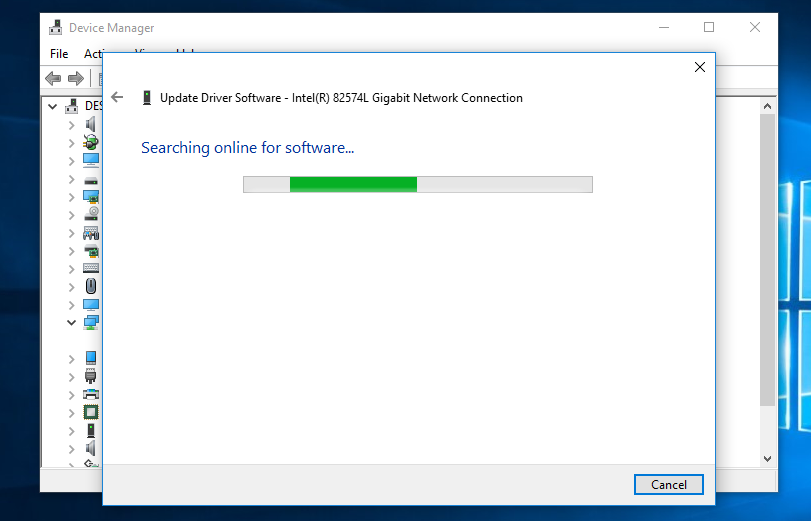
- Wait a few moments for the updater to find the most recent driver version.
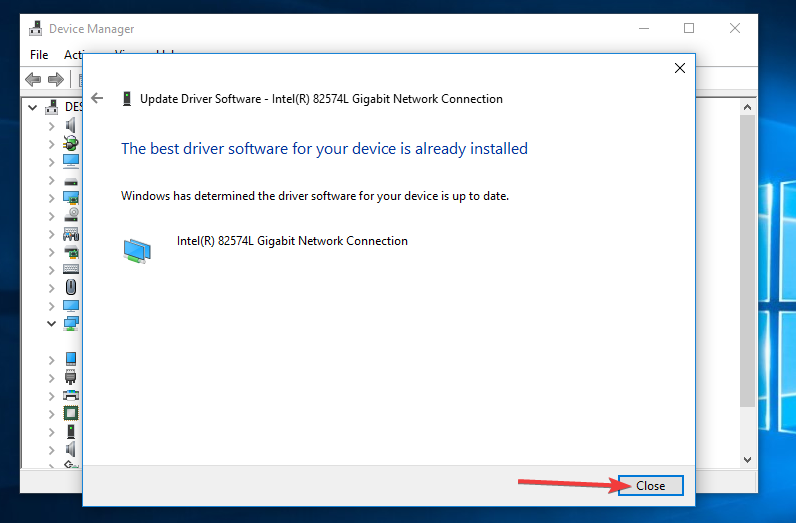
- If your device requires an update, it will be done; however, if the driver is the most recent, you will receive a message similar to the one below. To complete the update process, click Close, and then move on to the next device.
The process of updating drivers can be done in multiple ways, with some of the most common being using the Device Manager app to search for them one by one, using the Windows Update process, or using special software.
The easiest and most hassle-free solution for this is the latter, which involves taking advantage of the features of a great automatic driver updater software like Outbyte Driver Updater.
Should I upgrade to Windows 11?
Before jumping to any conclusions, keep in mind that there are numerous factors to consider. The first step is to determine whether or not your computer is capable of running Windows 11. Simply put, most current computers, as well as some powerful ones from the past generations, are capable of running this operating system. However, you may need to bypass some Windows 11 requirements along the road.
Now read over the Windows 11 system requirements and make sure your PC meets them:
- 64-bit CPU having at least 2 cores running at a clock speed of 1 GHz
- Minimum 4 gigabytes of RAM
- Storage device with 64 GB or more
- TPM version 2.0
- Graphics card with WDDM 2.0 driver that is compatible with DirectX 12 or later.
Next factor to consider is that several Windows 10 features have been removed from Windows 11. For example, many users valued the ability to move the Taskbar, but it is no longer movable from the bottom of the screen. As a result, you should take into account more than just the Windows 11 requirements.
Furthermore, Windows 11 may not be compatible with the software and devices you use regularly. So, before upgrading, we recommend that you first install Windows 11 on a virtual machine and then test your critical apps to see if they work correctly.
You can also test devices by installing Windows 11 on another computer or by installing Windows 11 on another drive and testing them.
After removing the barriers, Windows Installer should be able to install the operating system on your PC. If your PC has no additional problems, the installation progress will go on after you press the Refresh button at the bottom of the ‘What needs your attention’ prompt. However, if the error still remains, you have to keep searching for malfunctioning files and drivers.
After you have upgraded your computer to Windows 11, you can reinstall the application you’ve removed previously. We also encourage you to add to the list of potential programs that prevent the Windows 11 setup in the comment sections so other users can install the operating system easier.
Read our disclosure page to find out how can you help Windows Report sustain the editorial team. Read more


Improve this guide


User forum
0 messages