How to upgrade Windows 7 to Windows 10 in Parallels
2 min. read
Updated on
Read our disclosure page to find out how can you help Windows Report sustain the editorial team. Read more

Windows 7 users are most likely aware that their OS is at the end of its life, and that they will need to upgrade sooner or later to Windows 10.
The same thing can also be said about their Windows 7 virtual machines that they are running on their Mac in Parallels, which will also need an upgrade soon enough.
While not many users need virtual machines, those that do will definitely benefit from knowing how to upgrade.
That is precisely why we’ve decided to compile a step-by-step guide on how to upgrade Windows 7 to Windows 10 in Parallels Desktop for Mac.
How do I upgrade Windows 7 to Windows 10 in Parallels?
- Create a snapshot of your VM
- This step is only needed if you’ve done any work on a Windows 7 VM and need to save it for the upgrade
- You can back up the entire virtual machine by copying its .pvm file somewhere on your hard drive
- Update your Windows 7 VM until it is the latest version
- Download the Windows 10 Media Creation Tool
- Run it and download the ISO into your PC
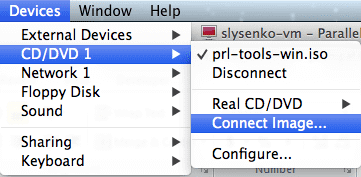
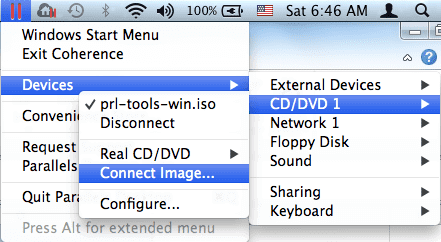
- Connect the ISO to your VM
- Open File Explorer
- Go to This PC
- Run Setup from the mounted image
- Follow the on-screen instructions
- Restart the VM
By following these steps, you will be able to successfully upgrade Windows 7 to Windows 10 in Parallels Desktop for Mac.
Keep in mind that in order to prepare for these steps, your PC should have enough processing power to run the two operating systems in parallel.
Additionally, make sure you have at least 10 GB of hard disk space for the upgrade from Windows 7 to Windows 10. If you do meet these criteria, then the upgrade process should go flawlessly.
Do you use Parallels to run a Windows VM on a Mac too? Tell us what other articles you might be interested in reading in the comment section below.
RELATED ARTICLES YOU SHOULD CHECK OUT:


User forum
0 messages