Windows Can't Check The Disk While It's in Use [Force Dismount]
Tested and trusted solutions to fix force a dismount issue
4 min. read
Updated on
Read our disclosure page to find out how can you help Windows Report sustain the editorial team Read more
Key notes
- Windows can’t check the disk because another program is using it.
- A clean reboot can fix Windows if it can't match the disk while in use.
- However, the force a dismount option will make the partition temporarily inaccessible.
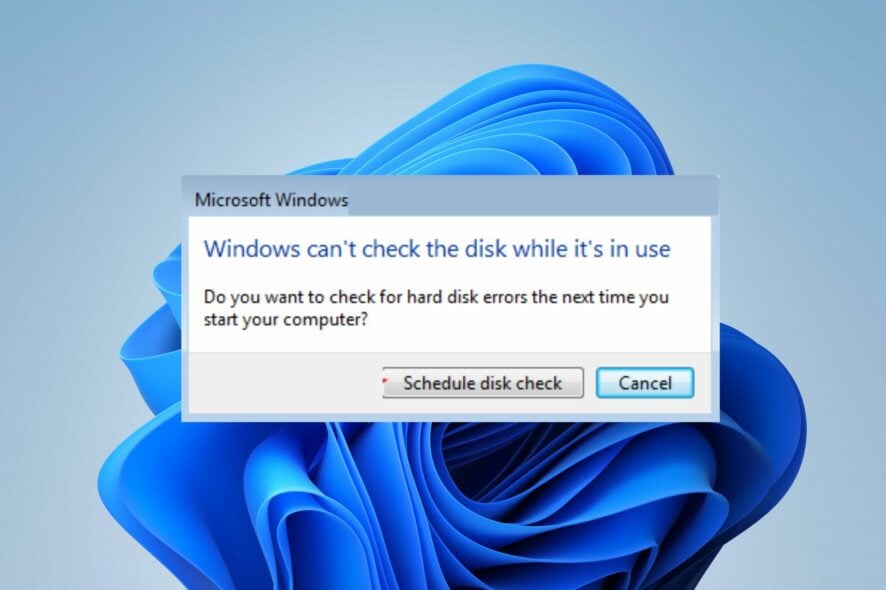
CHKDSK is a Windows command line or utility that means Check Disk. It helps sort and put the system files and disk files in order. However, Windows can’t check the disk while it’s in use: Force a dismount error indicates that Windows can’t access the disk for some reason.
What does it mean to force a dismount?
Windows operating system allows you to mount and dismount data volume. The C: drive remains mounted by default, allowing numerous programs to use it.
However, the Force a dismount message may appear if the CHKDSK (Check Disk) program wants to analyze the disk and detect other programs using it. Hence, forcing a dismount will stop every action on the disk and temporarily unmount the volume.
In short, force a dismount option is an aggressive way of removing a volume, making the partition temporarily inaccessible.
Why can’t Windows check the disk while it’s in use?
Windows CHKDSK (Check Disk) programs require sole ownership and exclusive access to your disk/drive when running a disk check. So, if the disk is being used by other programs or services on your PC, Windows won’t be able to check it.
Furthermore, some other factors that can cause Windows not to be able to check the disk while it’s in use are:
- CHKDSK is not permitted to run at the time of reboot – When the Check Disk program is not allowed to run before the operating system boots, other programs will run and use the disk before CHKDSK can access it. So, you can encounter the Windows can’t check the disk while it’s in use error if CHKDSK doesn’t run on boot.
- Other programs running on Windows – Many programs use the disk utility for their processes. Hence, CHKDSK may run into problems due to interference from these programs.
Windows can experience Check Disk problems due to these causes.
How do I fix the Windows can’t check the disk while it’s in use error?
Observe the following preliminary checks before trying any advanced troubleshooting steps:
- Turn off background apps running on your computer.
- Unplug any unnecessary external devices and USB drives connected to your PC.
Proceed with the solutions below if you can’t fix the problem:
1. Run the CHKDSK command after reboot
- Press Windows + R key to launch the Run dialog box, type cmd in the text bar, and hold the Ctrl+Shift+Enter keys together.
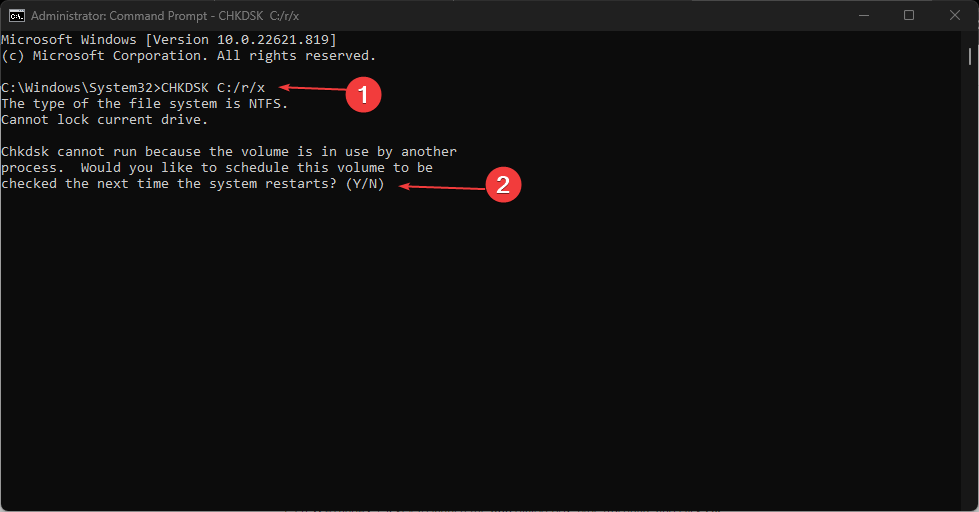
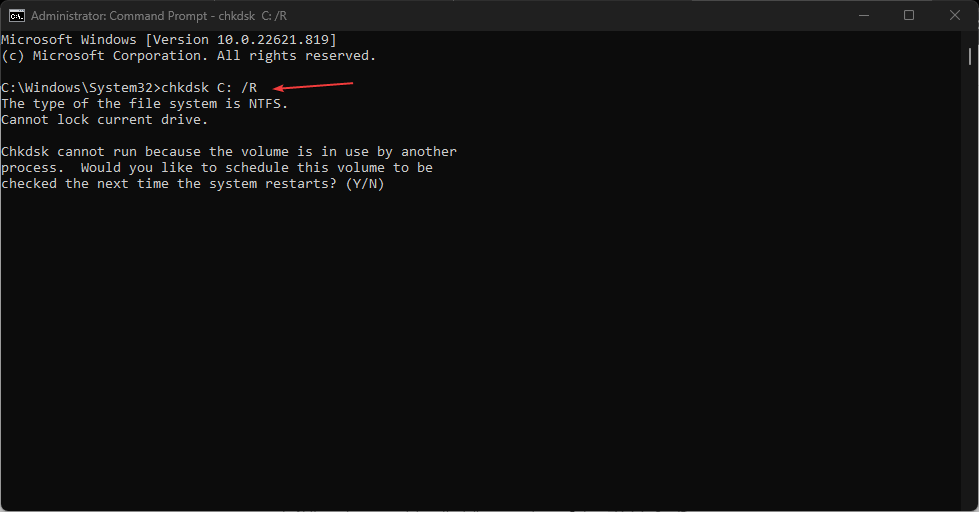
- Type the following command in the new window and press Enter: CHKDSK C:/r/x
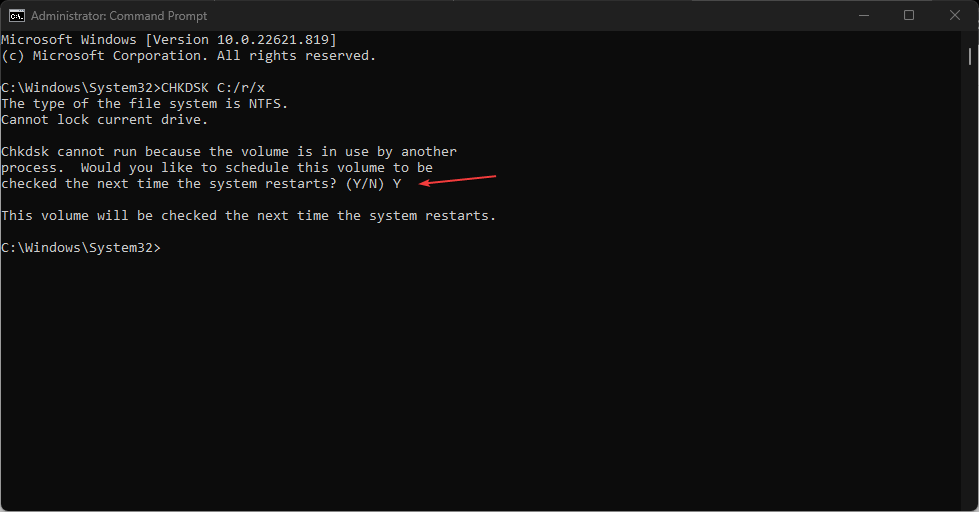
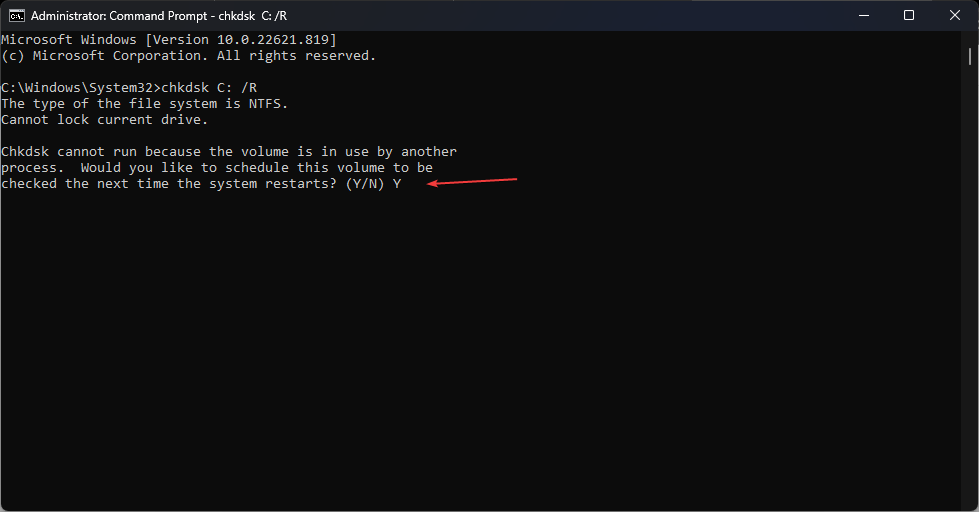
- Press the Y key and press Enter. You’ll see a prompt stating that This volume will be checked the next time the system restarts.
- Restart the PC and check if it runs the Check Disk Utility on the System Drive.
Running the CHKDSK command after reboot allows it to take control of the disk before other programs. You may experience chkdsk.exe running on every boot; check how to stop it.
2. Perform a Clean boot
- Press Windows + R key to launch the Run dialog box, type msconfig, and click OK.
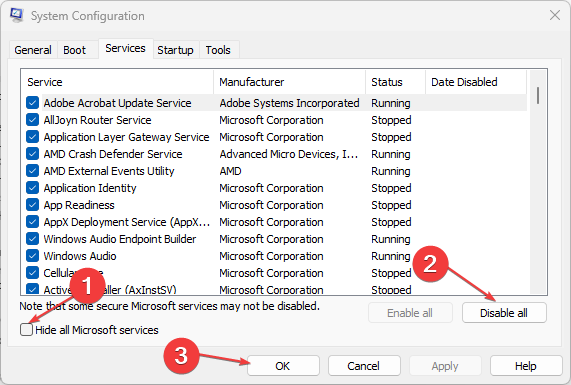
- Go to the Services tab and check the box for Hide all Microsoft services, then click Disable all.
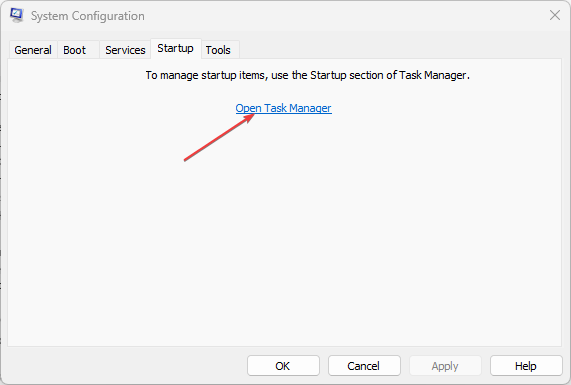
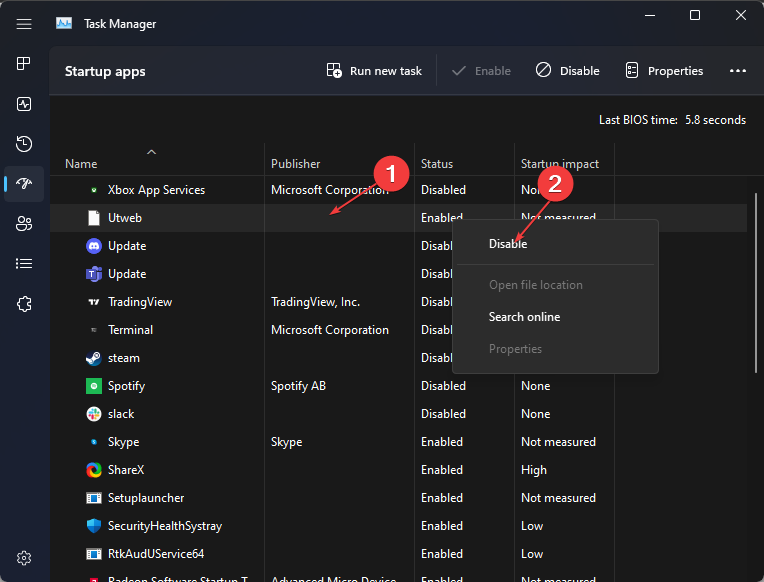
- Go to the Startup tab and click Open Task Manager.
- Select the unnecessary startup programs, right-click and select the Disable button.
- Restart your PC and check if the error persists.
Performing a clean boot will prevent any interference from third-party apps and disable startup apps that may prompt disk errors.
3. Use Advanced Boot Options to force dismount
- Press the power button to turn on the computer and click the F8 key continuously until the Advanced Boot Options menu appears.
- Select Repair your Computer, select the US keyboard input method and click Next.
- Log in as an administrator and click OK.
- Select Command Prompt on the System Recovery Options window.
- At the system prompt, type the following and press Enter:
chkdsk C: /R - Type Y as your response, indicating YES, and restart your PC.
Force a dismount will temporarily disable the partition if Windows can’t check the disk while in use.
Besides, if the built-in utility is stuck at CHKDSK is verifying Usn journal, repair the corrupt system files to get things running!
Alternatively, you can check what you need to do if Windows cannot access the disk on your PC.
Also, please read our guide about CHKDSK getting stuck in Windows 11 and some fixes for the problem.
Do you have further questions? Kindly drop them in the comments section. Also, you can tell us which solutions worked for you.

