Fix Windows Error Recovery Loop on Windows 7 & 10 [Laptop, PC]
Here's how to fix Recovery error in Windows 10 or 7 with or without a disk ?
Key notes
- If you're looking for the right Windows error recovery Windows 7 solution or even a Windows 10 fix, you're in the right place.
- We will show you exactly what to do when your PC says recovery, so read on.
- From removing recently added hardware to restore your system to a point where it worked fine, we got you covered.

If you’re wondering how to fix Windows error recovery, you’re in the right place. Obviously, you are not alone. In fact, many users reported similar issues. The good news is that they also managed to solve these problems.
Let’s quickly review some of the most common issues related to Windows Recovery mode:
- Windows error recovery loop Windows 7 – If Windows 7 failed to start it’s likely you encounter the recovery Windows error on a Dell laptop, HP laptop, and so on.
- Laptop recovery problem – Speaking about portable PCs, more often than not, you’ll get the recovery screen on laptops.
- Windows error recovery on startup
- Obviously, the issue can impact all versions of the OS and a particularly common scenario takes the form of Windows error recovery in Windows 10.
- Windows error recovery keyboard not working
Don’t worry, we’ll show you exactly what to do when your PC says recovery. But first let’s see what we’re dealing with and what is it that triggers such errors, to begin with.
What is error recovery in computer?
Running apps might seem like a straightforward action, but it’s in fact a complex process involving syntax verification, compiling, and parsing operations that your computer constantly runs in the background.
The Windows error recovery is usually caused by problems such as corrupt system files, a hardware change, or a compromised Boot Configuration Data (BCD). The good news is that all of these are easy to resolve.
In fact, some of the situations generating this error have more than one solution meaning there is a huge chance of cracking the matter.
We’ll show how to fix Windows error recovery without CD or with a CD. There are various methods available, so you’ll be able to find the right Windows error recovery Windows 7 solution or Windows 10 fix effortlessly.
How do I fix Windows 10/7 recovery error?
➡️ If possible, make sure that the computer is connected to a reliable internet network as you execute these steps.
➡️ We will be using an HP laptop for demonstrative purposes, but the operations can be applied as such on any other brand (Dell, etc.)
1. Remove recently added hardware
- Turn off your laptop and remove the AC adapter and its battery.
- Disconnect the newly added device. You may have to reopen the laptop to access whatever hardware you had installed (if it was an internal addition).
- Return the battery.
- Turn on the laptop the usual way.
- The laptop may successfully boot to the desktop and the Windows error recovery message will not be redisplayed.
- You can now try to reconnect the device and wait for Windows to recognize it (for external hardware like a USB webcam).
- For hardware that is installed on the motherboard, the best approach is to ensure that you are installing a compatible device and to introduce the right drivers immediately.
Adding hardware, for example, a new RAM module can sometimes originate Windows instability problems. This triggers the Windows error recovery loop, making your laptop fail to reboot.
Use these steps to rectify whatever issues arose as a result of installing new hardware.
 Tip
Tip
2. Run Windows Start Repair
- Let the laptop timer countdown run to zero once the error message appears or just press Enter while the launch start repair option is selected.
- The startup repair interface opens and starts scanning your laptop for problems.
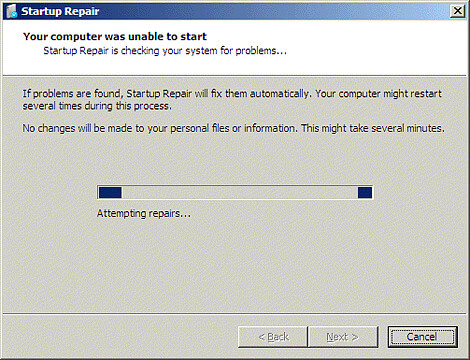
- Implement the suggestions made by the startup repair wizard to rectify the pending faults.
- The laptop should soon restart and boot into your normal desktop.
You can now attempt to repair a faulty Windows startup process by mending the relevant files.
3. Boot into LKGC (Last Known Good Configuration)
- Restart your laptop.
- Press F8 repeatedly until the advanced boot options appear.
- Choose LKGC (last known good configuration -advanced) then press Enter.
Booting into the last known good configuration is easy and could solve the problem without much fuss.
4. Restore your laptop with System Restore
- Turn off the laptop and then, press its power button to turn it back on.
- Now, start pressing the F8 key repeatedly until a startup screen appears.
- Highlight the safe mode option using the up/down arrow keys and press Enter.
- Select an administrator user account when the Windows login screen displays and enter your password (if any).
- When the desktop appears, press the windows button on the menu then click inside the search bar.
- Type cmd then press Enter.
- In the Command prompt window, type rstrui then press Enter again.
- The Restore System screen opens.
- Click Next, then choose the last restore point that worked (from the displayed options) then click next.
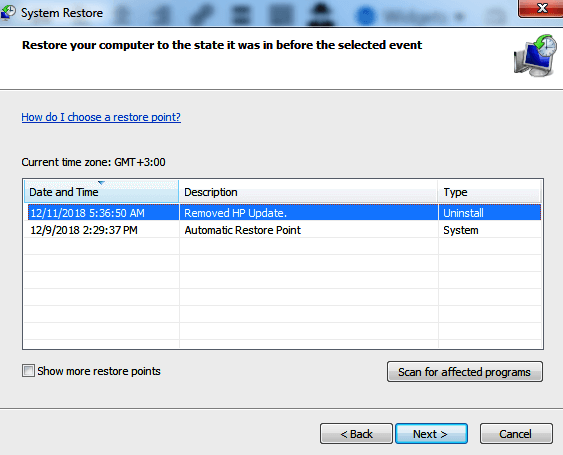
- Now click Finish and wait for the checkup and restart process to complete. Again be patient.
Restoring the laptop takes it back to the settings that previously worked. You can execute the system restore directly from the startup repair window if that option pops us.
Here is how to initialize restore if the option wasn’t provided and fix the Windows error recovery via Command prompt.
Besides the Windows error recovery loop, this method should also help if your computer is stuck in a restart loop, so make sure you check it out.
5. Recover the Laptop
Recovering a laptop is equivalent to resetting the computer its factory configuration.
- Windows 7
- Turn off the laptop.
- Turn it on and press the F11 key repeatedly until the Recovery Manager (Windows 7) opens.
- Click System recovery under the I need help immediately tab.
- Select your preferred backup option when the system recovery asks for your backup preferences.
- Click OK when and if a warning displays.
- Click Finish to reboot the laptop as soon as the recovery is complete.
- Now go over the typical Windows setup until the laptop finishes the fresh reconfiguration.
- Restart your computer to ensure everything sails smoothly again.
You may have to reinstall some or all of your previous software including the antiviruses and business programs (if any) plus any backup files.
- Windows 10
- Turn off the laptop.
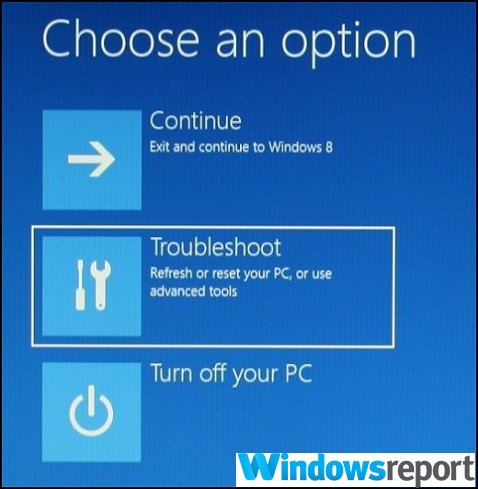
- Turn it on and press the F11 key repeatedly until the Choose an option window is displayed.
- Click Troubleshoot under the Choose an option tab.
- Next, click Recovery manager on the Troubleshoot tab.
- Finally, click System recovery under Help to finally progress to recovery.
- Windows 8
- Turn off the laptop.
- Turn it on and press the F11 key repeatedly until the Choose your keyboard layout window is displayed when the laptop restarts.
- In the new windows, click Troubleshoot.
- Click Recovery manager on the troubleshooting window.
- Select Windows 8 to open the all-important recovery manager.
- Now, click System recovery for the laptop to be reset to its original factory setup.
- Another option would be to click the minimized image recovery in order to restore only your windows 8 operating system, and drivers, and select Software.
Use the HP Recovery disc to run the recovery
- Turn on the laptop and then insert your first HP recovery CD/DVD into the drive.
- Turn off the computer.
- Now turn it on.
- Press the escape key continuously until a window’s startup menu or the select boot device window opens.
- If you get the select boot device menu, click the correct CD/DVD drive then press enter.
- Else press F9 to access the boot menu/ device option then choose the right CD/DVD drive and press enter.
- If the window requesting you to run recovery from the hard disk appears, choose the Run program from disc option and click next.
- Select Recovery discs created from your computer/ Recovery discs received from HP support option appropriately.
- Select Factory reset/ Reset the computer by erasing the entire drive and restoring to the factory setup depending on what’s shown on the screen.
- Select a suitable backup option or otherwise.
- Click OK to hide the warning that appears.
- Follow the steps and insert the next recovery disc when prompted.
- Click Finish/Next as prompted when the recovery ends.
- The laptop may turn off or restart automatically. If it is turned off, wait about 5 seconds before turning it back on.
Boot from a USB recovery drive
- Turn on the laptop and insert the recovery USB flash disk into the USB port.
- Now turn off the laptop and turn it back on.
- Press the ESC key continuously until a window’s startup menu or the select boot device window opens.
- The selections you need to make vary slightly depending on the type of menu that displays on your screen:
- For select boot device menu, select the correct USB storage drive then press Enter.
- For the startup menu, press F9 to access the boot menu/ device option. Again select the right USB storage drive and press enter.
- The rest of the steps are as I explained above for CD/DVD.
- Remember to remove the USB drive before restarting the laptop.
6. Perform Startup Repair with a Windows installation disc
- Restart the computer and press F9 (repeatedly) until you see the message Press any key to boot from CD or DVD on the screen.
- Select your preferred language, time plus currency, and a favored keyboard/input method, and then click next.
- Choose Repair your computer.
- In the next system recovery options window, choose the drive where your Windows installation is and click next.
- Click Startup repair in the next dialog.
- Select System restore and follow the steps until the computer is repaired.
We already showed you how to fix Windows error recovery without CD. However, all methods may fail if there is a critical error with your Windows installation.
In such an instance, you need to repair the original Windows installation using the disk. Finally, should everything else fail, you may need to reinstall a fresh copy of Windows.
Read our disclosure page to find out how can you help Windows Report sustain the editorial team. Read more


Improve this guide


User forum
0 messages