FIX: Windows Installer error 0x80300002
4 min. read
Updated on
Read our disclosure page to find out how can you help Windows Report sustain the editorial team. Read more
Key notes
- Windows Installer errors can be quite serious since they can prevent your OS from installing software.
- One good example of such an error is Windows Installer error 0x80300002.
- For more similar guides, you should know that we have a dedicated Windows 10 Installer Errors Hub.
- Further fixes can be found by accessing our Windows 10 errors page.

So you’ve got the Windows Installer Error 0x80300002. That means that the system cannot be installed on the partition you indicated because there is something wrong with the partition or the media you’re installing the system from.
If you got the 0x80300002 error, you probably see this on your screen: We couldn’t install Windows in the location you choose. Please check your media drive. Here’s more info about what happened: 0x80300002.
Sounds serious and complicated but don’t panic. The computer can feel your panic and use it against you. Of course not! We will fix this together in no time.
How can I fix Windows Installer Error 0x80300002?
1. Check the media
The first thing you need to check is the media from which you are installing the Windows system. If you are doing it from a bootable DVD, a scratch, or just an old disk could be the smoking gun here.
A more subtle approach would be to check if there are any compatibility issues between the media and the BIOS.
If you are installing Windows 10 from an external HDD or SDD, and that is based on GPT (GUID Partition Table), then your BIOS should be set on UEFI and if the media is based on MBR (Master Boot Record), your BIOS has to be set on Legacy.
Sounds complicated but if you don’t know either of them, the most simple way to fix it is by toggling your BIOS boot mode. You will find the option in the Boot section.
Entering BIOS seems too complicated? Check out this guide for more information.
2. Create another bootable drive
- Insert a working USB drive.
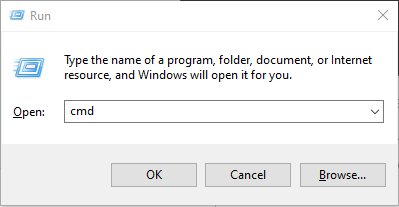
- Open Command Prompt by pressing the Windows Button + R, then type cmd.
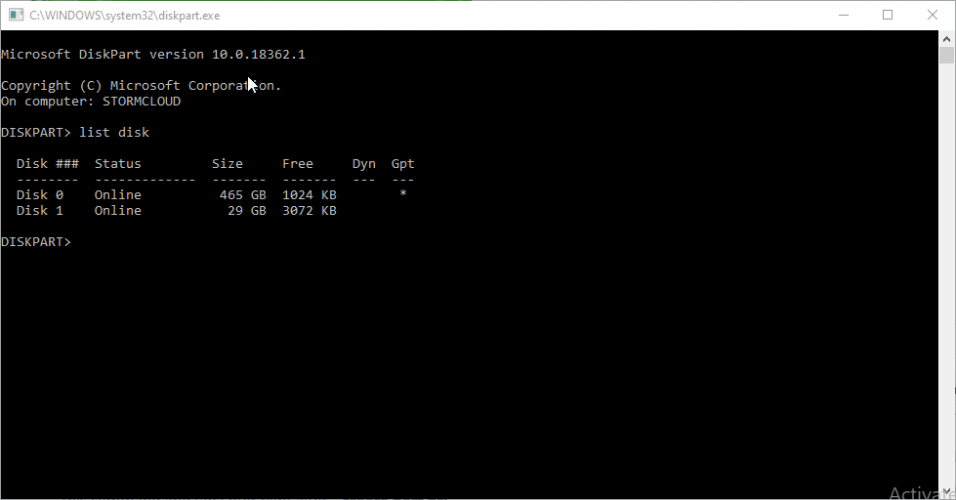
- When the new window opens type diskpart to run the disk partitioning tool.
- In the new window type list disk to find all the drives on your computer and the external media.
- Type disk X (where X is the correct number of the drive) to select it and then enter clean to erase all the configuration information and data from the drive.
- To create another partition on the drive type create part pri, then select part 1 to select it.
- The next step is to format it, so enter the command format fs=ntfs quick.
- To activate the newly formatted partition type active.
- Presuming that you have the image for Windows 10 ready, save it to the root of the USB storage device.
If you need any additional info on how you can create a Windows 10 UEFI bootable USB, follow the simple steps from this handy guide.
3. Recreate all partitions
If nothing you’ve read until now worked, you will need to start from scratch and that means recreating all the partitions again. Don’t worry because it’s not so complicated.
Just restart the installation until you find the part where the system asks you where to install Windows (Where do you want to install Windows?).
There you will have the options to delete the partitions and that’s what you need to do. Delete all the partitions, then use the New button to create fresh partitions.
You only need one primary partition to install the new system so you don’t need to get too deep in creating the others. You can do that after you successfully install the new system.
Of course, go on with the installation and hopefully jump for joy at the end. If you have any more questions or suggestions, leave them in the comments section below and we’ll be sure to check them out.
[wl_navigator]


User forum
0 messages