Windows License Only Allows One Language? How to Add More
Clear any language preferences to add a Windows display language
![]() 4 min. read
4 min. read
![]() Updated on
Updated on
Share this article
Improve this guide
Read our disclosure page to find out how can you help Windows Report sustain the editorial team. Read more
Key notes
- Windows is a system that supports multiple languages, but the version you have installed on your computer can only support one language at a time.
- If you want to change the display language of your operating system, you need to purchase another license or perform a clean install.
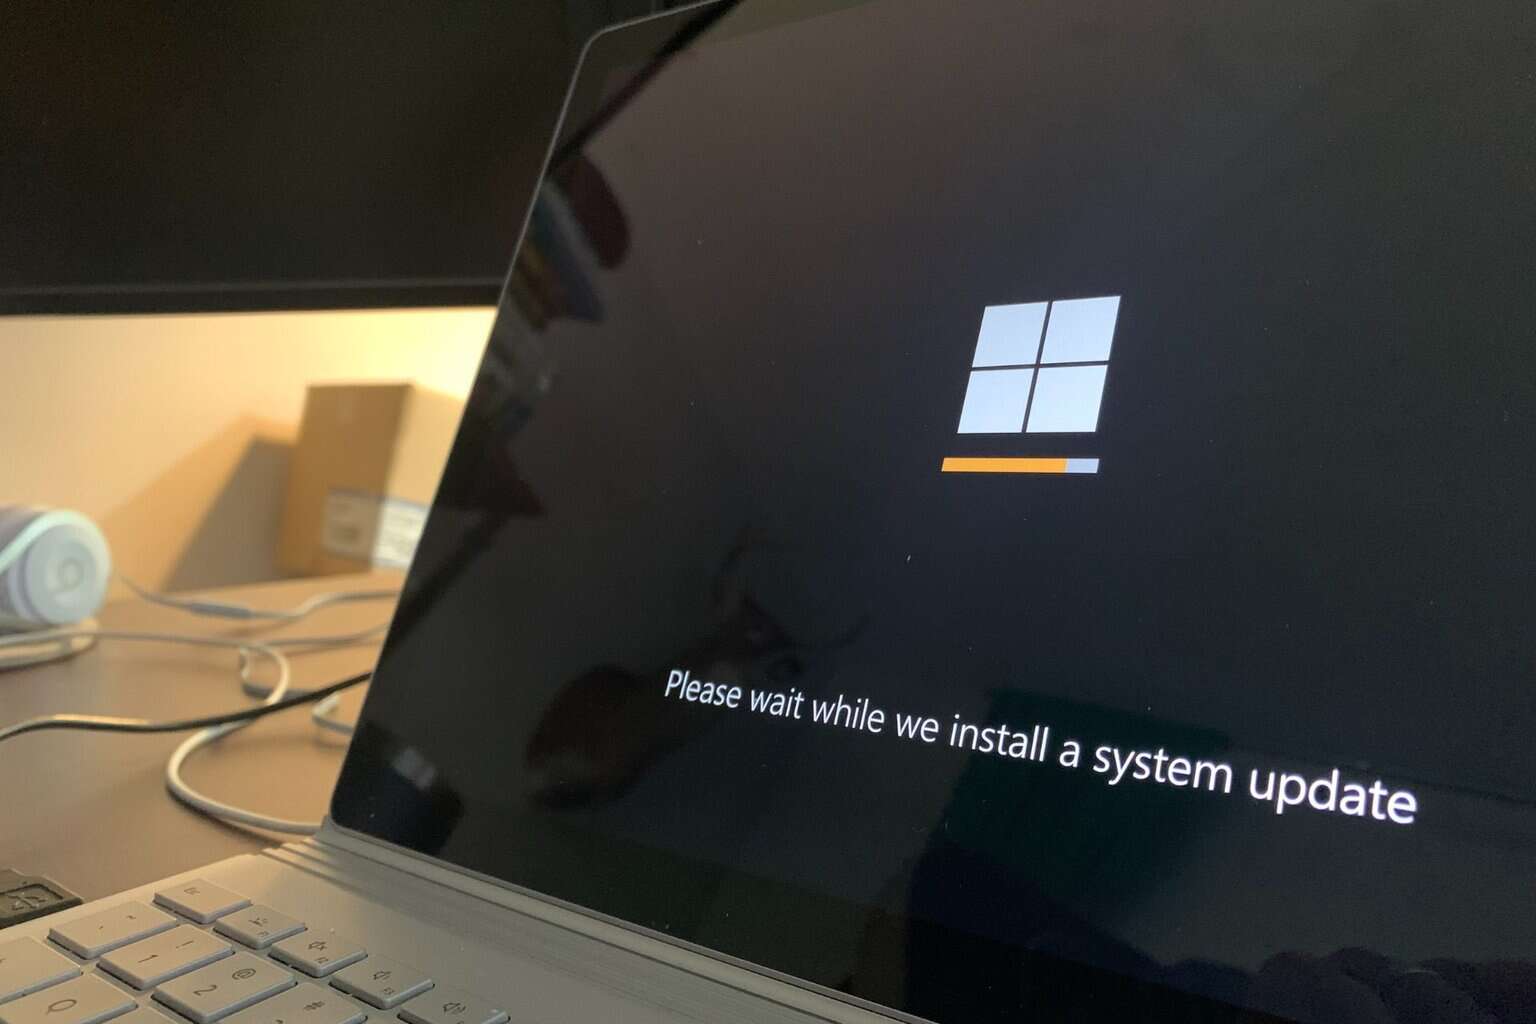
Given how many computers are in the world and the Windows operating system’s market share, it would be wrong to assume it only comes in one language. Windows 11 is a multilanguage OS. However, some versions of Windows licenses only allow one language.
You need to be careful, especially if you don’t speak the default display language shipped with your Windows license. You could end up stuck with an OS you don’t understand. If you find yourself in this predicament, we’re here to help you.
What does license supports only one display language mean?
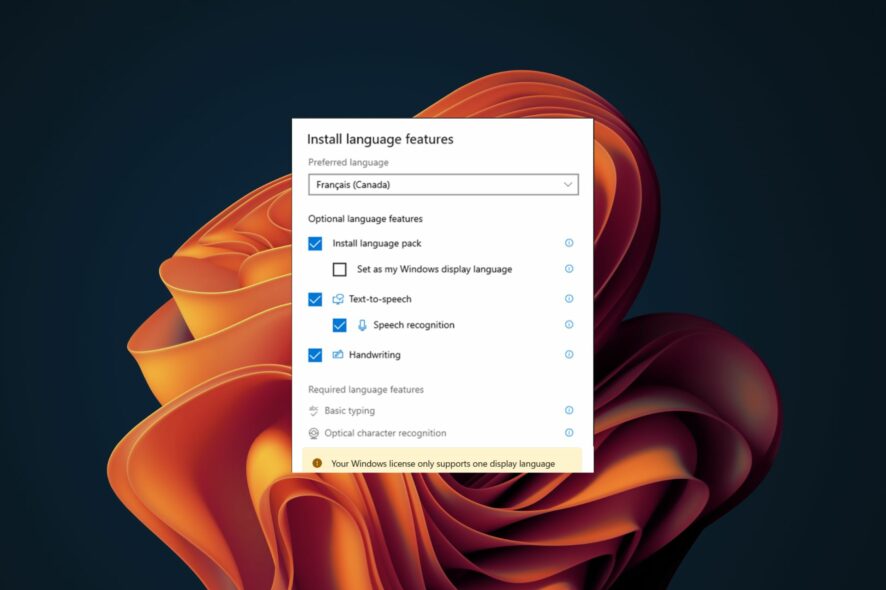
Your OS supports only one language, and it not changing the display language is different. You can add more languages for the latter, but if your Windows version only allows one language, it is locked to the license and cannot be changed.
The main reason for this restriction is to prevent you from getting a cheaper license for a specific language version.
However, some little-known factors could provide a loophole and enable you to change your display language on your Windows device. These include:
- Location – If the location on your device does not reflect your current status, changing it can allow you to update your Windows display language.
- Trial version – If you were in the testing phase of Windows to get a feel of the OS before fully committing, when activating your copy, you can change the display language.
How do I enable multiple languages in Windows?
1. Add language packs
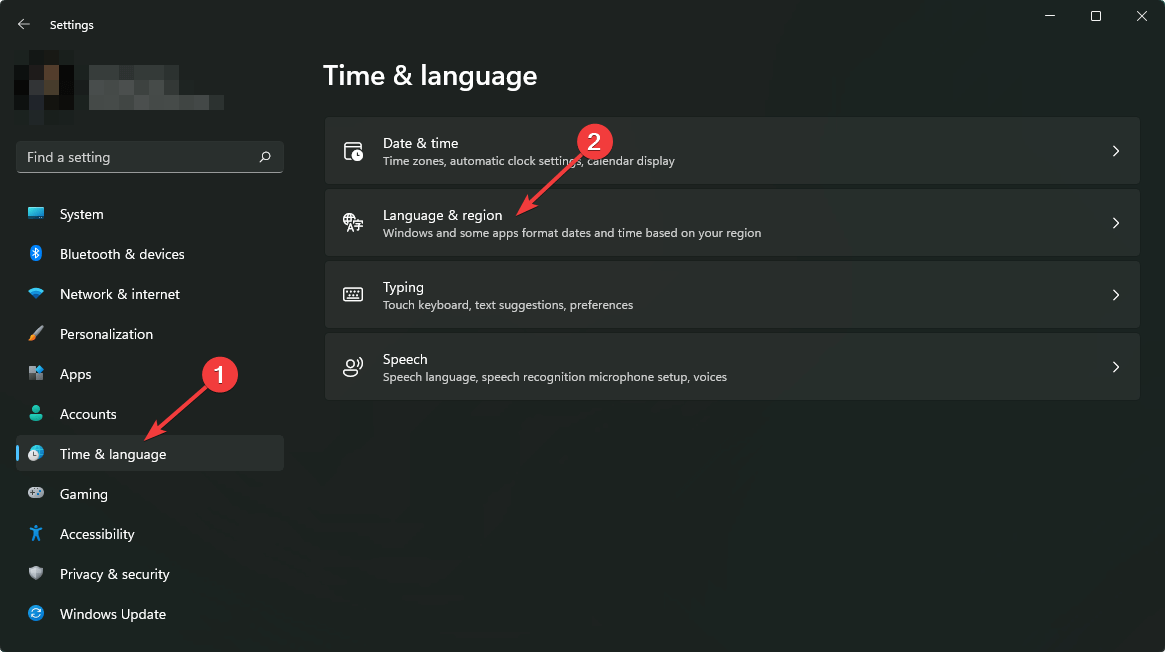
- Press the Windows + I keys to open Settings.
- Select Time & language on the left pane then click on the Language and region option.

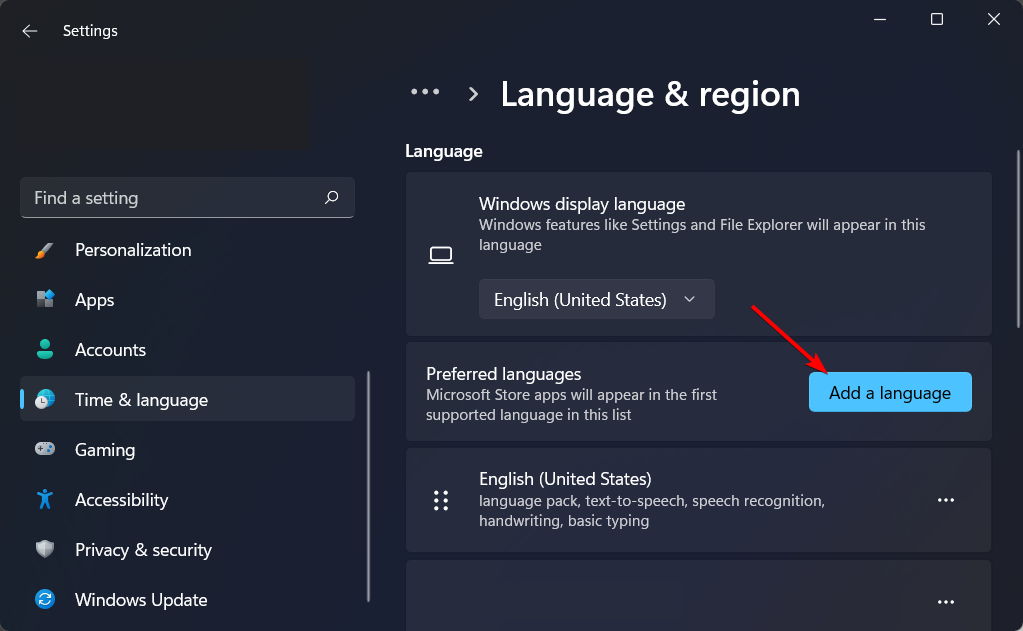
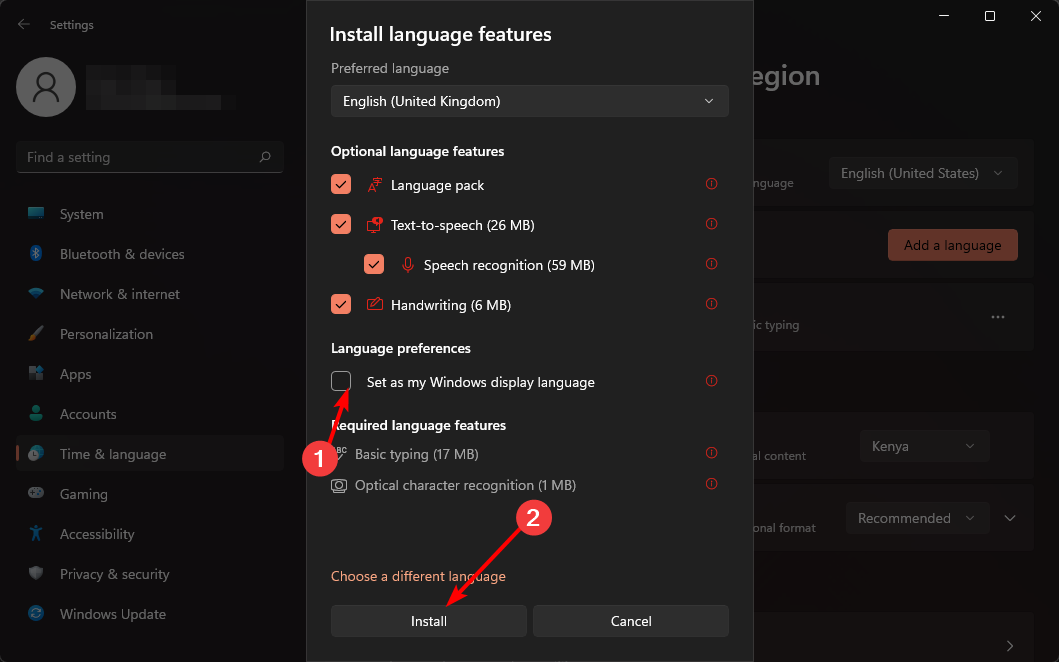
- Click the Add a language button.

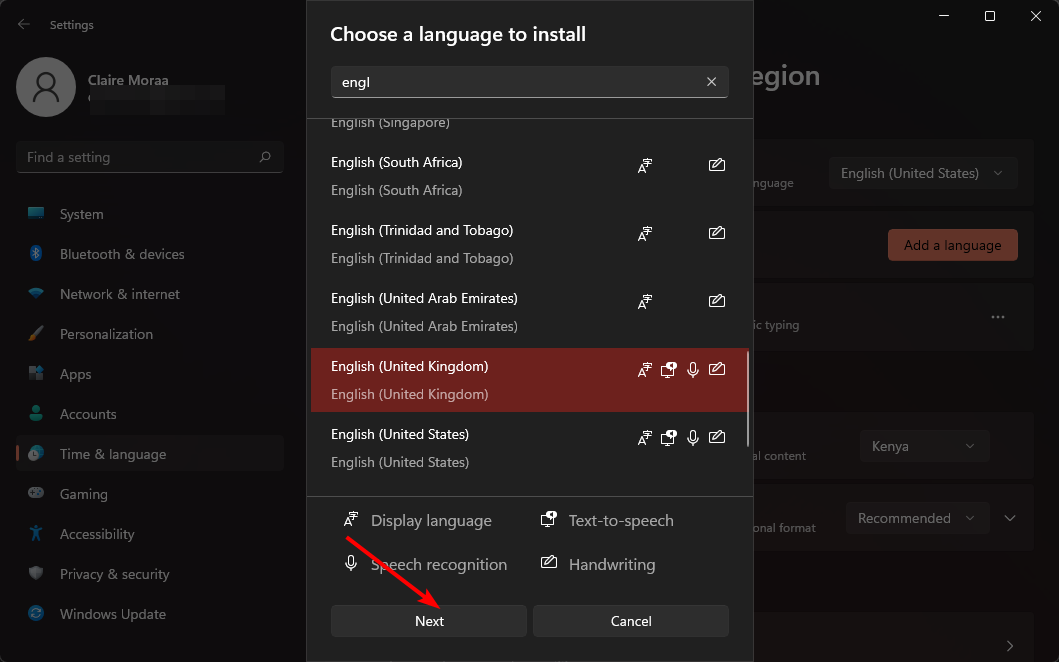
- Select your preferred language and press Next.

- Check the box for Set as my Windows display language then press Install.
- Restart your PC to effect the changes.
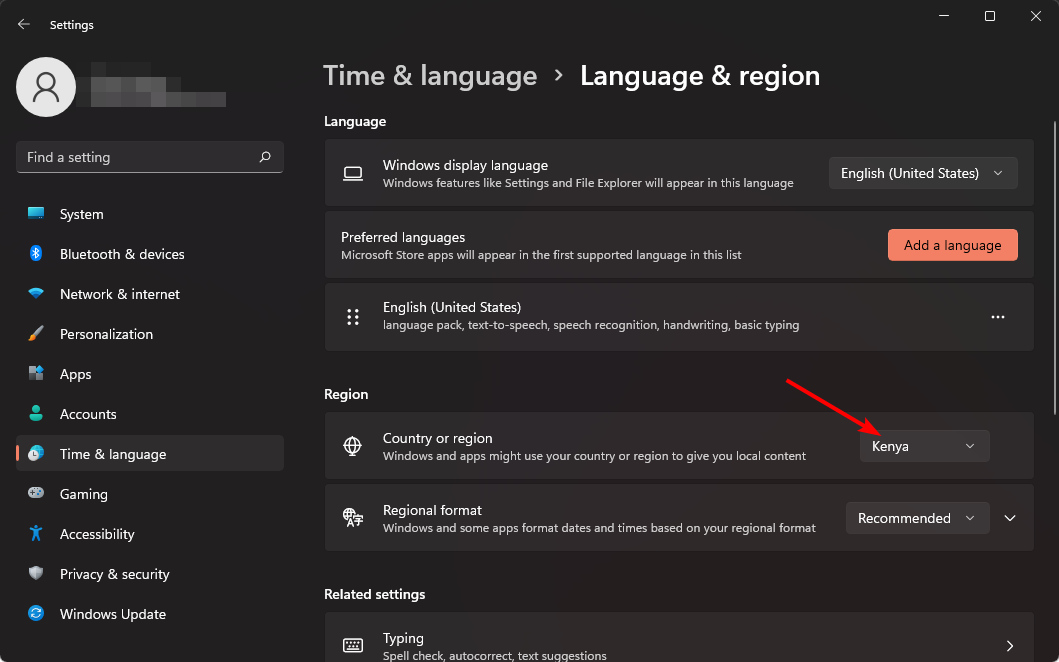
2. Change your region settings
- Press the Windows + I keys to open Settings.
- Click on Time & language then select the Language and region page on the right side.
- Under Country or region, update your location if applicable.
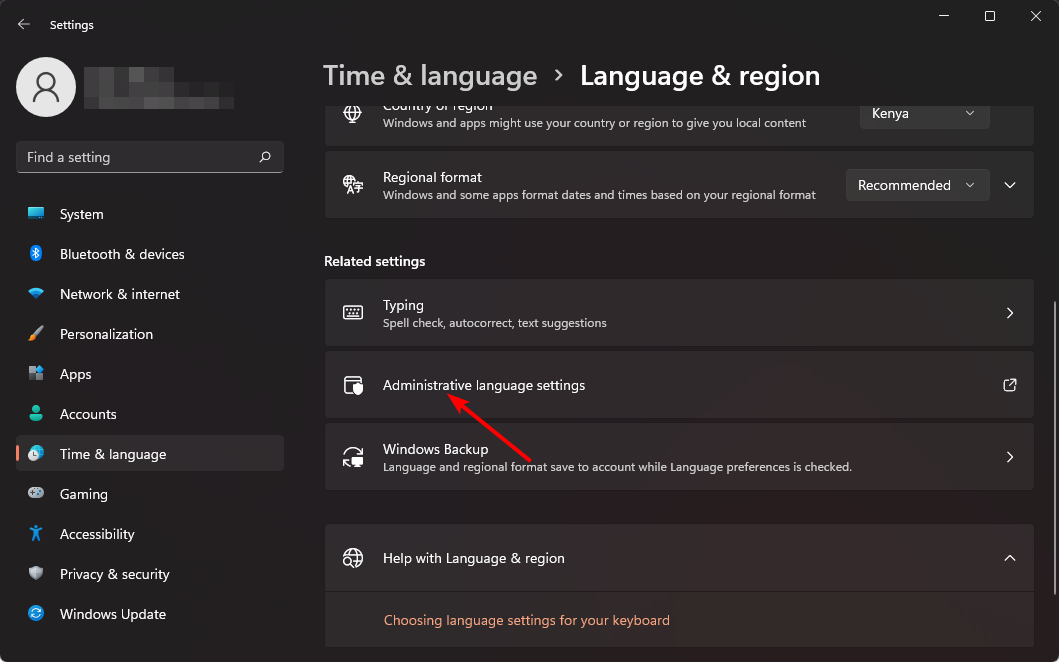
- Next, go back to the Administrative language settings.
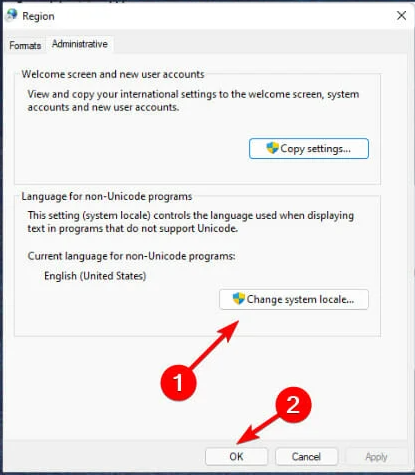
- Select Change system locale button then press OK.

- Specify the new language, check the Beta: Use Unicode UTF-8 for worldwide language support box and then click the OK button.

- Restart your PC and try changing your display language again.

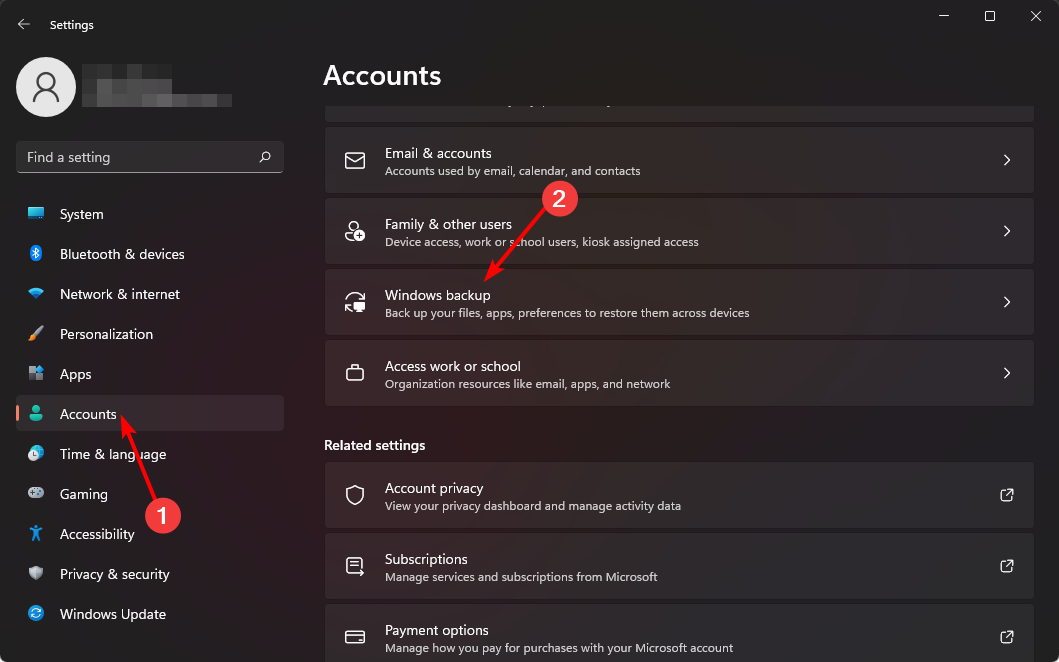
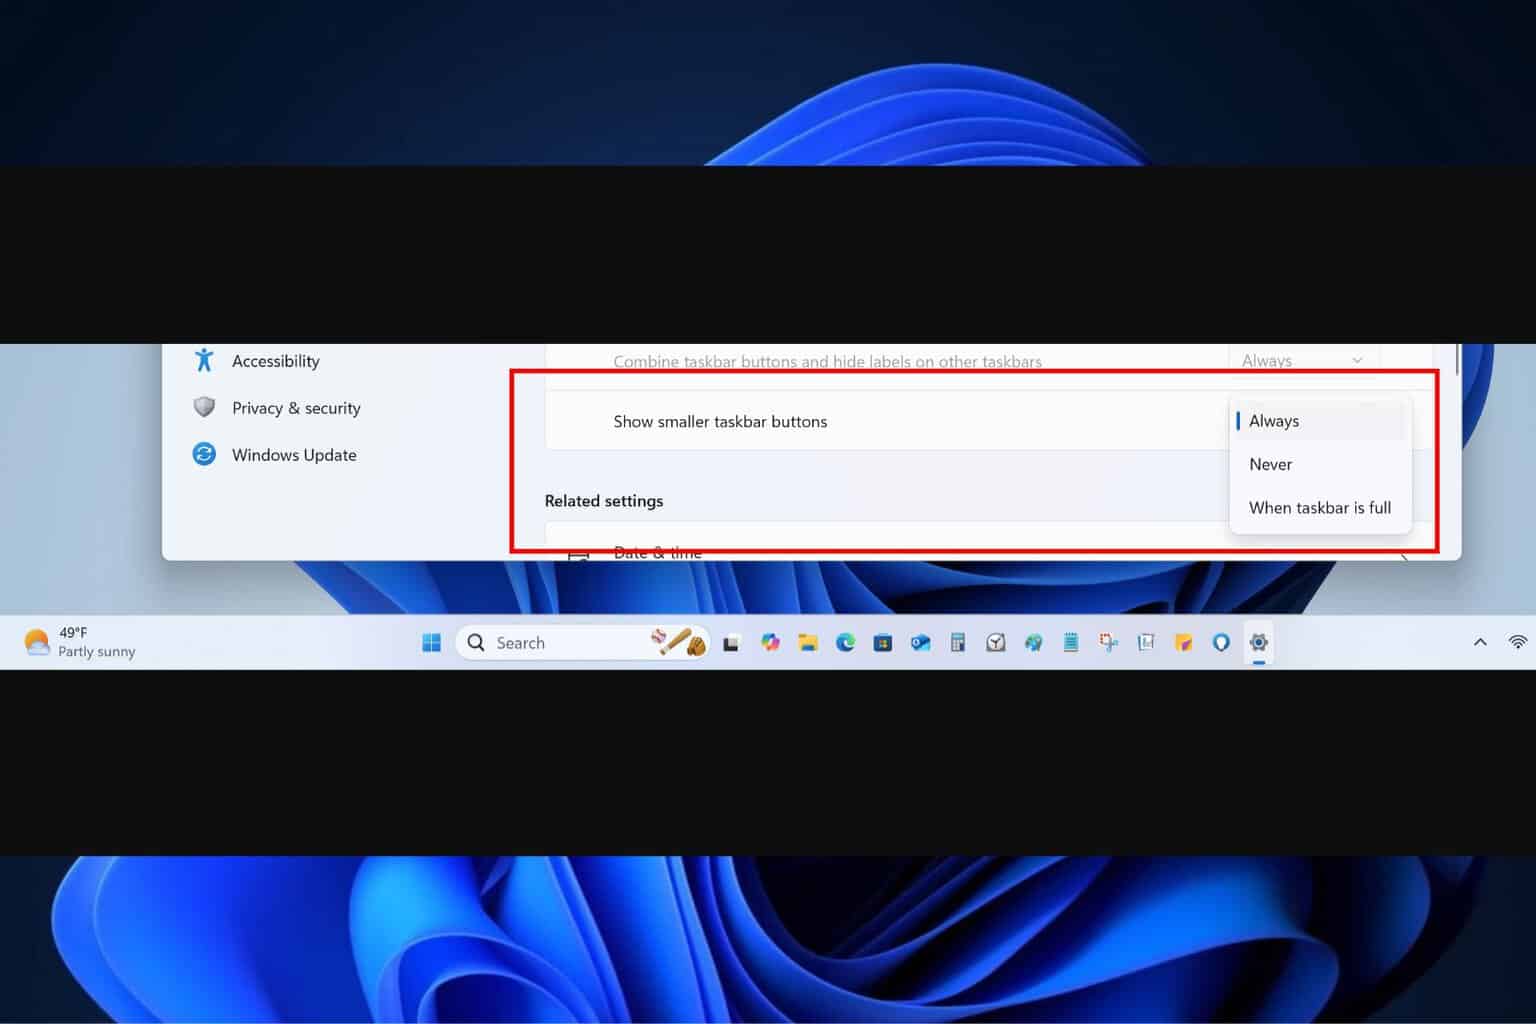
3. Disable sync for language settings
- Press the Windows + I keys to open Settings.
- Click on Accounts then select the Windows backup page on the right side.
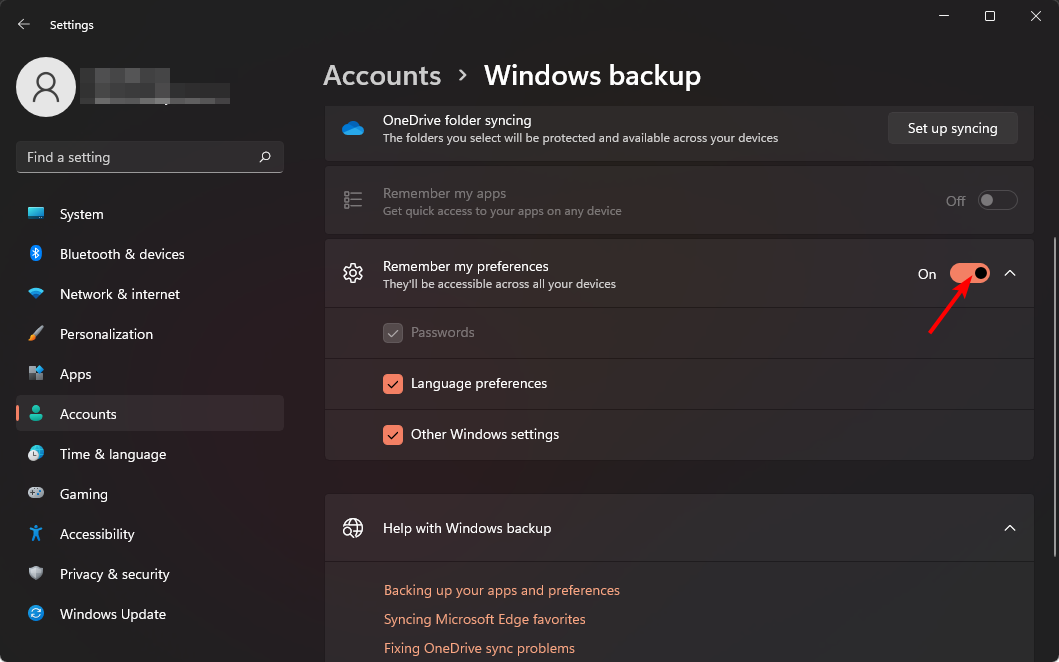
- Toggle the Remember my preferences option on.
- Clear the Language preferences option.
- You should now be able to change your display language.
4. Perform a clean install
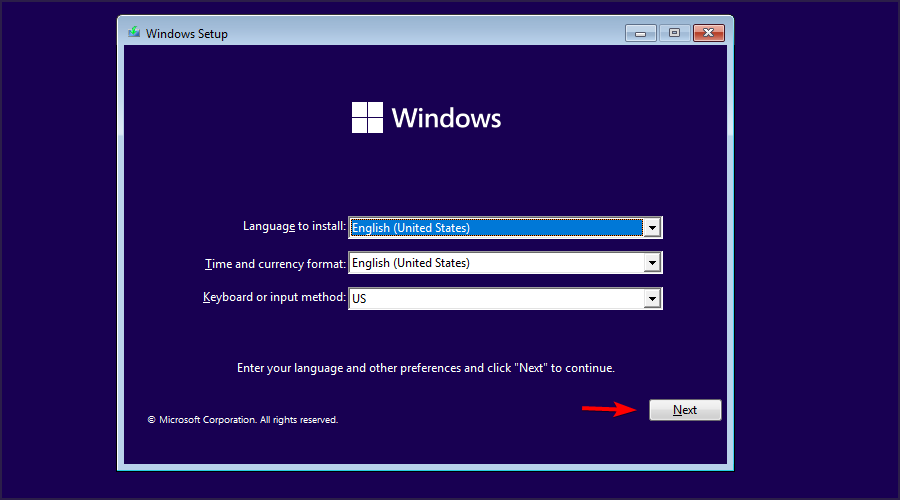
- Create a bootable USB drive.
- Connect the bootable installation media USB flash drive to your PC.
- Restart your PC and enter BIOS by pressing Del or F2 during the boot.
- Set your flash drive as the default boot device and save changes.
- Press any key to enter setup when asked and click Next.

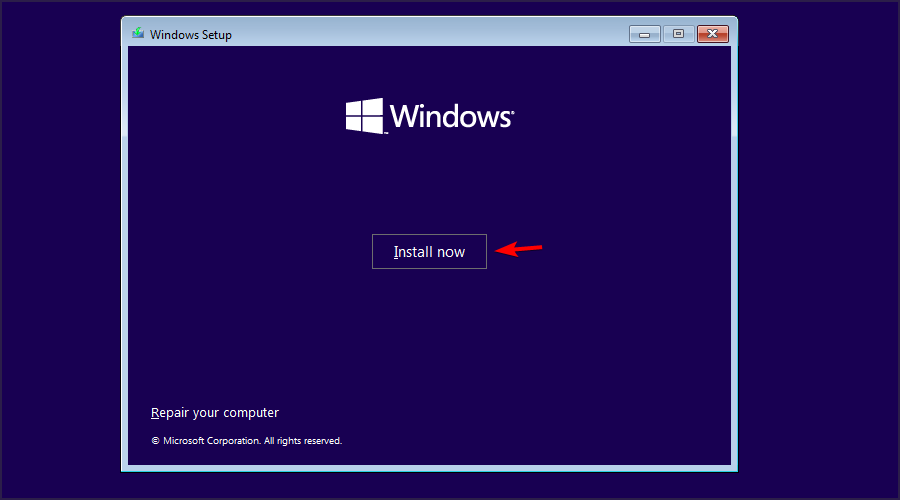
- Click on Install now to proceed.
- Enter your product key or choose I don’t have a product key.
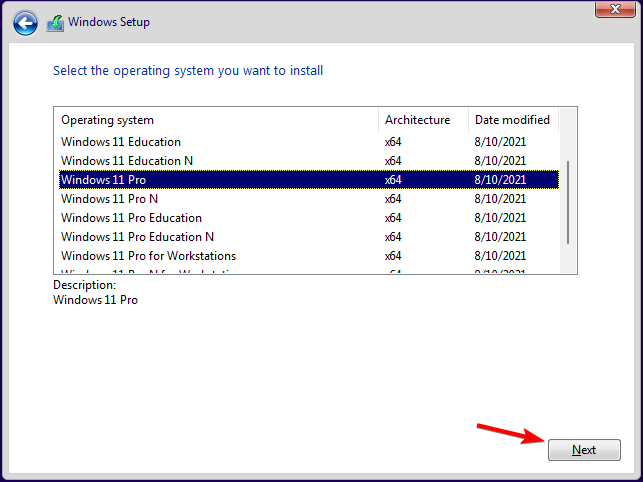
- Select the version that you want to install and click Next.

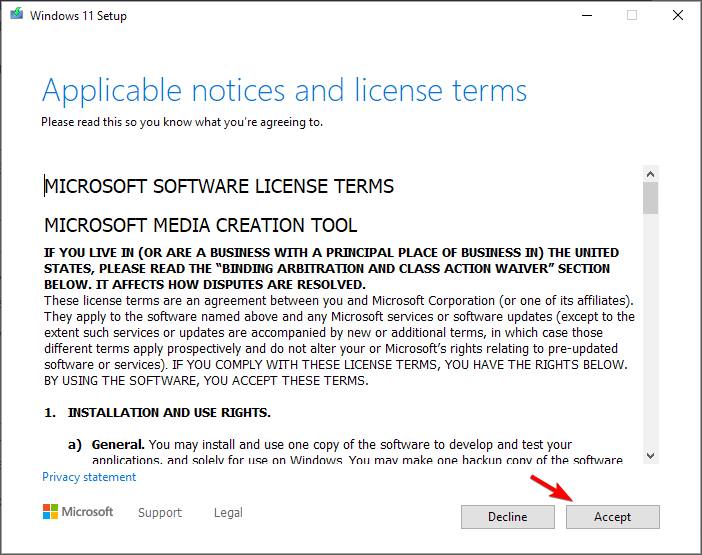
- Accept the terms of service and click Next.

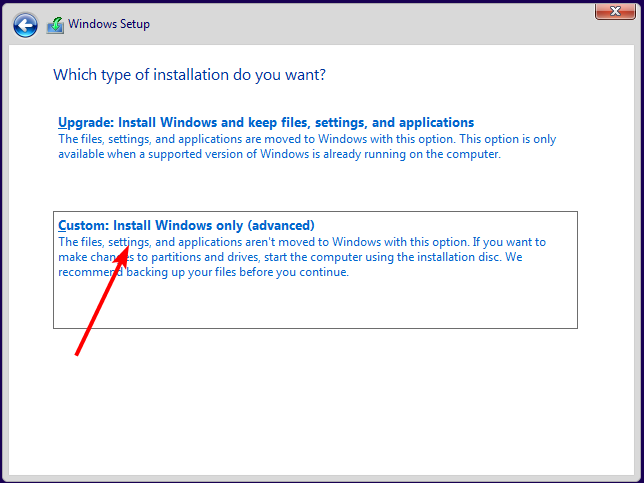
- Select the Custom install option.

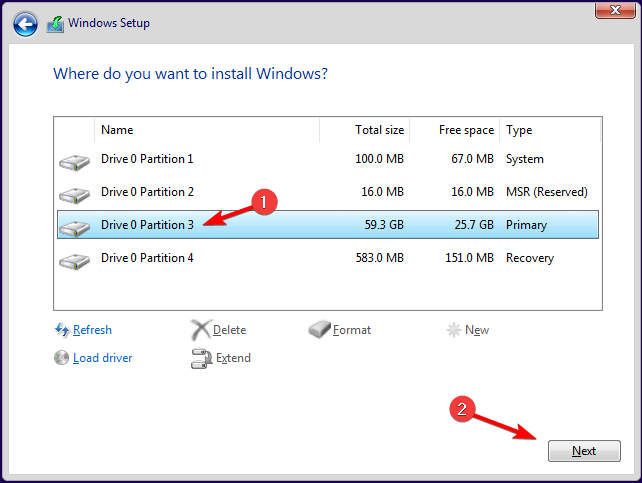
- Select the Primary drive and click Next. Double-check to make sure that you’ve selected the correct drive.

- Follow the on-screen prompts to complete the installation.
If you’d like to restore your files, use Windows.old files, but don’t wait too long because they have an expiry date.
Hopefully, you’ve been able to add more display languages to your Windows device with the methods listed above.
Let us know of any additional comments you may have on this topic below.


User forum
0 messages