No Arrows on Windows Photos? 5 Ways to Quickly Fix it
Restore the missing arrows on your Windows Photo Viewer
Key notes
- Unfortunately, there are times when Windows Photo Viewer stops working properly — perhaps due to a bug or an update that has gone wrong.
- If you can't see arrows in Windows Photo Viewer, resetting it might do the trick. Refer to our below steps in this regard.

Arrows enable you to scroll through images when using the Photo Viewer. While these arrows are not always necessary, they might come in handy from time to time.
A more worrying problem would be if Windows Photo Viewer is not working but we have already covered that in our detailed guide. For today, let’s solve the arrows missing from this program issue.
Why can’t I scroll through pictures on Windows 11?
If you’re a Windows user, then there is no doubt that you have used the Windows Photo Viewer at least once. It’s the default image viewer after all.
But if you’re trying to scroll through pictures, you may be wondering why the photos arrow keys are not working. Here are a few reasons:
- Faulty mouse – If you can’t scroll through pictures on Windows 11 on your Photo Viewer, it’s possible that your mouse is faulty or broken. In this case, you’ll need to replace your mouse as soon as possible.
- Outdated/corrupted keyboard drivers – If you’re using a keyboard that came with your computer, it’s possible that you have outdated or corrupted drivers. You will need to update your keyboard drivers first and see if the problem persists.
- Incompatible application – If you’ve recently installed any new software or tried to download something from the Internet, it’s possible that there was a problem with that installation process, which could prevent Windows from recognizing your arrow keys. You will have to uninstall the application and see if it is the cause of the problem.
- Firewall settings – Sometimes, your firewall settings can affect how other applications behave on your PC. You need to check whether your firewall is blocking a program, then disable it temporarily and see if that fixes the problem.
- Sticky Keys – The Sticky Keys feature is a handy way for you to use your keyboard without having to press all of the keys at the same time. However, they can sometimes cause conflicts with other programs. You may have to disable the Sticky Keys feature and see if the arrows work.
- Multiple keyboards – If you have multiple keyboards connected to your PC at once, you may have to disconnect all other keyboards from their USB ports and try again. Sometimes it may be the case that they have already been assigned to these keys and hence, won’t work on the keyboard you are using.
What can I do if the Windows Photo Viewer is not showing arrows?
To attempt the fix, let’s first start by checking off the basics:
- Securely plug in the keyboard in the USB ports and check whether you still have no next/previous arrows in Windows 11 Photo.
- Make sure that the Windows Photo Viewer application window is active by clicking inside with your mouse cursor.
- Unplug all other peripherals and only connect your keyboard and mouse.
- Try with another keyboard (if available). You may find that some keyboard keys may not be working.
- Close and open the application again.
- Restart your PC.
If none of these solutions works, then proceed to the more advanced troubleshooting steps.
1. Update your device drivers
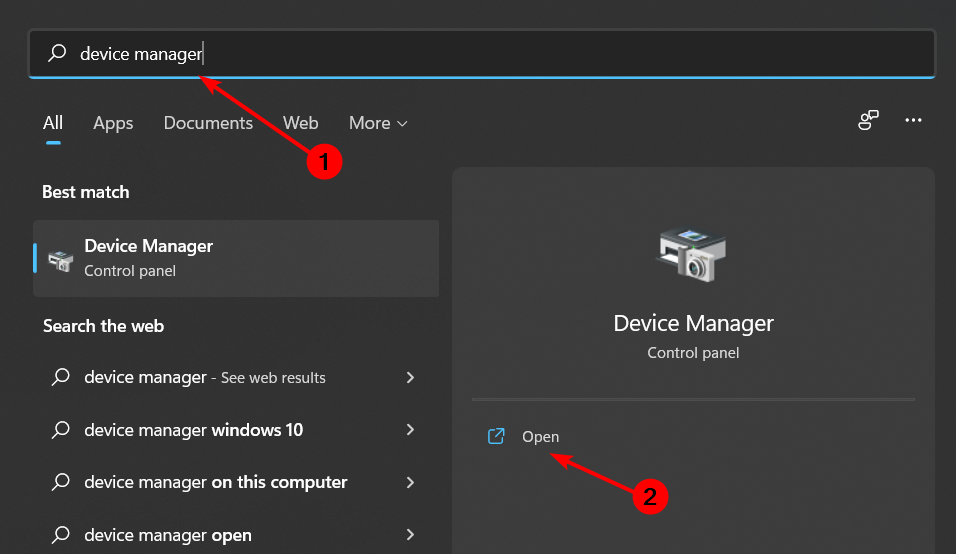
- Hit the Windows key, type Device Manager in the search bar, and click Open.
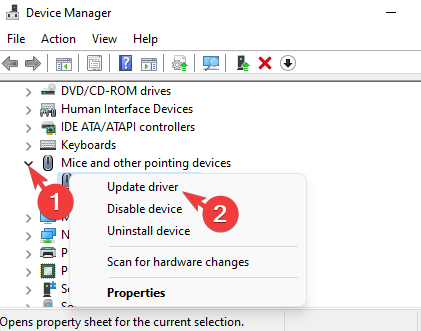
- Navigate to Keyboard, select your keyboard, right-click, and select Update driver.

- Select Search automatically for drivers.

- Repeat the same process for Mice and other pointing devices and click Update driver.
You can prevent these problems by using an automatic tool that will search and install the correct drivers on your computer with just a few clicks. That's why we recommend you use Outbyte Driver Updater. Here's how to do it:
- Download and install the Outbyte Driver Updater app.
- Launch the software.
- Wait for the app to detect all incompatible drivers.

- Afterward, it will show you a list of the drivers found to select the ones to Update or Ignore.
- Click on Update & Apply Selected to download and install the newest versions.
- Restart your PC to ensure the applied changes.

Outbyte Driver Updater
Use this software and solve all driver-related issues from your PC.2. Disable Firewall temporarily
- Hit the Windows button, type Windows Security in the search bar, and click Open.

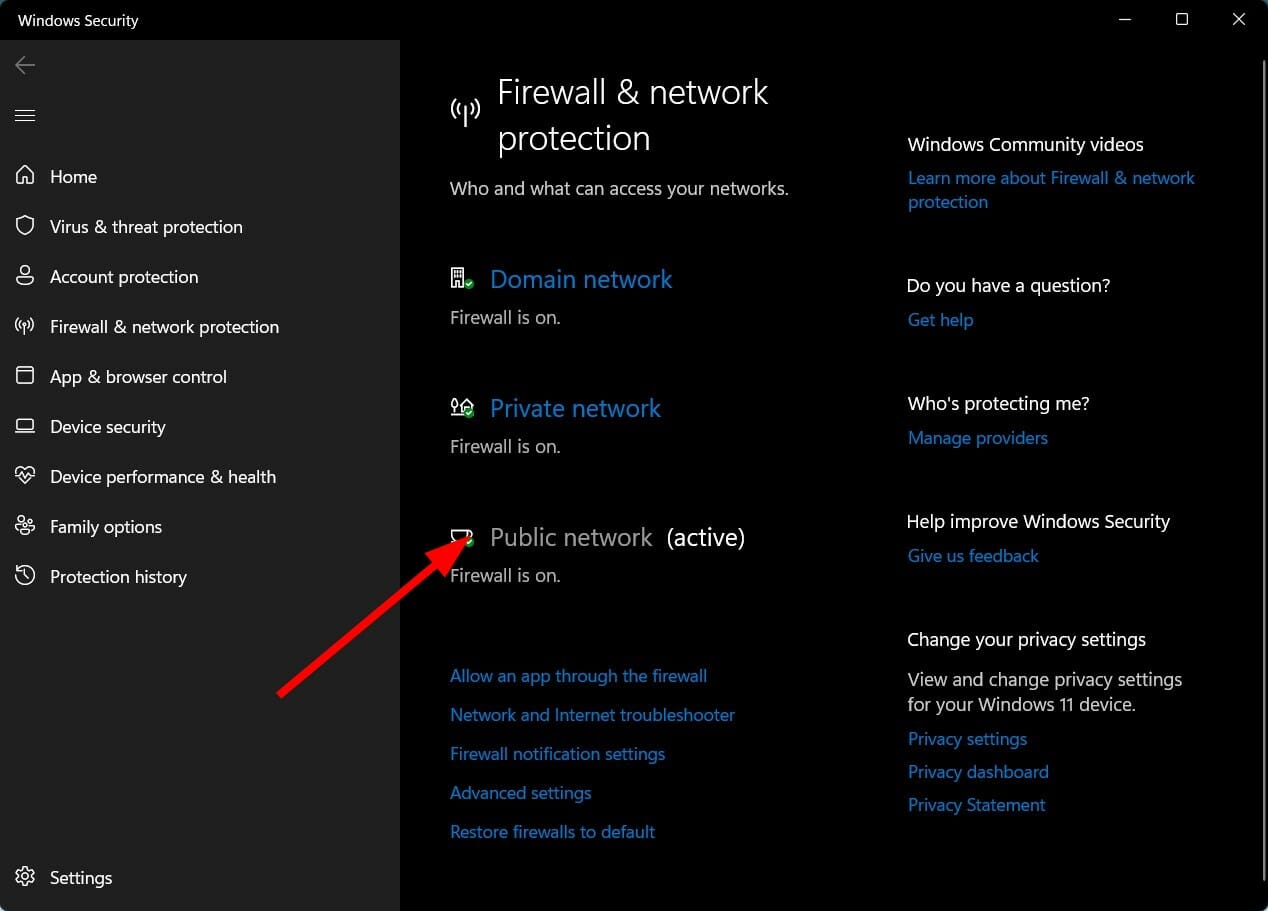
- Click on Firewall & network protection then select Public network.
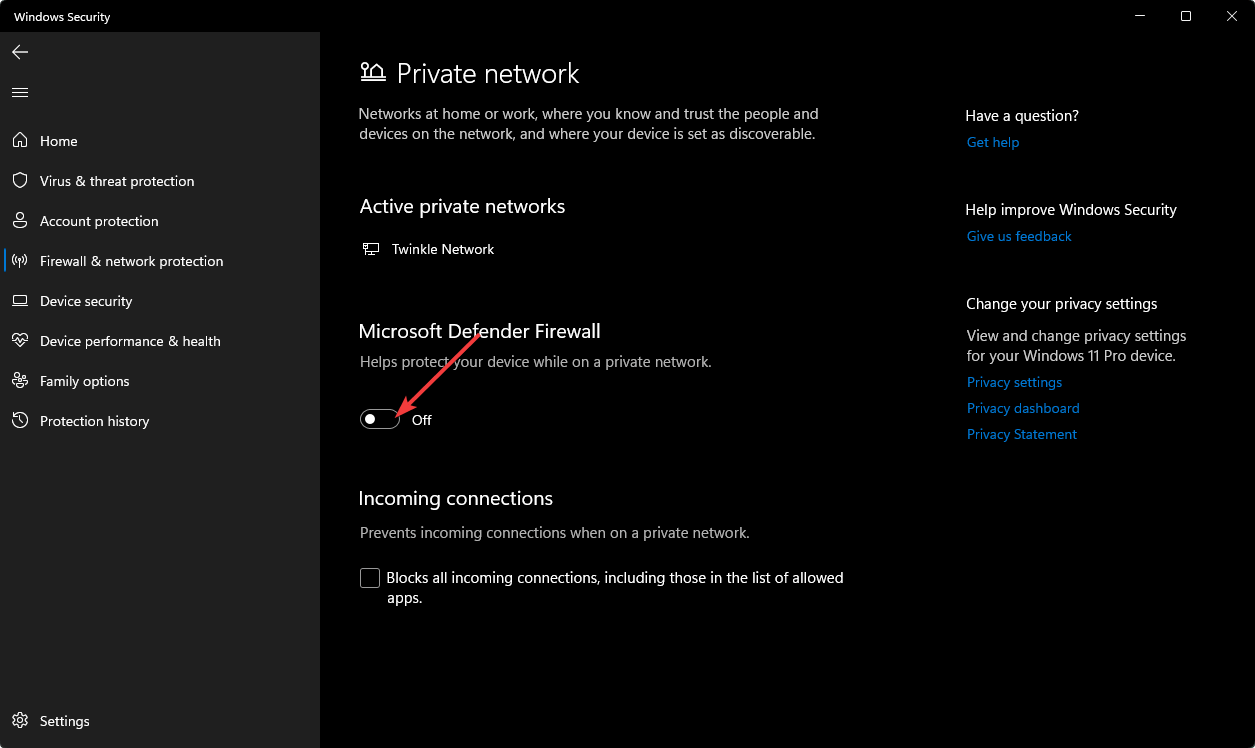
- Locate Microsoft Defender Firewall and toggle the off button.
3. Reset Windows Photo Viewer
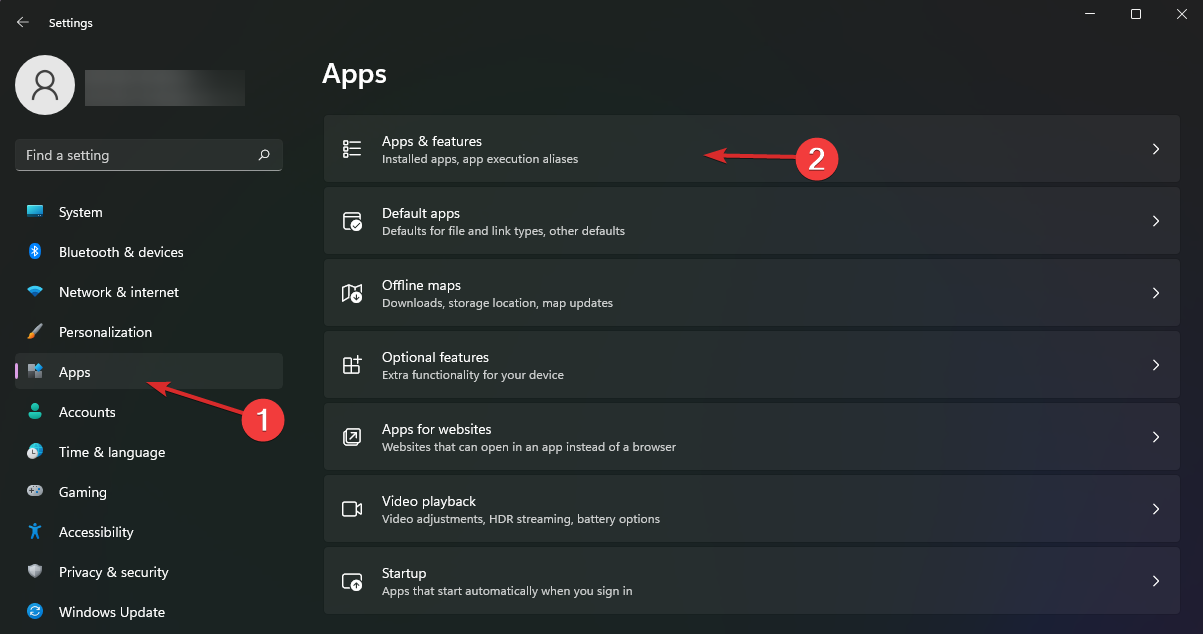
- Hit the Windows key and select Settings.

- Click on Apps on the left pane then select Apps & features on the right pane.
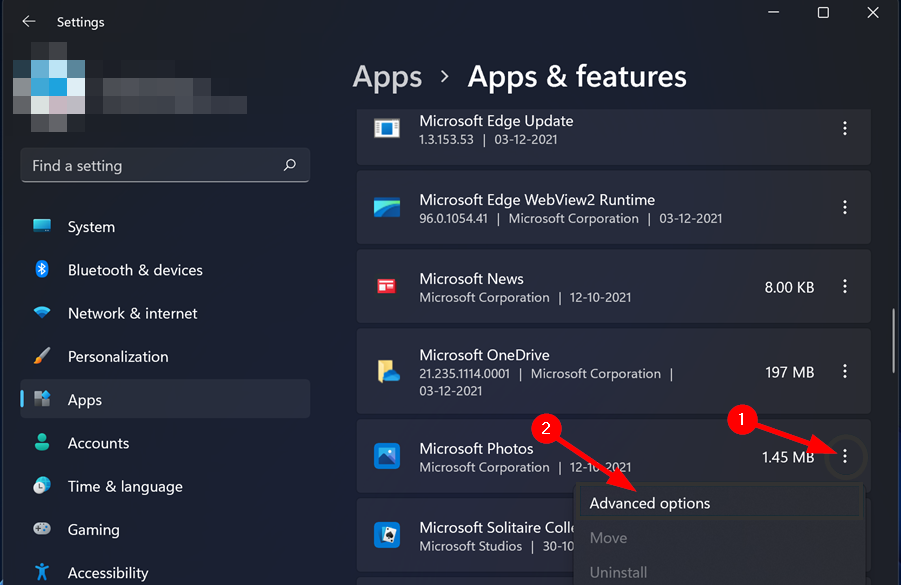
- Locate Windows Photo Viewer, click on the three vertical ellipses and select Advanced options.
- Click the Reset button.
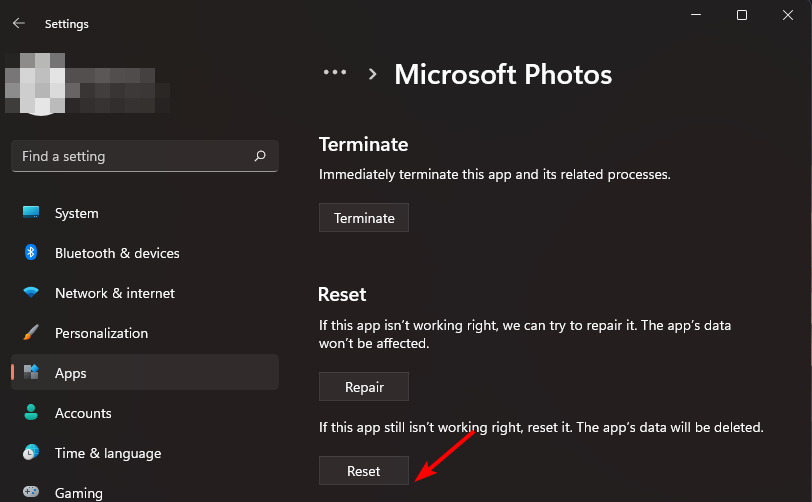
- Again, click Reset on the pop up that appears.

Resetting the app should also help when there are no next/previous arrows in Windows 10 Photo. Though the process is slightly different from the previous iteration, it shouldn’t be much trouble to reset an app in Windows 10.
4. Check for Windows updates
- Hit the Windows key and select Settings.
- Click on Windows update, then select Check for updates.
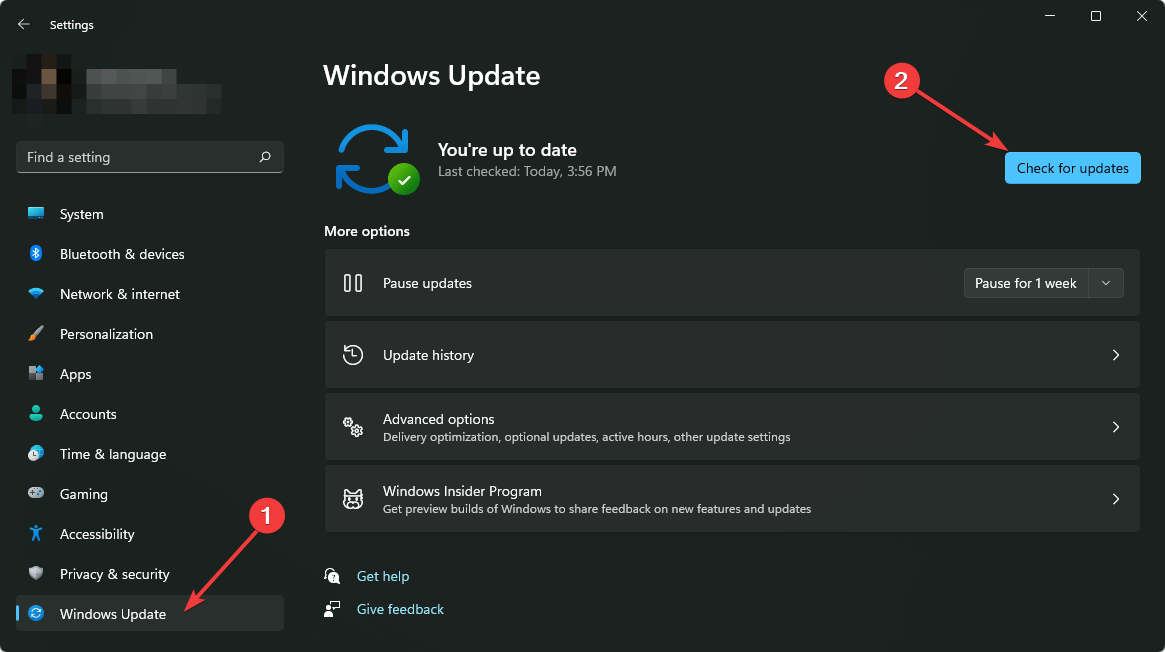
- Download and install if any are available.
5. Use another image-viewer program
There are many options available for viewing images on Windows computers – including Windows Photo Viewer itself. However, sometimes, your operating system doesn’t support the necessary features the program needs.
That’s why you may find Windows Photo Viewer keeps skipping pictures. Most modern photo viewer software tools have many features that make it worth using over Windows Photo Viewer, including support for major formats and batch conversions.
And that’s how to resolve Windows Photo Viewer not showing arrows. You may also encounter an issue where Windows Photo Viewer cannot open this picture, so don’t hesitate to refer to our guide.
Perhaps you are tired of clicking the arrow to view the next picture and are wondering how to view photos continuously in Windows 11. You’ll be excited to know that there are a handful of slide show maker apps that take away any need for arrows.
Let us know what method worked for you in the comments section below.
Read our disclosure page to find out how can you help Windows Report sustain the editorial team. Read more


Improve this guide


User forum
0 messages