Windows Update Error 0x80244018 [5 Ways to Fix it]
Try running SFC scan or check your Proxy settings
5 min. read
Updated on
Read our disclosure page to find out how can you help Windows Report sustain the editorial team Read more
Key notes
- Windows update error code 0x80244018 pops up when you try to install the available update.
- This could be because you have a jumpy internet connection or some essential services are disabled.
- You can try disabling the antivirus or restarting the update service.
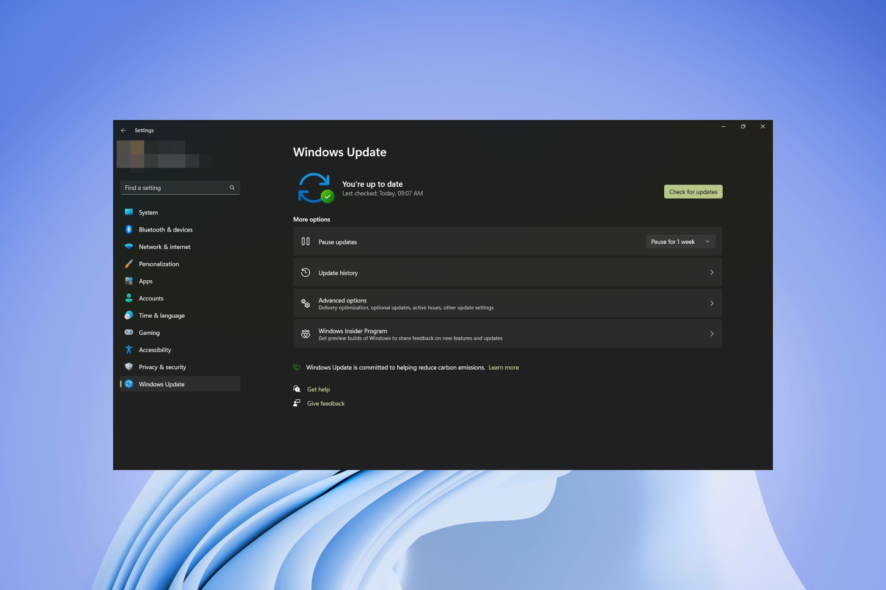
Having your Windows update halted by errors can be very frustrating, I’m sure we can all agree on that. Not being able to access new features or fix those bugs in the current version you’re running can really put a damper on things.
I know how exasperating it can be when your system throws that dreaded error message, “There were problems installing some updates.” But don’t worry, as I’m here to share a few solutions that will help you tackle this issue head-on.
This guide is packed with practical tips to resolve the Windows update error 0x80244018, so let’s dive right in and get your system back on track.
Why am I getting Windows update error 0x80244018?
After some research, we were able to list out some of the most common reasons users are getting the Windows update error 0x80244018.
- The server is down: Sometimes, when official servers are down, you won’t be able to download the latest Windows updates on your PC.
- Your internet connection is faulty: Your internet connection might be jumpy, which is why you are getting the Windows update error 0x80244018.
- Antivirus is blocking the update: Aggressive antivirus settings might stop Windows from downloading the latest update.
- System files are corrupt: If some important Windows update service-related files are missing or corrupt, you might get this error.
- Background Intelligent Transfer Service isn’t running: Some third-party app or your settings might have disabled the Background Intelligent Transfer service.
How can I fix Windows update error 0x80244018?
Before you go ahead and check in with the advanced troubleshooting solutions, we would advise you to apply the below-mentioned fixes and hopefully resolve the problem quickly.
- Shut down your PC and wait for about 5 mins before turning it on. A restart will help you reload all the system files from scratch.
- Check if your internet connection is working perfectly fine or not.
- If you have installed a VPN, we recommend uninstalling the program from your PC.
Now, let us apply the solutions the advanced solutions.
1. Use the Windows update troubleshooter
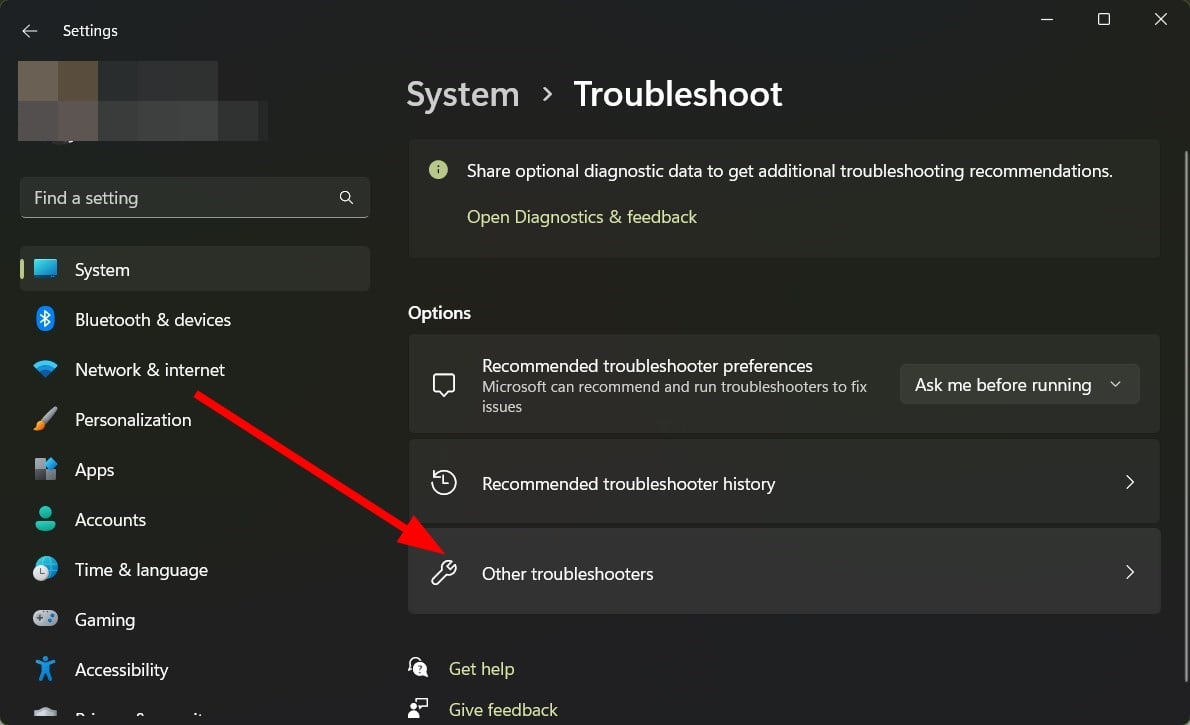
- Press the Win + I buttons to open Windows Settings.
- Click on Troubleshoot on the right side.
- Select Other troubleshooters.
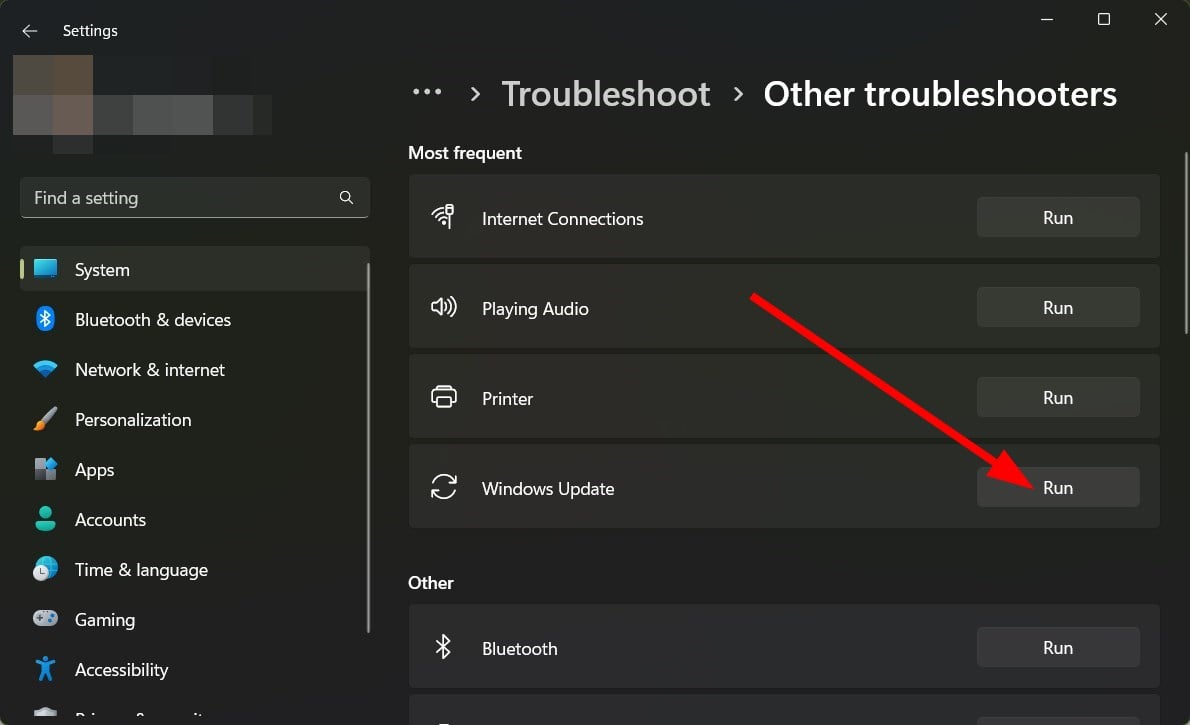
- Click the Run button next to the Windows update option.
- Your system will start detecting the issues and will prompt you to apply the fixes if there are one.
Windows OS comes with a built-in troubleshooting tool, which along with another hardware troubleshooter, also features a Windows update troubleshooter.
You can use this feature by following the above steps and fixing the problem quickly.
2. Restart the update service and rename the SoftwareDistribution folder
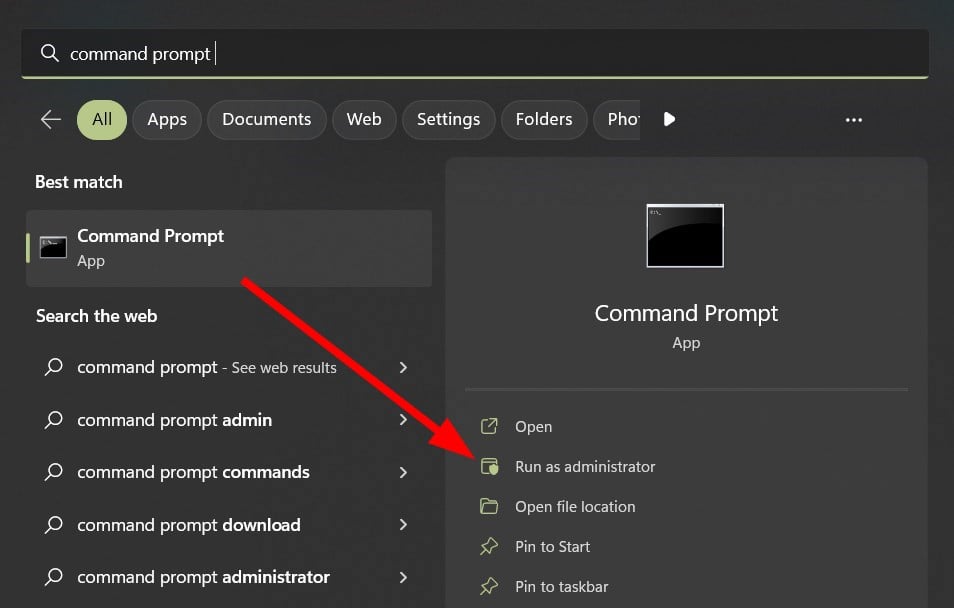
- Open the Start menu.
- Type the command prompt and run it as an administrator.
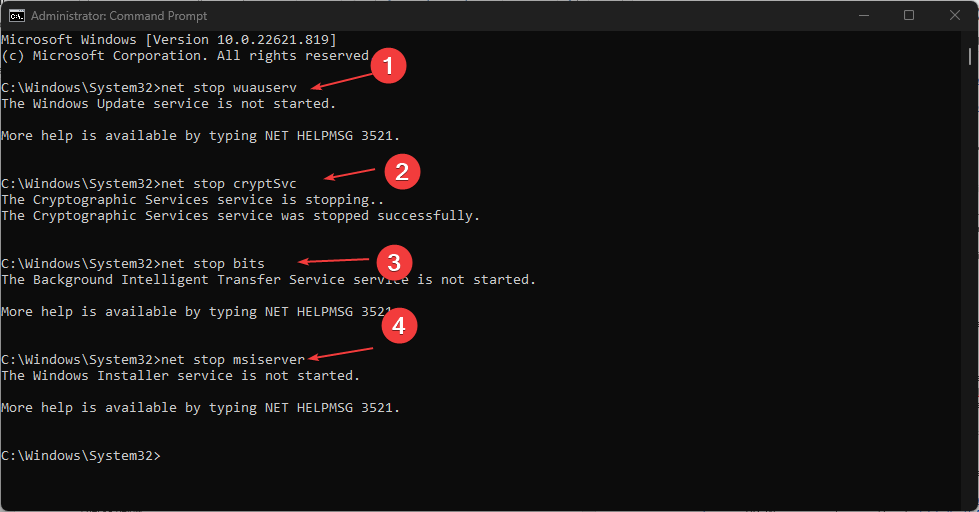
- Type the below commands and press Enter after each one.
net stop wuauservnet stop cryptSvcnet stop bitsnet stop msiserverren C:\Windows\SoftwareDistribution SoftwareDistribution.oldren C:\Windows\System32\catroot2 catroot2.oldnet start wuauservnet start cryptSvcnet start bitsnet start msiserver - Wait for the process to complete.
- After completion, restart your PC.
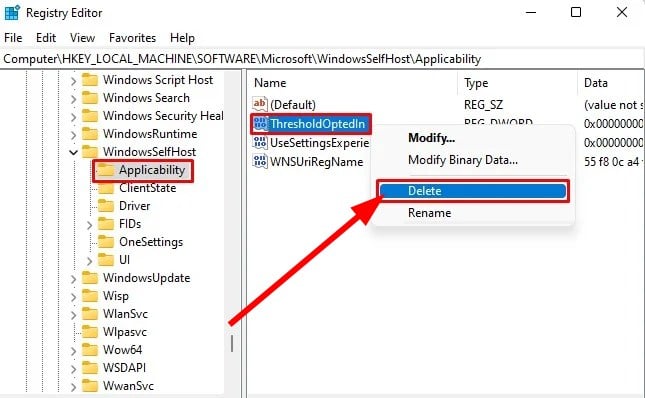
3. Delete the ThresholdOptedIn Registry Entry
- Press the Win + I keys to open the Run dialogue.
- Type regedit and press Enter.
- Navigate to the below path.
Computer\HKEY_LOCAL_MACHINE\SOFTWARE\Microsoft\WindowsSelfHost\Applicability - Delete the ThresholdOptedIn registry entry if it is available.
Windows stores all data and information regarding our installed applications in your system. If they crash, it will cause update issues, which is why you will face Windows update error 0x80244018. Follow the above steps, delete the ThresholdOptedIn entry, and check whether this resolves the problem.
4. Check whether the BITS service is running
- Press the Win + R buttons to open the Run dialogue.
- Type services.msc and press Enter.
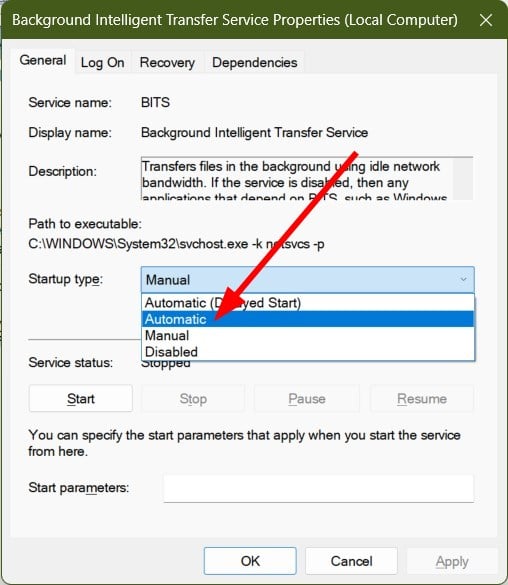
- Locate the Background Intelligent Transfer Service and double-click on it.
- Under the Service status, press the Start button.
- Select Automatic for the Startup type drop-down menu.
Services such as the Background Intelligent Transfer service should run in the background to ensure that the Windows update processes are performed smoothly. When any of these services are stopped, it could trigger update errors.
5. Turn off the Proxy Settings
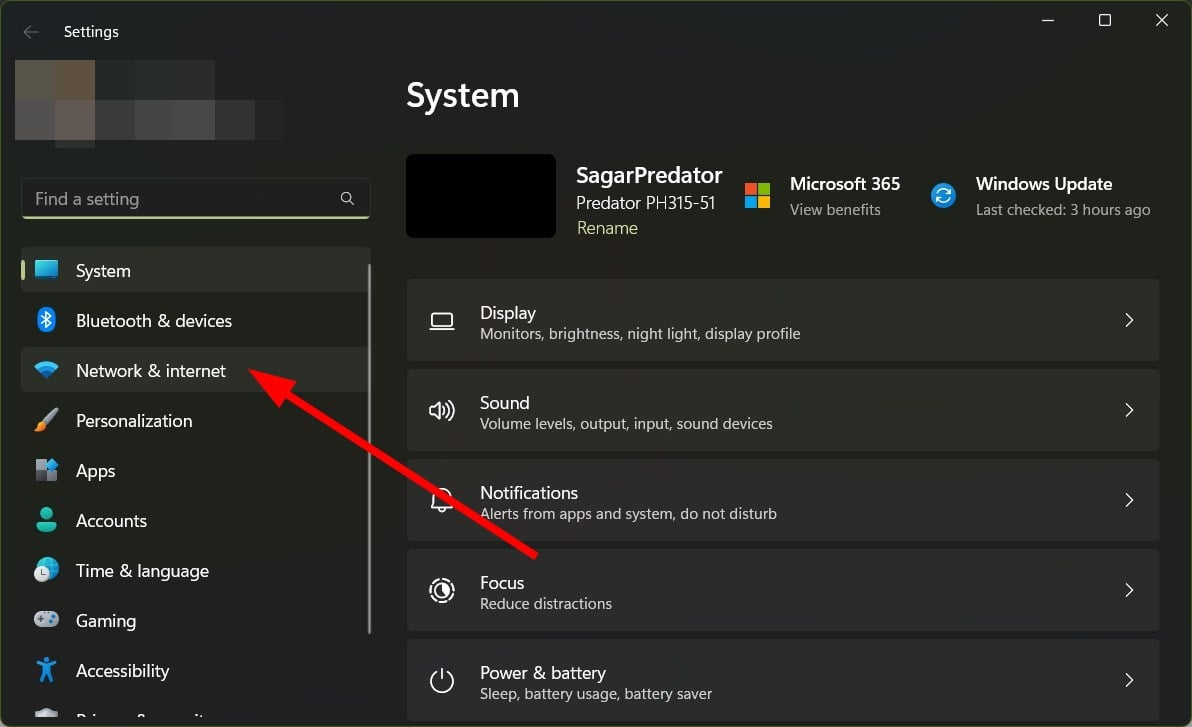
- Press the Win + I keys to open the Settings menu.
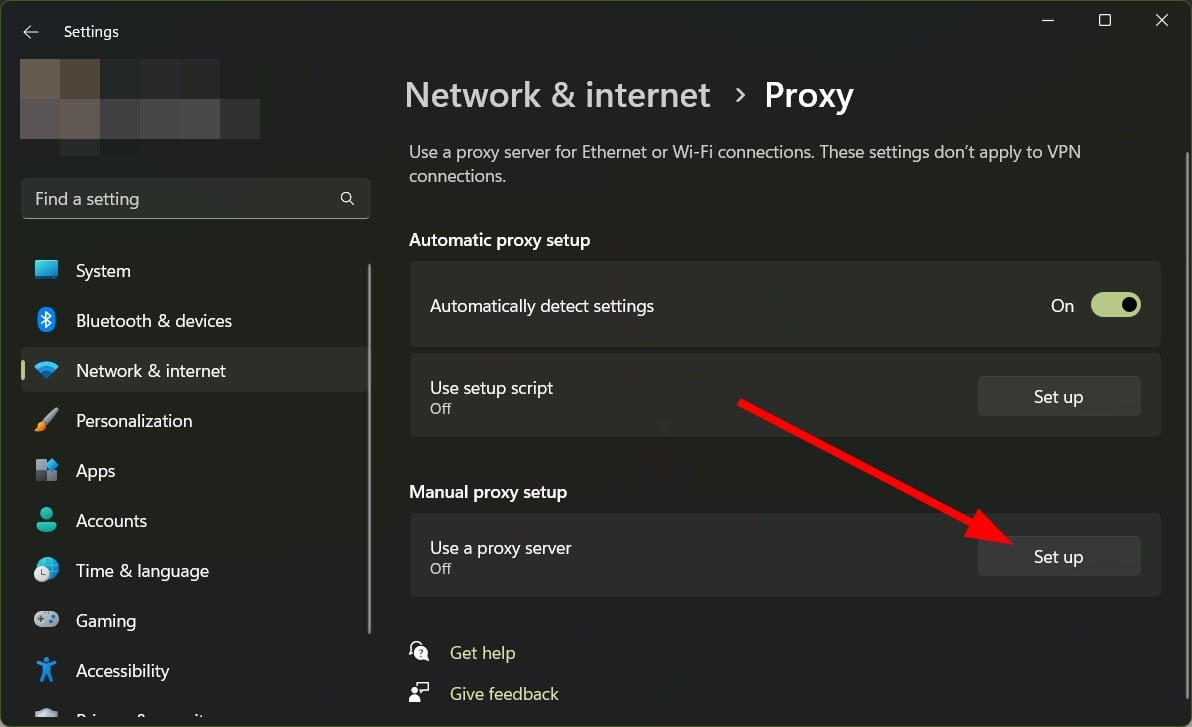
- Select Network & Internet from the left side pane.
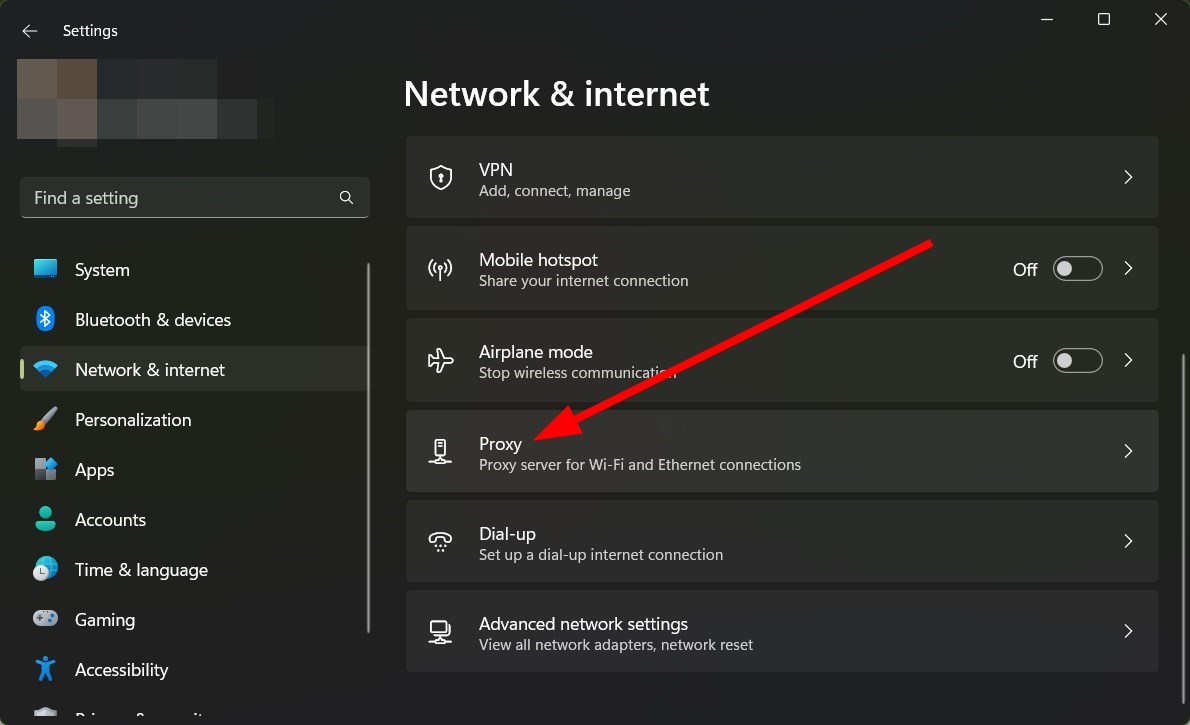
- Click on Proxy on the right side.
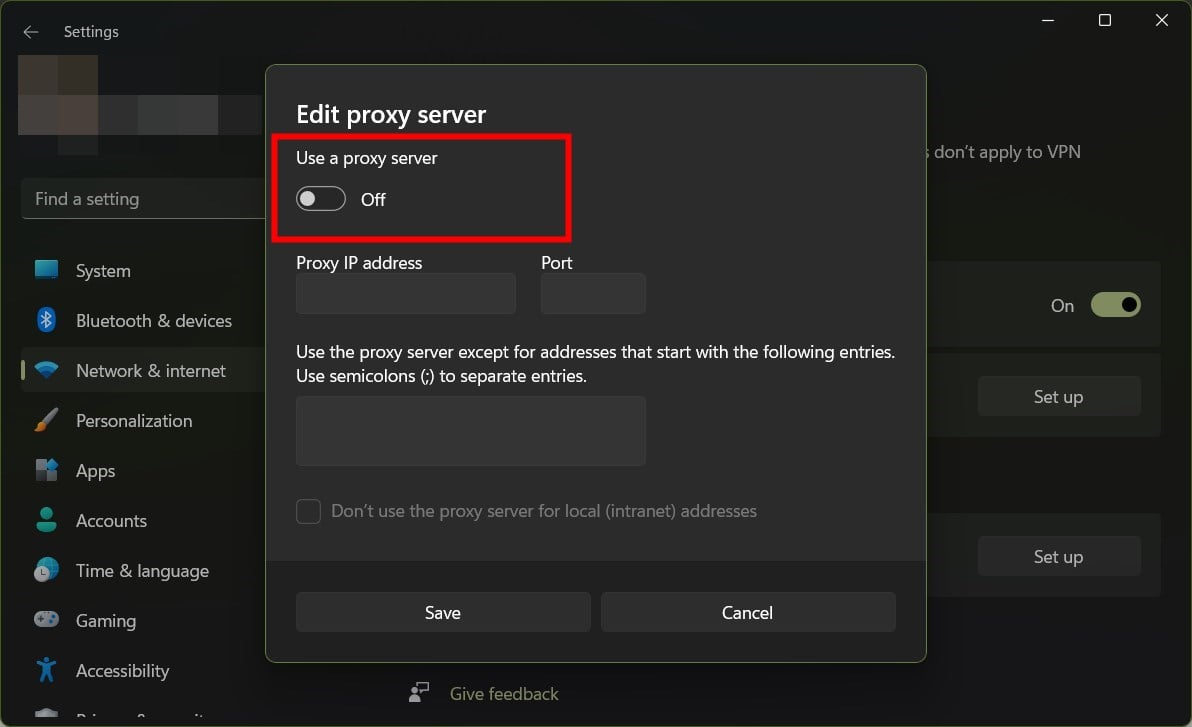
- Under Manual proxy setup, click the Set up button.
- Toggle on the Use a proxy server option.
- Restart your PC.
6. Run SFC Scan and DISM commands
- Open the Start menu.
- Type the command prompt and run it as an administrator.
- Type the below command and press Enter.
sfc /scannow - Wait for the process to complete.
- Execute the below command.
Dism /Online /Cleanup-Image /Check healthDism /Online /Cleanup-Image /restorehealth - Let the process complete.
- Restart your PC.
That is it from us in this guide. However, if you are getting Windows update error 0X800f081f, then you can check out our guide that lists a bunch of solutions to resolve the problem.
Also, we have five quick solutions to resolve the Windows update error 0x800704cf. You can also check out our guide on update error 0x800f0831.
In case you have more problems, our download error 0x80248014 guide will offer you more solutions.
Let us know in the comments below which one of the above solutions resolved the problem for you.


