0x80248014 Windows Update/ Microsoft Store Error [SOLVED]
Resetting your components can fix this issue

Users have reported that the 0x80248014 download error appears in two cases – when they’re unable to check for updates and when they cannot complete a purchase in the Microsoft Store.
We have solutions for both problems, so just follow the instructions from this article.
How to fix Microsoft Store/Windows Update error code 0x80248014
1. Reset Network components
- Right-click on the Start Menu button, and choose Command Prompt (Admin).
- Enter the following command and press Enter: net stop WuAuServ

- Now, past the following into Search and press Enter: %windir%
- In Windows folder, find SoftwareDistribution folder, and rename it to SDold.

- Open Command Prompt (Admin) again, and enter the following command: net start WuAuServ

- Try to check for updates again
2. Delete the Software Distribution folder
- Go to Search, type services.msc, and go to Services.
- In the Services list, search for Windows Update.
- Right-click and go to Properties, then choose Disable.
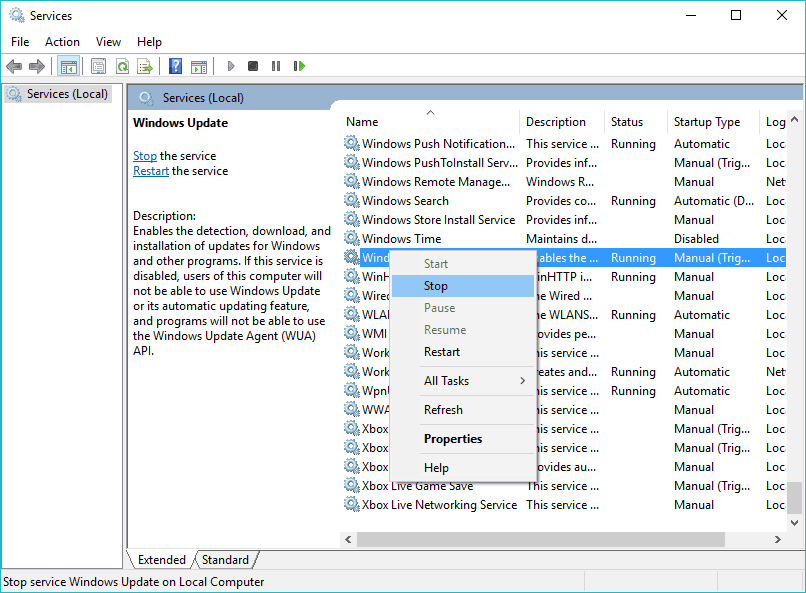
- Restart your computer.
Now that the Windows Update service is disabled, let’s go and delete (rename) the SoftwareDistribution folder:
- Navigate to C:\Windows and find the SoftwareDistribution folder.
- Rename folder to SoftwareDistribution.OLD (you can delete it, but it’s safer if we just leave it there).
- Restart your computer.
Once you do that, go and re-enable the Windows Update service:
- Once again navigate to Services and find Windows Update and, in Properties, change from Disabled to Manual.
- Restart your computer once again.
- Check for updates.
3. Run the Troubleshooter
- Go to Settings.
- Head over to Updates & Security > Troubleshoot.
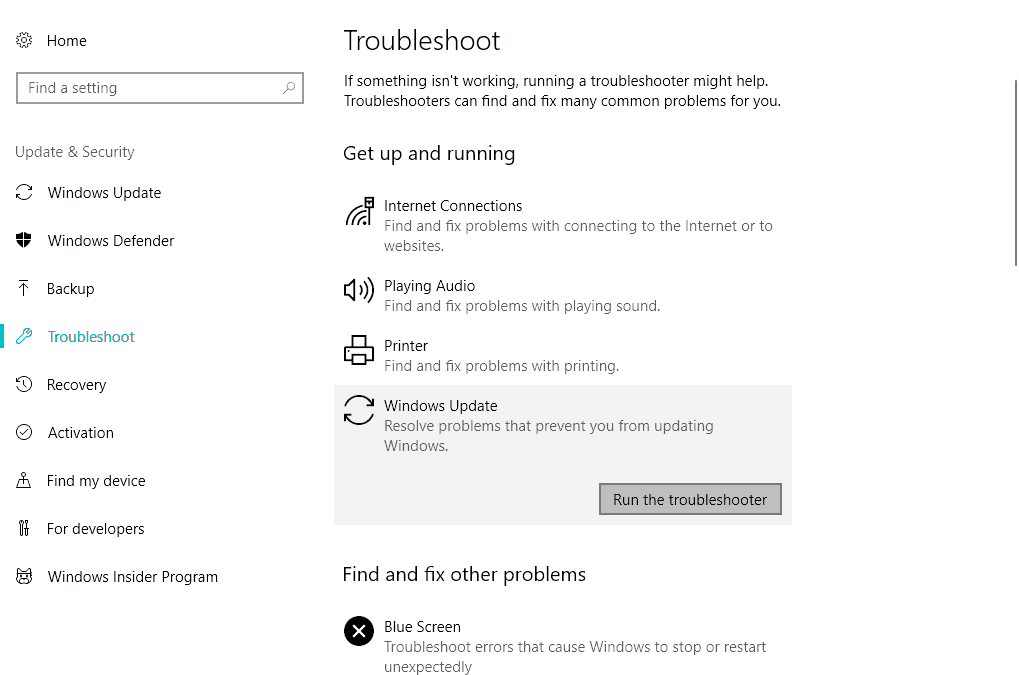
- Now, click Windows Update, and choose Run the troubleshooter.
- Follow further on-screen instructions.
Alternatively, you can use a third-party troubleshooting tool. Choose one from our great list.
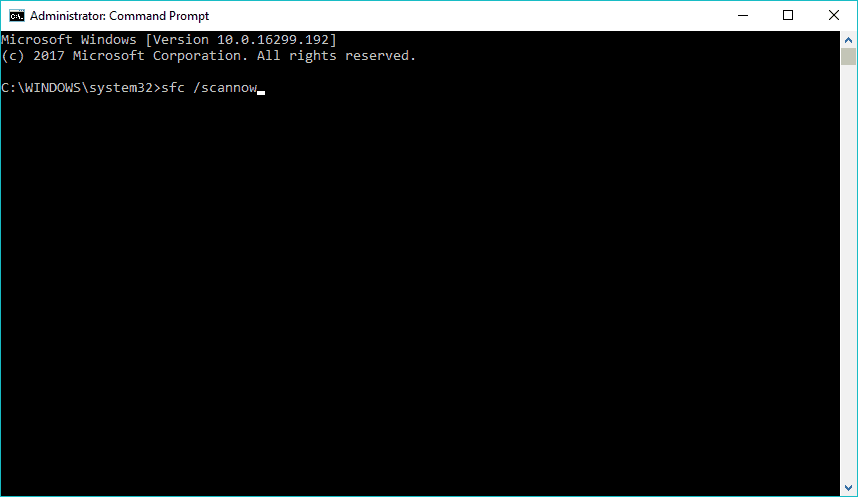
4. Run the SFC scan
- Go to Search, type cmd in the Search box, and then right-click on Command Prompt.
- Click on Run as administrator. (If you are prompted for an administrator password or for a confirmation, type the password, or click Allow).
- At the Command Prompt, type the following command, and then press ENTER: sfc /scannow
5. Run the DISM
- Open the Command Prompt as shown above.
- Enter the following command and press Enter: DISM.exe /Online /Cleanup-image /Restorehealth

- Wait for the process to finish.
- Restart your computer.
6. Flush DNS
- Start Command Prompt as administrator. To do that press Windows Key + X and choose Command Prompt (Admin) from the menu.
- When Command Prompt opens, enter the following lines before closing Command Prompt and restarting your PC:
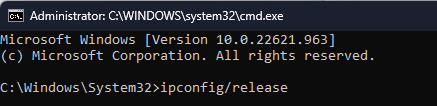
- ipconfig /release
- ipconfig /flushdns
- and ipconfig /renew
7. Disable UAC
- Go to Search and type user account. Choose User Account Control from the menu.

- User Account Control Settings window will appear. Move the slider all the way down to Never notify and click OK to save changes.

8. Reset Windows
- Press the Windows key + I to open the Settings app.
- Go to Windows Update.

- Select Advanced options.

- Click Recovery.

- Select Reset this PC.

- Select Keep My Files.

Wrapping up
We hope you managed to fix the Windows Update error 0x80248014, as well as the error with the same name that appears on Microsoft Store.
This isn’t the only error you’ll encounter, and we already wrote about 0x80d02013 in Windows Update and Windows Update error 0x80246019.
Lastly, don’t miss our Windows Update error 0x80244018 guide for more potential solutions.
Let us know how it went in the comments section below.
Read our disclosure page to find out how can you help Windows Report sustain the editorial team. Read more


Improve this guide

User forum
3 messages