FIX: Windows Update Service registration is missing/corrupt
Key notes
- Keeping your Windows system updated is a priority because it keeps your computer safe.
- If the Windows Update Service registration is missing or corrupt, you cannot update your OS.
- If you have any problems with the automatic updates, check the Microsoft Update Catalog.
- Our Windows 10 Hub is the most comprehensive part of our website, with lots of useful information.

Windows Update should be an essential aspect for every user of the Windows Operating System.
If the system does not get updated on time, it might face all kinds of problems such as security issues, performance issues, etc.
Quick tip:
Most computers get their updates automatically but sometimes, although the Update Service is set on the Automatic Mode, the system is not able to install the available updates.
If this happens, please try to run the Windows Update Troubleshooter first. Go to Settings, then to Update & Security, and click on Troubleshoot to launch the troubleshooter.
If this doesn’t fix the problem, you can use one of the methods described below.
How can I fix the Windows Update Service registration problem?
- Disable the antivirus software
- Check Windows Update Related Services
- Run Windows Update Commands
- Run a SFC scan
- Turn off and on the Windows Firewall
1. Disable the antivirus software
You can also try to turn off the antivirus software temporarily. Sometimes, your antivirus tool may prevent your computer from installing the latest updates.
As a result, simply disabling your antivirus may help you fix this problem. If it doesn’t you will need to remove your antivirus completely.
We say completely because by using the regular uninstalling technique, many programs leave some leftover files behind. In time, that file accumulation may lead to system slow down and other problems.
It’s extremely simple to use and once you run it, you will be amazed at the free space you will regain after the operation.
When you’re done with uninstalling the old antivirus and performing the OS updates, you shouldn’t leave your PC unprotected so we recommend switching to a safer and unobtrusive antivirus.
You can find Windows 10 compatible antivirus software that won’t interfere with your system or the update process, while also being light on your PC.
Make sure to get an antivirus software with a large and frequently updated threat database, multi-layers of protection, a powerful firewall, as well as a transparent privacy policy.
2. Check Windows Update Related Services
1. Press the Windows key + R shortcut.
2. Type services.msc and press Enter.

3. Locate the Windows Update Service, Background Intelligent Transfer Service, and the Cryptographic
Services.
4. Right-click on each of the services and select Properties.
5. In the Startup type field, please select Automatic from the list.

6. Click Start under the Service status.
7. Click OK.
Make sure you follow the above steps for all three mentioned services.
3. Run Windows Update Commands

1. Search for command and click on Run as administrator to open Command Prompt.
2. Copy and paste the commands below one by one:net stop wuauserv net stop cryptSvc net stop bits net stop msiserverren C:WindowsSoftwareDistribution SoftwareDistribution.old ren C:WindowsSystem32catroot2 catroot2.old net start wuauserv net start cryptSvc net start bits net start msiserver
3. Wait for the process to complete and then close the Command Prompt. Restart your computer and check if the issue persists.
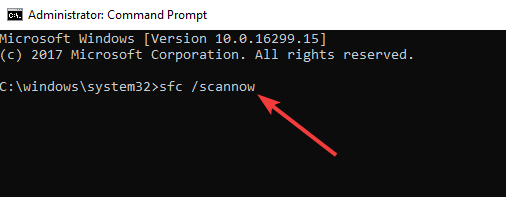
4. Run an SFC scan
1. Open Command Prompt as an administrator as shown in the previous solution.
2. Type sfc /scannow and hit Enter
3. Wait for the process to complete and then check if you can install the updates.
5. Turn off and on the Windows Firewall
1. Open Control Panel
2. Click on Windows Firewall
3. Select Turn Windows Firewall on or off (in the left pane)

4. Check the button next to turn off Windows Firewall (not recommended) then click the OK button
5. After the Windows Update error is solved, don’t forget to turn back on the Windows Firewall performing the same steps.
This issue can lead to 0x8024001e error in Windows Update and other problems, so be sure to address it as soon as you can.
We hope that one of the methods listed above helped you fix the problem. If you come across other solutions to fix this issue, let us know in the comments below.
Read our disclosure page to find out how can you help Windows Report sustain the editorial team. Read more


Improve this guide


User forum
0 messages