What is Wisptis.exe & Should You Disable it?
Disabling it isn't recommeded for those who use pen-enabled devices
Key notes
- Although wisptis.exe is a legitimate Windows file, it may cause a number of issues.
- Terminating it with Task Manager won't do as Windows automatically restores it in a reboot.
- To disable it, you can use the Local Group Policy Editor or Command Prompt.
Many users have reported that the wisptis.exe process has caused problems for their OS, including consuming high memory. This begs the question of whether it’s safe to remove it because it’s a Windows component.
If you’ve also run into the same issue, keep reading for some effective solutions.
What does wisptis.exe do?
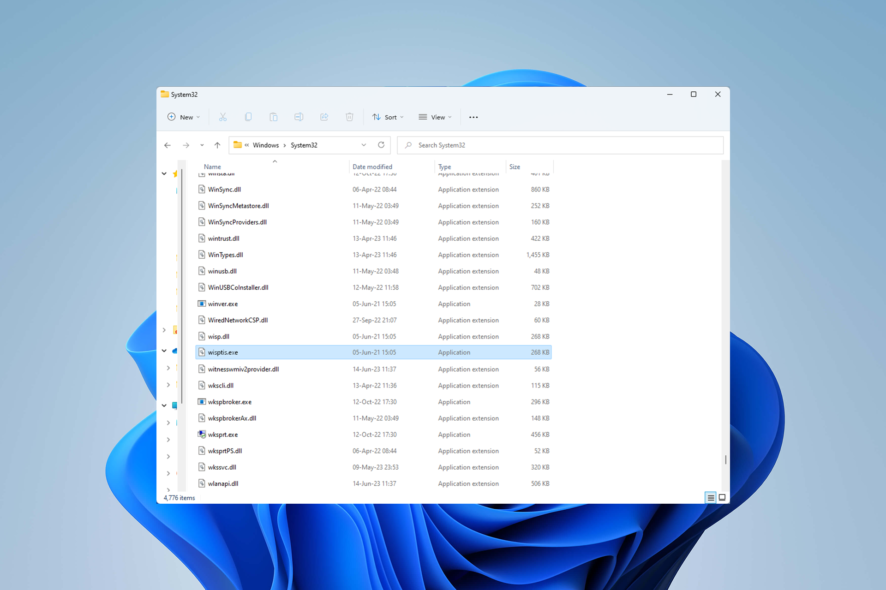
The wisptis.exe system file is an abbreviation for Windows Ink Services Platform Tablet Input Subsystem. It’s part of the Windows Ink Workplace, the service enabling handwriting on office and note-taking software.
The executable gets automatically installed along with any Microsoft Office, Adobe, or Journal viewer software.
Is wisptis.exe safe?
The wisptis.exe file is a legitimate Windows one. However, that doesn’t mean it can’t damage your computer. The problem with the file is that it remains active in the background even when no touch screen or pen input is available or used by the system.
This consumes many system resources, slows your CPU, and can even harm other software. So, while it might be safe to stay, as it’s a legitimate file, do you even need it on your PC?
Disabling it isn’t recommended for most users, especially touch screens and pen-enabled devices. The executable’s vital for the optimal performance and functionality of note-taking, drawing, or design apps.
However, if you do not own such a device or do not intend to use any pen input component, disabling the process might free up some valuable system resources and positively impact your PC performance.
You can terminate the wisptis.exe process from Task Manager, but this is just a temporary solution. Windows is set to automatically restore it every time you reopen an app that needs it or reboot your computer.
Scroll down below for some effective solutions to ensure that wisptis.exe remains disabled.
 Tip
Tip
How can I stop wisptis.exe?
1. Disable the process from auto-start using Command Prompt
- Press Windows + S to open the Start menu. Search for Command Prompt and click on Run as administrator.
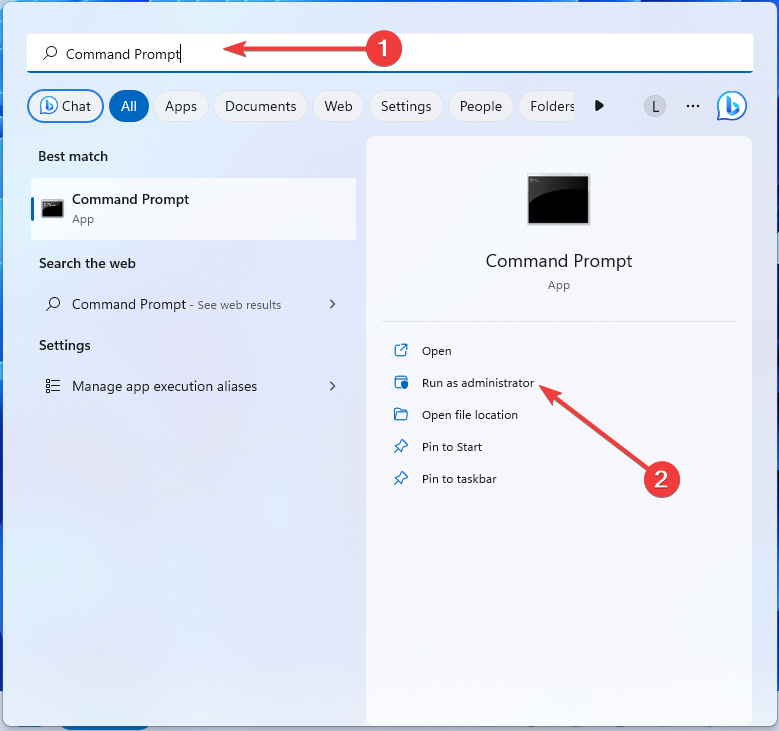
- A UAC (User Account Control) message will appear. Click Yes to confirm.
- Type in the following commands sequentially and press Enter after each one:
%systemdrive%cd %windir%\system32takeown /f wisptis.exeicacls wisptis.exe /deny “NT AUTHORITY\SYSTEM”:(RX) - Restart your PC.
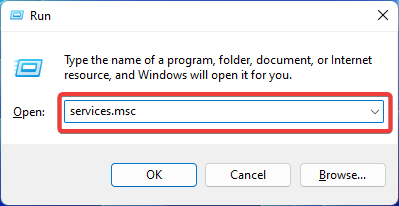
2. Disable the App-V client
- Press Windows + R to open the Run window, type services.msc into the search box, and press Enter.
- Navigate to the Microsoft App-V client and right-click on it. Open Properties.
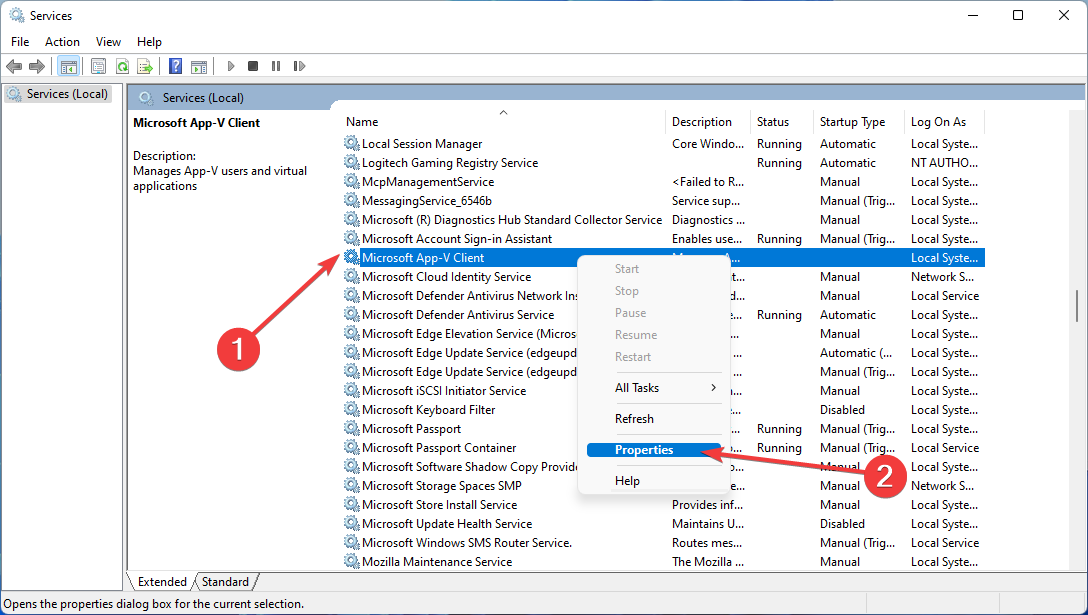
- In the General tab, find Startup type and choose Manual. Then, under the Service status option, select Stop.
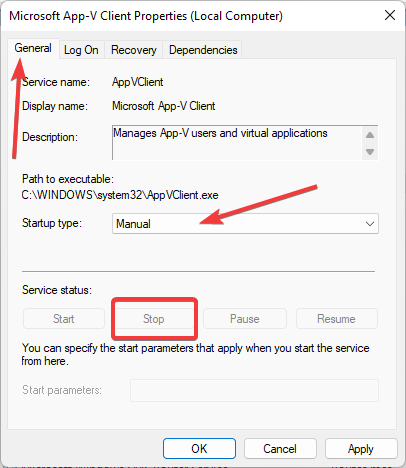
- Click on Apply and then OK.
- Reboot your PC.
Keep in mind that if disabling the App-V client harms your computing experience, you can re-enable it by following the steps above, but this time choosing Automatic under Startup type, followed by another restart.
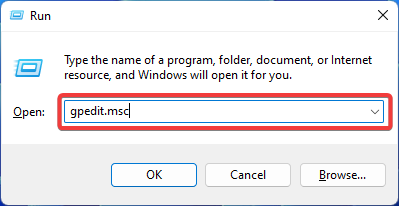
3. Use the Local Group Policy Editor
- Press Windows + R to open the Run dialog. Type gpedit.msc into the search box and press Enter.
- Click on Computer Configuration on the left-hand side. Open Windows Settings and then choose Security Settings.
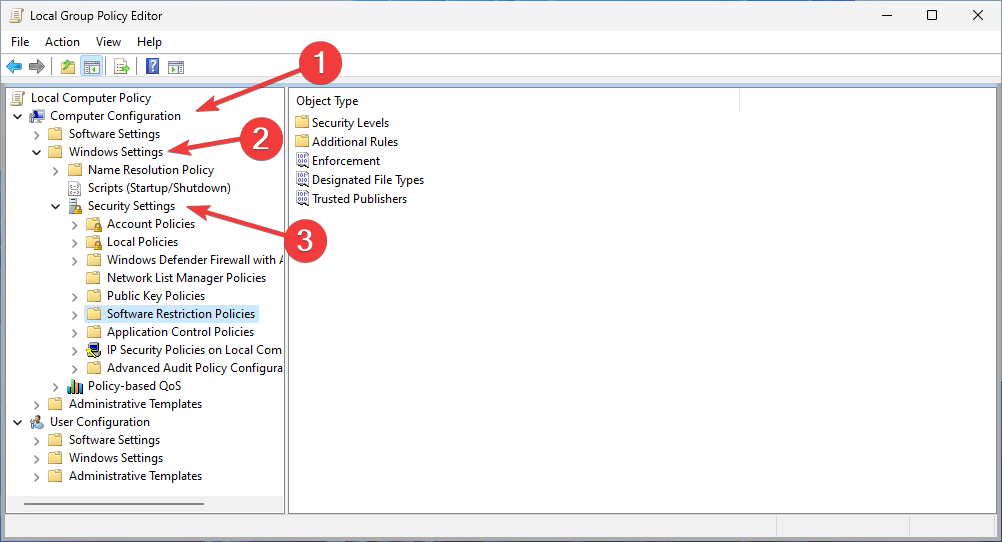
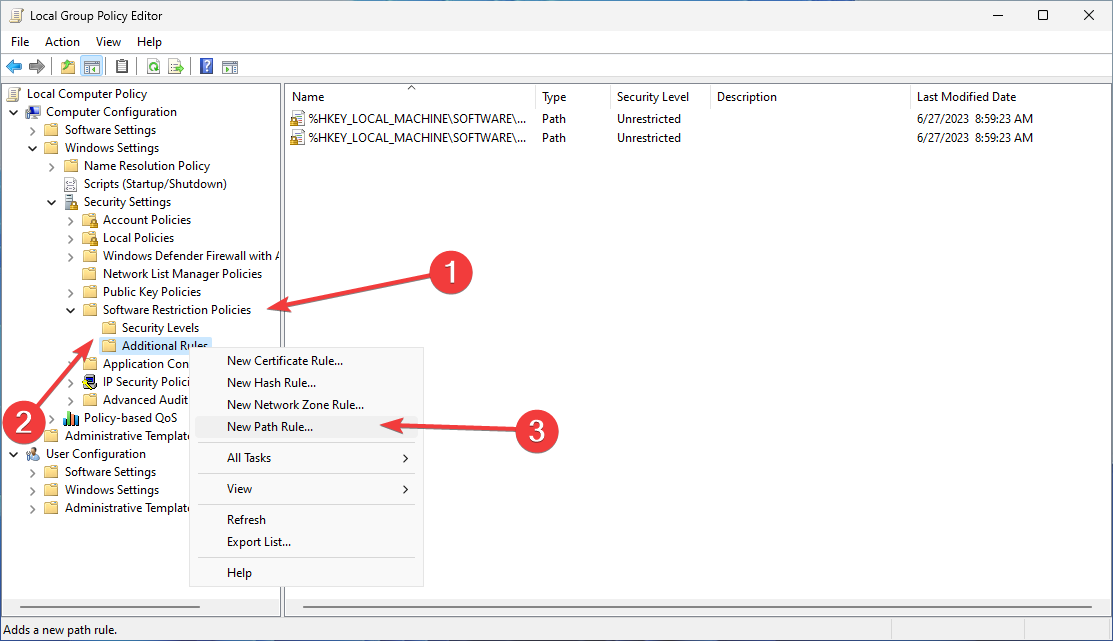
- Find Software Restriction Policies and open it. Right-click Additional Rules, and choose New Path Rule.
- Press Browse, find the location of the wisptis.exe process, and click OK. Then choose Disallowed from the drop-down menu under the Security level section.
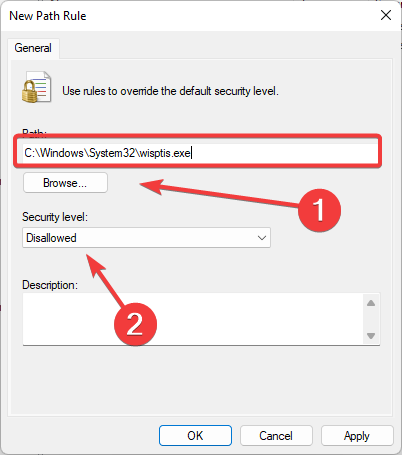
- Press Apply.
So that’s how you disable the wisptis.exe process. Additionally, you may disable the entire Windows Ink Workplace feature.
Did the above methods work for you? If you need further assistance or have any questions, kindly drop them in the comments section below.
Read our disclosure page to find out how can you help Windows Report sustain the editorial team. Read more


Improve this guide


User forum
0 messages