What is Wup.exe & How to Stop Its High CPU Usage?
Limit CPU usage of the process
Key notes
- One of the most annoying issues a Windows computer can have is high CPU usage by a non-essential process.
- Wup.exe is one of these files and in this article, we will provide you with information on what it is, how it affects your computer, and steps on how to stop it from affecting your PC adversely.

It’s easy to find yourself at the mercy of a virus such as wup.exe in your system, especially if you do not practice safe browsing habits. If left to linger around in your PC for an extended period, such malicious files can render your device inoperable.
Most of the reports indicate that it is consuming too much CPU, but this is just one of the side effects. So how do you stop this file from hogging your system resources? Find out below.
What is the wup.exe file?
The wup.exe file is a malicious program typically used by cybercriminals to steal information. It can be installed on your PC without your knowledge through the use of a trojan horse or spyware. The program will then run in the background and perform various tasks.
If the wup.exe file isn’t removed from your computer, it can cause a variety of problems, including:
- Slow computer performance
- System freezes or crashes
- Poor internet connection speed
- New tabs opening on web browsers with no reason
- Unwanted programs being installed on your computer without permission
How can I stop wup.exe high CPU usage on my PC?
1. End the process
- Hit the Windows key, type Task Manager in the search bar, and click Open.
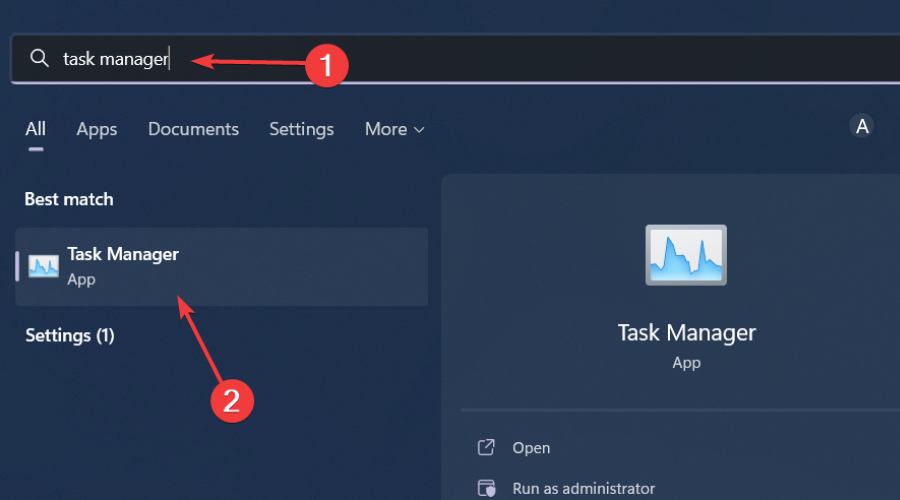
- Navigate to the Processes tab, find wup.exe, right-click on it, and select End task.
2. Limit CPU usage
- Click on the Start Menu icon, type Task Manager in the search bar, and click Open.
- Navigate to the Details tab.
- Right-click wup.exe, and select Set affinity.

- Now uncheck all CPUs if you don’t want the wup.exe using any processor.

Manually limiting the process via the Task Manager works well most of the time but some viruses are known to be self-replicating so once you limit its usage, it can create another similar process and you’ll be back to square one.
If you want to make sure that your CPU doesn’t get bogged down by something like this, then you can opt for advanced resource monitor software that can also limit CPU usage for you.
3. Update your OS
- Hit the Windows key and click on Settings.

- Click on Windows Update then select Check for updates.
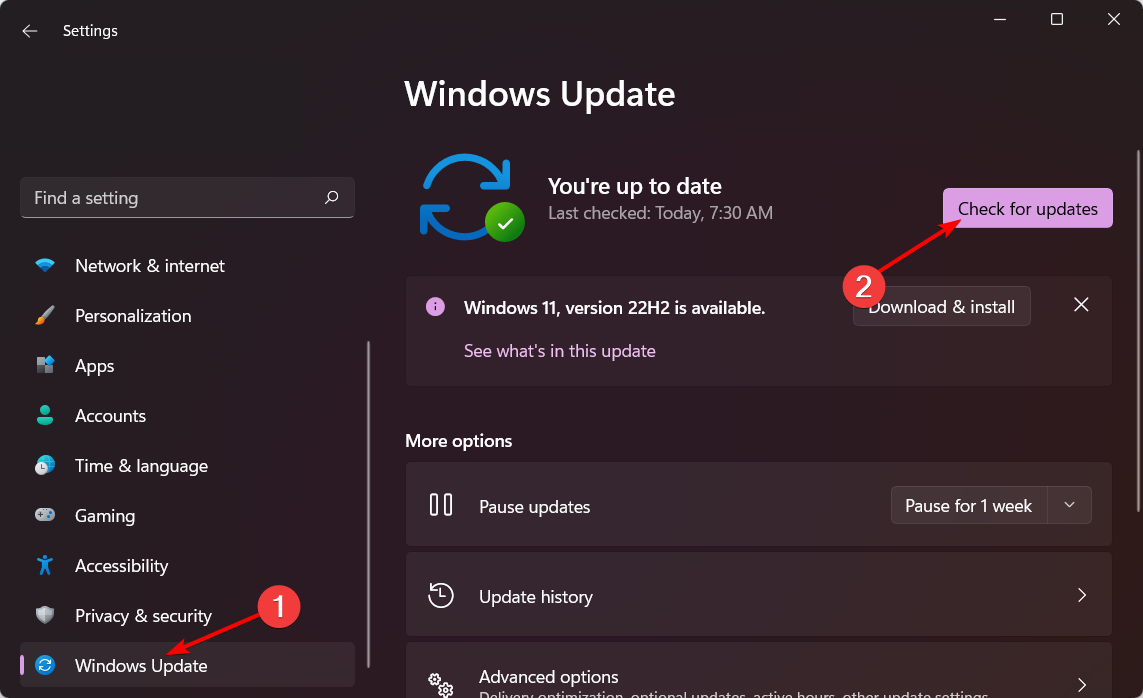
- If available, Download and install.
4. Run DISM and SFC scans
- Hit the Start Menu icon, type cmd in the search bar, and click Run as administrator.

- Type the following commands and press Enter after each one:
DISM.exe /Online /Cleanup-Image /Restorehealthsfc /scannow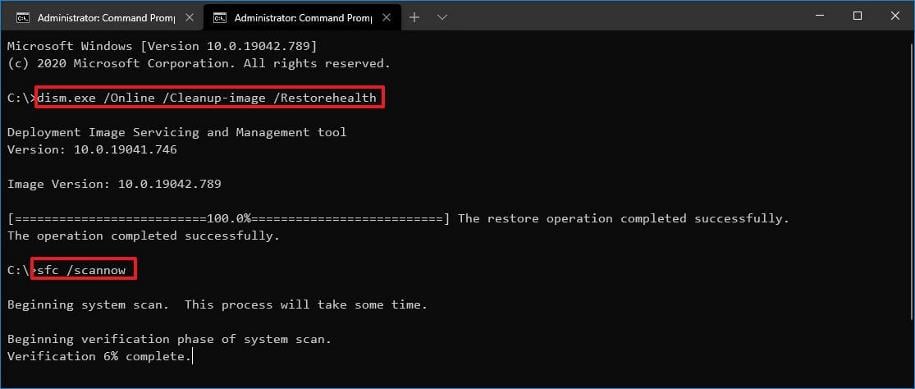
5. Remove viruses and malware
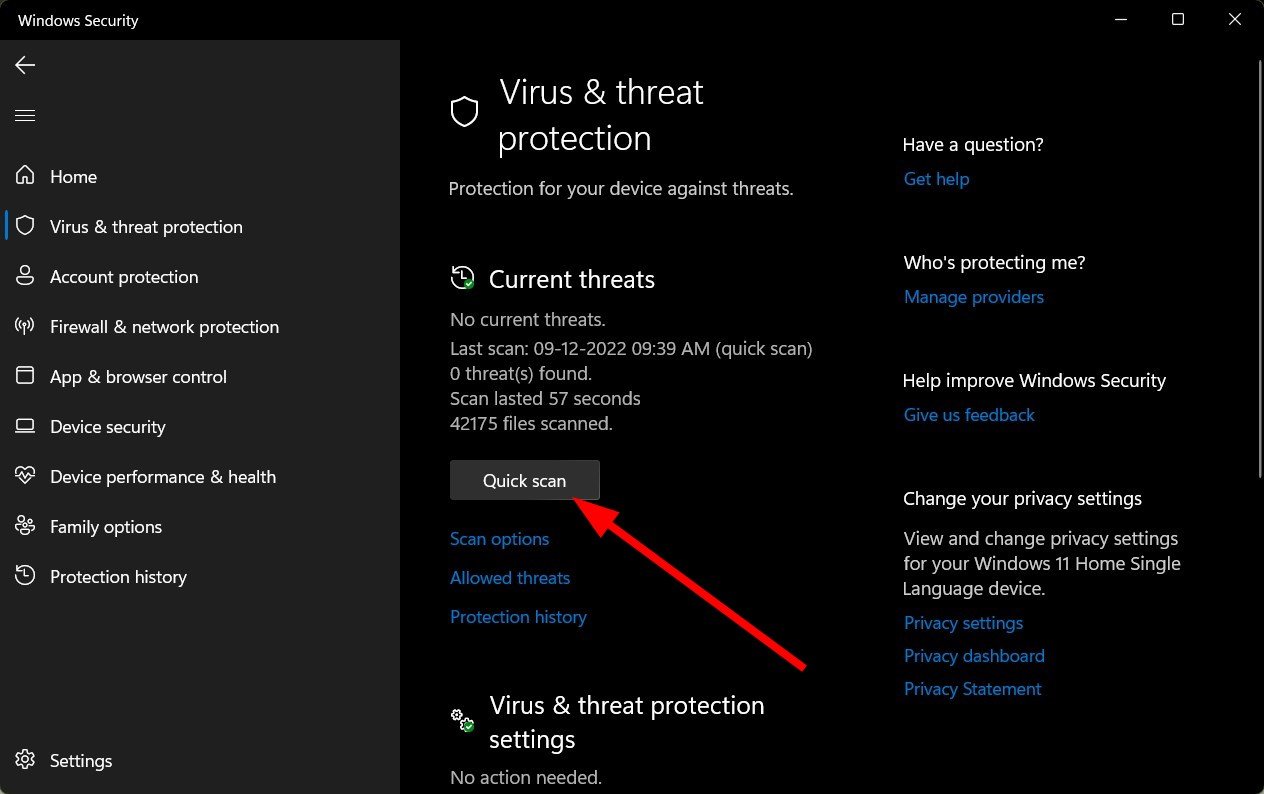
- Press the Windows key, search Windows Security, and click Open.

- Select Virus & threat protection.
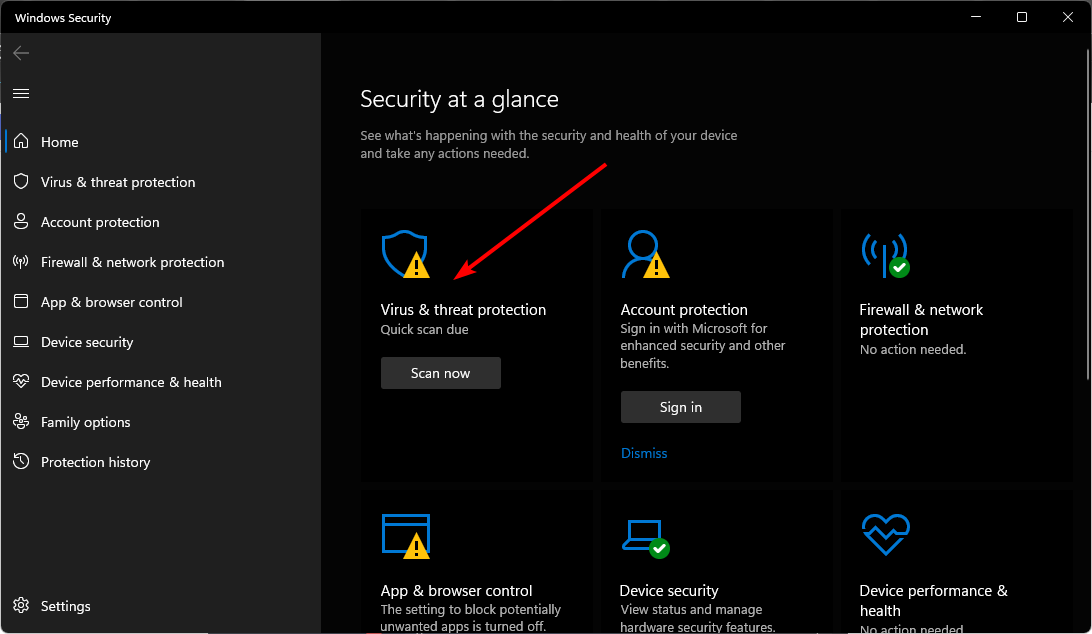
- Next, press Quick scan under Current threats.
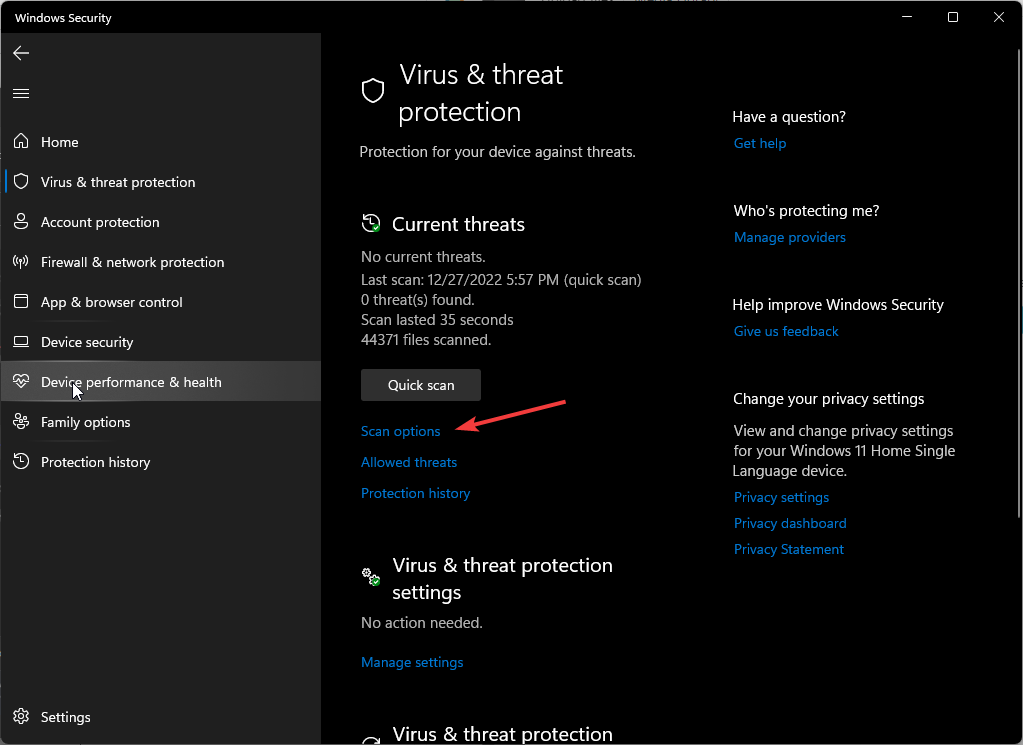
- If you don’t find any threats, proceed to perform a full scan by clicking on Scan options just below Quick scan.
- Click on Full scan, then Scan now to perform a deep scan of your PC.
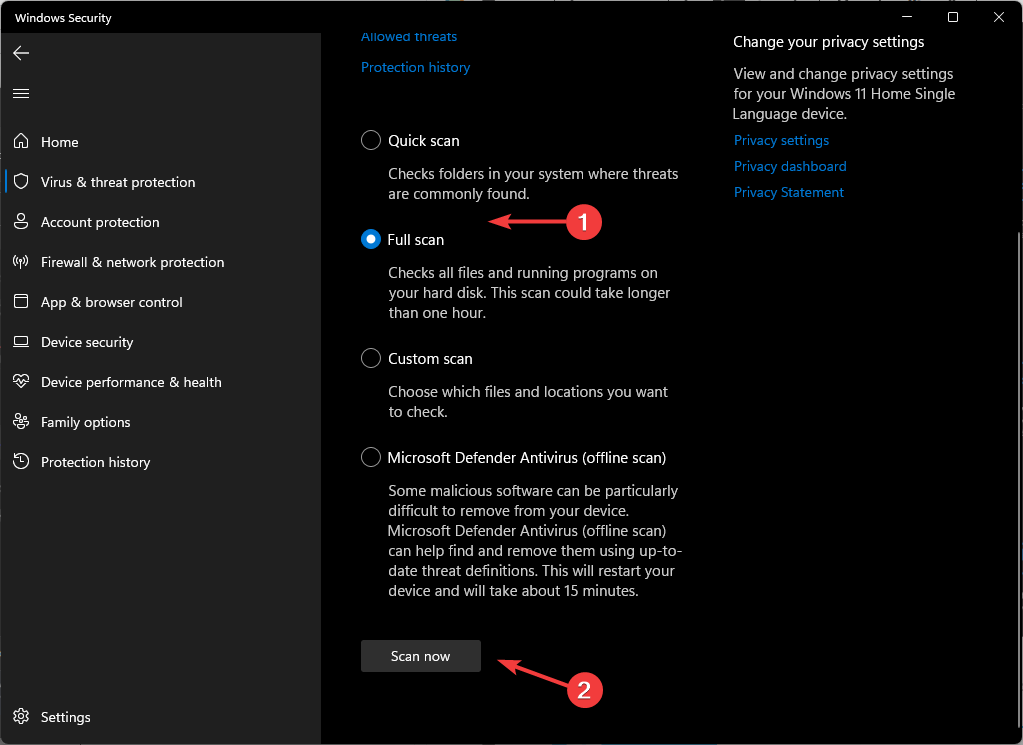
- Wait for the process to finish and restart your system.
Windows Defender is your best bet for protecting yourself from malware and viruses. But if you’re looking for more, then you might want to look into another third-party antivirus solution.
It does a good job at detecting viruses and malware, but it doesn’t always catch everything, especially those known for being difficult to detect. That’s why we recommend using ESET NOD32, which has top-notch detection rates and advanced protection features.
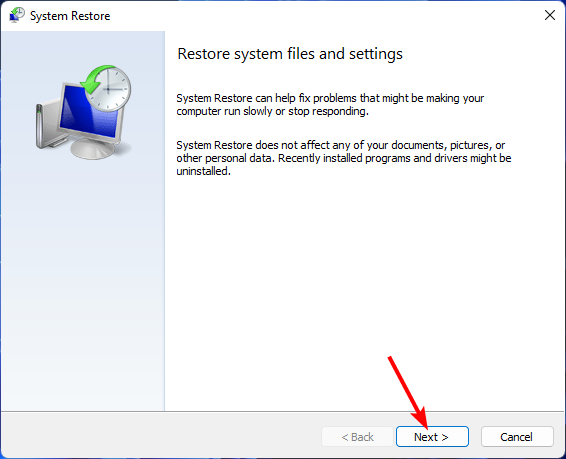
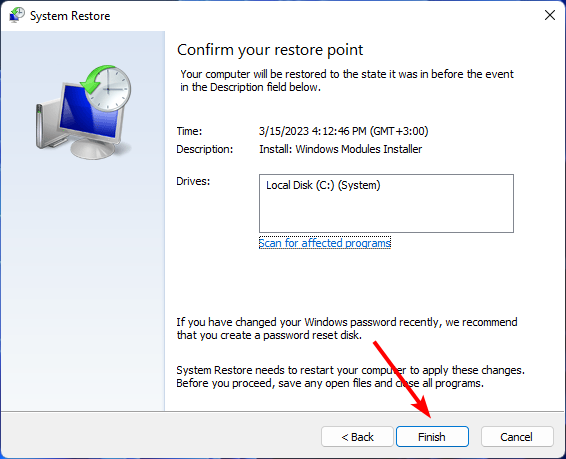
6. Restore your system to an earlier point
- Press the Windows + R keys, type rstui, and hit Enter.

- The System Restore window will open. Click on Next.
- Select the restore point you wish to revert to and click on Next.
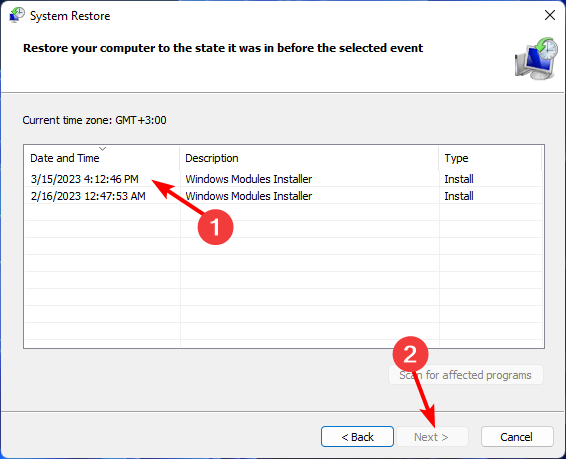
- Now click on Finish.
By using the methods mentioned above, you can stop the high CPU usage of the wup.exe file and protect your computer from further damage.
However, this will not be the last of the malicious programs on your PC. You might even run into more advanced malware that does more than consume your CPU.
At the very least, securing your system should be a non-negotiable. A good antivirus should always be part of your security system. For an extra layer of protection, you can install antiviruses for browsers or use a browser like Opera that already has its built-in antivirus.
Leave any additional thoughts in the comment section below.
Read our disclosure page to find out how can you help Windows Report sustain the editorial team. Read more


Improve this guide


User forum
0 messages