Fix: XPS option is not enabled error
Key notes
- Printer errors such as The job was not printed because the XPS option is not enabled might appear for any printers from Xerox, Canon, or others.
- Typically, a Windows configuration to (re)enable XPS options or a printer driver update will make the issue go away.
- Having a different error? Check out our printer error troubleshooting section for common issues, fixes, and more.
- Take a look at the Document Management section for related articles on software and recommendations for your documents.

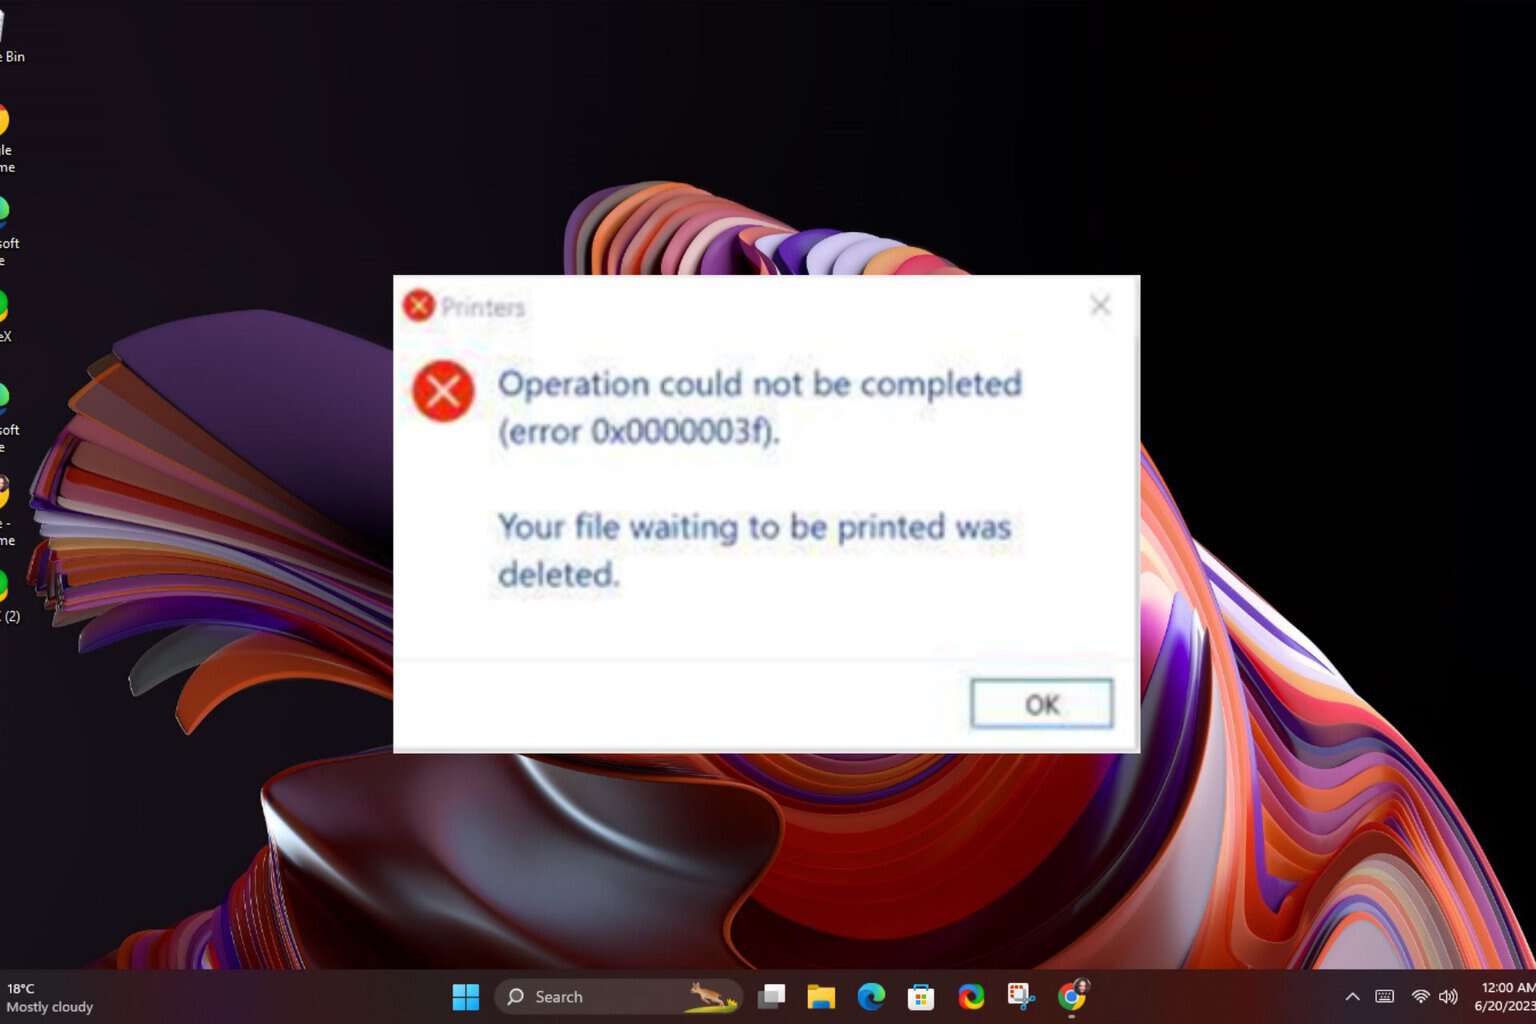
Printer errors such as The job was not printed because the XPS option is not enabled. Contact System Administrator to enable XPS on this device are not uncommon, especially when you are trying to connect to the printer via Wi-Fi.
This specific issue is usually related to class drivers or system conflicts. This is extremely inconvenient, so in this guide, we’ll show you a few potential fixes for the error.
What to do if the job was not printed because the XPS option is not enabled?
1. Reconnect the printer’s power supply

The first thing you’re going to try is to turn the printer off and remove the power cord from the wall outlet. Then, pull out the power cord from the power supply.
After one minute, reconnect the power cord into the power supply and then plug the power cord into the outlet. You may turn the printer back on and see if the issue persists.
2. Download the PS driver for your device

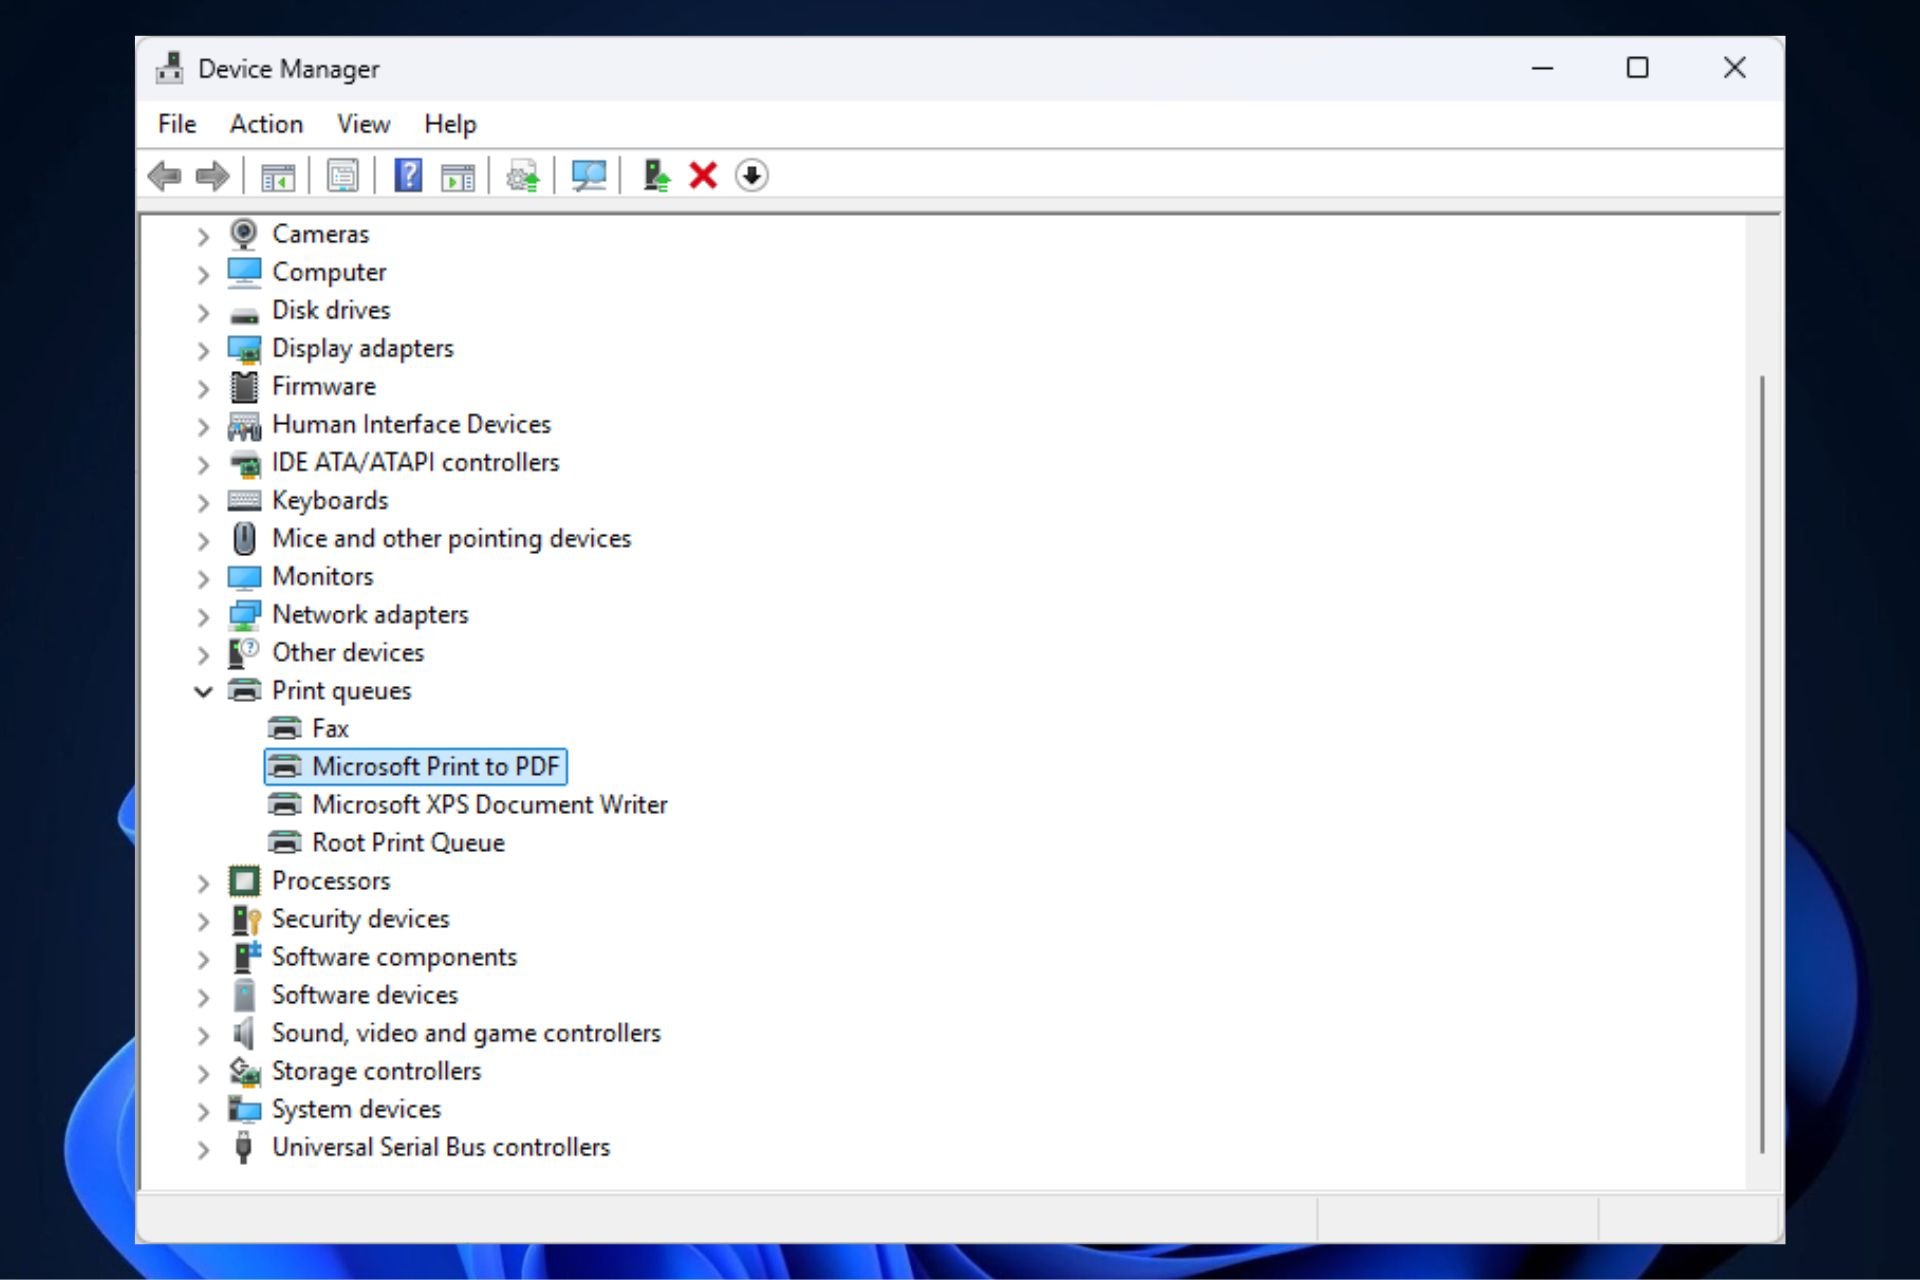
That error typically means a class driver is being used on Windows 8 or Windows 10. Luckily, there is an easy fix if you’re still seeing it after reconnecting the power supply. You need to determine if you are using a class driver, so check the installed printers.
If there is one that is XPS, or a Class Driver, uninstall or remove it. Up next, navigate to the support page for your machine and select the Drivers & Downloads tab. Download the PS driver for your device.
Then, make sure that Query the printer and automatically select the driver to use is not checked when installing the driver. If it is checked, note that you will not be asked to use the driver you just downloaded and extracted. Finally, you may restart your computer and print.
3. Enable XPS option on your PC

- Quickly open the Control Panel.
- Click on Programs next.
- Click on Turn Windows features on or off.
- In the Windows Feature, look for XPS Service. After finding it, just click the checkbox next to it.
- Click OK.
- Wait until the configuration process completes.
- Once done, go to Control Panel > Devices and Printers and check if the Microsoft XPS Document appears.
Your printer does not support XPS unless you paid for that feature. The Microsoft XPS Document Writer (MXDW) is a print-to-file driver that steps in when it comes to enabling a Windows application to XPS files.
Follow these steps to enable the XPS option on your Windows 10 PC connected to the printer.
4. Update the printer driver software

- In the search box on the taskbar, enter Device Manager.
- After that, select Device Manager.
- Select a category to see names of devices, then right-click the printer you’d like to update.
- Select Search automatically for updated driver software.
- Finally, just select Update Driver.
- If any updates are available, they will be downloaded automatically in the background. Once the updates are installed, check if the problem is still there.
One aspect that doesn’t usually get much attention is updating the printer driver software. Printer drivers are software programs, and their function is to convert the data you command to print to the form that is specific to the installed printer.
Even if Windows 10 usually installs the missing updates automatically, it cannot hurt to look for any missing updates by following the above steps.
5. Use the troubleshooter to fix all emerging problems

- Press the Windows logo key + R keyboard hotkey to open the Run dialog box.
- Type control in the Run dialog box and hit Enter.
- In the Search box in Control Panel, type troubleshooter.
- Up next, click Troubleshooting.
- Under the Hardware and Sound item, click Use a printer.
- Enter an administrator password or provide confirmation when prompted.
- Press Next and let the troubleshooter scan for problems.
- Fix all emerging problems.
If you can’t get rid of this error, using the troubleshooter might help to solve the problem. This will restart your printer and drivers and check for any errors. Your printer must be connected during this procedure.
If you’re trying to print and encounter the XPS option not enabled error, we’ve listed some solutions on how to fix it. If you found our article useful, feel free to let us know by leaving a comment below.
Also, keep in mind that there are various other posts on printers. Just use the search function to find the articles you need to fix your printer issues or take a peek here.
[wl_navigator]
Read our disclosure page to find out how can you help Windows Report sustain the editorial team. Read more


Improve this guide
User forum
0 messages