Fix: You Don't Have Permission to Access Minecraft.net
Certain extensions and proxy server settings cause access issues
4 min. read
Updated on
Read our disclosure page to find out how can you help Windows Report sustain the editorial team. Read more
Key notes
- Minecraft.net is the official website for Minecraft where you can buy the game and enjoy some resources.
- However, sometimes the website will deny you access to enter the website.
- This guide will show you how to regain access to Minecraft.net.
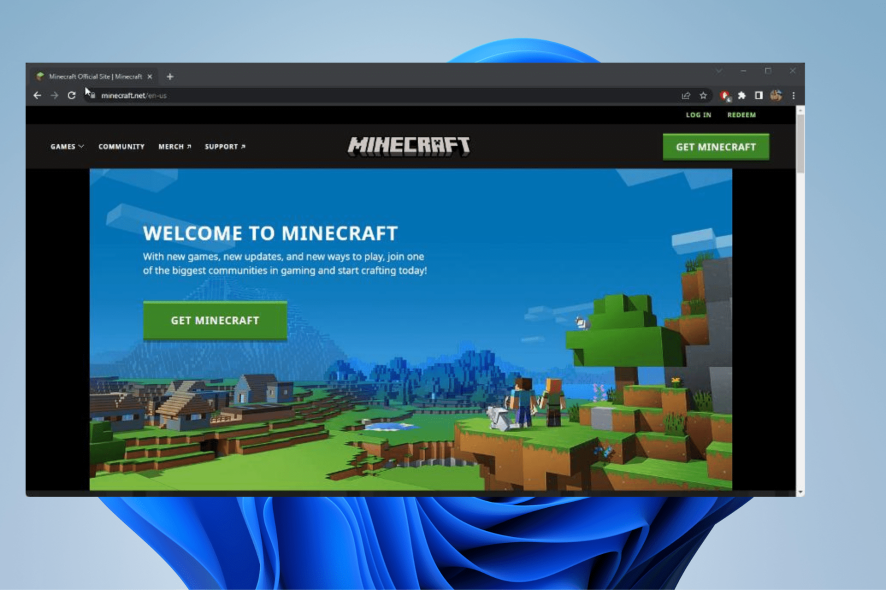
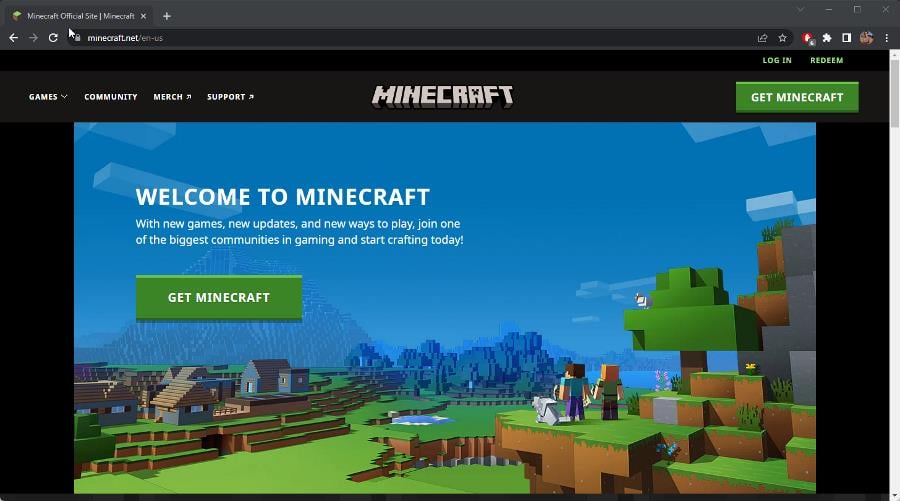
Minecraft.net is the official website for the video game Minecraft where players can sign up and purchase the title. It’s also a one-stop shop for Minecraft-related news, fan creations, merchandise, and a helpful library of resources.
Having access to Minecraft.net is pretty invaluable so you can imagine not having access to the website to be pretty debilitating. There are multiple reasons as to why access denial occurred and this guide will help you overcome this.
Why do I not have permission to access Minecraft?
For starters, the website could just be under maintenance. This happens randomly so if you encounter this, just come back later. Other times, you may have to clear browser data.
We also recommend resetting your browser to solve this problem. Some people have complained that certain extensions and proxy server settings have caused access problems too.
This guide will show you on to fix this problem on Firefox and Chrome which are two of the most popular web browsers out there.
Quick Tip:
Instead of fixing this issue on Minecraft on your own, you have an easier alternative to change your browser to Opera GX.
This way, you have quicker and more flexible navigation for accessing joyful games features like GX Corner or system resources optimization.

Opera GX
Take this opportunity to utilize this flexible and fully secured browser to access Minecraft easily.How can I fix you don’t have permission to access Minecraft.net?
1. Clearing out browser data
- On Firefox, press the CTRL, SHIFT, and DEL keys at the same time. This will open the Clear Recent History menu.
- In the new window, make the boxes next to Browsing & download history, Cookies, and Cache are checked.
- Click OK to erase everything.
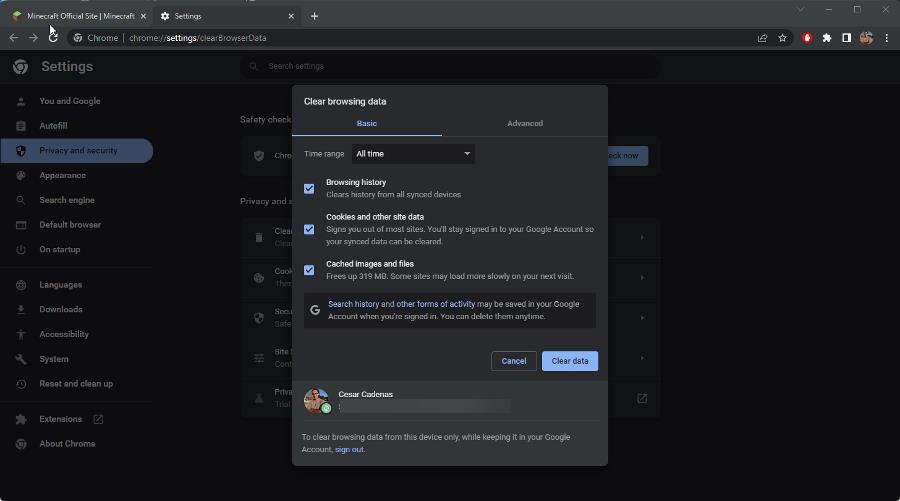
- On Chrome, you can also press CTRL, SHIFT, and DELETE to open the Clear browsing data menu.
- Make sure the boxes for Browsing history, Cookies and other site data, and Cached images and files are checked off.
- Click the Clear button to erase everything.
2. Reset the browser
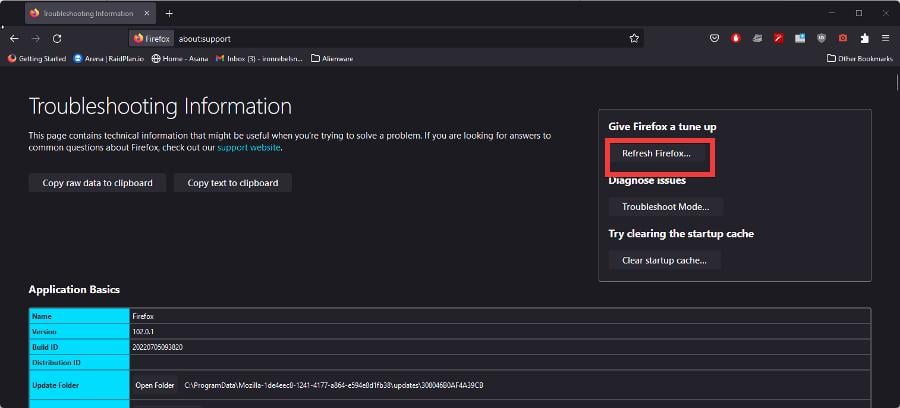
- In Firefox, type in about:support into the address bar and hit Enter on your keyboard.
- On the right-hand side, click the Refresh Firefox button.
- A window will appear telling you that resetting the browser will remove all your extensions and customizations. Essentially, the browser will return to its default settings.
- Click the red Refresh Firefox button.
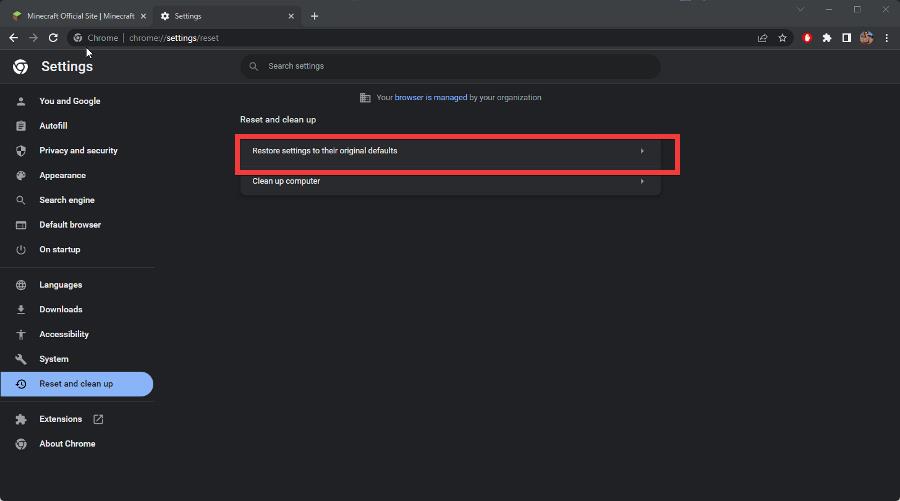
- On Chrome, type in chrome://settings into the address bar and hit Enter on your keyboard.
- Click Reset and clean up on the left-hand menu.
- Click Restore setting to their original defaults in the middle.
- In the new middle, click the Reset settings button.
3. Disable extension
- Some people have complained that certain extensions cause the access problem. Dark Reader in particular has been known to cause a lot of problems.
- In the address bar, type about:addons into the address bar and hit Enter.
- Click the toggle switch next to an extension to disable it.
- Conversely, you can click the three dots next to the extension to make a context menu appear.
- Click Remove to get rid of the extension.
- On Chrome, type chrome://extensions into the address bar and hit Enter.
- Scroll down to the extension you want remove.
- You can either click the toggle switch to turn it off or click Remove.
- A small window will appear. Click the Remove button.
4. Disable proxy server
- Click the magnifying glass icon and search for Internet Options.
- Click the entry that appears.
- In the Internet Properties window, select the Connections tab.
- Click the LAN settings button located at the bottom of the window.
- Make sure the box next to Use a proxy server for your LAN is turned off. If it isn’t, click the box to turn it off.
- Click OK to close the window and finish.
How do I allow Minecraft through my firewall?
Sometimes your computer’s firewall will prevent you from playing Minecraft as it won’t recognize the game and see it as malicious. To get past this, you’ll have to give the game permissions in the firewall.
You can do this by opening Windows Defender Firewall and select the option that reads Allow an app or feature through Windows Defender Firewall. Click Change settings then Allow another app.
Find the Minecraft app on your computer and then click Add to give the game Firewall permissions.
Feel free to leave a comment below if you have any questions on Minecraft updates. Feel free to leave comments about guides that you’d like to see or other information.





User forum
1 messages