2 Ways to Use BSOD Viewer to Diagnose Blue Screen Crashes
Learn how to explore the features of the BSOD viewer tool
![]() 3 min. read
3 min. read
![]() Updated on
Updated on
Share this article

Improve this guide
Read our disclosure page to find out how can you help Windows Report sustain the editorial team Read more
Key notes
- New Windows platforms have become more intuitive and user-friendly, but the BSOD errors error.
- To see the details of these errors, you need to use a BSOD viewer for Windows 10.
- Using a specialized BSOD fixer, you can also fix the blue screen error.
The Blue Screen of Death (BSOD) is the most dreadful error on Windows PCs. It usually denotes a severe problem with your device and serves as a halt command to prevent damage.
When a BSOD error shows up, Windows creates a minidump file containing this error’s details. To make it easy to understand the technical jargon and codes in the minidump file, you need a BSOD viewer or analyzer on Windows 10.
In this guide, we have detailed how to use the popular BSOD viewer on Windows 10, known as BlueScreenView.
What is a BSOD viewer?
A BSOD viewer or analyzer is a tool that dissects everything about the minidump files created during a blue screen error. Examples of these tools include BlueScreenView and WinDbg.
BlueScreenView, the most popular and commonly referred to as just BSOD viewer, is a portable tool that analyzes any blue screen error like cldft.sys. You can use this tool from a USB drive without installation.
You only need to run the executable file, and it will get to work immediately. BlueScreenView shows the minidump file and the drivers or modules loaded when it was created.
This lets you know the cause of the issue. Lastly, this BSOD viewer has a feature that allows you to search online for possible solutions.
How can I use BSOD viewer?
1. View and analyze the BSOD
- Download and install the BlueScreenView app from the official site.
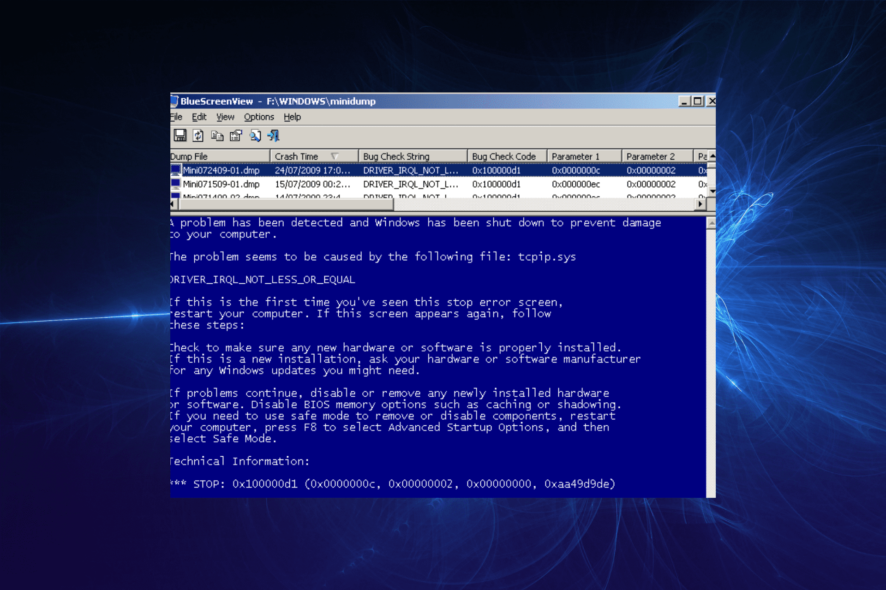
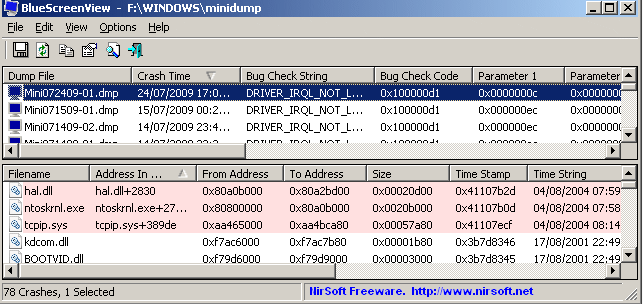
- Run the executable file, automatically analyzing the minidump files created on your PC.
- Check the upper pane for the minidump files and the lower pane for the drivers/modules causing the issue.

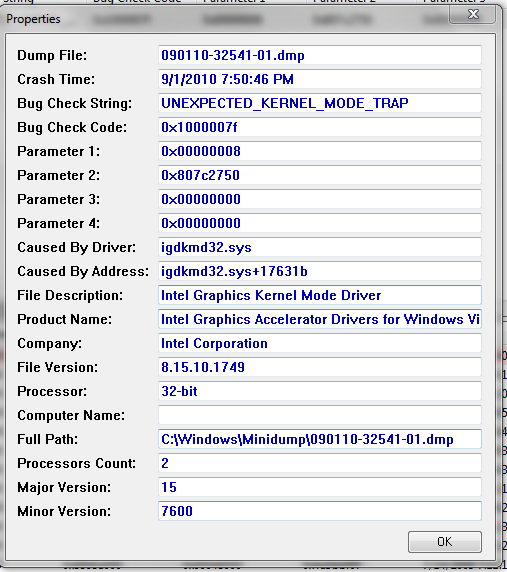
- Double-click on a driver to view its properties and error details in a table.

- To find a solution to a problem online, right-click on any driver/module in the lower pane and select Google Search – Bug Check + Driver, Google Search – Bug Check + Parameter 1, or Google Search – Bug Check.
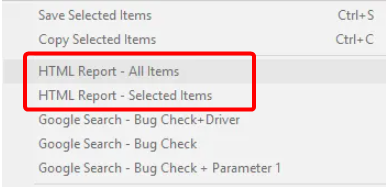
- To send a report to someone else, right-click on a minidump file and choose either HTML Report – All Items or HTML Report – Selected Items.

- Finally, to save a report for future use, right-click the minidump file and select the Save Selected items option.
This BSOD viewer tool has so many more functions. However, the features listed above are the most important.
To get a full pique into its other features, download the BlueScreenViewer BSOD analyzer online and explore it to the fullest.
2. Repair BSOD with a dedicated tool
BSOD errors repeatedly occur for all Windows users and are usually caused by faulty or outdated drivers, as shown by the BSOD viewer app. To prevent this problem, you need to make sure that your PC runs optimally at all times.
The BlueScreenViewer BSOD viewer is a helpful app that allows even the least tech-savvy person to get to the root of a blue screen error. To use the tool effectively, you only need to follow the instructions in this guide.
If you need a list of the best BSOD fixer tools, check our carefully curated list for the top available options.
Feel free to let us know the feature you enjoy using in the BlueScreenViewer app in the comments below.