Mutex Level Number Violation BSOD: 7 Ways to Fix it
Check for any conflicting software or drivers
Key notes
- To fix the MUTEX_LEVEL_NUMBER_VIOLATION BSOD, uninstall conflicting apps, update the drivers, or perform an in-place upgrade.
- The error usually appears due to conflicting apps or outdated/incompatible drivers.
- Read this guide to find out how our Windows Report experts fixed things in no time!
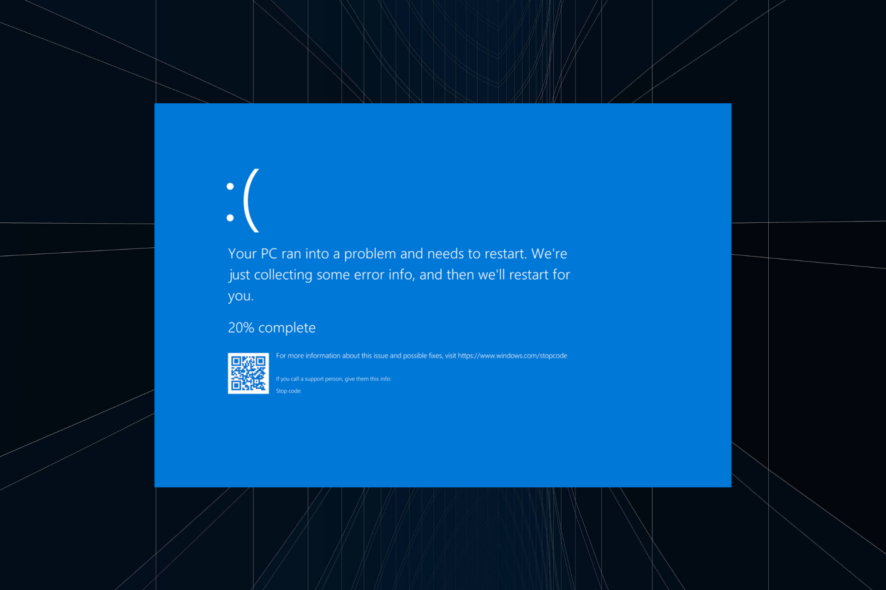
The MUTEX_LEVEL_NUMBER_VIOLATION BSOD error is rather uncommon in Windows, but this also makes troubleshooting all the more difficult. A quick Internet search doesn’t yield any productive results, nor do you get any solutions for it.
Also, it was primarily encountered on the earlier iterations of the OS and reported cases of MUTEX_LEVEL_NUMBER_VIOLATION on Windows 10 are few. So, let’s get straight to it!
What is the MUTEX_LEVEL_NUMBER_VIOLATION BSOD?
The MUTEX_LEVEL_NUMBER_VIOLATION blue screen of death error with a bug check value of 0x0000000D appears when a thread (operating system) attempts to acquire a lower level mutex that it doesn’t already own but can’t find one.
How do I fix the MUTEX_LEVEL_NUMBER_VIOLATION error?
Before we start with the slightly complex solutions, try these quick ones:
- Restart the PC and verify whether the error code appears again. In some cases, BSODs are a one-time thing.
- Check if any Windows updates are available and install them.
- Disconnect all non-critical peripherals like the printer, headphone, earphone, and speaker, especially any that was plugged in recently.
 Tip
Tip
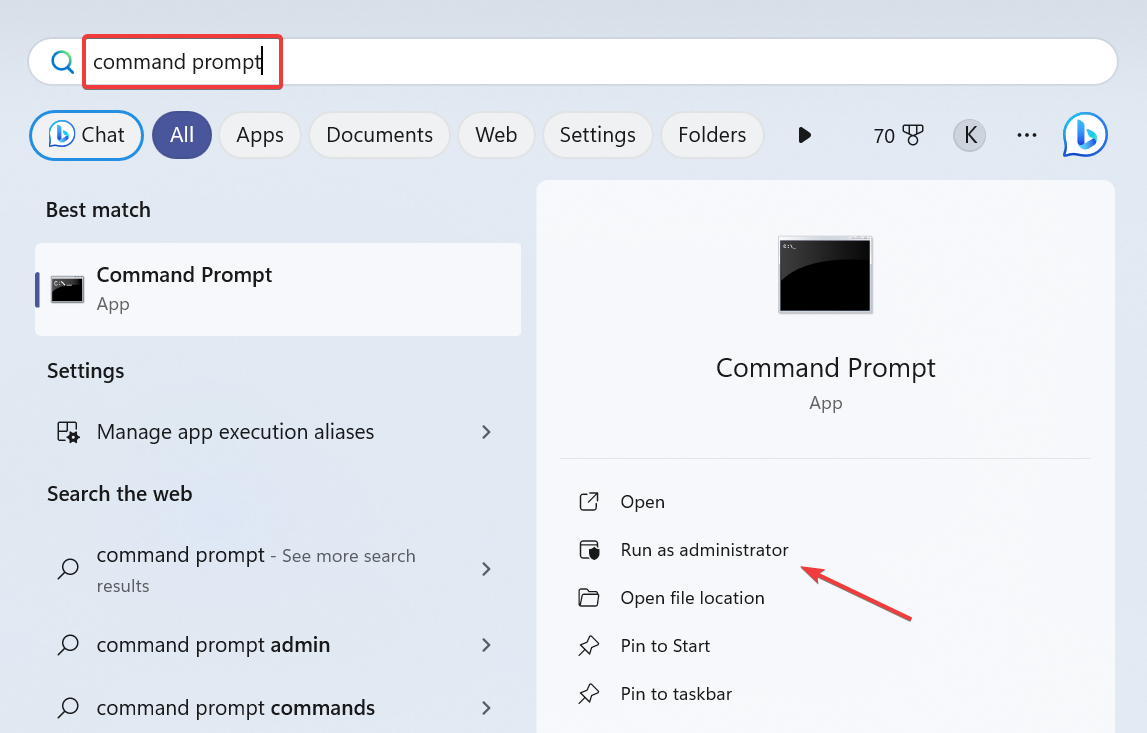
1. Repair the corrupt system files
- Press Windows + S to open Search, type Command Prompt in the text field, and click on Run as administrator.
- Click Yes in the UAC prompt.
- Paste the following DISM commands individually and hit Enter after each:
DISM /Online /Cleanup-Image /CheckHealthDISM /Online /Cleanup-Image /ScanHealthDISM /Online /Cleanup-Image /RestoreHealth - Next, run this command for the SFC scan:
sfc /scannow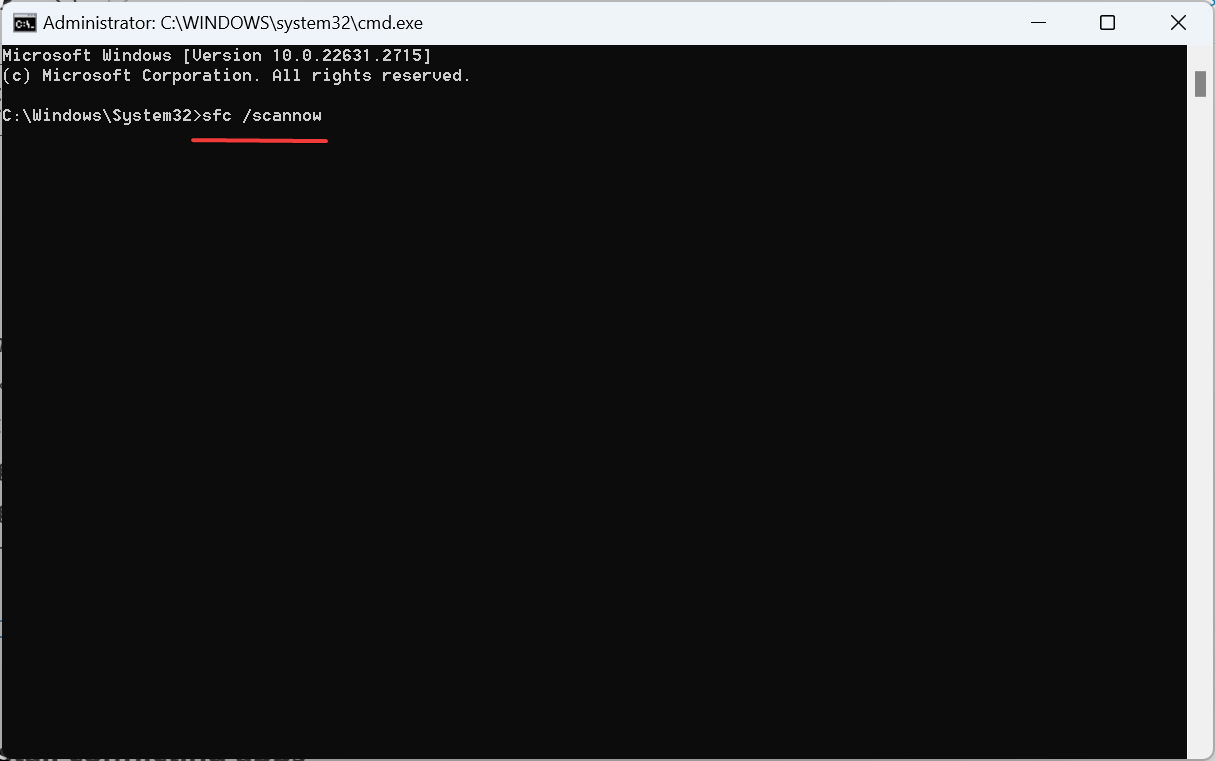
Running the DISM commands and SFC scan will repair all the corrupt system files. The two replace all such files with their cached copy stored on the PC.
Remember, this also helps fix the Kernel Mode Heap Corruption BSoD. We recommend trying specialized BSoD repair software as a faster and safer alternative.
2. Update the drivers
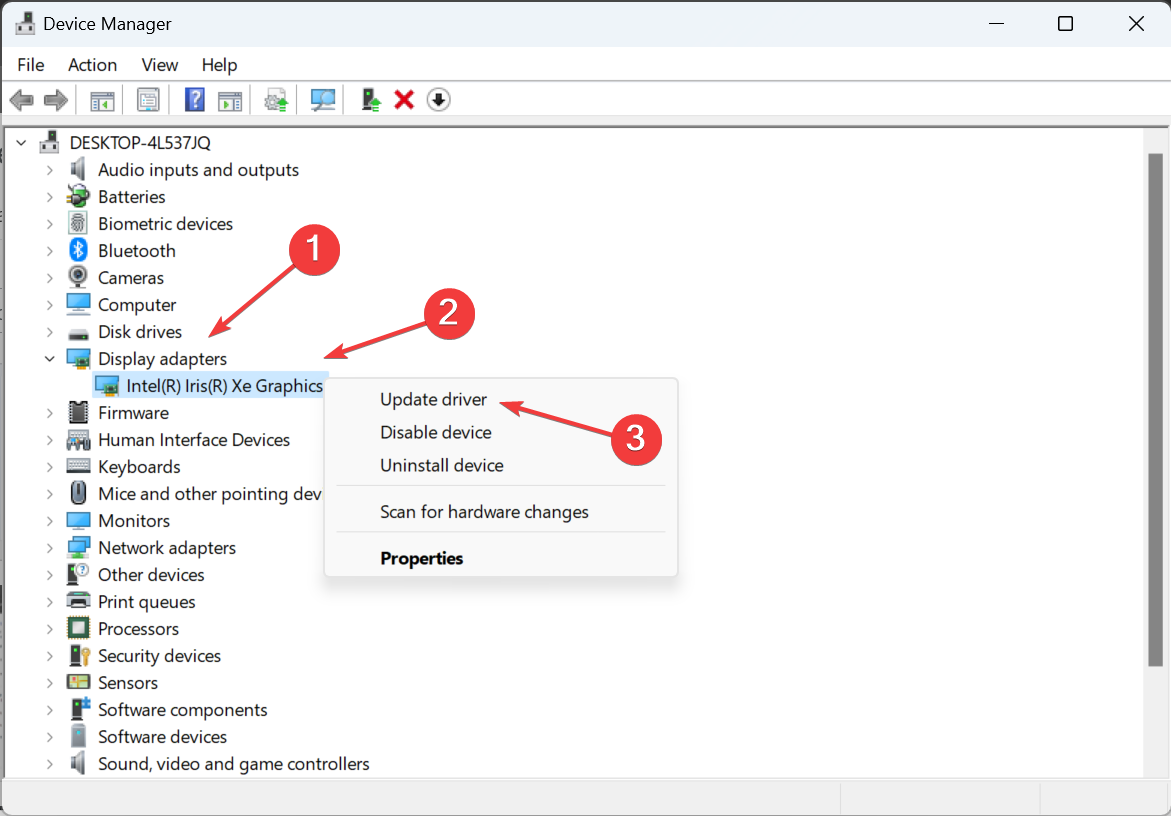
- Press Windows + X to open the Power User menu, and select Device Manager.
- Expand the Display adapters entry, right-click on the active graphics adapter, and select Update driver.
- Click on Search automatically for drivers and let Windows find and install the best locally available driver.
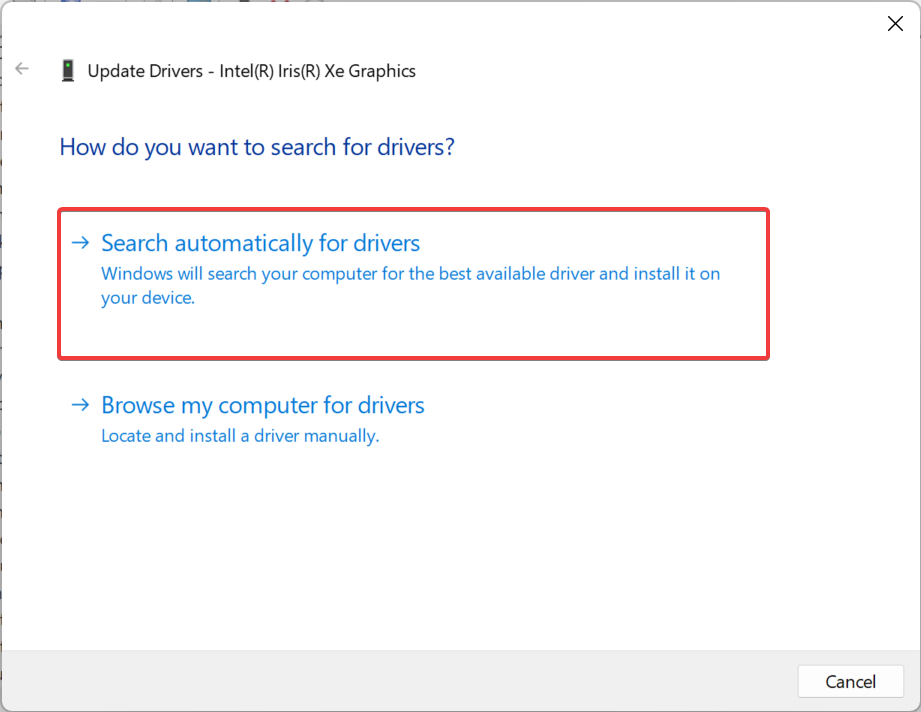
- If a newer version is installed, reboot the PC.
The MUTEX_LEVEL_NUMBER_VIOLATION crash in Windows usually appears due to driver conflicts, and updating the drivers does the trick. Remember, you will have to update all the drivers. This also helps with the SYSTEM EXIT OWNED MUTEX error.
Besides, if Windows can’t find a better one, head to the manufacturer’s website, locate the latest version, and manually install the driver.
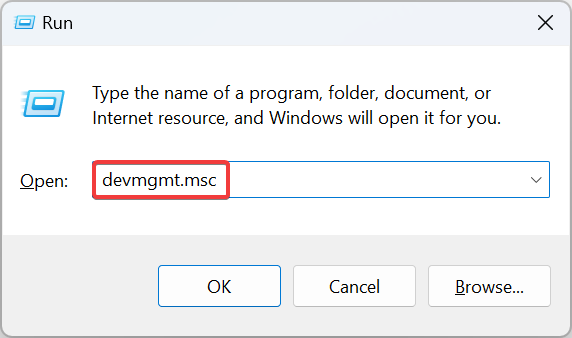
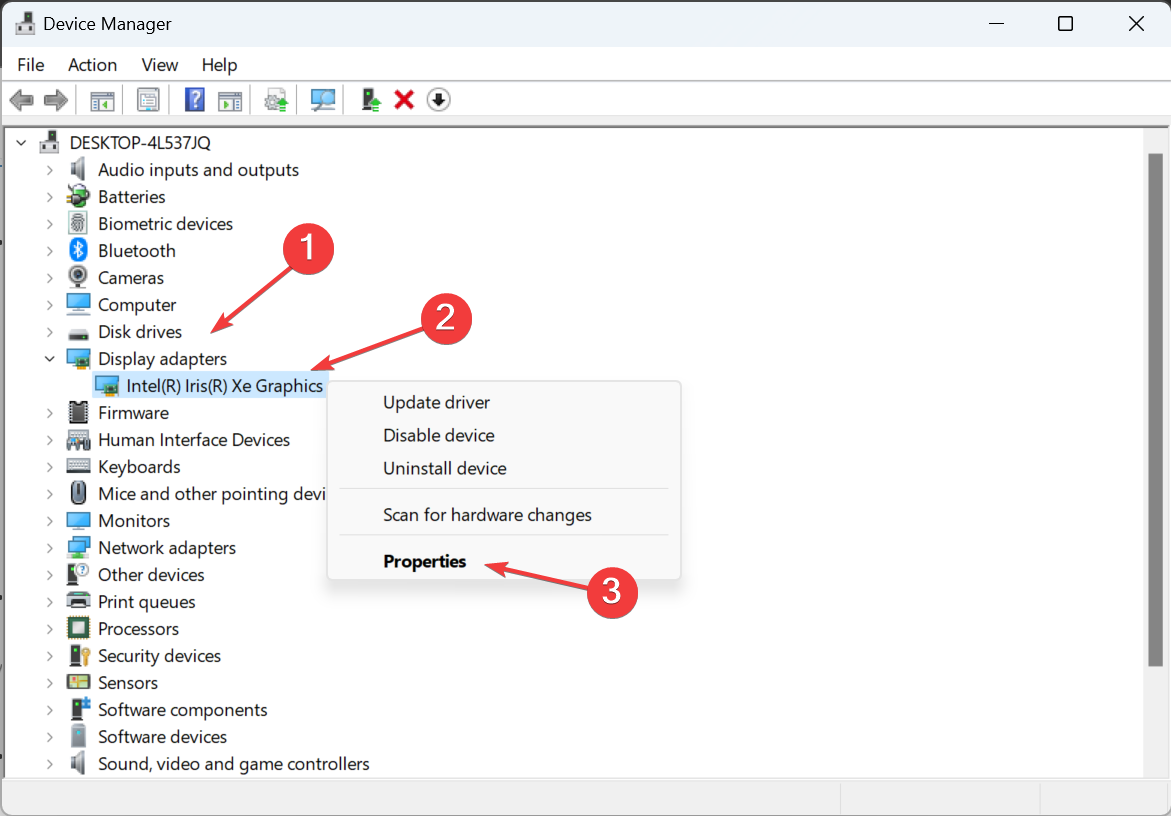
3. Roll back recent driver updates
- Press Windows + R to open Run, type devmgmt.msc in the text field, and hit Enter.
- Double-click Display adapters, right-click on the active graphics card, and then select Properties from the context menu.
- Go to the Driver tab, and click on the Roll Back Driver button.
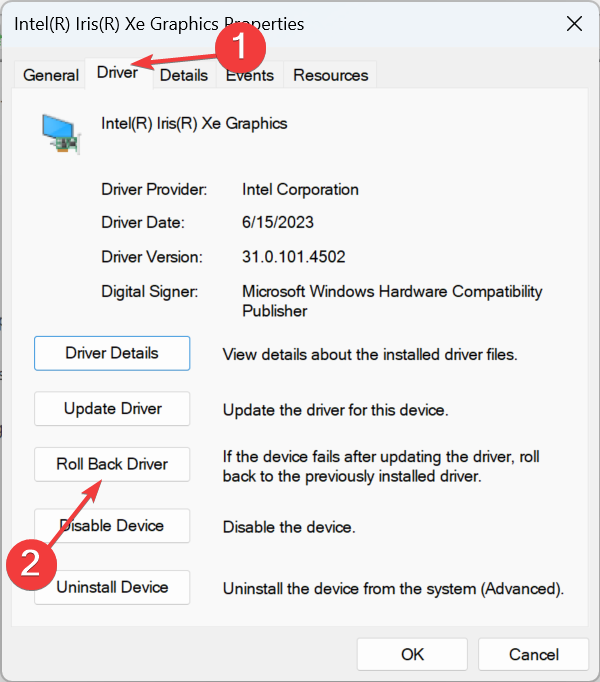
- Select a reason for the rollback or choose For another reason and enter one in the text field, then click on Yes.
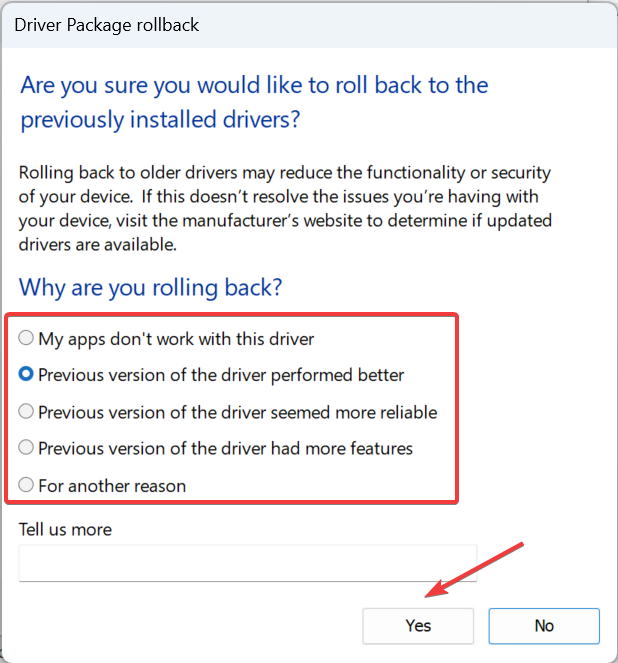
- Similarly, check the other devices and roll back their drivers until the error is fixed.
If the latest driver version is triggering the error, roll back to the previous stable version. Also, you can always manually install a previous driver version from the manufacturer’s website if the Roll Back Driver button is greyed out.
4. Uninstall conflicting apps
- Press Windows + R to open Run, type appwiz.cpl in the text field, and click OK.
- Select any recently installed application from the list, and click Uninstall.
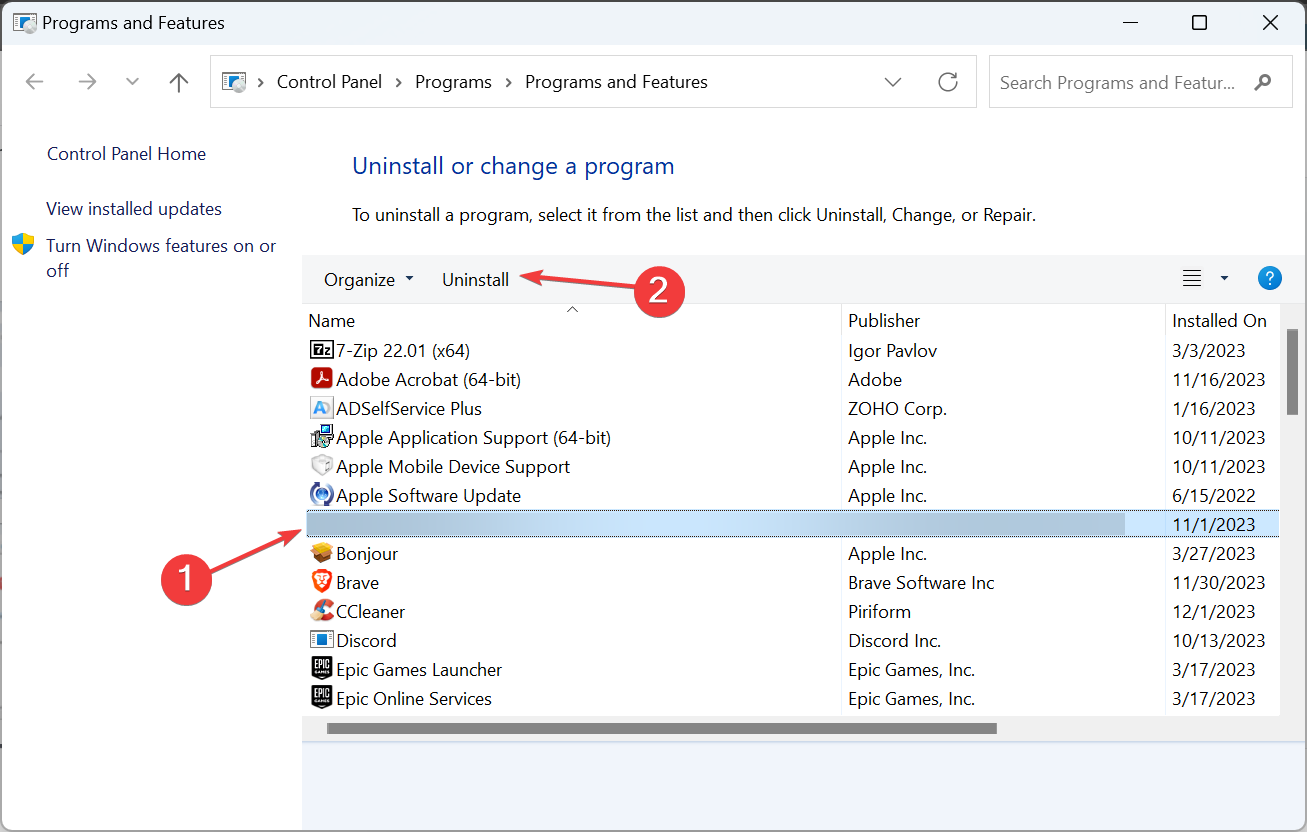
- Follow the on-screen instructions to complete the process.
- Reboot the device and check for improvements.
In case the MUTEX_LEVEL_NUMBER_VIOLATION error reappears, keep uninstalling apps until you find and remove the conflicting one. After that, reinstall the apps that were removed in the process.
5. Uninstall recent Windows updates
- Press Windows + I to open Settings, go to Windows Update from the navigation pane, and click on Update history.

- Scroll down and click on Uninstall updates.
- Click the Uninstall button next to the recently downloaded update.
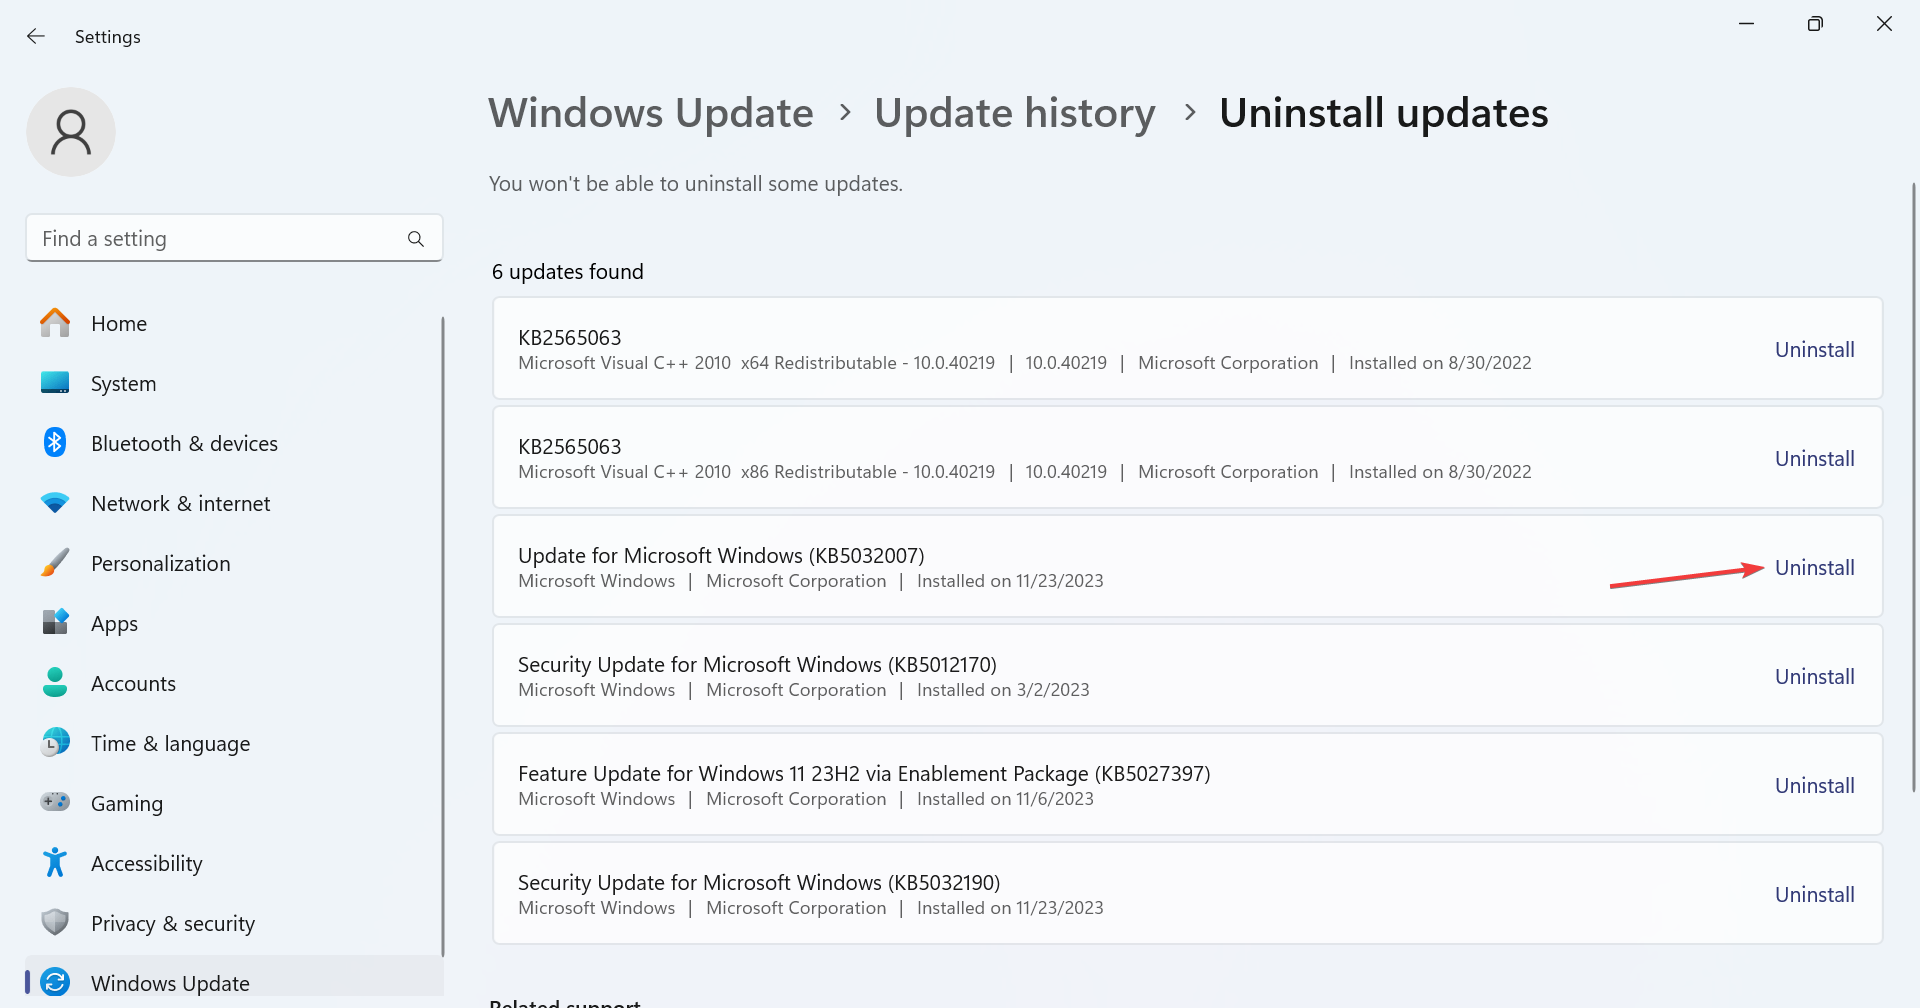
- Again, click Uninstall in the confirmation prompt.
- Reboot the device and check for improvements.
- If it reappears, uninstall all updates downloaded around the same time the MUTEX_LEVEL_NUMBER_VIOLATION error first appeared.
6. Perform an in-place upgrade
 NOTE
NOTE
- Go to Microsoft’s official website, select the OS edition and product language, and then download the Windows 11 ISO.
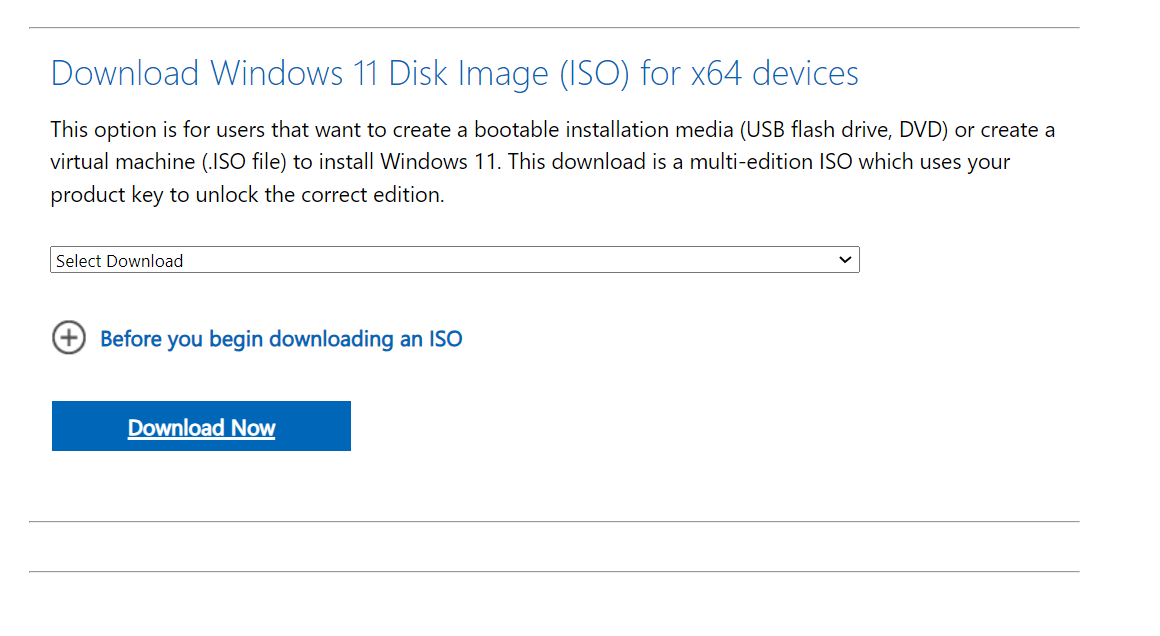
- Double-click the ISO, wait for a few seconds, and click Open in the confirmation prompt.
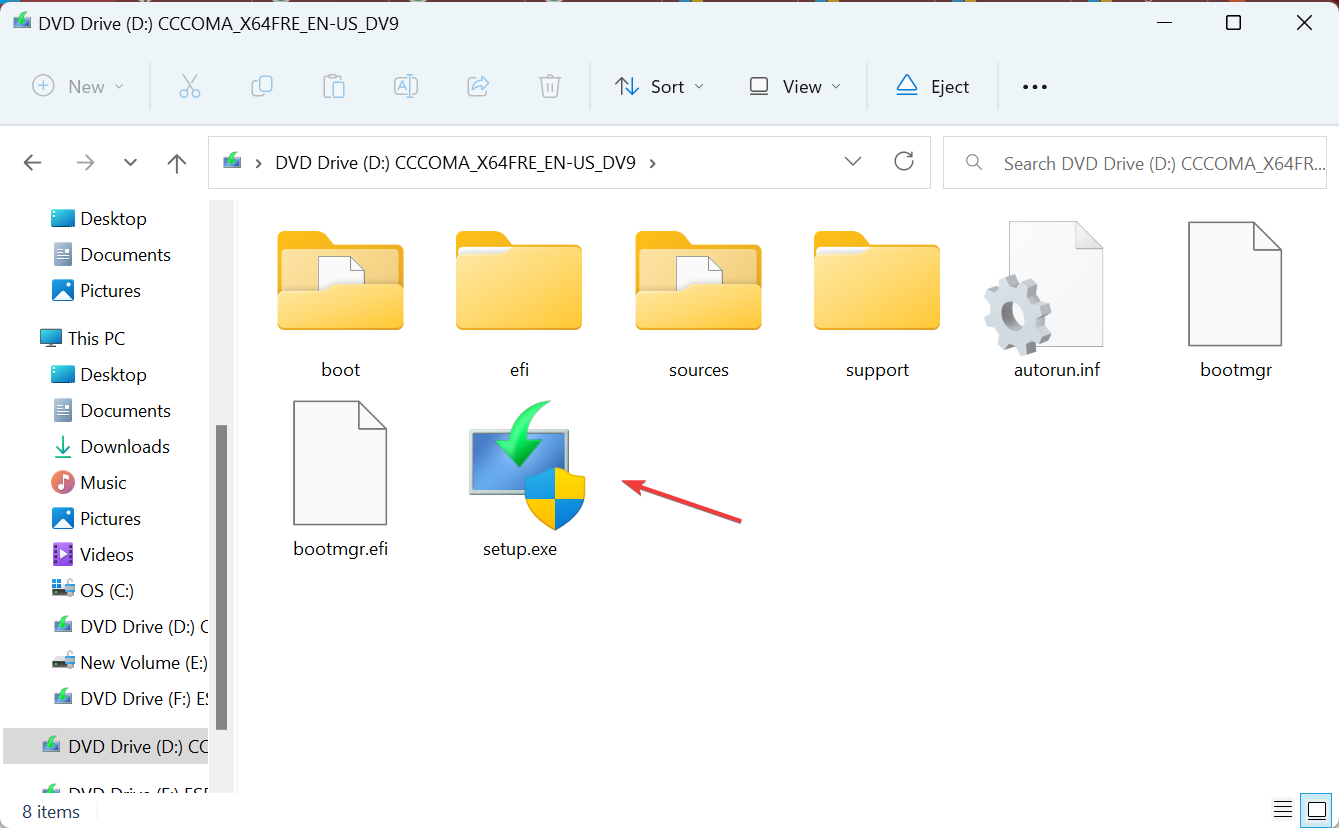
- Run the setup.exe file.
- Click Yes in the UAC prompt.
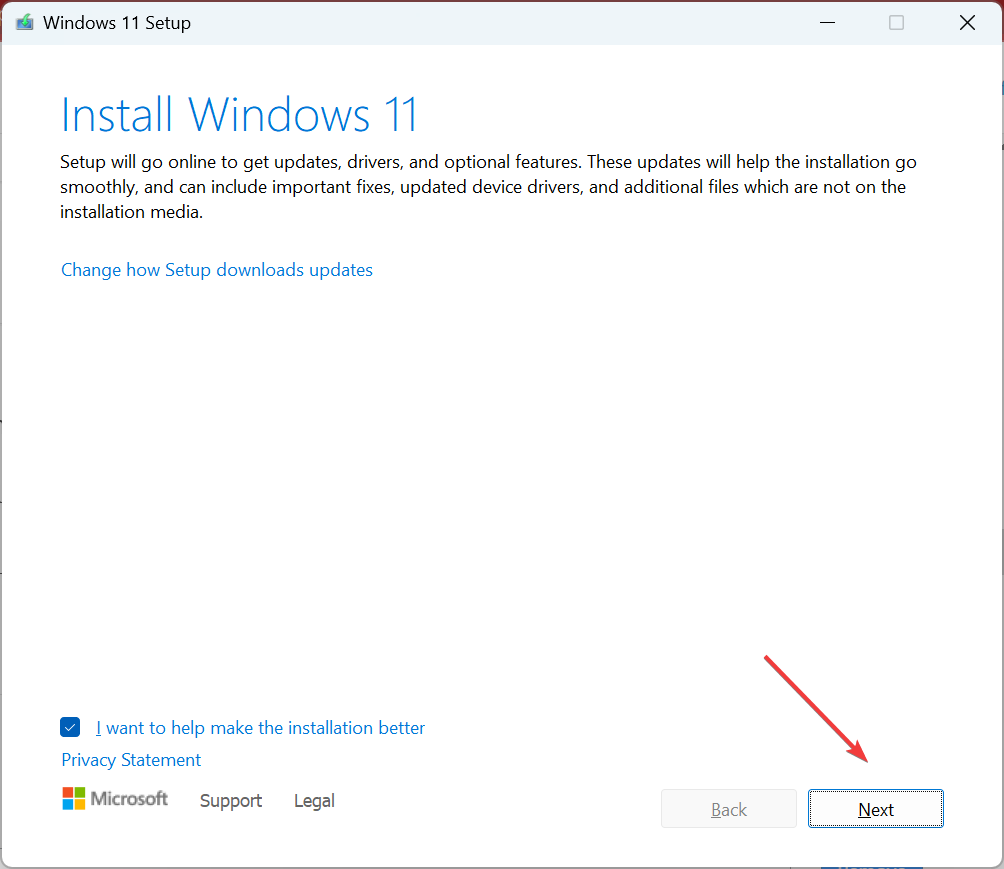
- Click Next to proceed.
- Check Microsoft’s license terms and click Accept.
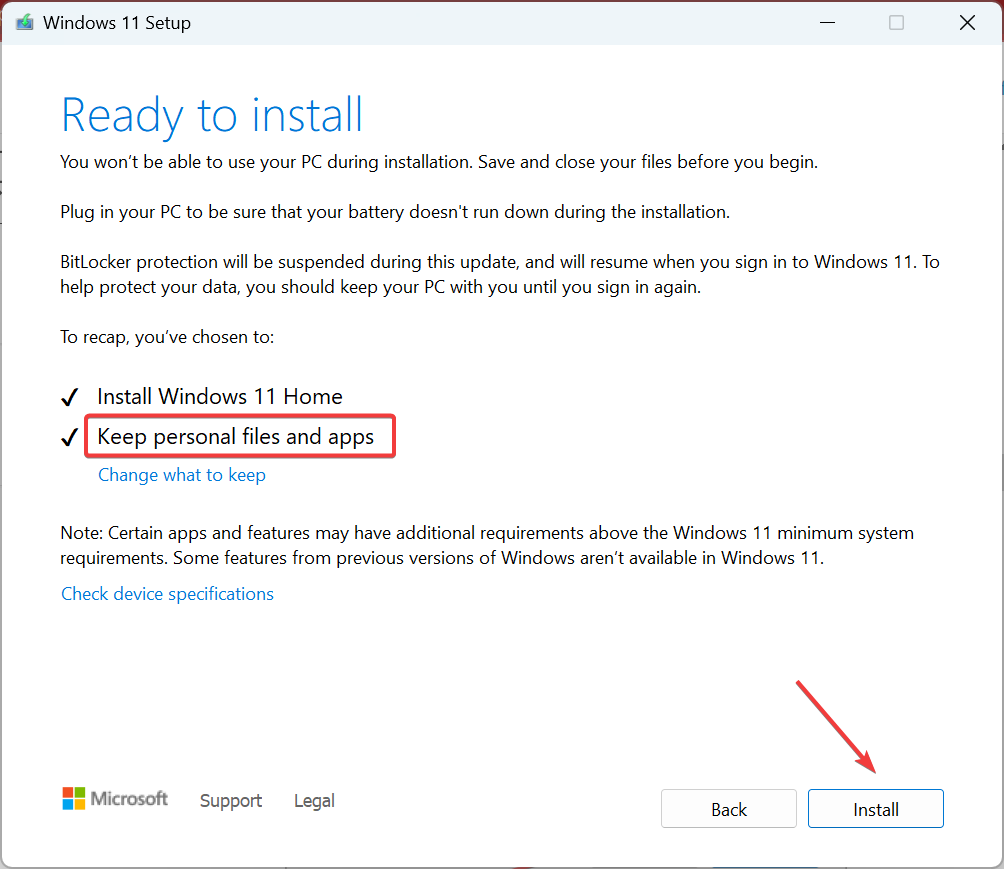
- Make sure the setup reads, Keep personal files and apps, and click on Install.
- Wait for the process to complete. It may take a few hours.
7. Install the latest iteration of Windows
When nothing else works, it’s time you upgrade the OS. At the moment, Windows 11 is the latest iteration. So, first, use the PC Health Check app to verify whether your system is compatible. If it is, install Windows 11.
Besides, if the device is not compatible with the latest iteration, you should still be able to download Windows 10. So, go with that instead because the MUTEX_LEVEL_NUMBER_VIOLATION blue screen error usually affects outdated, unsupported iterations of Windows.
Before you leave, discover the best PC repair software and get one to prevent similar errors from appearing.
For any queries or to share more solutions with us, drop a comment below.
Read our disclosure page to find out how can you help Windows Report sustain the editorial team. Read more


Improve this guide


User forum
0 messages