Solved: ATTEMPTED_SWITCH_FROM_DPC Error on Windows 11
A clean install of your drivers could be the answer
Key notes
- An attempted switch from DPC is an indication of driver errors, so ensure you update your drivers as a first response.
- Increasing memory size is another possible solution, but if it doesn’t work for you, we have more in store.
- Stay with us as we walk you through the pinpointing steps of successfully and quickly erasing this error from your computer.

The ATTEMPTED_SWITCH_FROM_DPC error occurs when a faulty component of Windows 11 or a black screen, triggers an event that initiates the OS to shut down forcibly.
It can pop up with multiple faces and interrupt your work at any moment. Though the error may look complicated at first, we’re here to help you comprehend the issue and fix it.
What does attempted switch from DPC mean?
The DPC stands for Delayed/Deferred Procedure Call and is a mechanism used by devices and applications on your computer to perform tasks without waiting for a response from the operating system.
The attempted switch from DPC error in Windows 11 occurs when an application tries to switch between threads, but the process isn’t ready yet or waiting for data that hasn’t arrived yet.
How do I fix the ATTEMPTED_SWITCH_FROM_DPC BSoD in Windows 11?
Start off with the following basic workarounds before any advanced troubleshooting:
- Check for any Windows updates and install if available.
- Perform a memory test to check whether your RAM is corrupted.
- Uninstall the concerned application. Most users reported Nox Player, Acronis, and Steel Series as the main culprits.
- Restart your PC in Safe Mode.
1. Run DISM and SFC scans
- Hit the Start Menu icon, type cmd in the search bar, and click Run as administrator.

- Type the following commands and press Enter after each one:
DISM.exe /Online /Cleanup-Image /Restorehealthsfc /scannow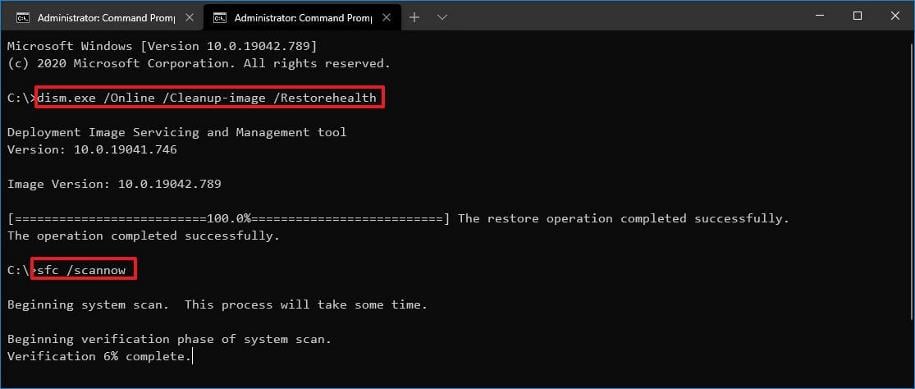
Another solution would be to use professional system repair tools. This software will greatly simplify your work and repair your system with just a few clicks.
2. Rollback previous Windows update
- Press the Win + I keys to open the Settings menu.
- Click on Windows Update on the left pane.

- Select Update history on the right.

- Under Related settings, select Uninstall updates.

- Choose the recently installed update and hit the Uninstall button.

- Follow the on-screen prompts.
- Restart your PC and see if it helps.
The system service exception error on Windows 11 also occurs due to faulty Windows Updates, so try downloading the update from the Microsoft Catalog if this doesn’t work.
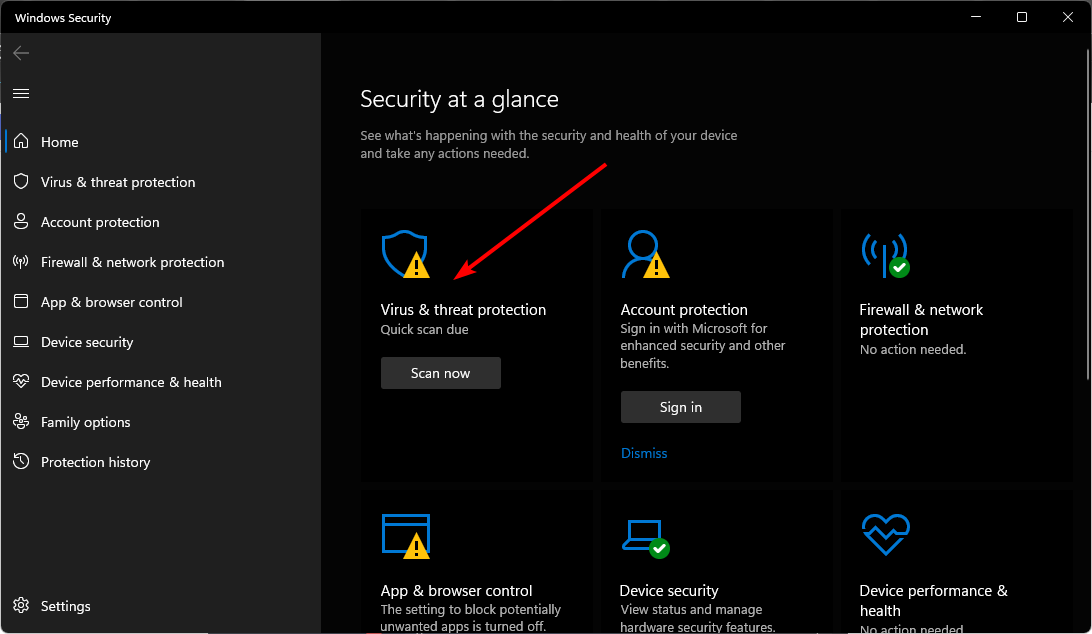
3. Scan for viruses
- Press the Windows key, search Windows Security, and click Open.

- Select Virus & threat protection.
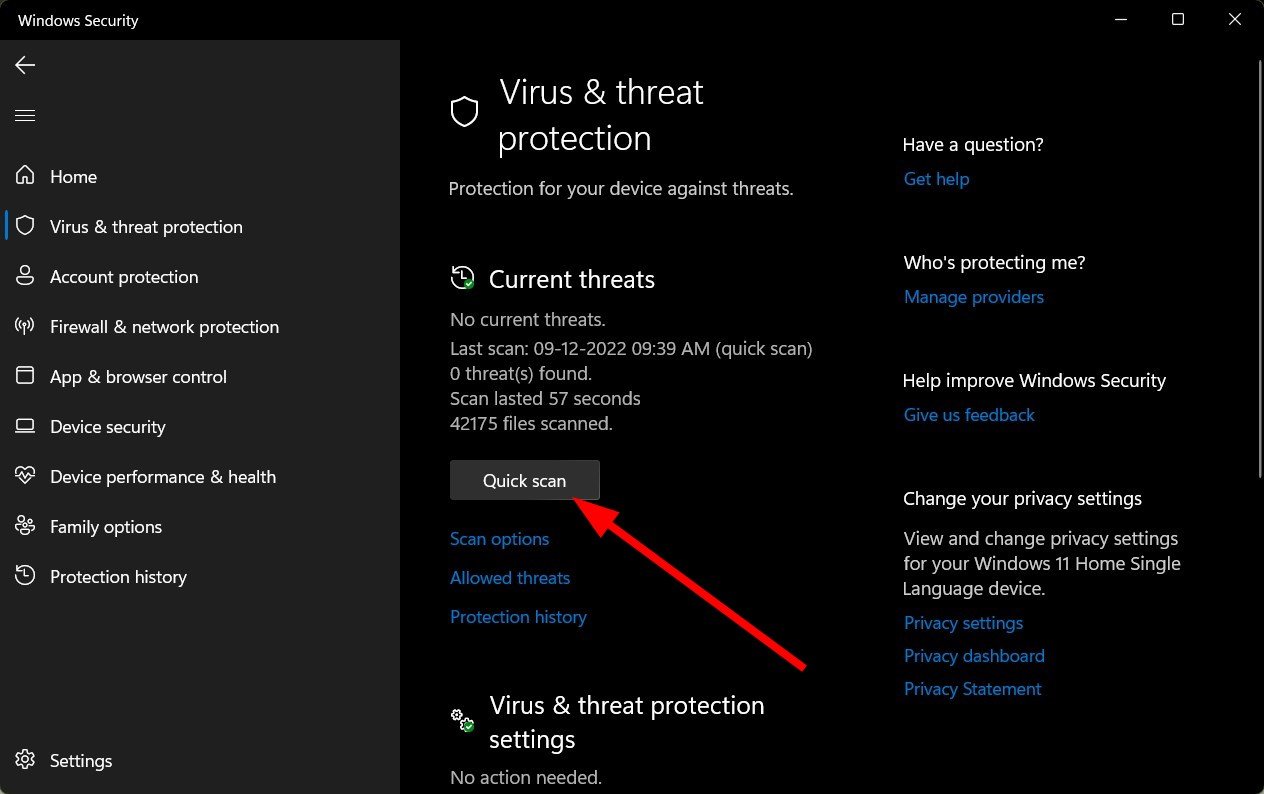
- Next, press Quick scan under Current threats.
- If you don’t find any threats, proceed to perform a full scan by clicking on Scan options just below Quick scan.
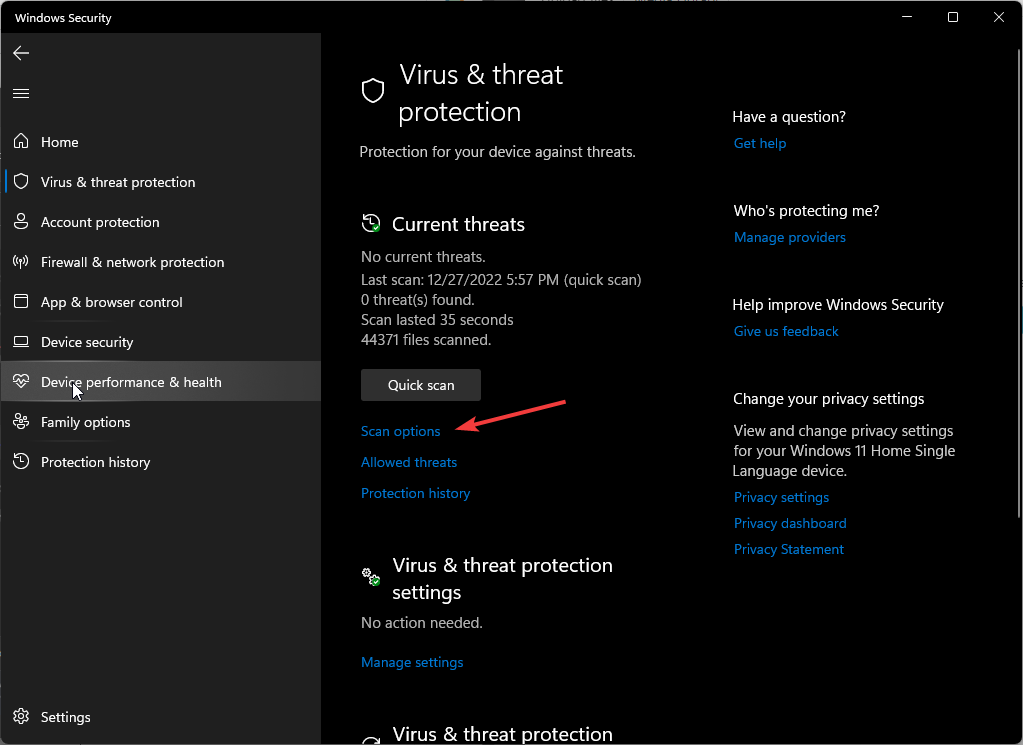
- Click on Full scan, then Scan now to perform a deep scan of your PC.
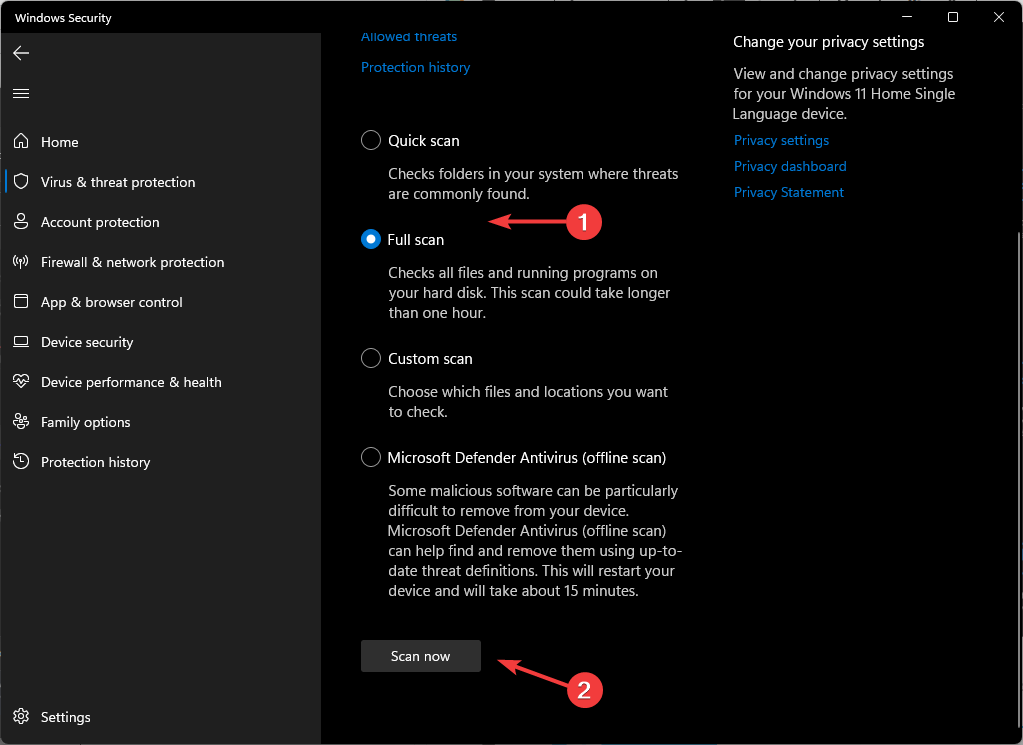
- Wait for the process to finish and restart your system.
4. Update your GPU drivers
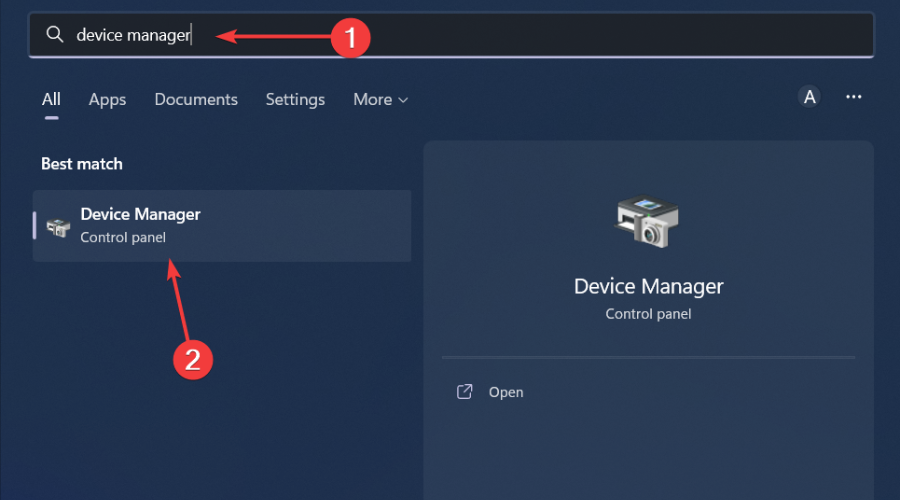
- Click the Search icon, type Device Manager in the search bar, and click Open.
- Navigate to Display adapters to expand, right-click on your graphics card, and select Update driver.
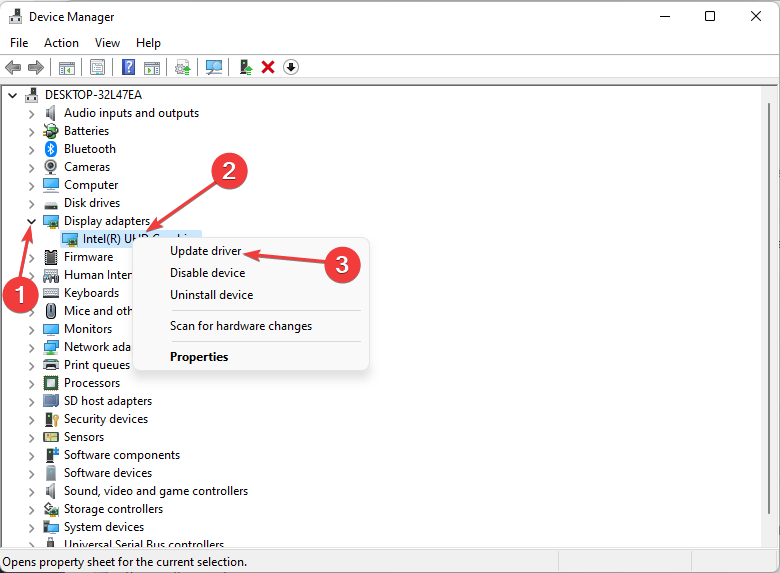
- Select Search automatically for drivers.

Ensure to do the same for your Chipset and Bluetooth drivers as well.
5. Reinstall your GPU drivers
- Click the Search icon, type Device Manager in the search bar, and click Open.
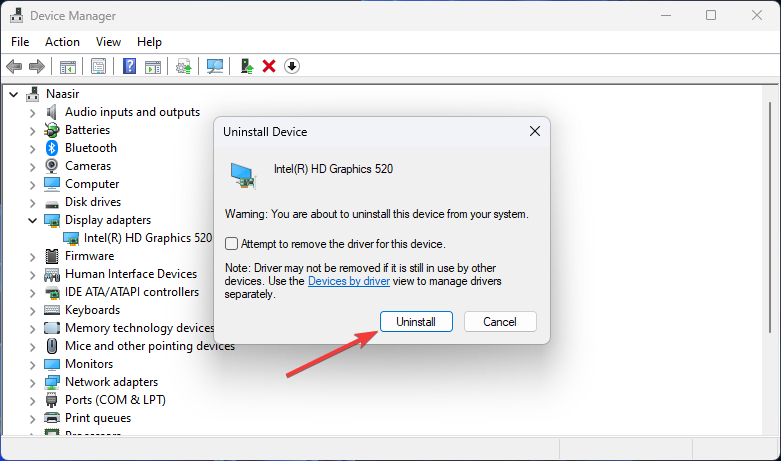
- Navigate to Display adapters to expand, right-click on your graphics card and select Uninstall device.
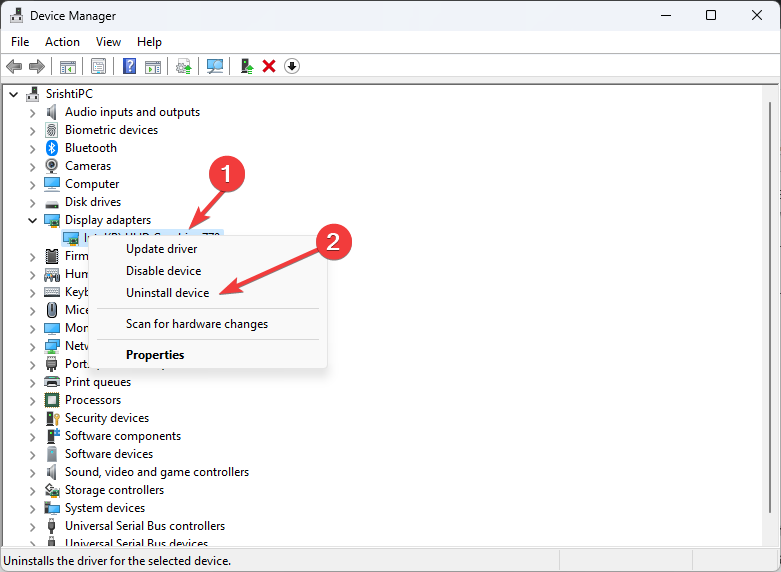
- Confirm uninstallation in the next prompt.
- Restart your PC and the drivers will automatically be installed.
6. Clean install your GPU drivers
- Before you download and install the NVIDIA drivers, ensure you close all unnecessary background processes, disable an overzealous antivirus/firewall, and disable any overclocking software.
- Navigate to your browser and download the corresponding NVIDIA driver for your OS.
- Locate the installation file, right-click on it, and select Run as administrator.
- Click Yes if the UAC prompt pops up and leave the default storage path as suggested.
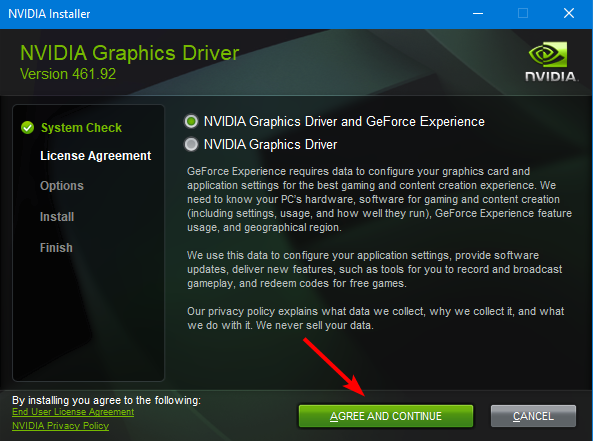
- Agree to the terms and conditions.
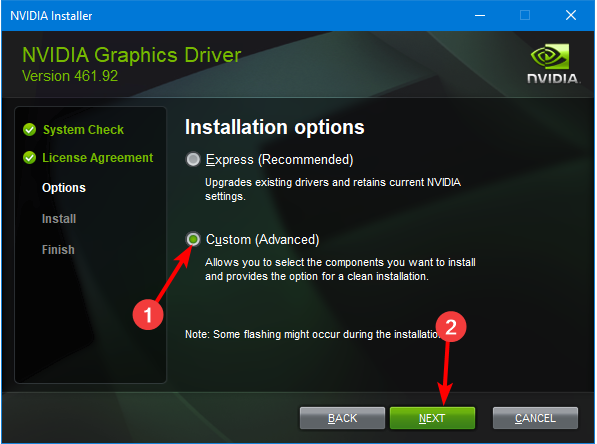
- In the next window, select Custom (Advanced) install, then hit Next.
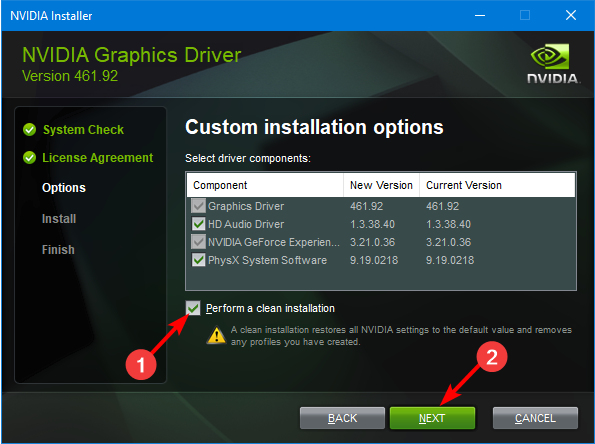
- Check the Perform a clean installation box then hit Next.
- Wait for the installation to finish, then restart your PC.
Users with an NVIDIA GPU noted the nvlddmkm.sys driver made an appearance and was a major cause of the issue. Installing the drivers afresh will ensure any compatibility issues previously brought about by automatic updates are taken care of.
7. Perform clean boot
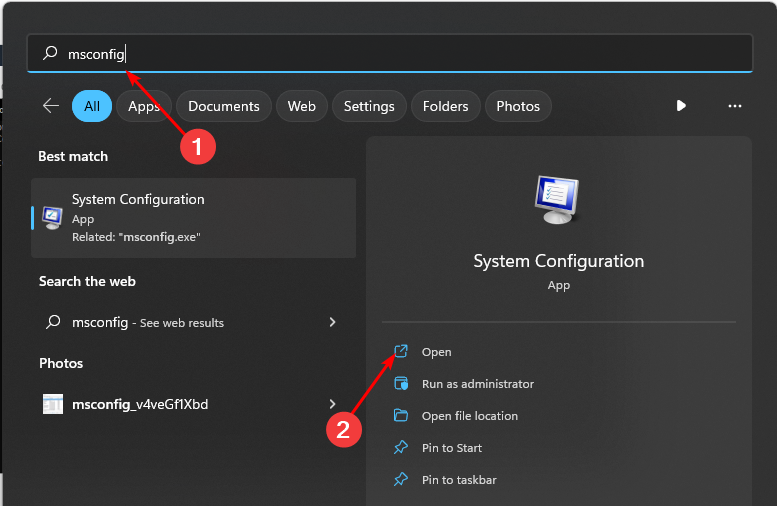
- Hit the Windows key, type msconfig, and open System Configuration.
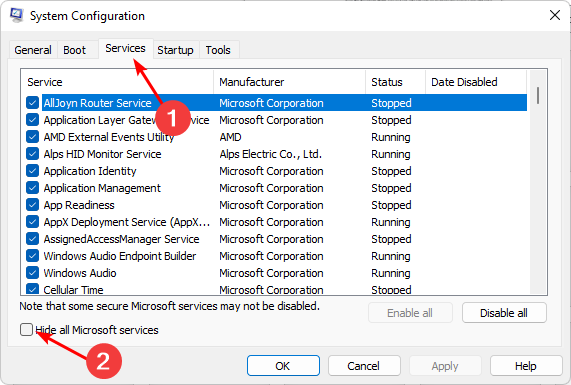
- Switch to the Services tab and select Hide all Microsoft services.
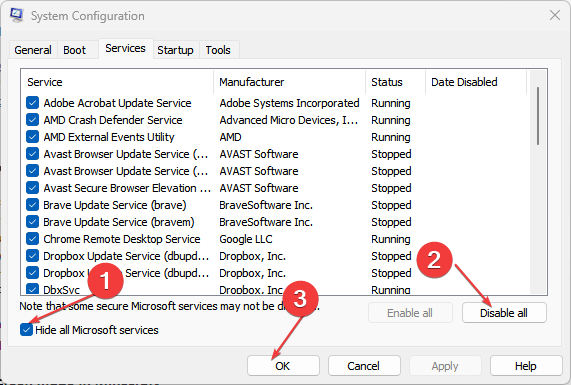
- Click on the Disable all button, then hit the Apply button to save the changes.
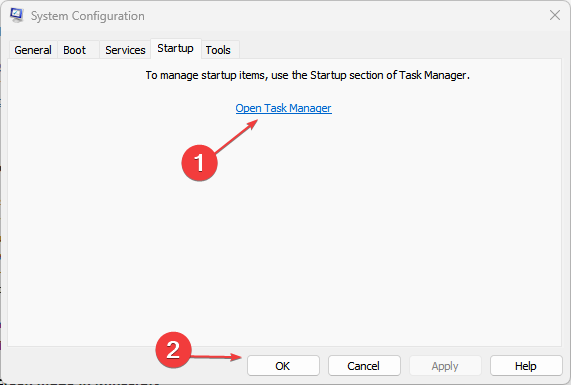
- Go back and click on the Startup tab, select Open Task Manager then click OK.
- In the Startup tab of the Task Manager, Disable all the Enabled startup items.
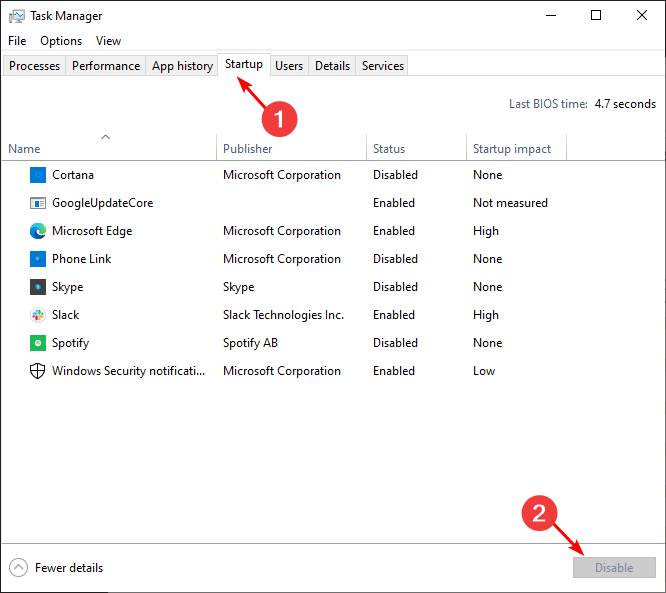
- Close Task Manager and restart your PC.
8. Perform a System Restore
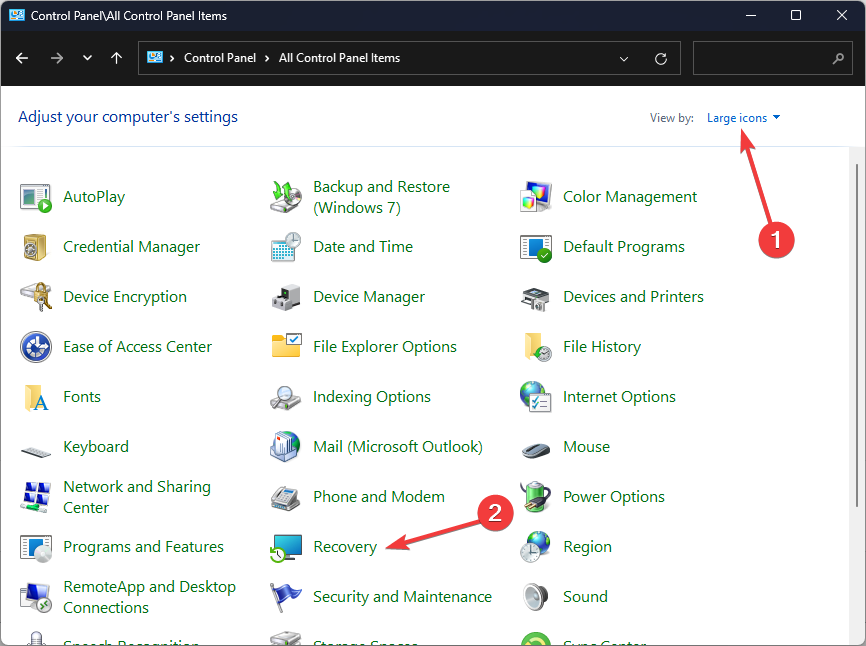
- Press the Windows key, type Control Panel, and click Open.

- Select Large icons as View by and click Recovery.
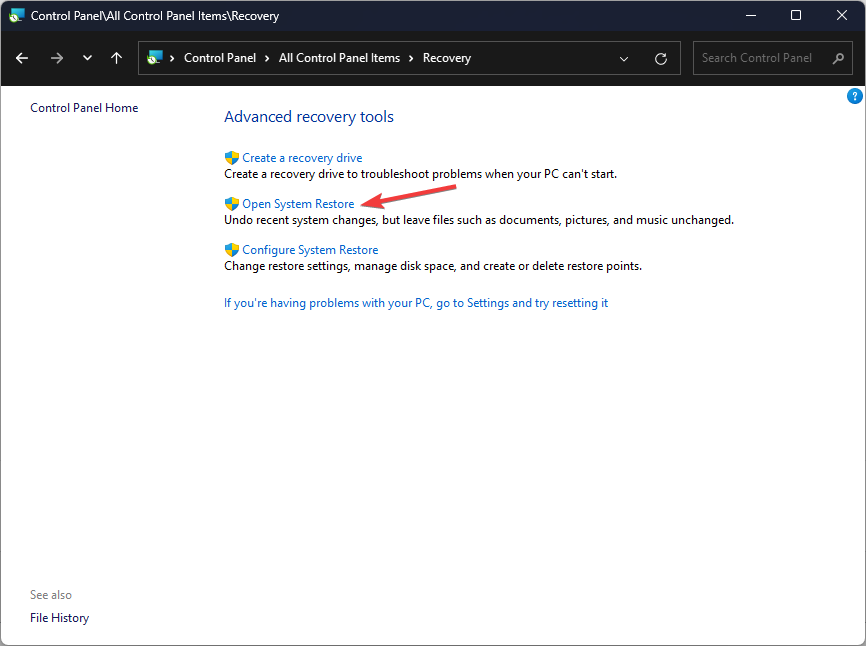
- Click Open System Restore.
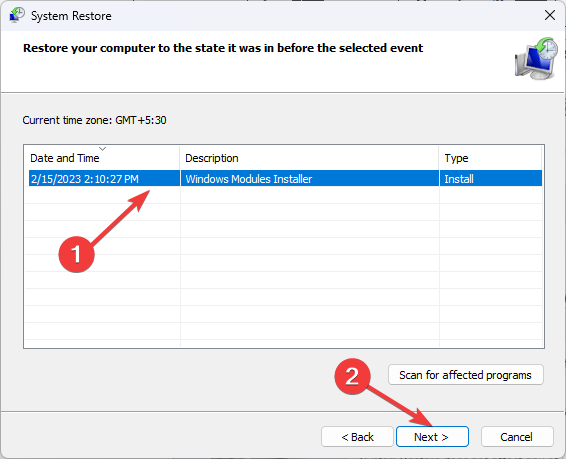
- Select Choose a different restore point and click Next.
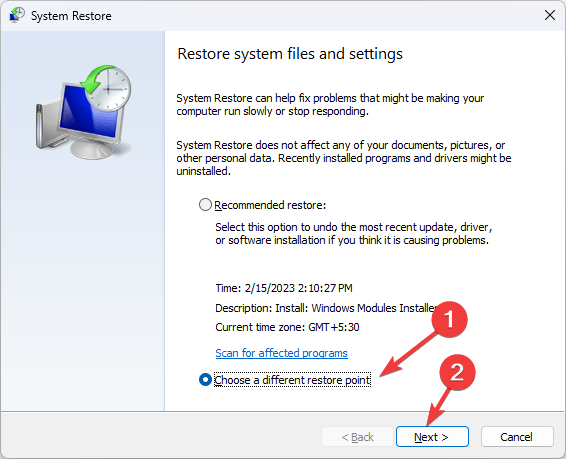
- Now select the restore point and click Next.
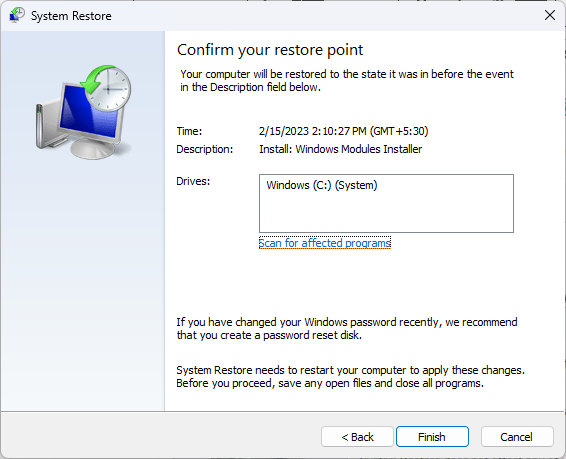
- Click Finish to restore the previous settings, and Windows will restart.
9. Update BIOS
- The process of updating BIOS will differ depending on your motherboard. For this step, we shall be updating the HP motherboard.
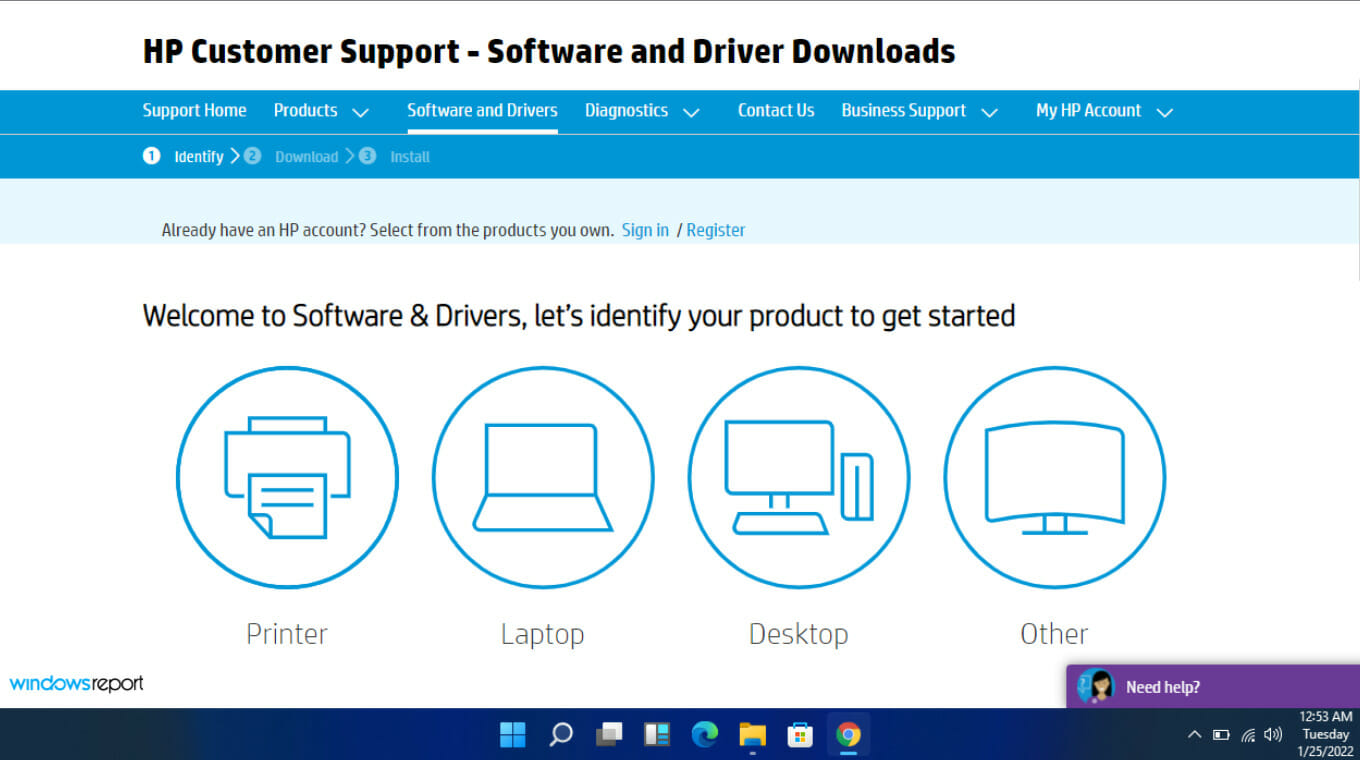
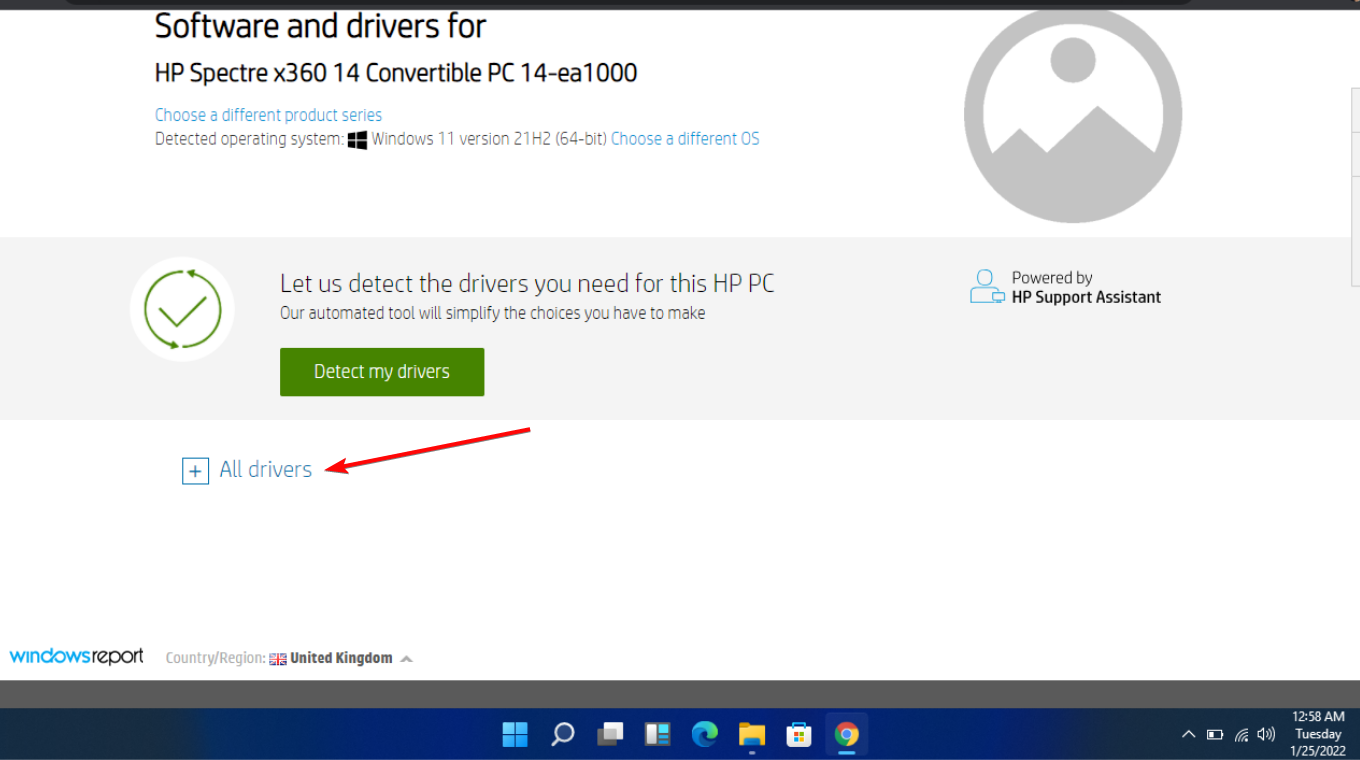
- Navigate to the HP driver and software download website.
- Choose laptop or desktop, depending on the type of computer you’re using.
- Enter your exact serial number or your exact computer model.
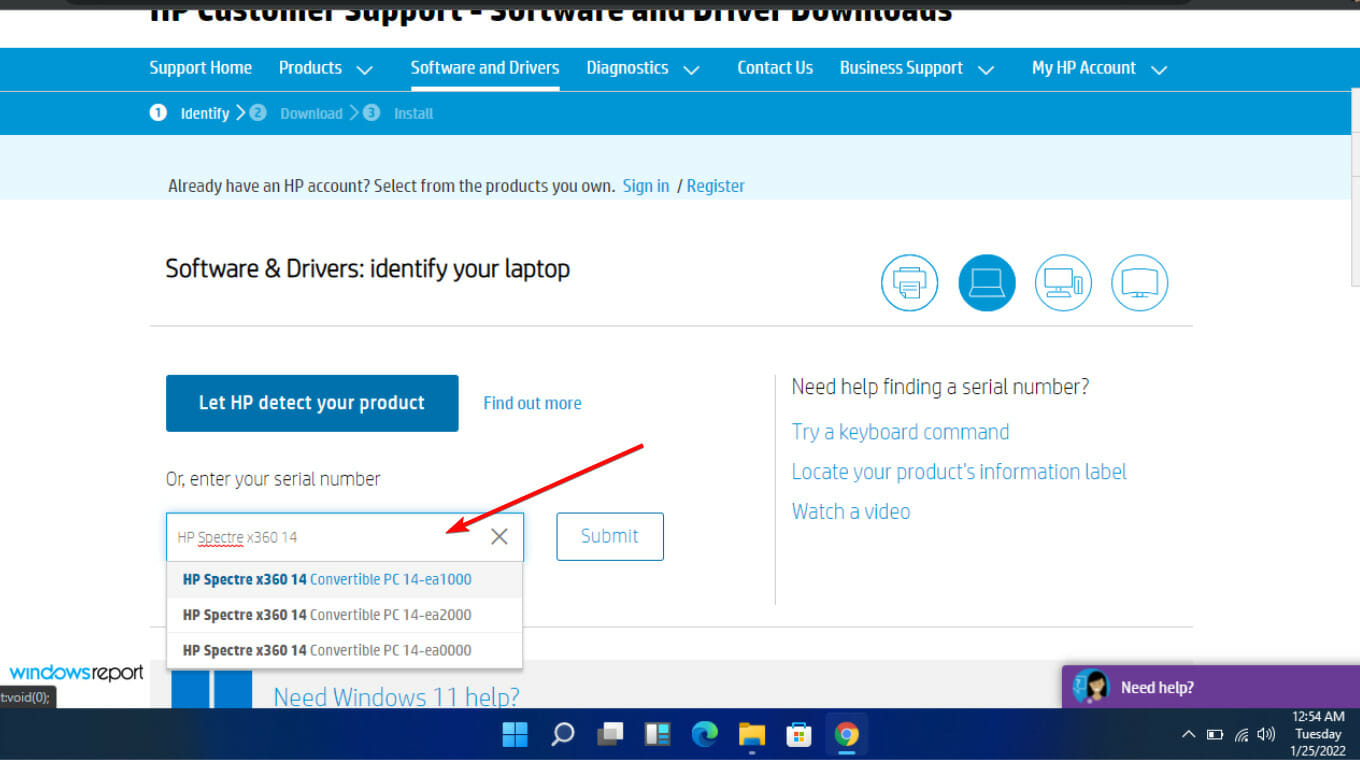
- Select your OS and OS version, then click Submit.

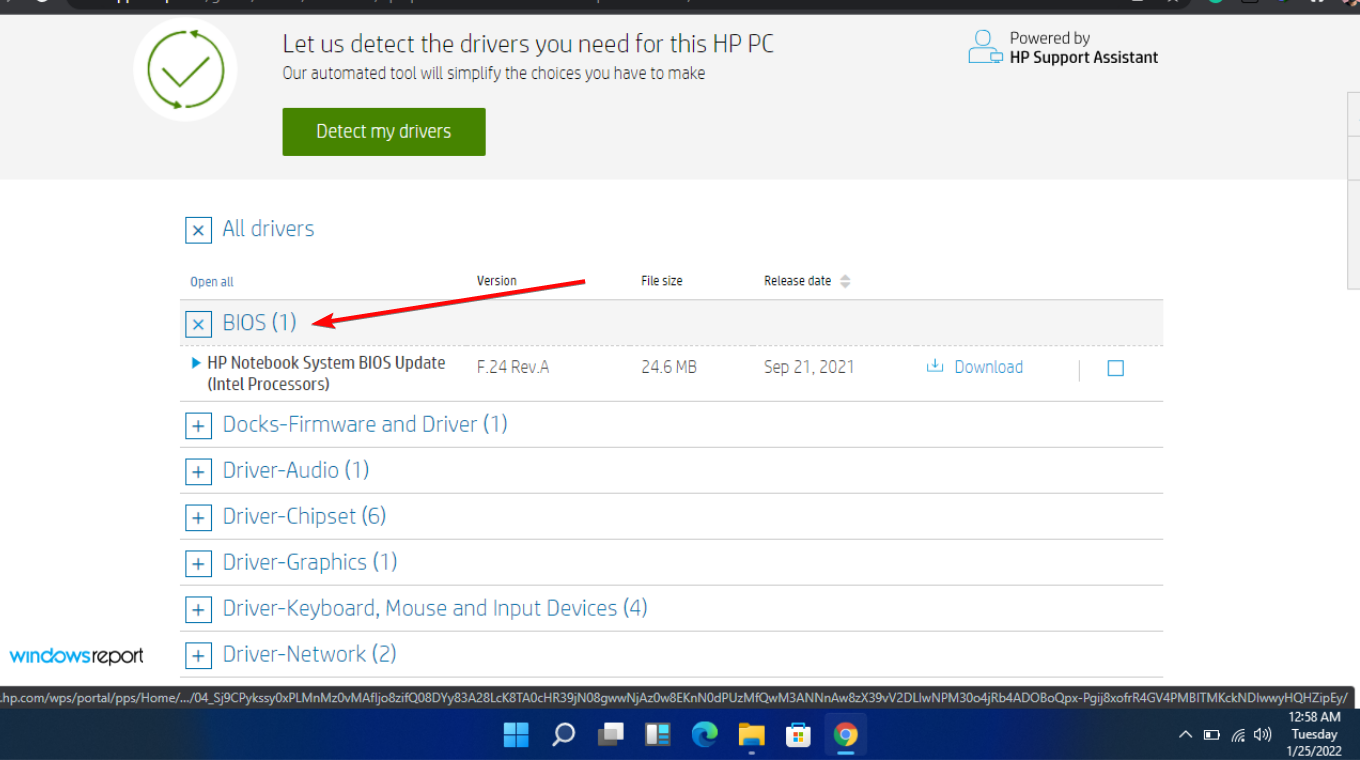
- Click on All drivers and then expand BIOS to see available updates.
- Click the download icon.
- Install the .exe file, following the on-screen instructions.
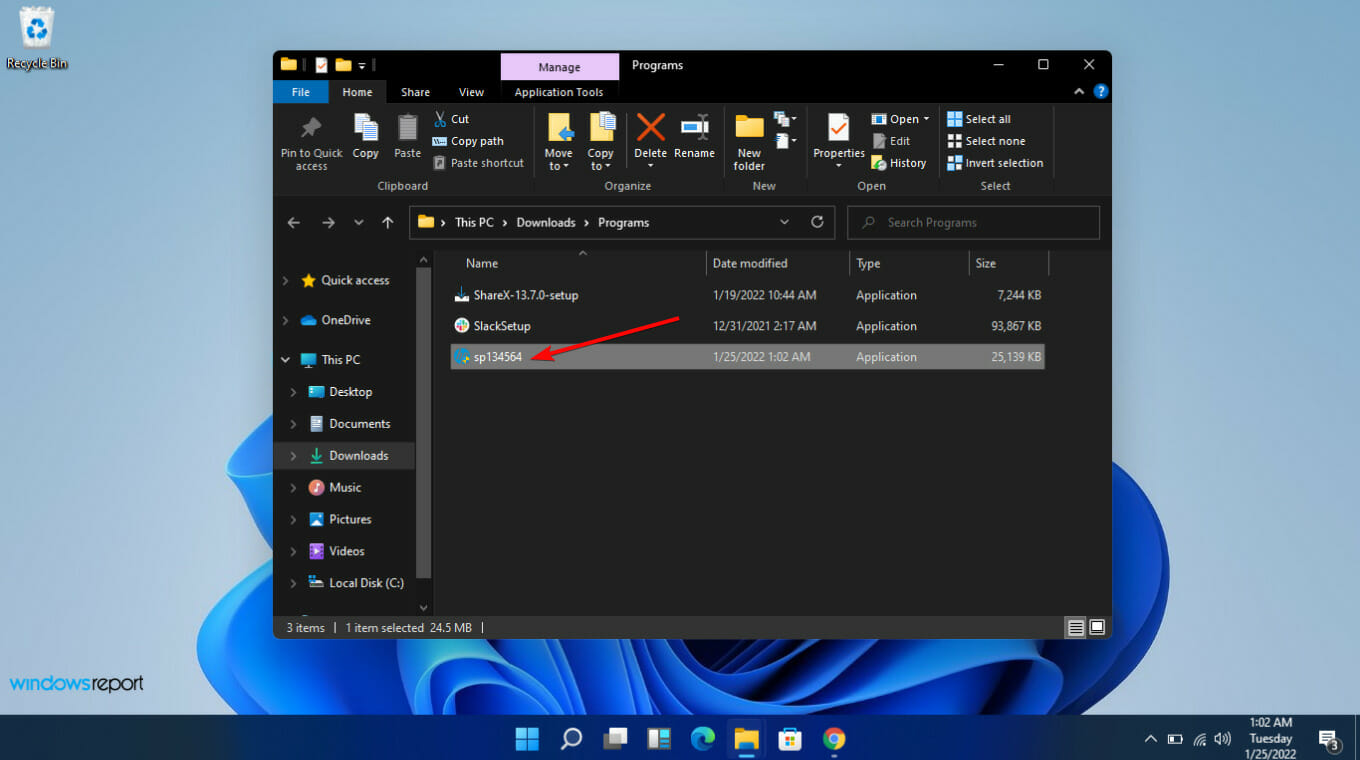
- Restart your PC.
10. Perform a Startup Repair
- Press Windows + I to launch the Settings app, and then click on Recovery on the right in the System tab.
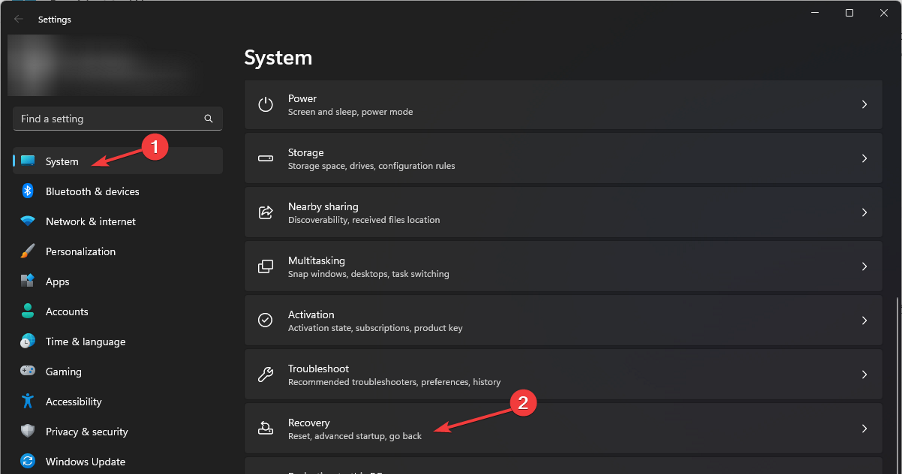
- Next, click on the Restart now button next to Advanced startup.

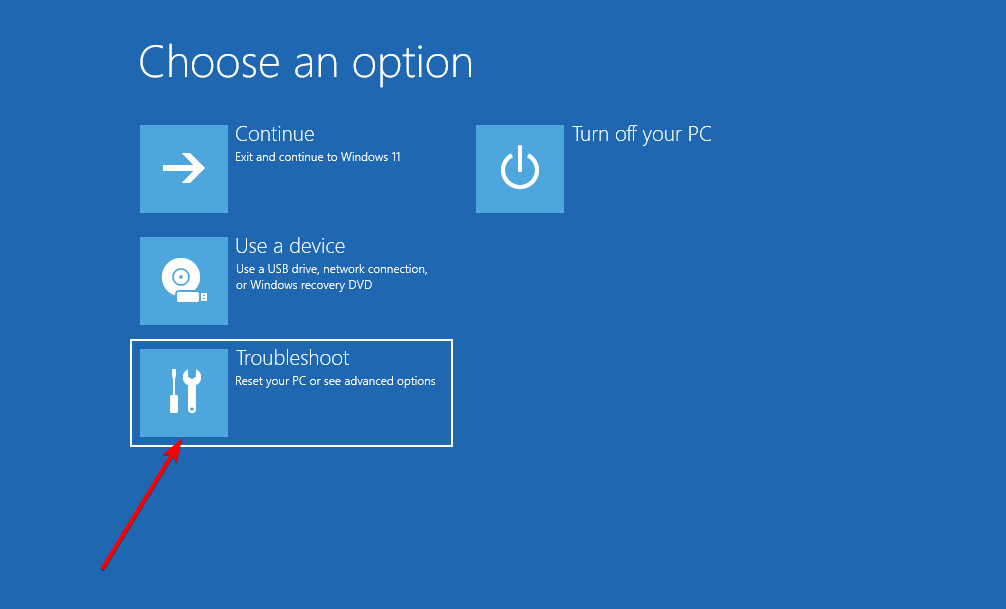
- Wait for the computer to restart, enter Windows RE (Recovery Environment), and then select Troubleshoot.

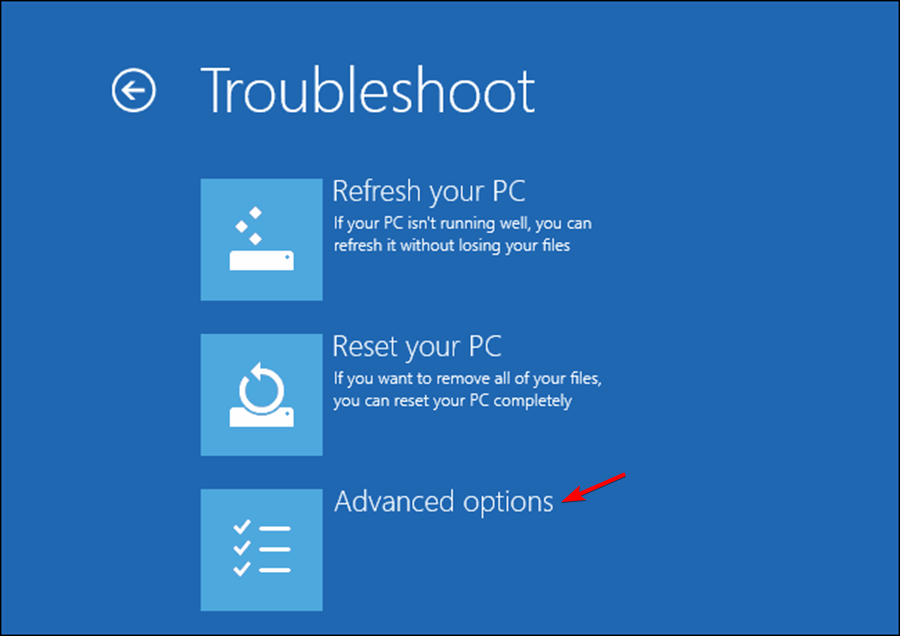
- Next, select Advanced options.

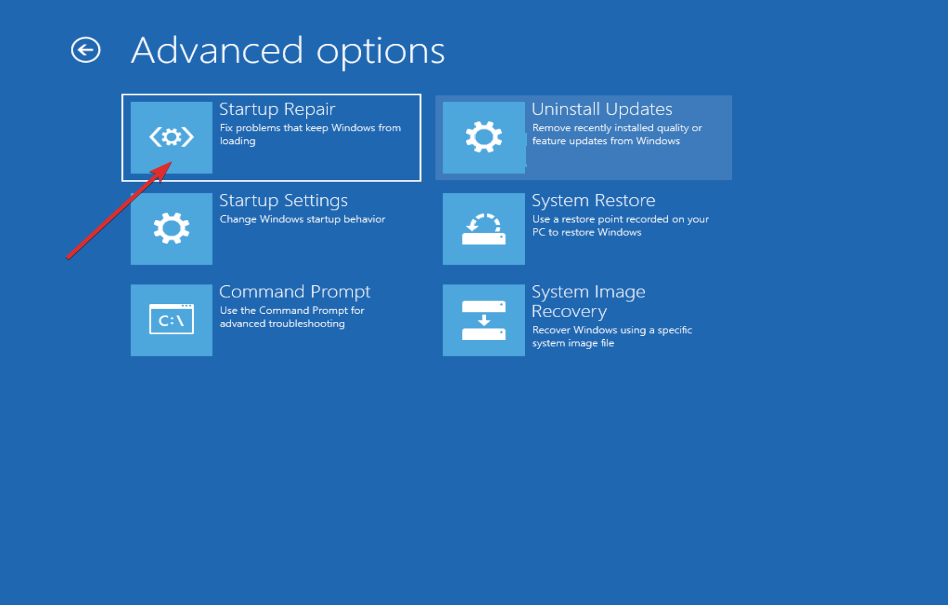
- Finally, click on Startup Repair.

It’s generally pretty easy to fix these errors, and you should be able to troubleshoot them on your own by following the easy steps provided above. Worst case scenario, if none of them works, you can also use an automated utility, and we have the best BSoD fixers lined up to fix them for you.
These tools are great in fixing a bunch of BSoD-related errors, especially those with little to no information like the unexpected store exception error or the Machine Check Exception stop code.
Hopefully, this article has provided helpful answers to your questions about the attempted switch from dpc Blue Screen of Death error on Windows 11. If you have any other questions or know other ways to fix this error, please share with us in the comments below.
Read our disclosure page to find out how can you help Windows Report sustain the editorial team. Read more


Improve this guide


User forum
0 messages