Can’t Install Hyper-V in Windows 10: 7 Fixes that We Tested
Ensure your PC meets the minimum requirements
![]() 8 min. read
8 min. read
![]() Updated on
Updated on
Share this article

Improve this guide
Read our disclosure page to find out how can you help Windows Report sustain the editorial team Read more
Key notes
- You should check the hardware requirements if you want to use Hyper-V in Windows 10.
- Note that users of Windows 10 Home version will not be able to install Hyper-V.
Windows 10 supports client Hyper-V, a robust, high-performance, and flexible client virtualization tech that allows users to run multiple operating systems simultaneously on their Windows computer.
You can enable the Hyper-V feature from the Turn Windows Feature on or off your desktop. You can also enable it from the Windows PowerShell and the Command Prompt.
At times you may encounter problems when installing Hyper-V in Windows 10. We will tackle this problem in the guide.
Why can’t I install Hyper-V on Windows 10?
There are a few reasons you may be unable to install Hyper-V on Windows 10. A few include the following:
- PC support – One possibility is that your computer’s CPU does not support virtualization, a feature required for Hyper-V to work.
- Disabled virtualization – Another possibility is that the feature is not enabled in your computer’s BIOS or UEFI firmware.
- No OS hyper-V compatibility: You might not be running a version of Windows 10 that includes Hyper-V, such as Windows 10 Home. You must also check if your device is running at least a 64-bit version of Windows 10 Pro, Enterprise, or Education.
Hyper-V is a great feature, but sometimes you might encounter issues while installing it. Regarding the issues, here are some common problems that users encountered:
- Failed to enable Hyper-V in Windows 10 – This is a common problem with Hyper-V on Windows 10. To fix this issue, check if your PC meets the hardware requirements.
- Can’t enable Hyper-v in Windows 10 – Many users reported that they couldn’t enable Hyper-V on their PC. This can occur due to third-party software, and the issue will be resolved after removing the problematic software.
- Windows 10 Hyper-V won’t install – If Hyper-V doesn’t install on your PC, specific settings may interfere with it. However, you can fix these settings by running a few commands in Command Prompt.
- Can’t install Hyper-V platform, integration services – Sometimes, you won’t be able to install Hyper-V due to specific issues on your PC. However, you should be able to fix this problem using one of our solutions.
Let us introduce you to some installation solutions. However, note that this installation issue may also occur on Windows 11.
What do I do if I can’t install Hyper-V on Windows 10
Before trying these fixes:
- Ensure you are not on the Home version. As you know, different versions of Windows 10 are available, and each has a different price and features. Unfortunately, Hyper-V isn’t available in the Home versions of Windows 10, so if you’re using the Home version, you’re out of luck. The only way to use Hyper-V is to switch to a Professional, Education, or Enterprise edition.
1. Check the hardware requirements
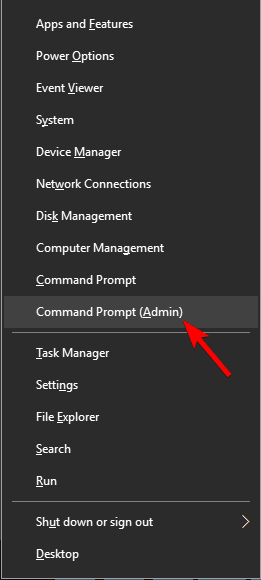
- Press Windows Key + X . Choose Command Prompt (Admin) or Powershell (Admin).

- Now type the command below and hit Enter.
systeminfo.exe
- The results should appear as shown below.


If all entries in the Hyper-V Requirements section say Yes, your PC can support and use Hyper-V. On the other hand, if certain features aren’t available, you’ll need to enable them in BIOS.
Data Execution Prevention Available and Virtualization Enabled in Firmware features can be enabled in BIOS. On the other hand, VM Monitor Mode Extensions and Second Level Address Translation features are related to your hardware. You’ll need to upgrade your CPU if these features aren’t available.
Hyper-V is a great feature, but if you want to use it, you must first meet specific hardware requirements. To use Hyper-V, your PC needs to meet the following requirements:
- 64-bit Windows
- 4GB RAM
- Second Level Address Translation (SLAT), also known as Rapid Virtualization Indexing (RVI)
2. Update your system
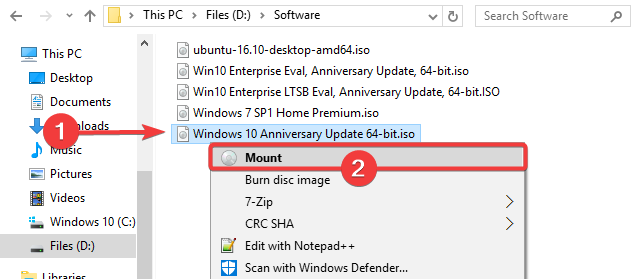
- Locate the Windows ISO file which you used to install the operating system. Right-click on it and select Mount.

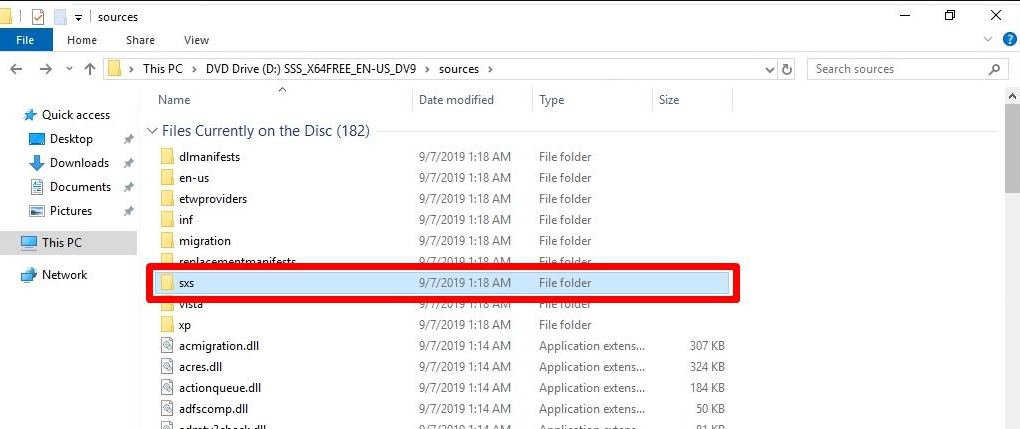
- Decompress the ISO file and locate the SXS folder in the Sources directory. Copy this folder to any drive which is not the system root drive, e.g., F: drive.

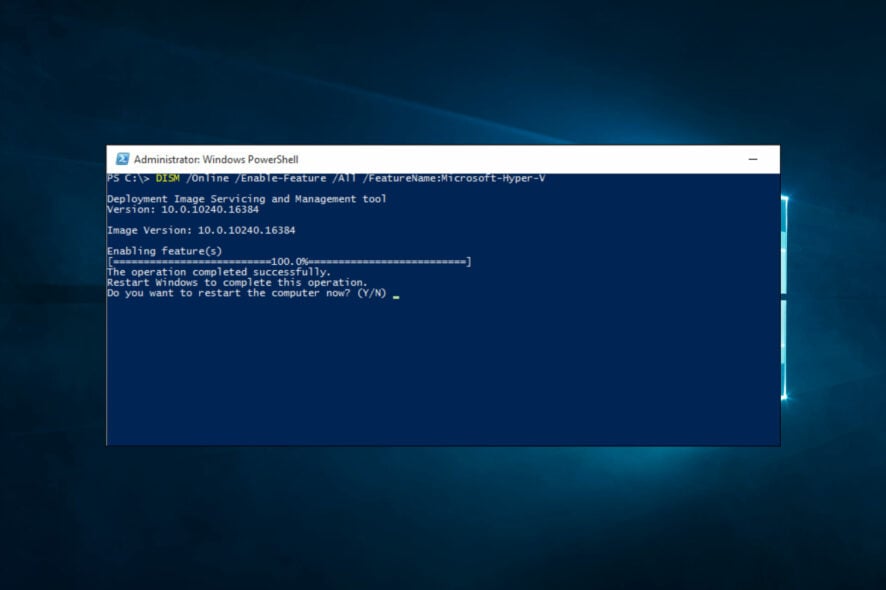
- Now open Windows PowerShell or administrative Command prompt and type the following command:
dism /online /enable-feature /featurename:Microsoft-hyper-v-all /All /LimitAccess /Source:<SXS Folder location> - Once prompted, restart the system. The Hyper-V feature will be ready to use after rebooting.
This solution is important if Hyper-V cannot be enabled even after performing a clean install of Windows 10 builds 10049 or after upgrading from a build that did not have Hyper-V enabled.
You may experience the problem because your hardware is not supported or the wstorvsp.inf was not properly added to the driver store during online driver servicing.
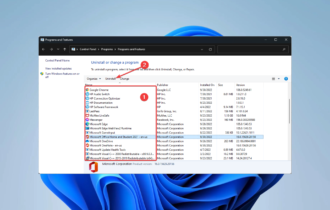
3. Remove third-party software
Hyper-V is a built-in virtualization software in Windows 10, but unfortunately, it doesn’t work well with some third-party applications. Sometimes third-party software can install drivers that can interfere with Hyper-V.
If Hyper-V can’t install, remove all third-party virtualization software from your PC. Many users had issues with VirtualBox, but it was resolved after removing it. Additionally, to VirtualBox, users reported issues with Check Point Endpoint Security VPN, so if you’re using this application, remove it.
We recommend using an uninstaller software, to make sure no remnants will stay on your PC.
These applications will remove all files and registry entries associated with the application, ensuring that it’s completely removed from your PC.
One of the top picks we recommend you try is IObit Uninstaller because it is specially created to remove any unwanted programs with all their associated files to improve your computer’s health and speed scores.

IObit Uninstaller
Get rid of all the stubborn applications within seconds and try using IObit Uninstaller.4. Use Command Prompt
- Press Windows Key + X and choose Command Prompt (Admin).
- Type the script below and hit Enter:
SC config trustedinstaller start=auto
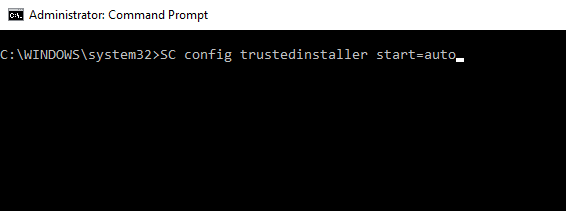
After the command is executed, restart your PC and try to install Hyper-V again.
If you can’t install Hyper-V on your Windows 10 PC, there might be a minor glitch on your system that’s preventing you from installing it. Several users reported that they fixed this glitch simply by running a single command in Command Prompt.
5. Modify your registry
- Press Windows Key + X and choose Command Prompt (Admin).
- Now type the following command, hitting enter after each one:
reg delete HKEY_LOCAL_MACHINESYSTEMCurrentControlSetControlDeviceGuard /v EnableVirtualizationBasedSecurityreg delete HKEY_LOCAL_MACHINESYSTEMCurrentControlSetControlDeviceGuard /v RequirePlatformSecurityFeaturesbcdedit /set {0cb3b571-2f2e-4343-a879-d86a476d7215} loadoptions DISABLE-LSA-ISO,DISABLE-VBS - Exit the command prompt and reboot.
Several users reported that the EFI system with the Secure Boot feature enabled could cause issues with Hyper-V and prevent it from installing. However, you might be able to fix this issue by running a couple of commands in Command Prompt.
Remember that these commands will modify your registry, but if you’re not comfortable with that, you might want to skip this solution.
6. Install Hyper-V components separately
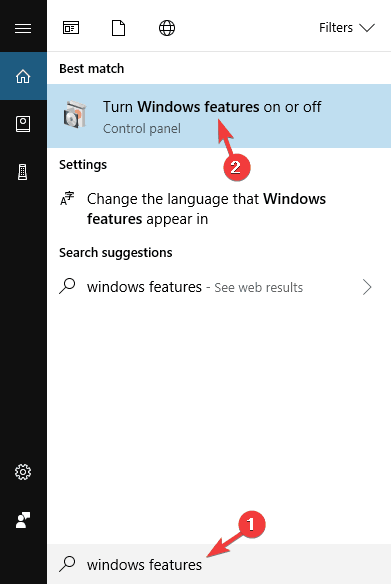
- Press Windows Key + S and enter windows features. Then select Turn Windows features on or off from the menu.

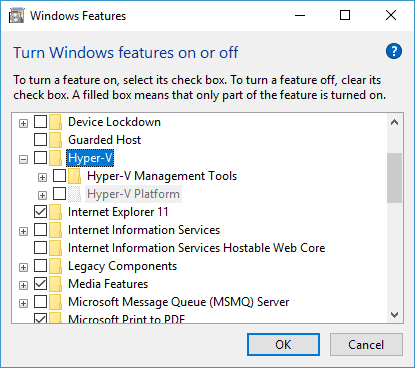
- Windows Features window will now appear. Expand the Hyper-V section. Check Hyper-V Platform first and click OK.

- Once your PC restarts, repeat the steps from above, but this time install Hyper-V Management Tools.
After your PC restarts again, the problem should be completely resolved, and Hyper-V will be installed on your PC.
According to users, if you can’t install Hyper-V on your PC, you might be able to circumvent the issue simply by installing Hyper-V components separately.
7. Perform a fresh start
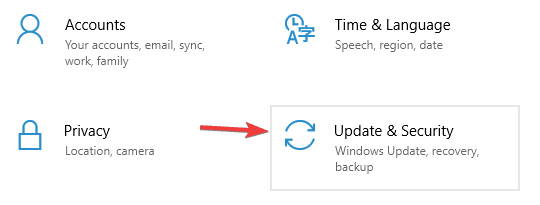
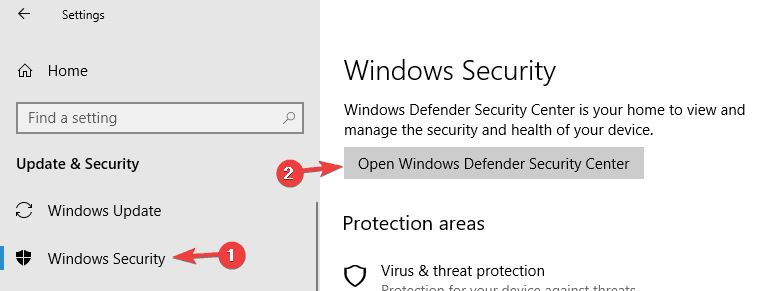
- Press Windows Key + I to open the Settings app. Navigate to Update & Security section.

- Go to the Windows Security section in the left pane. In the right pane, click Open Windows Defender Security Center.

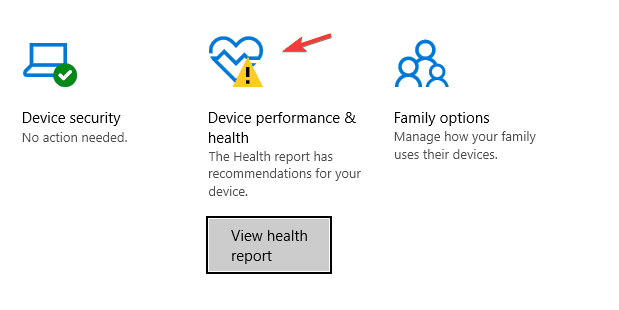
- When Windows Defender opens, go to Device performance & health section.

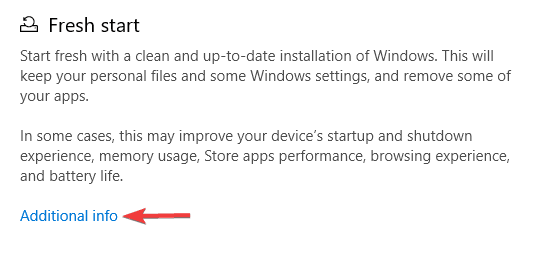
- Scroll down to the Fresh start section and click Additional info.

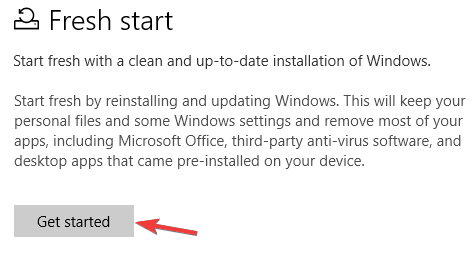
- Click the Get started button.

- Now follow the instructions on the screen to complete the process.
Once the process is finished, you’ll have a fresh installation of Windows 10, and Hyper-V should be able to install it.
Windows 10 has a helpful feature called Fresh start that allows you quickly and easily reinstall Windows 10. Before you perform a Fresh start, it’s advised to back up your files to avoid losing them. This process will remove your installed applications, so you’ll have to install them again manually.
Not being able to use Hyper-V can be a big problem for some users, but we hope you managed to fix this issue using one of our solutions.
Remember, we have not written these solutions in any particular order. So it would be best if you tried what seems most relevant to your case.
Let us know in the comments below what worked for you.