How to Move Windows to SSD: Migrate the OS Without File Loss
Most reliable drive transfer options
![]() 4 min. read
4 min. read
![]() Updated on
Updated on
Share this article
This article is translated in


Improve this guide
Read our disclosure page to find out how can you help Windows Report sustain the editorial team Read more
Key notes
- Moving your OS from a new SDD can improve the booting time and overall system performance.
- In this article, we're showing you how to move an already installed system to an SSD, without performing a clean install.
Windows 10 already has improved booting time compared to previous versions of Windows, but moving it from a regular HDD to a new SDD will enhance the system’s booting time and overall performance even more. However, many users wonder if they can move the OS to an SSD without losing data.
There are a couple of ways to transfer your system data from your current HDD to a new SDD, and we will discuss them all in this article.
The simplest solution is probably performing a clean install on the SSD drive, but you will lose all your data and have to install all your programs again.
And it could take even more time than moving an already-installed operating system. But you might choose this path if you don’t like to experiment.
Installing a fresh copy of Windows 10 on an SSD drive is no different than installing it on an HDD. First, you have to format your current system partition and then just install the fresh copy of Windows 10 on an SSD.
Can I move Windows to my SSD? Yes, you can move Windows to your SSD, and it can provide several benefits, such as improved boot and load times, faster application launch, and improved overall system responsiveness.
The benefits of moving Windows to an SSD include the following:
- Faster boot times – SSDs have significantly faster write and read speeds than traditional hard drives, which means your computer will boot up more quickly.
- Faster application launch – Since applications are stored on your SSD, they’ll load faster than on a traditional hard drive.
- Improved system responsiveness – With an SSD, your computer will feel more responsive overall. Applications will launch faster, and you can navigate your files and folders more quickly.
- Increased durability and reliability – SSDs don’t have any moving parts; hence they’re less likely to fail due to physical damage. This makes them more durable and reliable than traditional hard drives.
You can move your OS with the techniques we highlight below.
How do I move Windows to SSD?
Before you go into the solutions we offer, you must back up your data because if something goes wrong, you might lose it forever, and it will be required for the process.
When you back up your drive, it’s time to get rid of the additional disk space because SSDs have much less space than regular hard disks, so we want your system partition to fit on the SSD drive.
Use a dedicated tool to move Windows from HDD to SSD
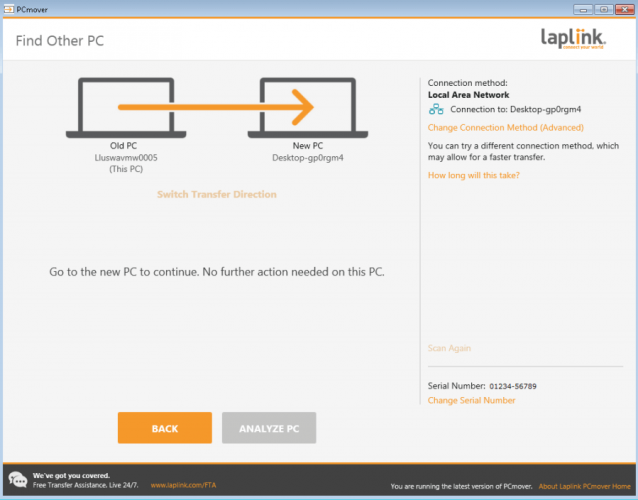
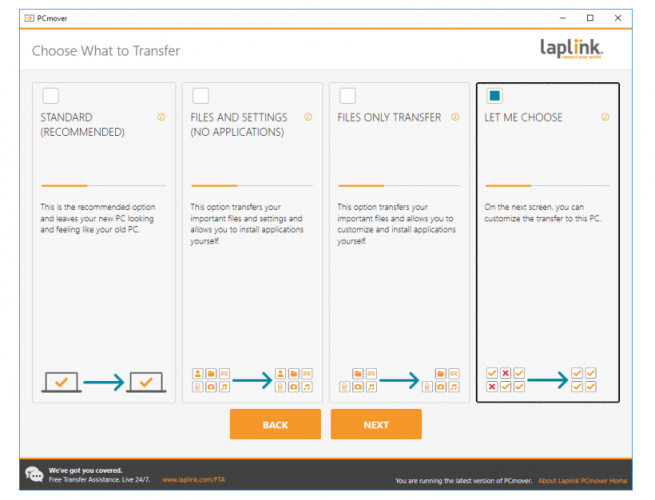
You can transfer your system data from your HDD to a SSD using a dedicated tool. We recommend Laplink PCMover, a small desktop application that can help you to easily move all your files, settings, and user profiles to your SSD.
With Laplink PCMover, the whole process is hassle-free, extremely user-friendly, and intuitive. The programs are installed and ready to use right away. You don’t need OS images, DVDs, download links, OS keys, or similar. You just need to configure the transfer and the tool will do the rest for you!
1. First, click on Get Laplink PCMover to download the app on both your computer and your SSD. (Make sure the SSD is connected to your computer at all stages of the process.)
2. Install Laplink PCMover.
3. Then, open the tool on both your PC and SSD.
4. Choose which network method you will use to connect your systems for the transfer. Laplink recommends using WiFi.
5. Then follow the on-screen prompts to allow the tool to discover the SSD (seen as New PC).
6. Once the two are connected, open Laplink PCMover on the SSD.
7. Click on Analyze PC, then follow the prompts to customize what you want to be transferred.
8. After the transfer is complete, your OS will have been moved from your HDD to your SSD. It will take a few hours for the process to finish.
2. Use a specialized tool
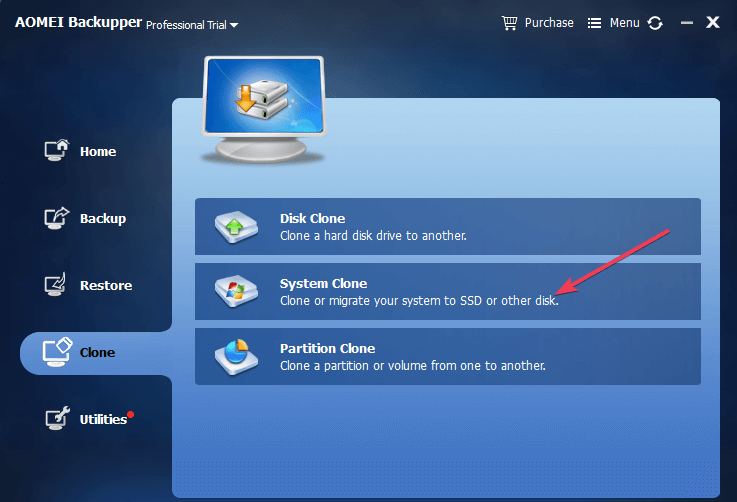
- First, you must download and install the AOMEI Backupper on your machine.
- Then, you need to connect your hard drive to your computer.
- Now, go to the Clone option on the right one and select System Clone to launch the process.

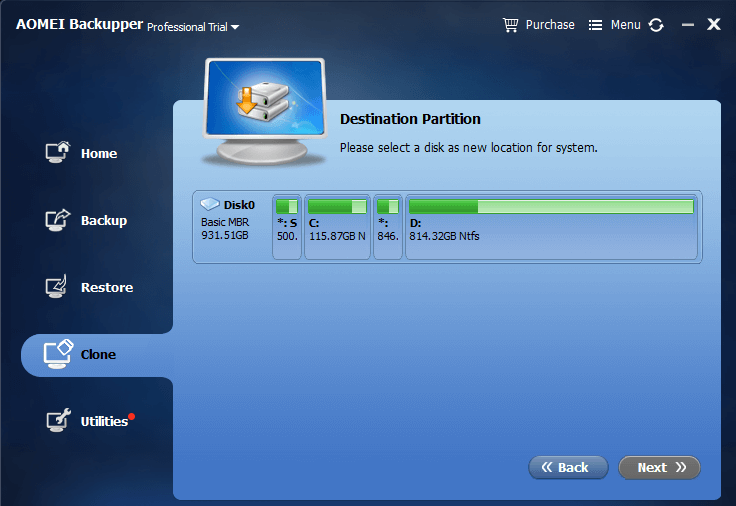
- Your machine should now display a new window asking you where you want to move the OS files. Select your SSD and confirm your choice.

- Hit Next and follow the on-screen instructions to complete the process. It’s as simple as that.
If Windows doesn’t activate after the cloning process is complete, follow this guide to solve the problem.
And that’s about that; your Windows 10 is now successfully moved to the SSD drive, and it will perform much faster.
How to move only Windows 10 to an SSD?
- Connect your SSD to the PC and ensure Windows recognize it.
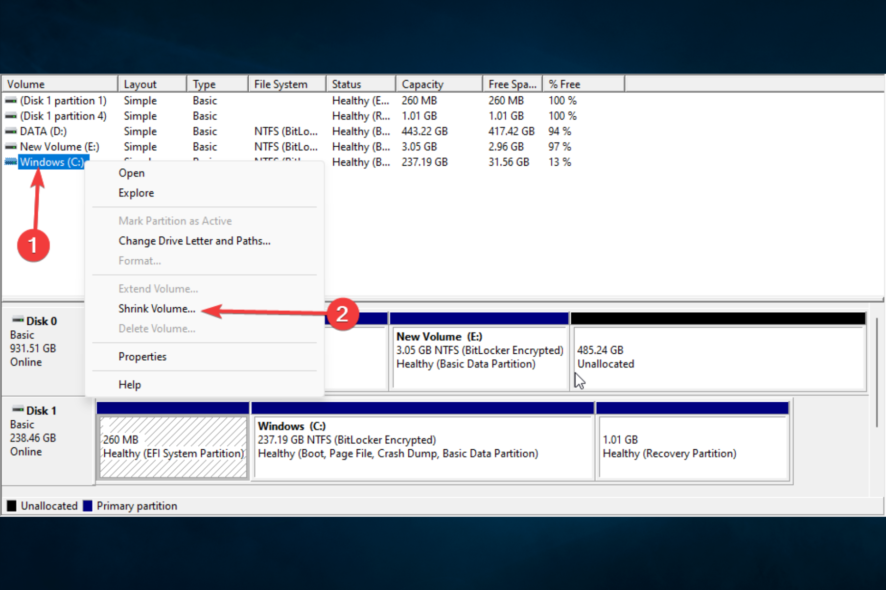
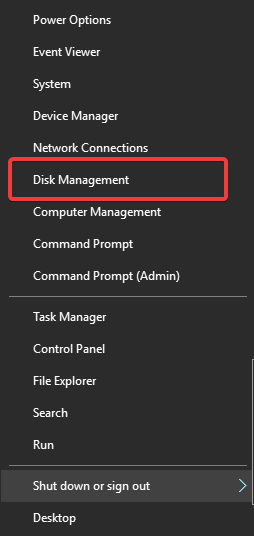
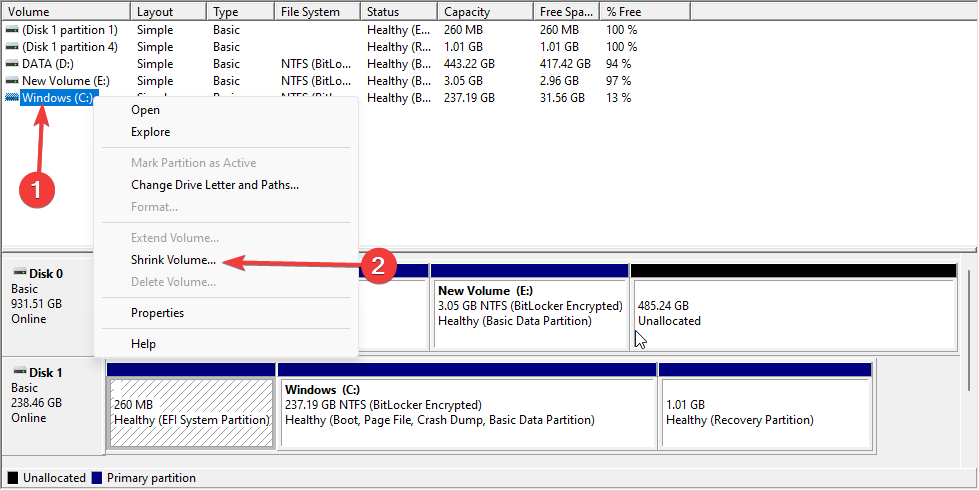
- Open the Disk Management utility by pressing the Windows key + X and selecting Disk Management.

- Right-click on the partition containing Windows and choose Shrink Volume.

- Shrink the volume to a size smaller than the SSD’s capacity.
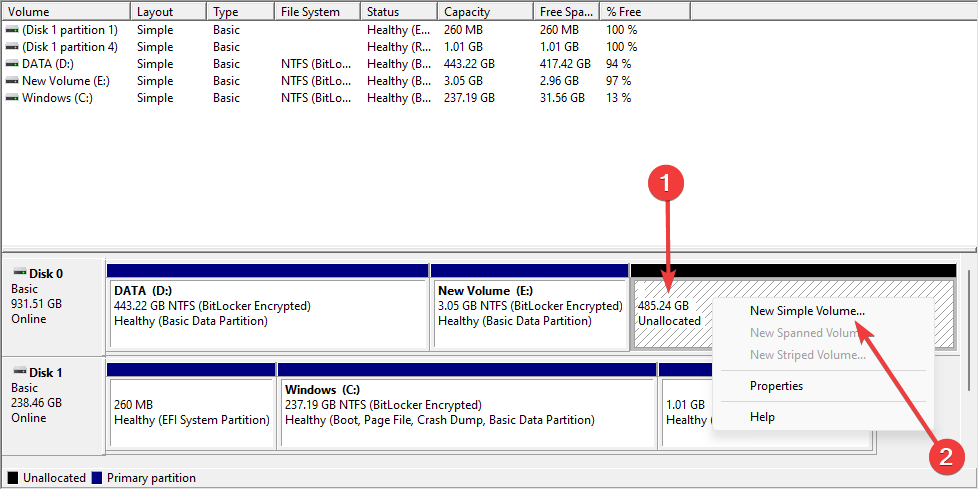
- Create a new partition on the SSD by right-clicking on the unallocated space and selecting New Simple Volume.
- On your new partition, assign a drive letter.
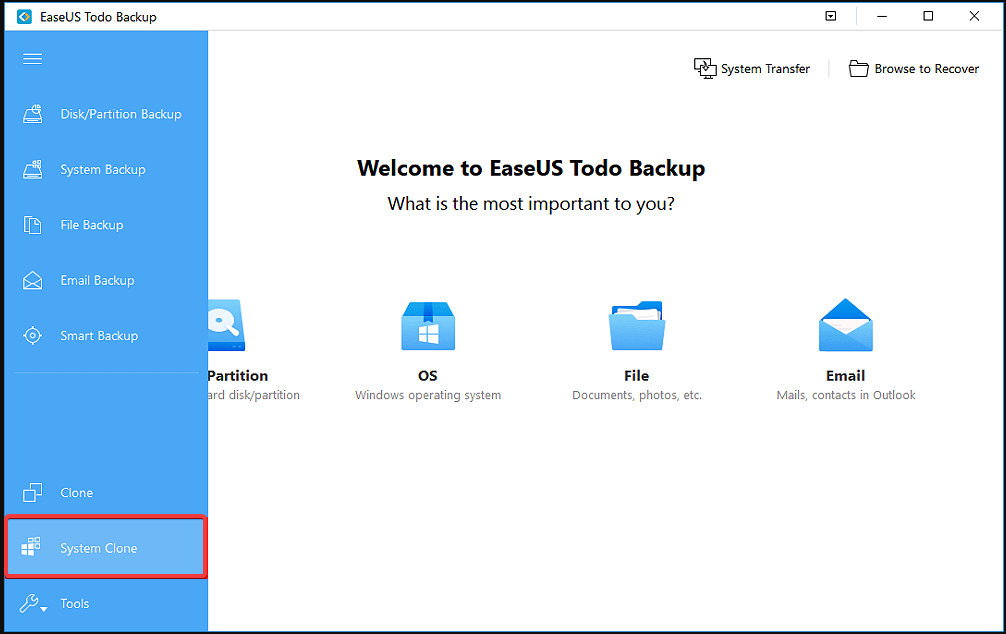
- Download and install cloning software such as EaseUS Todo Backup.
- Launch the software and select the System Clone option to clone your hard drive.

- Select the source partition containing Windows and the destination partition on the SSD.
- Start the cloning process and wait for it to complete.
- Shut down your computer and disconnect the HDD.
- Restart your PC and go into the BIOS by pressing the corresponding Function key for your device.
- Set the SSD as the primary boot device.
- Start your computer and ensure that everything works correctly.
If you want to reinstall your Windows 10 apps on the new drive, check out this guide for a seamless transition.
That would be all; we presented you with a complete guide on moving your Windows 10 system from your old HDD partition to the SSD and getting everything to work.
If you followed our instructions and successfully moved your system to the SSD, please tell us your impressions in the comments section below, and we’ll be sure to take a look.