FIX: Windows Update error 0x80072efd in Windows 10/11
![]() 5 min. read
5 min. read
![]() Updated on
Updated on
Share this article

Improve this guide
Read our disclosure page to find out how can you help Windows Report sustain the editorial team Read more
Key notes
- The Windows update error code 0x80072efd usually indicates some system failure.
- Applying a few easy troubleshooting steps like the ones below should fix the issue in no time.
- We can always help you solve similar problems with our step-by-step articles in the Windows Errors Hub.
- We've got a fix for any OS problem you might encounter, so make sure to visit the Troublehooting section.

The Windows update process sometimes fails, displaying certain error codes, for easier identification.
One such annoying error affecting Windows 10 (or older) is Windows Update error code 0x80072EFD.
We have reported similar issues before, more specifically with the Windows Store App Updates: 0x8007064a, 0×80246007, 0×80248014 Errors.
One user says the following, blaming this problem on the proxy settings
Cant use windows update cause of 80072efd. From what I found the problem is with network proxy, but I tried to reset the IE and the proxy even without automatic detection, also used netsh command to reset proxy but still the problem persists.
But whenever I run a local proxy like Psiphon I can use windows update (proxy is not required for downloads only for update check).
Fortunately for those affected by this problem, Microsoft has officially acknowledged the issue.
So here are the steps that you need to take to fix this problem.
How can I fix Windows Update Error 0x80072efd on Windows 10?
- Update Network drivers
- Run the Network troubleshooter
- Fix connection problems
- Restart Windows Update service
- Run the SFC scan
- Run the DISM
- Switch to the iPv4 network
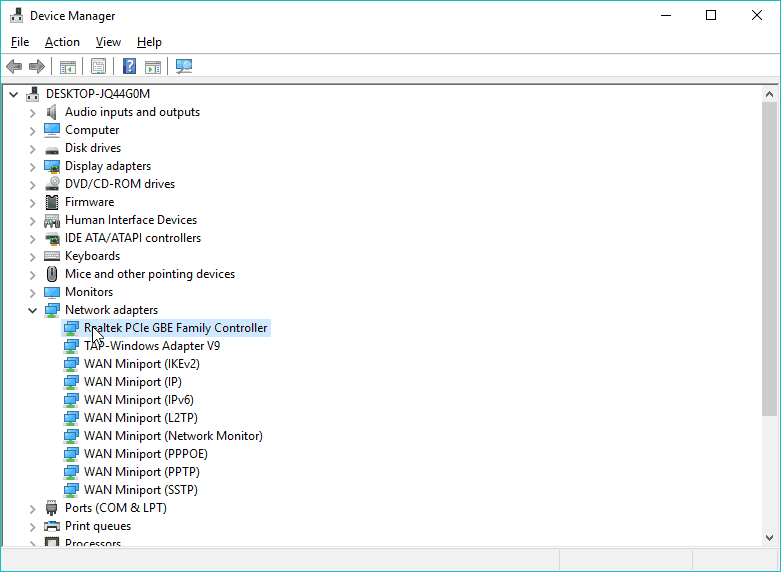
1. Update Network drivers
- Go to Search, type devicemngr, and open Device Manager.
- Find your router under Network Adapters.

- Right-click your network adapter, and go to Update driver…
- Wait for the process to finish, and follow on-screen instructions.
- Restart your computer.
Whenever you suspect something is wrong with your Internet connection, the very first thing to try is updating your network drivers.
On the other hand, since updating drivers manually needs extra caution, we recommend you use a dedicated tool like Outbyte Driver Updater.
Thus, you will prevent file loss and even permanent damage to your computer, because this tool scans your device for outdated drivers and recommends the appropriate new versions to install.
You can rest assured that Outbyte Driver Updater offers only reliable driver options, from its built-in database.
2. Run the Network troubleshooter
- Go to Settings.
- Head over to Update & Security > Troubleshoot.

- Find Windows Update, and click Run the troubleshooter
- Follow further on-screen instructions.
- Restart your computer.
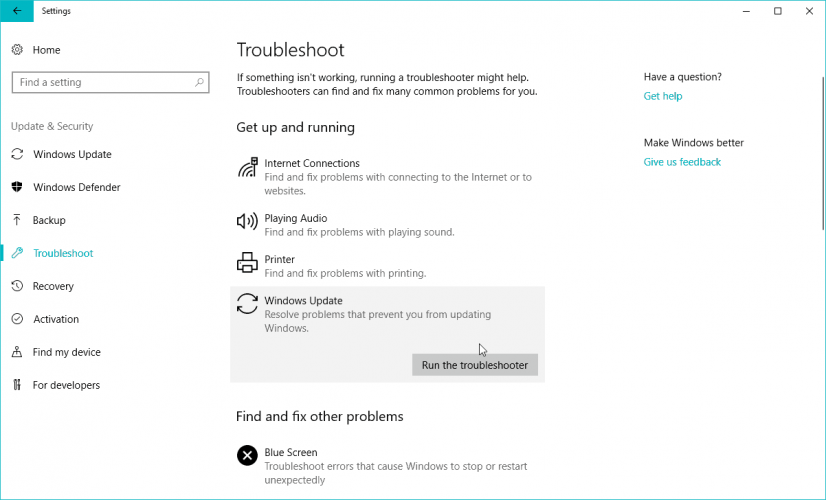
Microsoft’s troubleshooting tool is extremely useful when dealing with various system-related issues, including Windows Update problems.
3. Fix connection issues
Now, let’s investigate if something’s wrong with your internet connection. The simplest way to check this is to, well, connect to the Internet.
Check out some of the following articles and see if any of these problems apply to your situation:
- Internet connection is limited in Windows 10 [FULL GUIDE]
- 10 steps to fix wireless adapter or access point issues on PC
- Network Protocol missing in Windows 10 [STEP-BY-STEP GUIDE]
- No Internet connection after installing Windows Updates
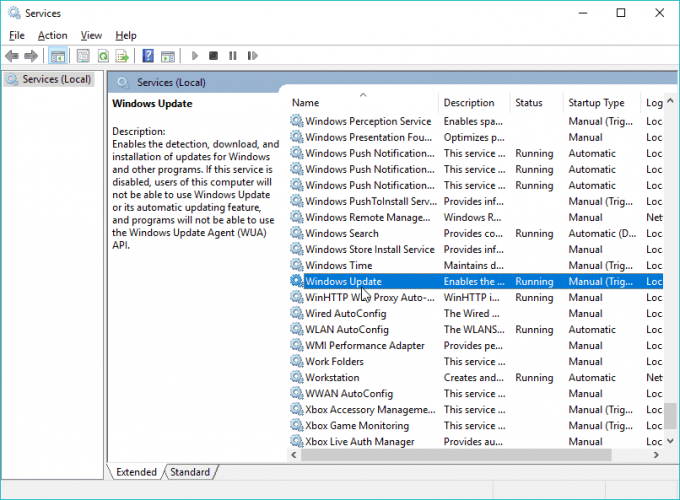
4. Restart Windows Update service
- Go to Search, type services.msc, and go to Services.
- In the Services list, search for Windows Update.

- Right-click and go to Properties, then choose Disable.
- Restart your computer.
- Check out Services again and make sure that Windows Update is Disabled.
Now that the Windows Update service is disabled, let’s also delete the Software Distribution folder. This folder stores all the updated data and info before it gets installed on your computer.
So, deleting this folder will reset the complete update mechanism. We’ll also re-enable the Windows Update service after deleting the folder.
Here’s what you need to do:
- Find the SoftwareDistribution folder in File Explorer.
- Rename the folder to SoftwareDistribution.OLD (you can delete it, as well but why to take unnecessary risks).
- Restart your computer.
- Once again navigate to Services and find Windows Update.
- In Properties, change from Disabled to Manual.
- Restart your computer once again.
- Check again for updates.
5. Run the SFC scan
- In Windows Search type cmd
- Right-click and Run as administrator.
- In the command line type: sfc/scannow

- The process should last a few minutes.
- After it’s done, close the command prompt.
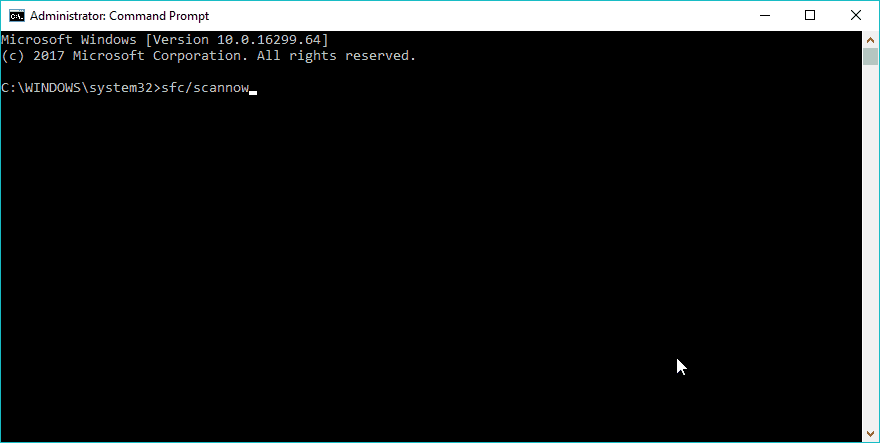
In case you’ve never heard of this feature, the SFC scan is Windows’ built-in tool for resolving various problems. And it could be useful here, as well.
6. Run the DISM
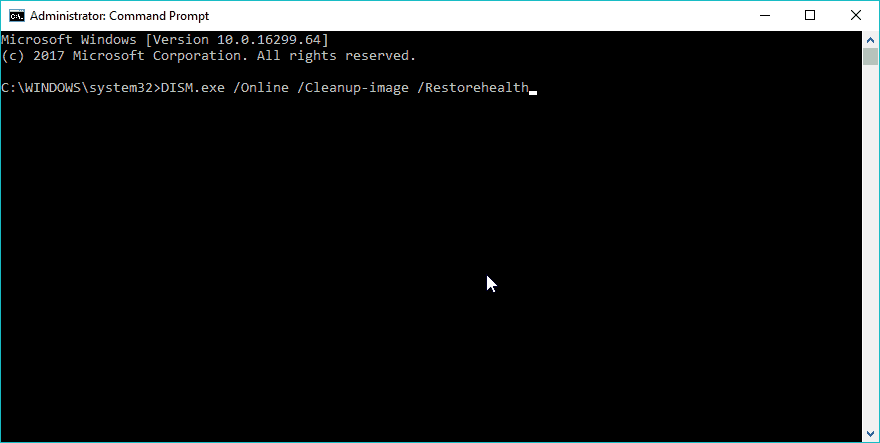
- Press Windows key + X and run Command Prompt (Admin).
- Copy and paste the following command:
DISM.exe /Online /Cleanup-image /Restorehealth - In case the DISM can’t obtain files online, try using your installation USB or DVD. Insert media and type the following command:
DISM.exe /Online /Cleanup-Image /RestoreHealth /Source:C:RepairSourceWindows /LimitAccess
Note: Be sure to replace the C:/RepairSourceWindows path of your DVD or USB.
Similar to the SFC scan, DISM (Deployment Image & Servicing Management) is also a tool for dealing with various system errors, but a more advanced one.
So, if the SFC scan didn’t get the job done, your chances are better with DISM.
7. Switch to the iPv4 network
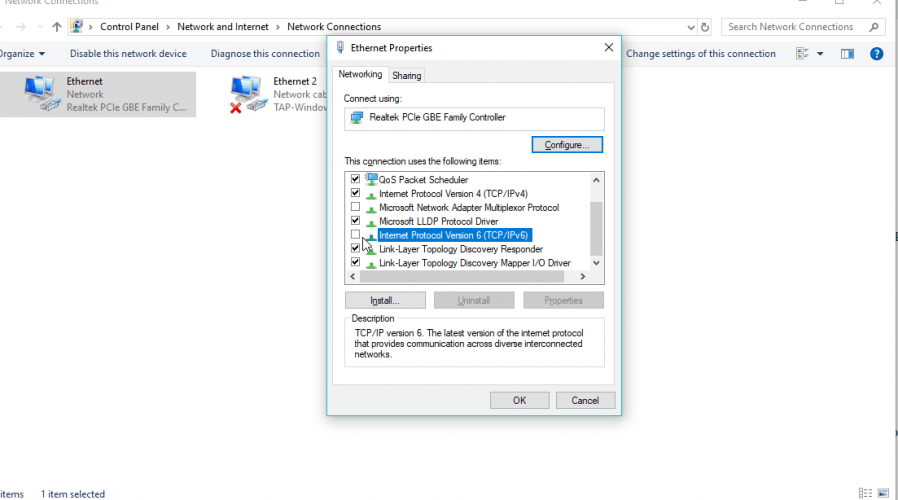
- Go to Search, type network connections, and open Network Connections.

- Right-click the connection (either LAN or Wi-FI) you’re currently using and choose Properties.
- In the list of the connection items, uncheck the iPv6 box and confirm the selection.
- Save the changes.
- Go to Windows Update and check for updates.
This solution was helpful when dealing with Windows 10 update error 0x8024401c so it might also help in this case.
That’s all, we certainly hope at least one of these workarounds helped you with the 0x80072efd error. If you have any comments, questions, or suggestions, just let us know in the comments below.