0x80071a2d Windows Update Error: How to Fix it
Install Windows updates using alternative methods
5 min. read
Updated on
Read our disclosure page to find out how can you help Windows Report sustain the editorial team. Read more
Key notes
- Windows updates are often needed to fix problems and make sure that your computer runs smoothly.
- However, downloading and installing them can be a hassle if the error 0x80071a2d is anything to go by.
- Luckily, there are more ways to download the update if the built-in Windows update utility fails.
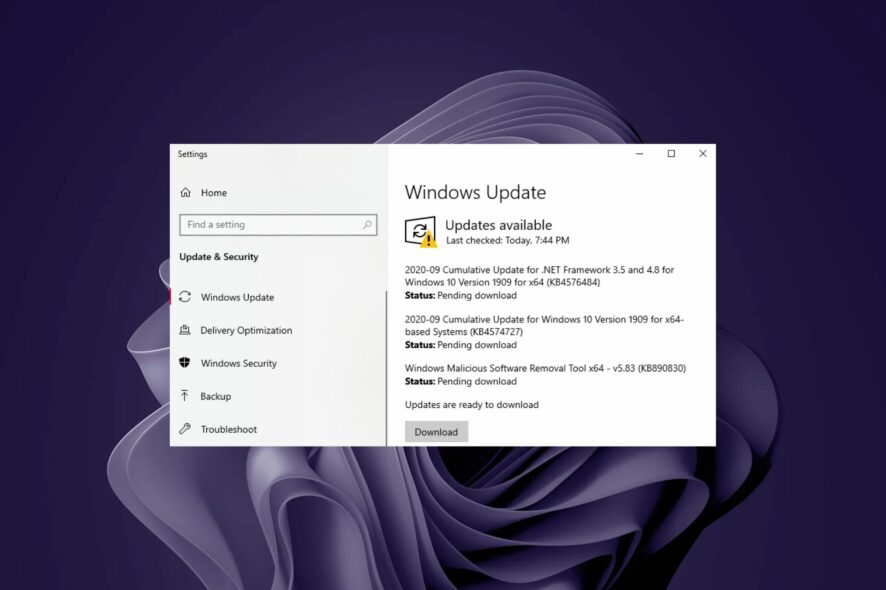
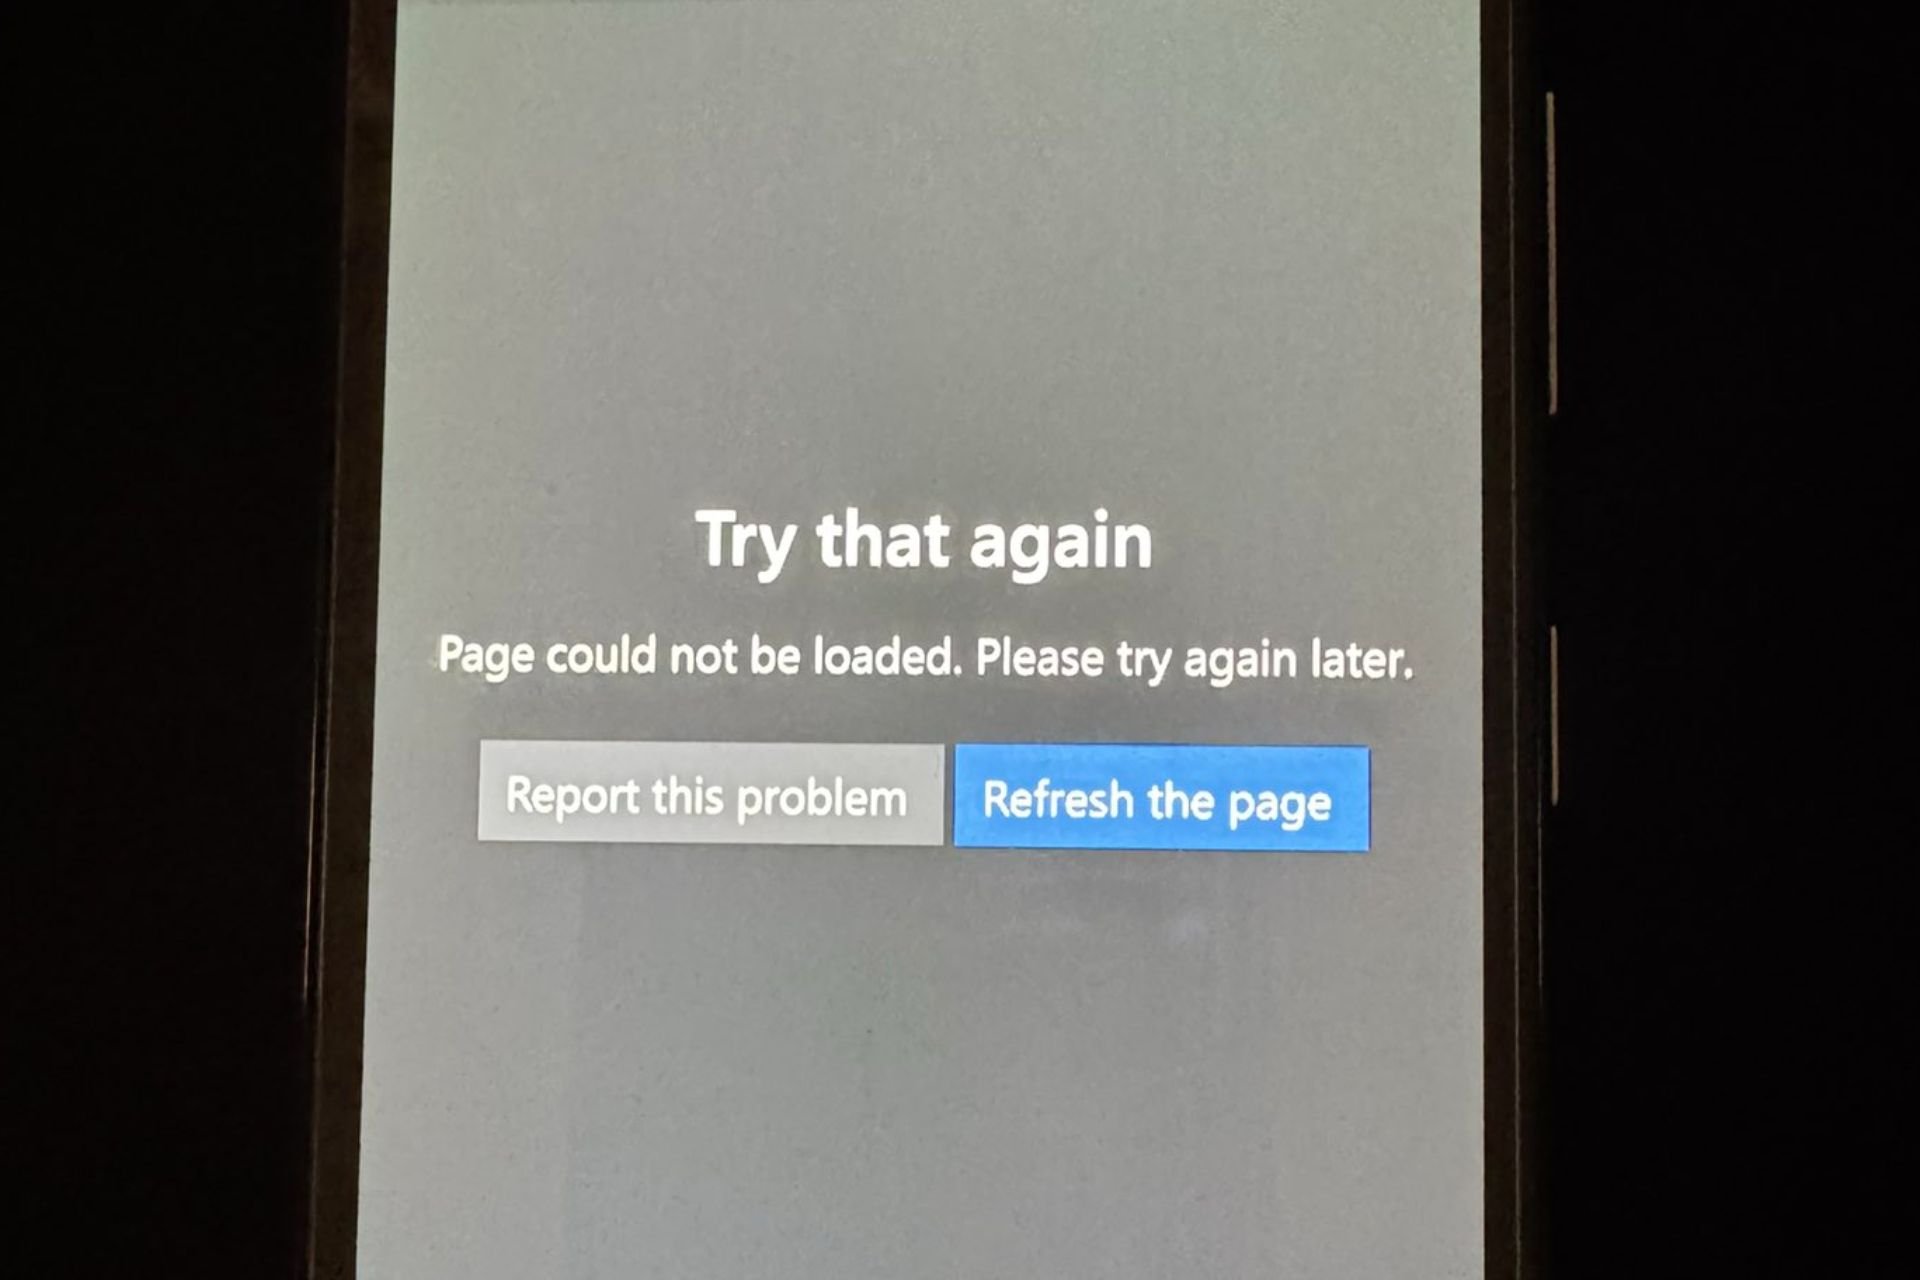
Running Windows updates is so seamless sometimes we forget that there can be instances where it can fail. This is what the error 0x80071a2d does.
You may have successfully installed other updates, but for some reason, these start and fail right before they finish. Why does this happen? Let’s find out, shall we?
What is the Windows Update error 0x80071a2d?
This error occurs when you’re in the middle of installing Windows updates. You may get a head start, but at some point, you’ll get a message saying that the update has failed. But what is the root cause of this issue? Below are some possible causes:
- Failed connection – The 0x80071a2d error message means that Windows Update could not connect to the Microsoft server. This could be because there was no network connectivity when you tried to install an update.
- Firewall settings – Antivirus software can interfere with the installation process for Windows Updates.
- Corrupt system files – The Windows Update error 0x80071a2d can also happen due to corrupt system files and registry entries. When these files become corrupted, it can cause issues with installing updates on your computer.
- Problem with the Windows Update service – This can happen if your computer has been infected by malware such as viruses. The malware could be preventing the Windows Update service from running correctly.
How can I fix the error 0x80071a2d?
A few preliminary checks that can get you out of this hassle include:
- Check whether your internet connection speeds are stable.
- Ensure you have enough space to install Windows updates.
- Check whether your antivirus is blocking the updates.
- Try installing the update one by one instead of cumulatively.
- Check Microsoft server status and ensure there are no scheduled downtimes.
- Wait for a few minutes and try later.
1. Run the Windows Update troubleshooter
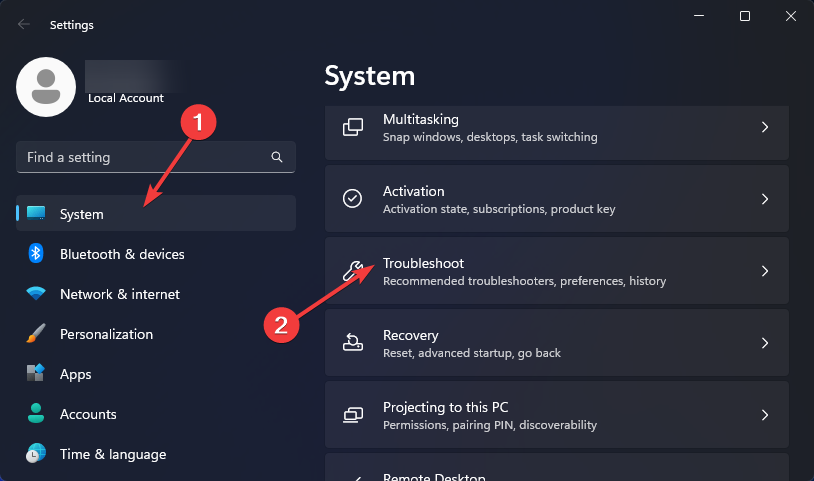
- Hit the Windows key and click on Settings.
- Click on System and select Troubleshoot.
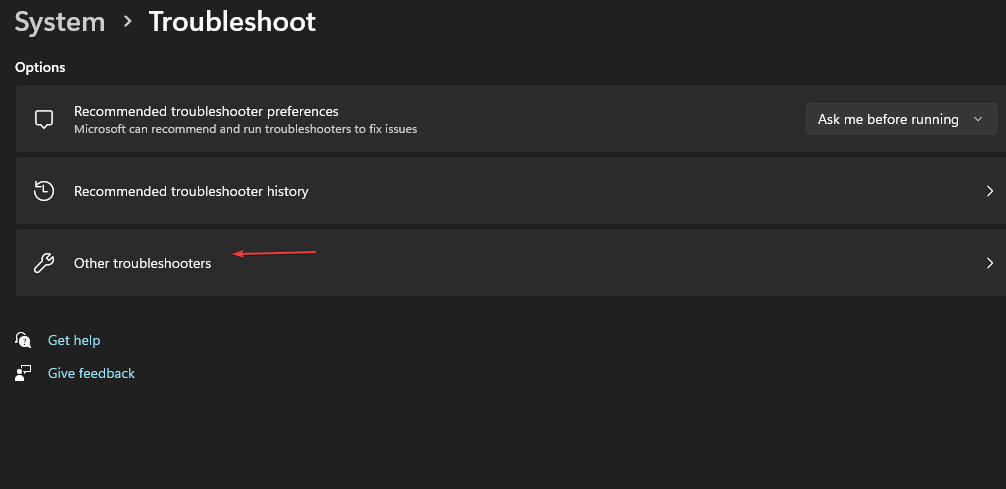
- Navigate to Other troubleshooters.
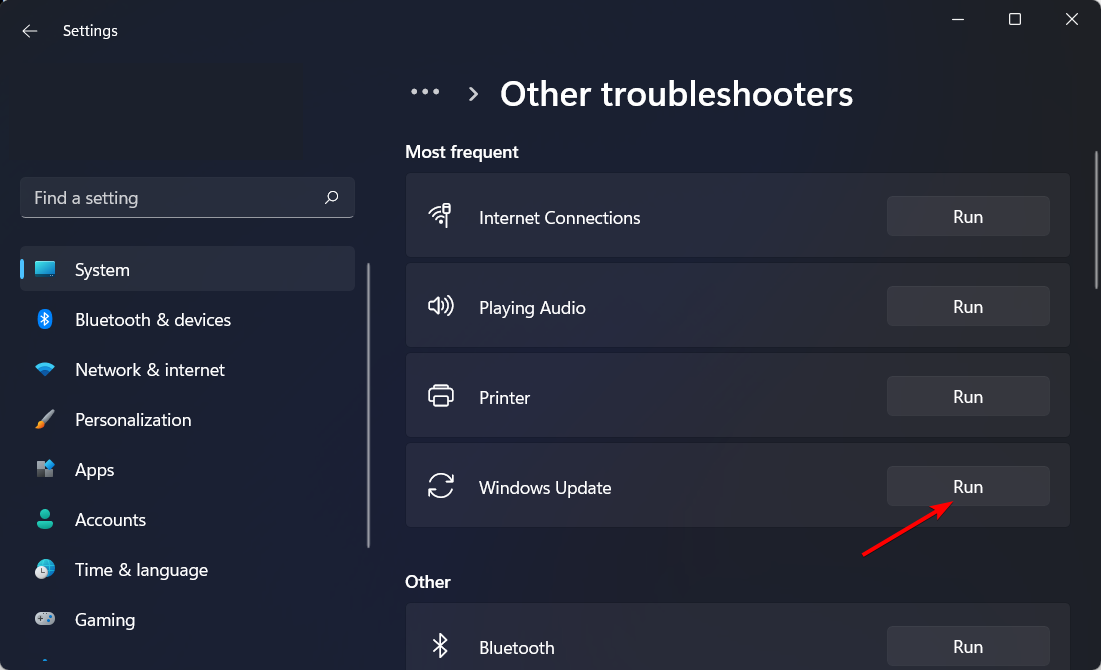
- Click the Run option for the Windows Update troubleshooter.
If the Windows troubleshooter didn’t solve the issue in the end, you could use an alternative method. So, the ideal way to repair corrupted system files or registry issues is a professional system repair tool.
2. Restart the Windows Update service
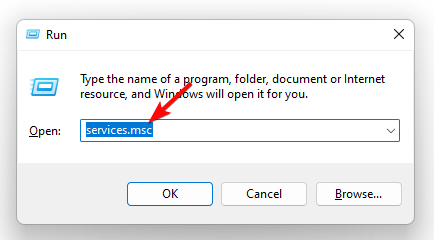
- Hit the Windows + R keys to open the Run command.
- Type services.msc and hit Enter.
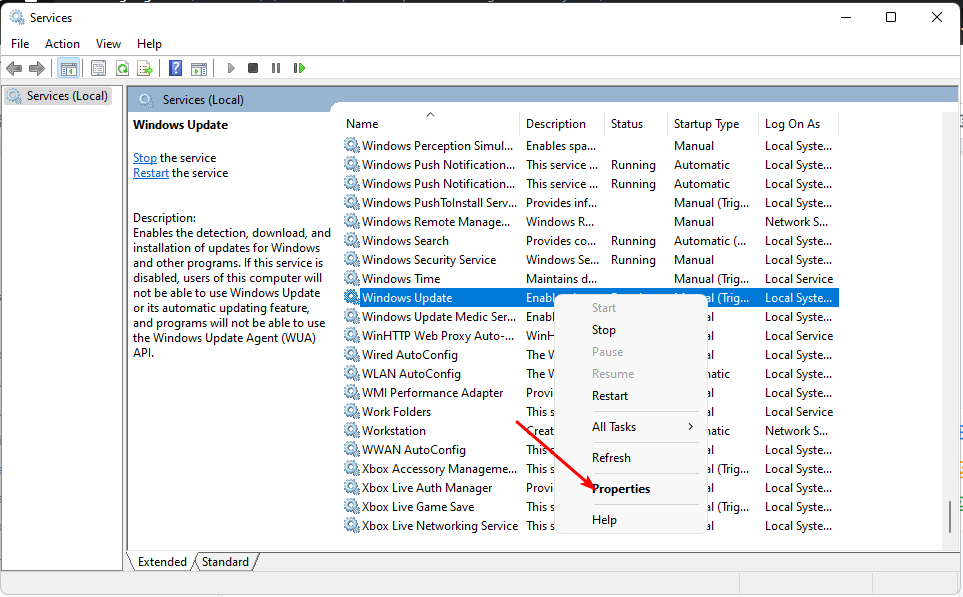
- Locate Windows update service, double click on it and select Properties.
- Navigate to the General tab, under Startup type, select Automatic from the drop-down options, and click on the Start button.
- Next, click Apply and then OK.
3. Restart the Background Intelligent Transfer Service
- Hit the Windows + R keys to open the Run command.
- Type services.msc and hit Enter.
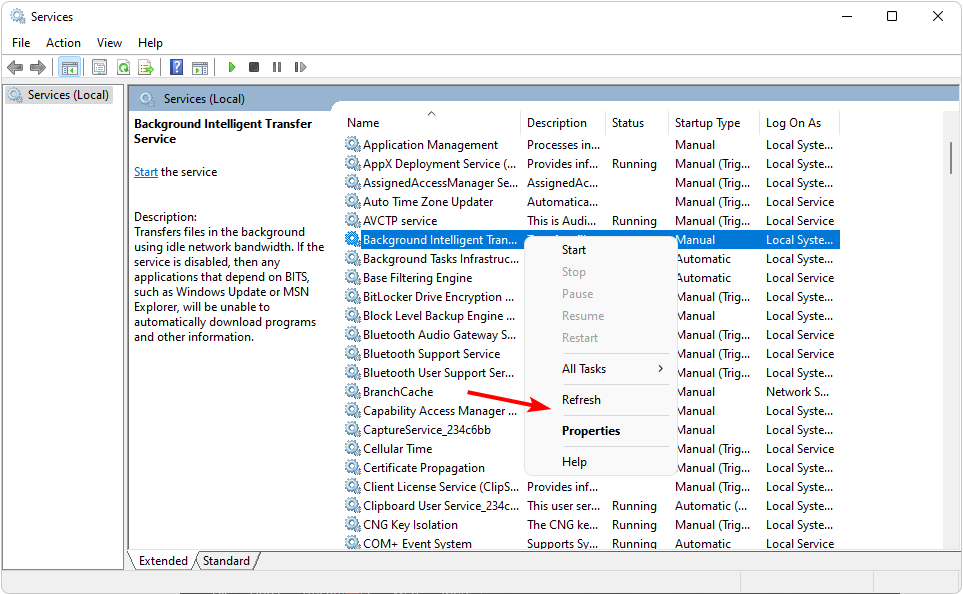
- Locate the Background Intelligent Transfer Service, double click on it and select Properties.
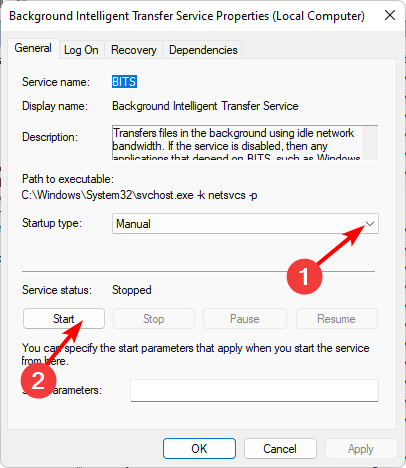
- Navigate to the General tab, under Startup type, select Automatic from the drop-down options, and click on the Start button.
- Next, click Apply and then OK.
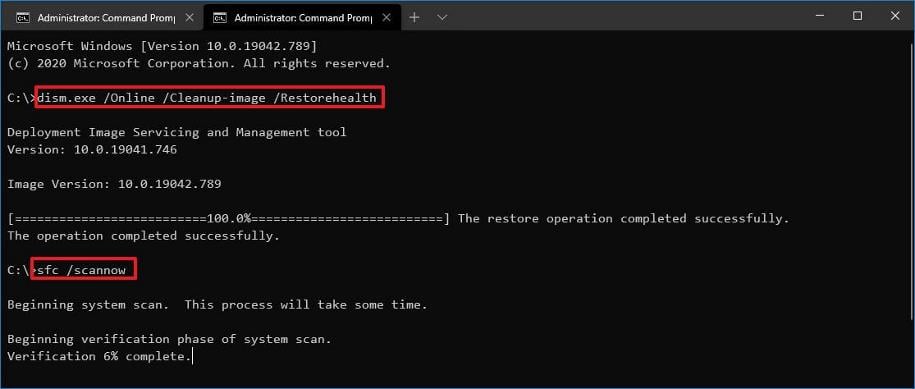
4. Run the DISM and SFC scans
- Hit the Start Menu icon, type cmd in the search bar, and click Run as administrator.
- Type the following commands and press Enter after each one:
DISM.exe /Online /Cleanup-Image /Restorehealthsfc /scannow
5. Reset the Windows update components
- Click on the Start Menu icon, type cmd in the search bar, and click Run as administrator.
- Type the following commands and press Enter after each one:
net stop bitsnet stop wuauservnet stop appidsvcnet stop cryptsvcDel "%ALLUSERSPROFILE%\Application Data\Microsoft\Network\Downloader\*.*"rmdir %systemroot%\SoftwareDistribution /S /Qrmdir %systemroot%\system32\catroot2 /S /Qregsvr32.exe /s atl.dllregsvr32.exe /s urlmon.dllregsvr32.exe /s mshtml.dllnetsh winsock resetnetsh winsock reset proxynet start bitsnet start wuauservnet start appidsvcnet start cryptsv
6. Download the update manually
6.0 Use the Microsoft Update Catalog
If you have tried all of the above recommended steps and are still getting the error code 0x80071a2d update error, it may be time to download straight from the site.
The problem could be with the built-in update tool. You can find the specific update from the Microsoft Update Catalog.
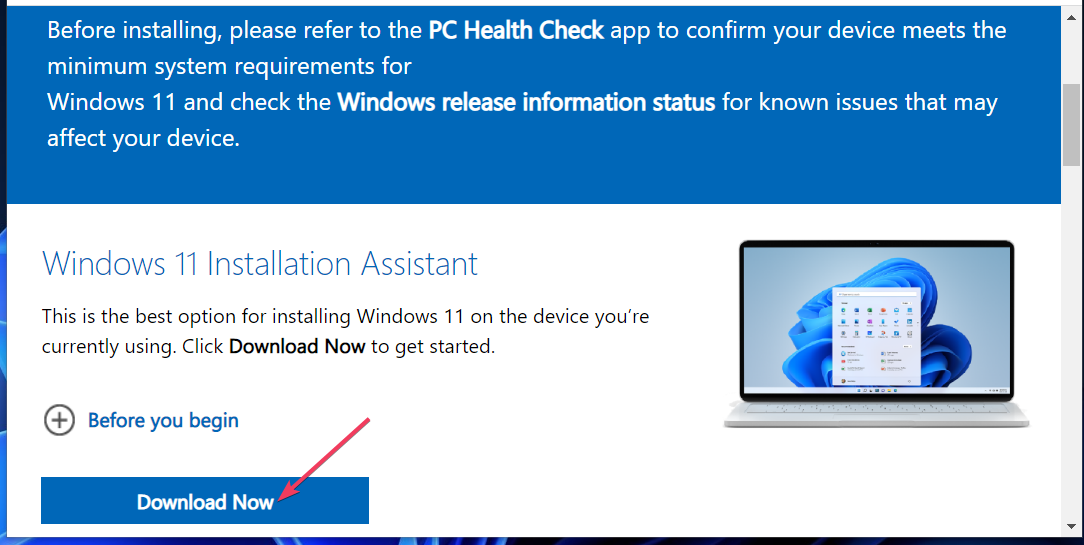
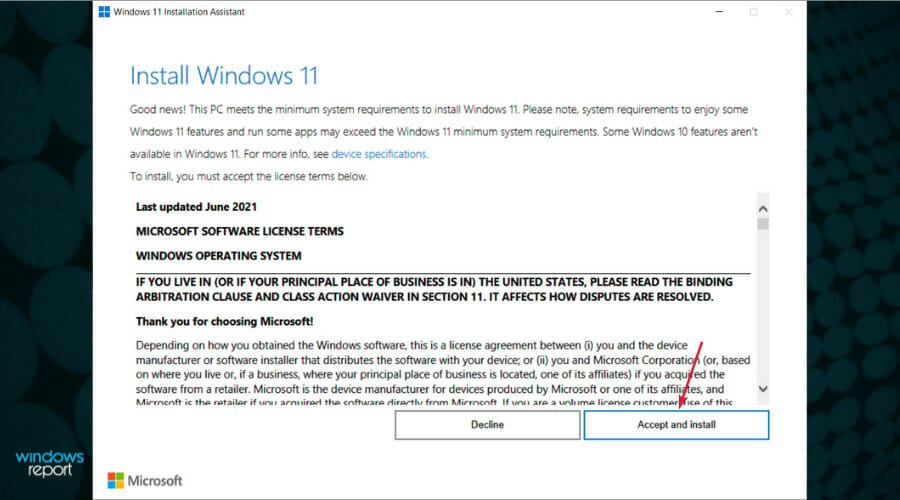
6.1 Use the Update Assistant
- Navigate to your browser and go to the Update Assistant page.
- Click on the Download Now button.
- Launch the exe file and hit the Accept and Install button.
- The updated files will begin downloading as soon as the tool verifies your PC meets the system requirements. You’ll be prompted to restart your PC after completion.
6.2 Use the Media Creation Tool
You can also use the Media Creation Tool as an upgrade tool for updates. You will need an external storage device, and your PC must meet the Windows 11 system requirements.
As a last resort, you may have to perform a clean install, but hopefully, it doesn’t get to that stage.
That’s it for this article, but for any feedback, queries, or comments, leave a comment below.




User forum
2 messages